L2M (Layer2-Martini) VPN
The L2M (Layer2 Martini) VPN, based on the IETF Martini set of drafts, supports the configuration of Layer2 Martini, AToM (Any Transport Over MPLS), and VLL (Virtual Leased Line) VPNs. The following steps illustrate how to configure a L2M VPN:
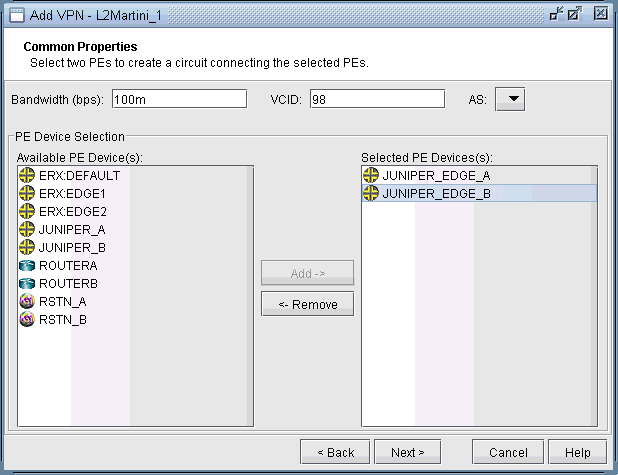
- Click on Next to take you to the Common Properties window
to select the two PEs. You may then assign a VCID for the circuit.
You may also optionally assign a bandwidth value for the circuit.Figure 1: Select two PEs and assign a bandwidth value
- Click on Next to take you to the screen where you can
specify or add the (PE facing CE) interfaces as needed. The following
figures illustrate the adding of the interface ge-1/1/0.98 and assigning
of the VLAN ID 98 to the JUNIPER_EDGE_B router. This window is opened
by selecting the JUNIPER_EDGE_B router from the upper left list of
PEs and then clicking the “Add” button above the lower
right list of interfaces for the selected router. The same steps are
used to add the interface and to assign the VLAN ID to the JUNIPER_EDGE_A
router.Figure 2: Add a gigabit ethernet interface, ge-1/1/0.98
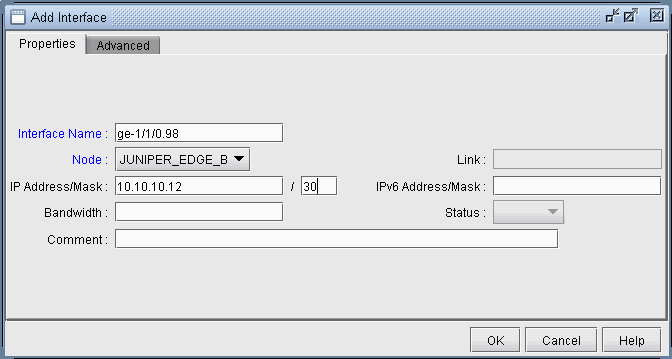 Figure 3: Assigning a VLAN ID of 98 to the interface ge-1/1/0.98
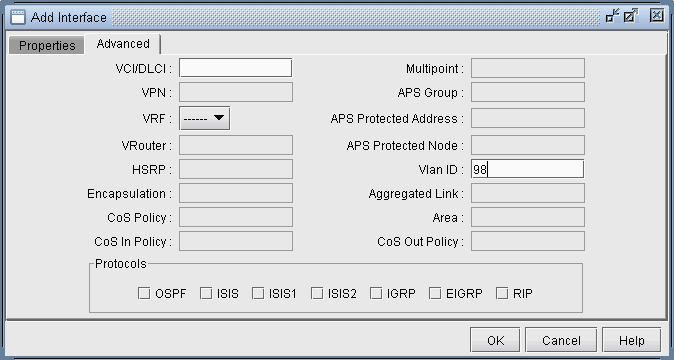
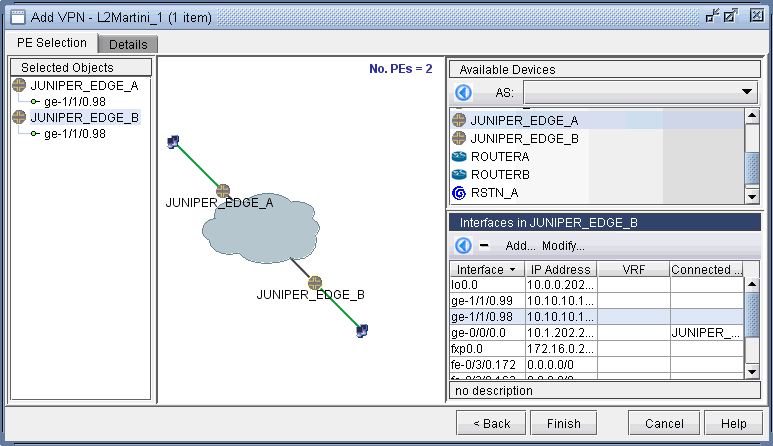
- The following figure shows the result of both interfaces
assigned, after selecting each PE router, adding the appropriate sub-interface
to the interface list in the bottom right, and then dragging and dropping
that new interface to the appropriate PE in the PE list.Figure 4: Finished assigning interfaces on the PEs
- Next, click on the Details tab to take you to the following
screen, where the VCID and Encapsulation can be assigned. Note that
the VCID only needs to be assigned if it was not already done so in
the Common Properties window. The LSPs can also be assigned if necessary.
The following figure shows both the VCID and the encapsulation assigned.
Figure 5: Encapsulation and VCID assigned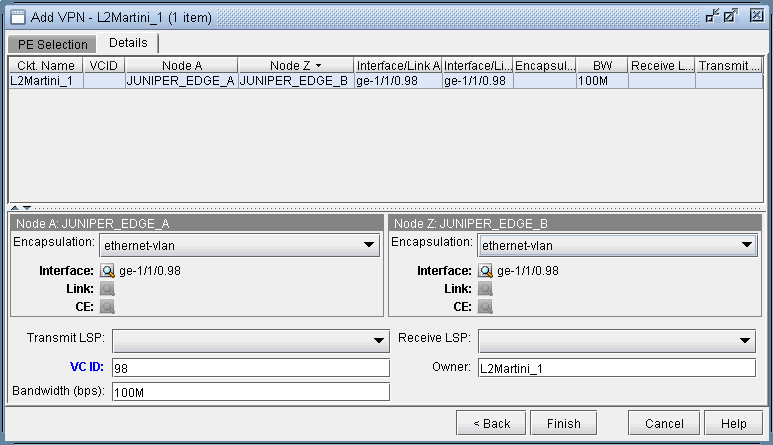
Note that the Encapsulation drop-down can take on the values as described in the following table.
Field
Description
Encapsulation
For Juniper, the interface encapsulation types include: aal0, atm-aal5, atm-ccc-vc-mux, atm-cell, atm-cell-port-mode, atm-cell-vc-mode, atm-cell-vp-mode, cisco-hdlc, ethernet, ethernet-vlan, frame, frame-relay, frame-relay-ccc, interworking, and ppp.
For Cisco, the interface encapsulation types include: aal0, aal5, dot1Q, frame-relay, hdlc, and ppp.
- Next click Finish to complete the adding of
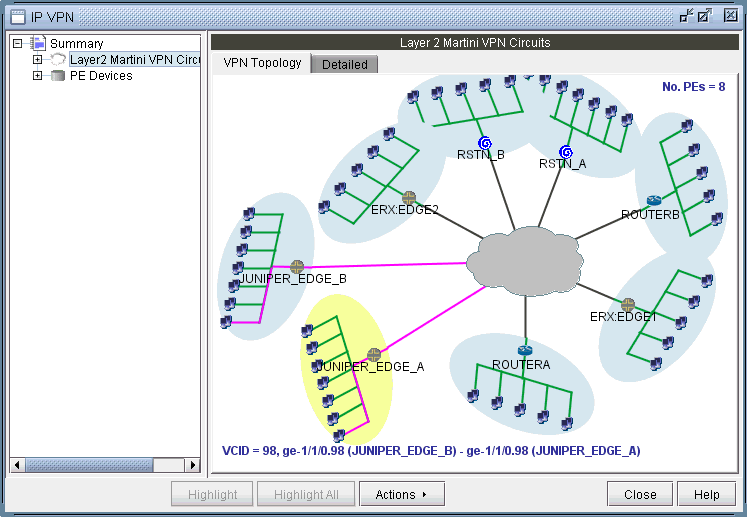
the L2M VPN. The following figures show both the single and summary
topology (with the added Martini circuit highlighted in pink) views
for the L2M VPN just added.Figure 6: Topology view for the L2M VPN added
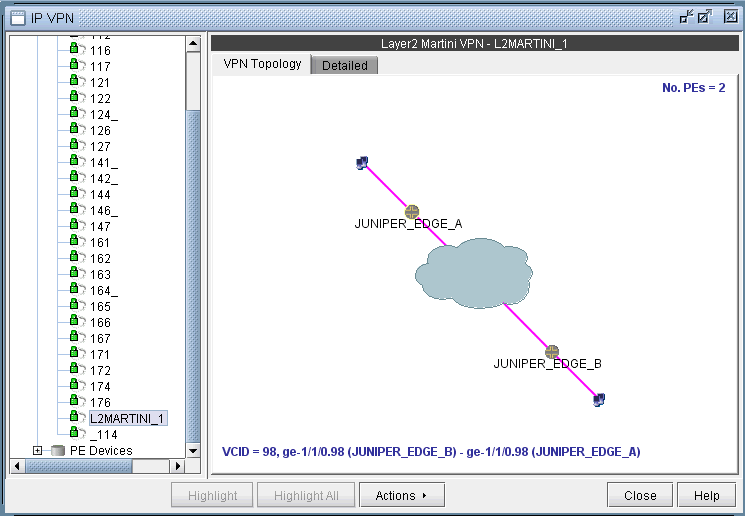 Figure 7: L2M VPN summary topology view with newly-added circuit (VCID 98) highlighted