Sorting and Filtering Options in the Network Information Table
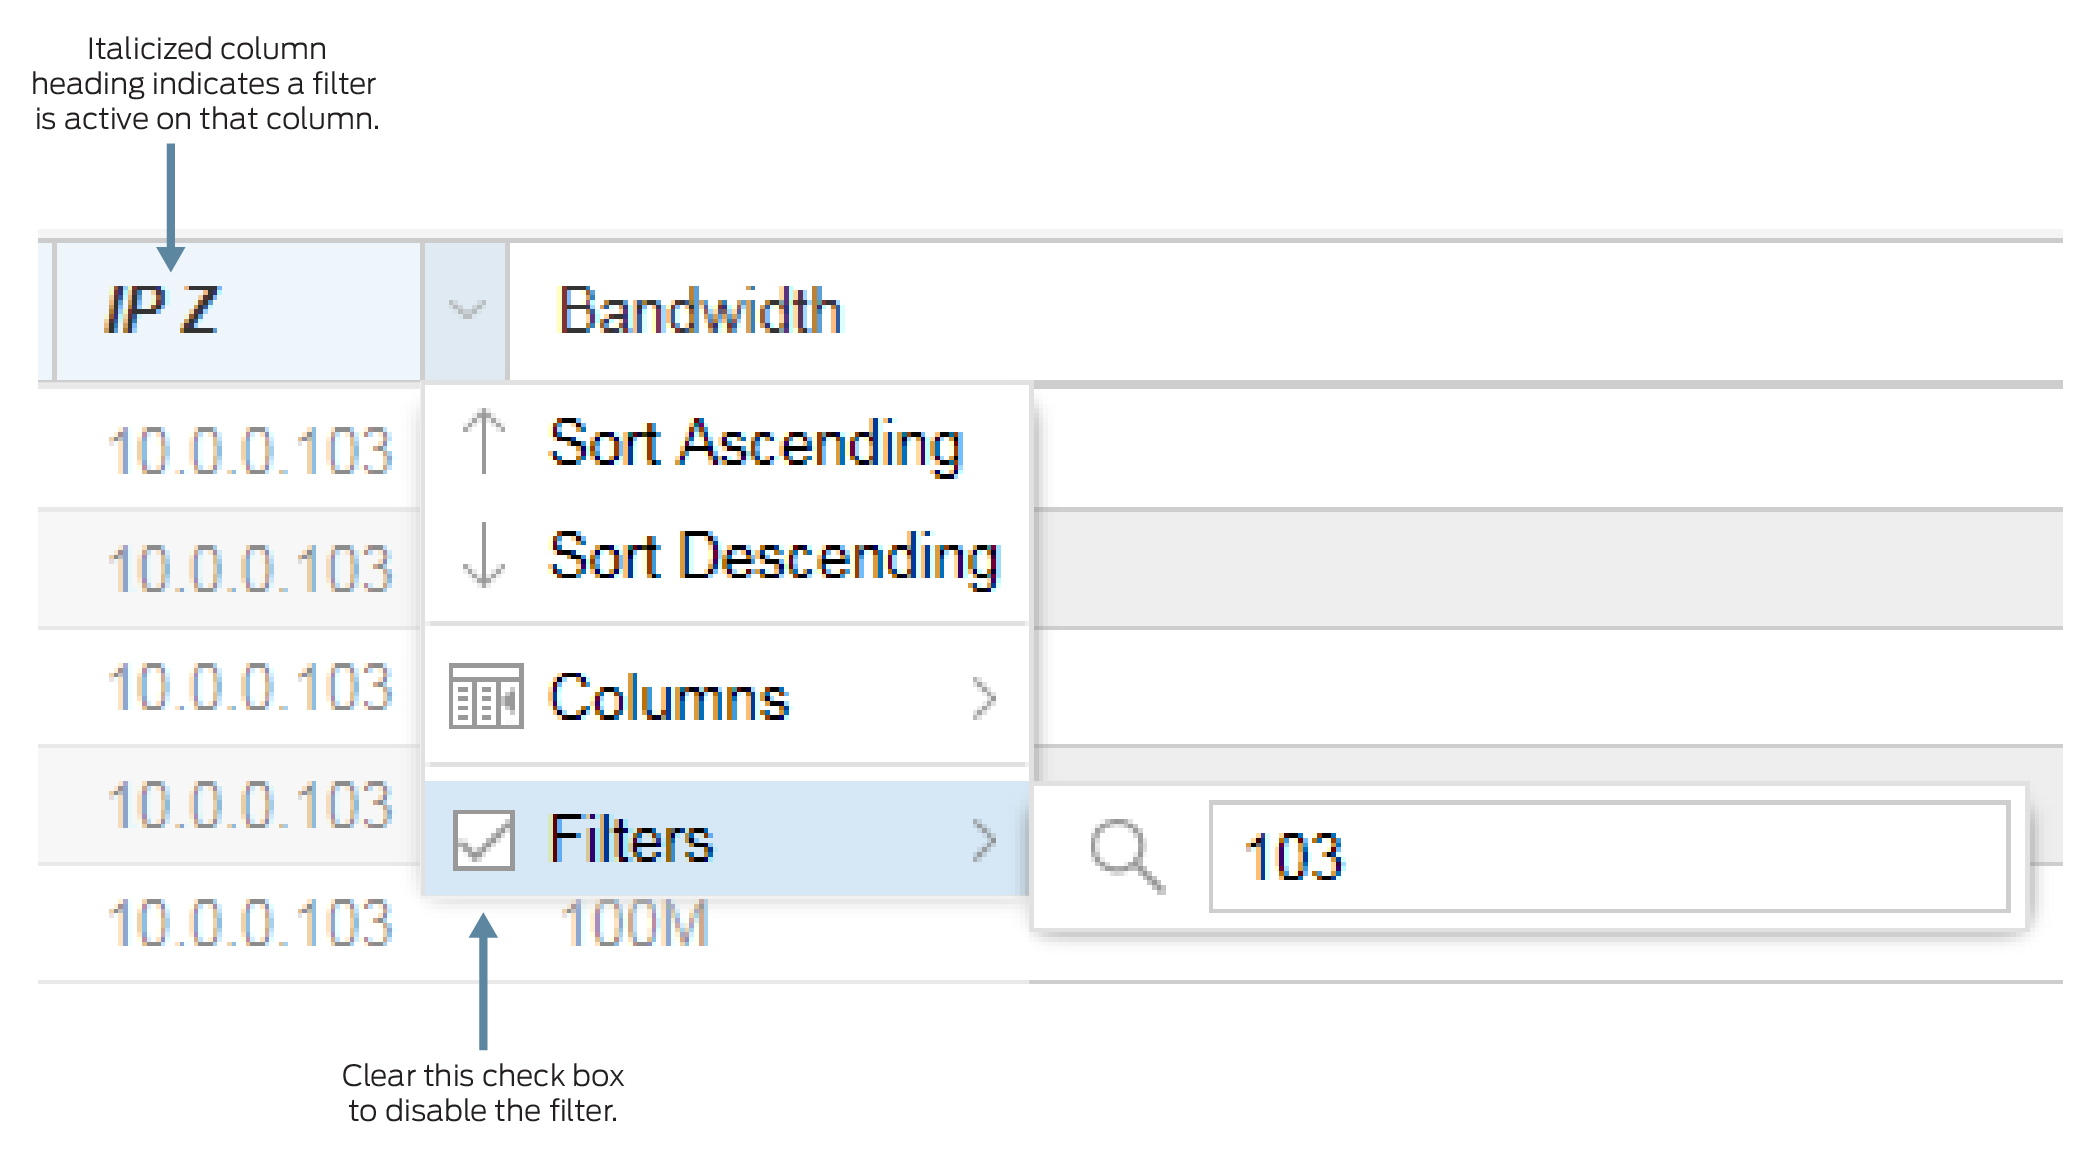
For many of the columns in the network information table, sorting and filtering options become available when you hover over the column heading and click the down arrow that appears.
Table 1 describes the sorting and filtering options that could be available, depending on the data column.
Option |
Description |
|---|---|
Sort Ascending |
Sorts the list of elements from lowest to highest. |
Sort Descending |
Sorts the list of elements from highest to lowest. |
Columns |
Click the check boxes to add or remove columns in the network information table. |
Filters |
For some columns, the Filters option provides a search box. For other columns, the Filters option allows you to enter values in greater than (>), less than (<), or equal to (=) fields. To remove a filter, clear the check box next to the Filters option. |
In some topologies, the list of network elements can include multiple pages of data. NorthStar only offers sorting capabilities on the active page. In that case, try filtering to narrow down the number of rows displayed.
Using the Filters option, you can filter the devices that are included in the display by activating a filter on any column. For example, if you want to display only the tunnels that have 103 in their configured IP Z address, hover over the IP Z column heading, click the down arrow that appears, and enter 103 in the filter box. The Filters check box is automatically selected, and the display is filtered accordingly. The IP Z column heading appears as italicized to indicate an active filter on the column. Figure 1 illustrates this example.

To remove a filter, clear the Filters check box. You do not need to remove the filter text, allowing you to toggle the filter on and off without reentering the text.
