Create P2MP LSP Tunnels and Generate Corresponding LSP Configlets
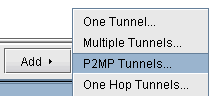
NorthStar Planner allows the user to create P2MP LSP tunnels. First, switch to Modify mode and then select Modify > Elements > Tunnels to bring up the Tunnels Window. Then click on the Add button, and select the P2MP Tunnels option to bring up the Add P2MP Tunnels window.
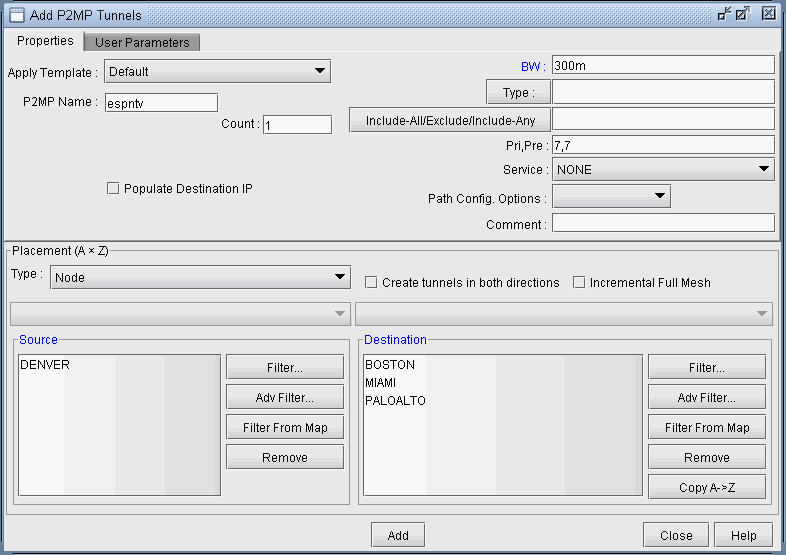
As shown in the above figure, first specify a name for the P2MP LSP instance and then choose the source node (ingress LSR) and the leaf nodes (egress LSRs for the sub-LSPs) for the P2MP tree. Then click on the Add button, and the tool will automatically perform the P2MP LSP path computations necessary to place the sub-LSPs associated with the P2MP LSP.
The user has the option to further specify traffic engineering constraints (such as bandwidth and explicit path) for each sub-LSP, as can be done with any point-to-point LSP. For further information on how to specify tunnel parameters. For more information, see NorthStar Planner LSP Tunnels Overview.
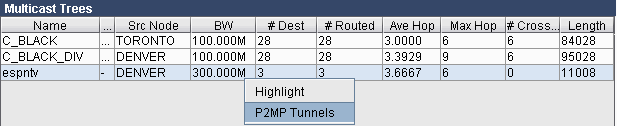
To see the newly-created P2MP LSP, switch out of Modify mode, and bring up the NetInfo > Multicast > Multicast Trees window to see the P2MP LSP tunnels configured in the network.

After using the NorthStar Planner to model P2MP LSPs, the P2MP LSPs can be rolled out according to the tool’s P2MP LSP path computation calculations. This allows the P2MP LSPs created during network planning to be translated into a series of actions that can be easily implemented by network operations. NorthStar Planner can be used to easily convert the outputs of the network modeling into LSP configlets.
A configlet is a small section of the router configuration file that describes all the LSP attributes: bandwidth, admin-group, primary path, etc. To generate the configlets, select Design > Confligets/Delta > LSP Configlet to bring up the LSP Configlet window. After the appropriate options have been specified, click on Submit button to generate the configlets for the selected nodes/tunnels.

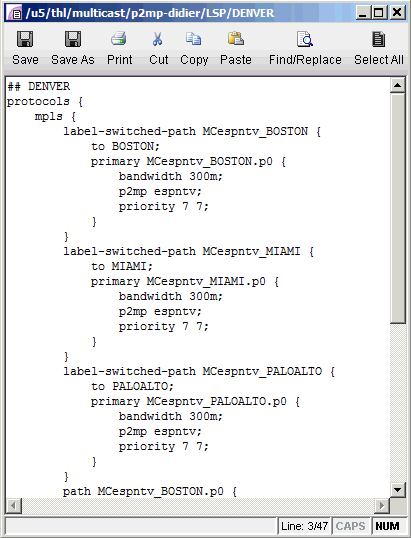
The following figure shows the various statements listed in the configlet generated by NorthStar Planner for the P2MP LSP (espntv) that was created above.