Static Routes Case Study
In this section we will define a demand with a destination IP and let the program route the demand according to the options and hardware settings present in the network. We will then define a new path for the demand and enforce this path using a static route. After defining the static routes, the demand path will be observed again to verify that it does indeed follow the defined static route. Note that for static routes to be successful in routing a demand, the demand must have an IP address associated with its destination, not simply a node name. This is due to the way static routes are defined in actual router configuration files.
Defining the Demand
- In this case study we are interested in demands
terminating at node NYC. In order for static routes to work, there
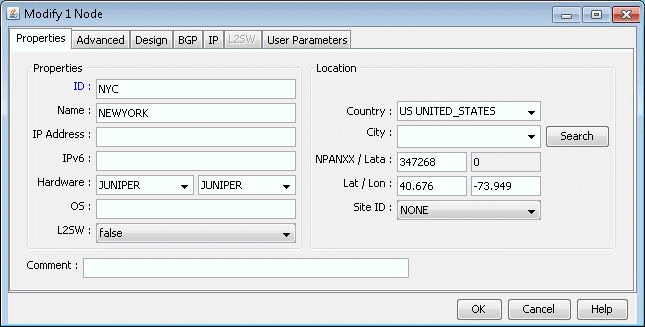
must be an IP address associated with the destination node. Navigate to the Nodes tab. Scroll down until you see node NYC. Highlight it and click the
Modify button to bring up the Modify Node window. Type in 10.10.10.11
for the IP address as shown in Figure 1. Click OK when finished.Figure 1: Assign an IP address to node NYC
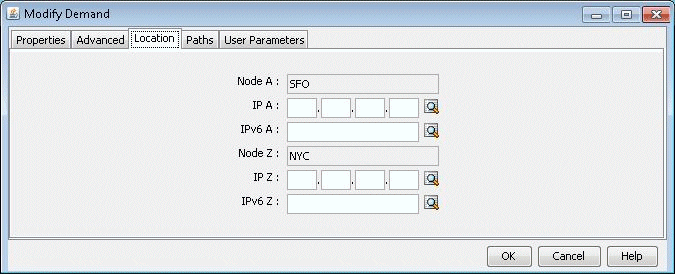
- Modify the demand by typing in the Location tab the corresponding
IP address for its destination node as shown in Figure 2. In this case, the
IP address is 10.10.10.11 for NYC. Click “OK”
to continue.Figure 2: Fill in the IP address for the destination node
-
Update the network by clicking the Update
button.
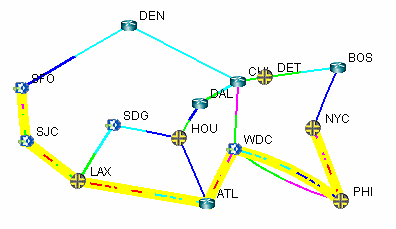
Reopen the Demands window by selecting
Network
> Elements > Demands. Now you can
view
the path of the demand xflow79 by selecting the demand and clicking the Show
Path button. The current path will be displayed in the Map window as shown in
Figure 3
below.
Figure 3: Path of demand xflow79, from SFO to NYC
Creating the Static Route Table
Suppose it has been decided that the demand xflow79 and other such demands going to node NYC (10.10.10.11) are to be rerouted to go through node CHI instead of PHI. This could be due to the fact that the link between PHI and NYC is being heavily utilized, as indicated by the red/purple colored link. Thus, it is necessary to create a static route table at node WDC to enforce this route.
First, identify if there are any tunnels available starting from node WDC that go through CHI. To do this, right click on node WDC, and select View > Tunnels On/Thru Node.
In the new Tunnels at Node: WDC(WDC) window, notice that the tunnel RWDCBOS goes from node WDC to node BOS. Highlight this tunnel and click the Show Path button. The path of this tunnel will be displayed in the Map window, as shown below in Figure 4:
Figure 4: Path of tunnel RWDCBOS from WDC to BOS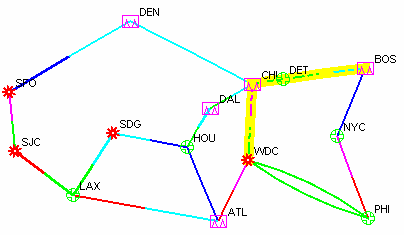
This is a good choice for the next hop of a static route at node WDC for the purpose of this example, since it will route all demands through nodes CHI, DET, and BOS rather than through node PHI.
On the menu bar, navigate to Network > Protocols > Static Route Table.
Click the Add button to bring up the Add Static Route window.
Select NYC from the Dest. Node dropdown menu. The Dest. (IP/Mask) field will be automatically filled in. Then, in the Next Hop section, check the radio button next to Tunnel and then select RWDCBOS from the dropdown menu, as shown in Figure 5.
Figure 5: Adding a static route at node WDC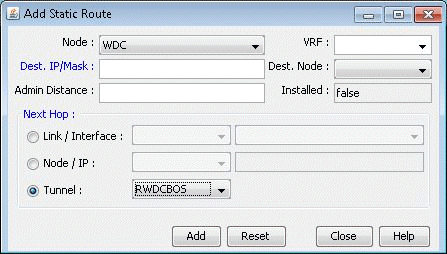
Click the Add button to add this entry to the static route table for node WDC. You should see this entry updated in the Static Routing Table for WDC window, as shown in Figure 6 below:
Figure 6: Updated static touting table for WDC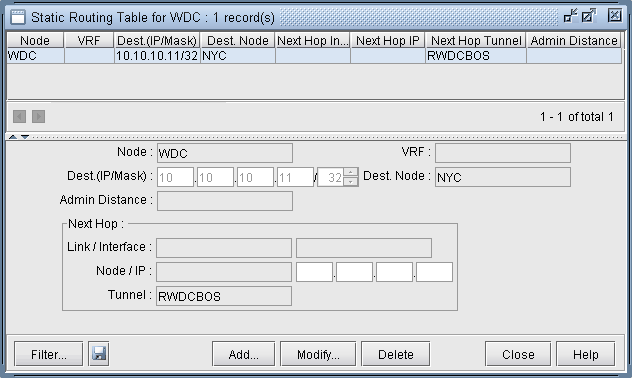
Verify the New Route
Now that the static route has been defined, it is time to test whether or not the demands will route as planned.
Select the Network > Elements > Demands menu.
Locate the demand, xflow79, and highlight it. Click Show Path to display its new path in the Map window. Below (Figure 7) is a screenshot of what it should look like. Notice that the new path takes the route specified by the static route table created at node WDC.
Figure 7: New route following static route specifications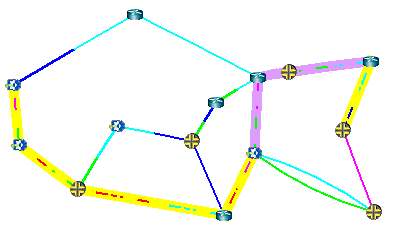
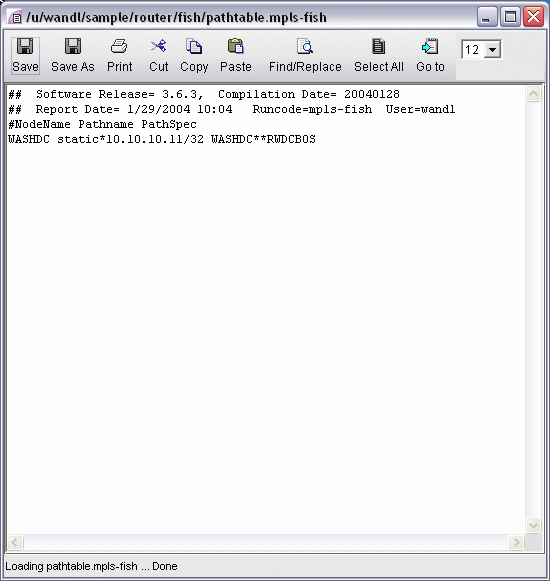
Information on static routes is stored in a pathtable.runcode file. This can be verified by opening the File Manager window, navigating to the directory where the network files are stored (i.e. /u/wandl/sample/IP/fish) and opening the pathtable file (i.e. pathtable.mpls-fish). For this case study, the file will look as follows.
Figure 8: Static route information is stored in a pathtable file