Configuring a Loose Route
The default setting for the tunnel is to route it dynamically. Note that for Cisco tunnels, the path should be configured with loose routes to the ABR. To change the paths to configured loose routes, open the LSP Tunnel window in the Tunnels tab on the Network Info table. Click Modify and then select “All Entries” and change the Path Config. Options to “Add” “Config” to configure the route.
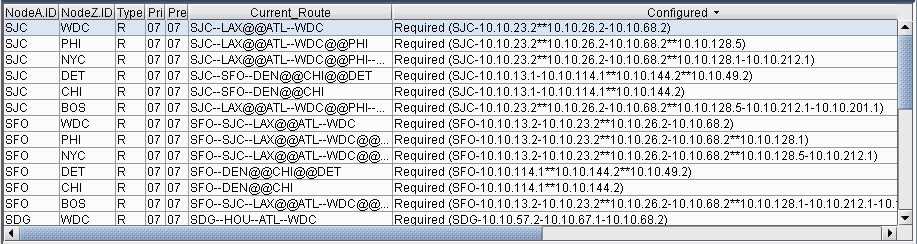
Notice that a loose route is now given in the Configured column, indicated by **.
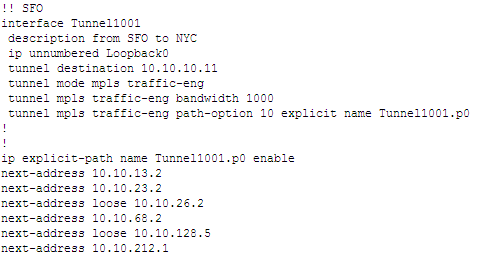
A route can also be manually configured. For example, select a tunnel and click Modify and then select “Selected Entries.” In the bottom half of the window, there is a table with the route for the tunnel. To configure the path, double-click the cell underneath the column “Configured Route”. Here you can enter in the path, using ** to indicate a loose route after the area border routers.
The Exclude-IP-Address feature is not currently supported for inter-area tunnels.

After configuring the routes as indicated in the previous step, LSP configlets can be generated for the newly created LSP tunnels. This is accomplished through Design > Confligets/Delta > LSP Configlet. For more information, see LSP Configlet Generation Overview.