Using the Multicast Tree Design Feature to Design Diverse Multicast Trees
Now that the two P2MP trees of interest have been marked to be in the same Diversity Group, you are ready to perform a design. For two multicast trees to be diverse from each other, the paths (i.e., the sub-LSPs of a P2MP multicast tree) to each destination from the source of each of the two trees have to not share any link or site or facility, depending on the diversity level. By default, the algorithm tries the highest diversity level first; so it will try to design for facility, then site, then link diversity.
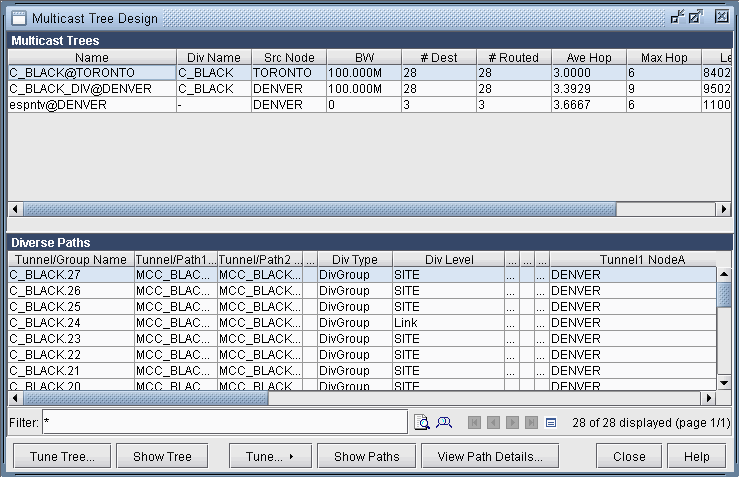
To perform the design, select Network > Protocols > Multicast > Multicast Tree Design to bring up the Multicast Tree Design window, as shown in the following figure. The top part of the window displays the list of P2MP trees that are configured in the network. The bottom part of the window shows the sub-LSPs that make up the P2MP tree selected on the top part of the window.
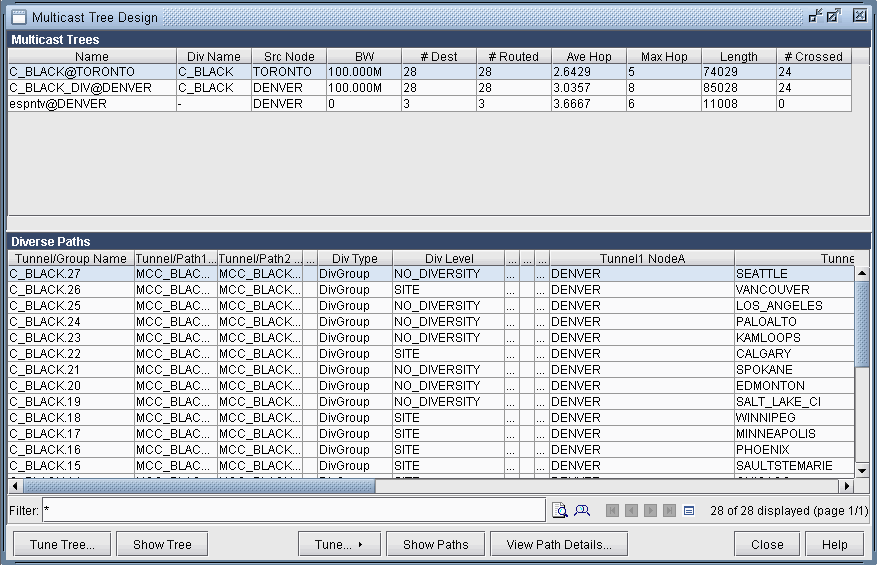
The Div Level column indicates the current diversity level (FACILITY, SITE, LINK, or NO_DIVERSITY) for the sub-LSP. The Show Paths button allows you to visually see two sub-LSPs that are diverse from each other. For instance, the following figure shows that the sub-LSP from TORONTO to VANCOUVER and the sub-LSP from DENVER to VANCOUVER are SITE-diverse from each other.

Next you are ready to start the actual design run. Simply click on the Tune Tree button to bring up the Tuning Options window, shown in the following figure. The Max Iterations box may be set to a higher value in order for the design’s heuristics algorithm to perform more iteration runs, which leads to even better solutions. The Remove configured paths before tuning option, which is checked by default, means that existing P2MP sub-LSP paths will be overwritten by the program. The Mark new paths as configured option, which is checked by default, means that the LSP will be explicitly routed by our optimization program.

Next click on OK and allow NorthStar Planner to perform the design. This may take a short amount of time, such as a few minutes; it may also take a much longer time. It all depends on the value that you specified for Max Iterations.
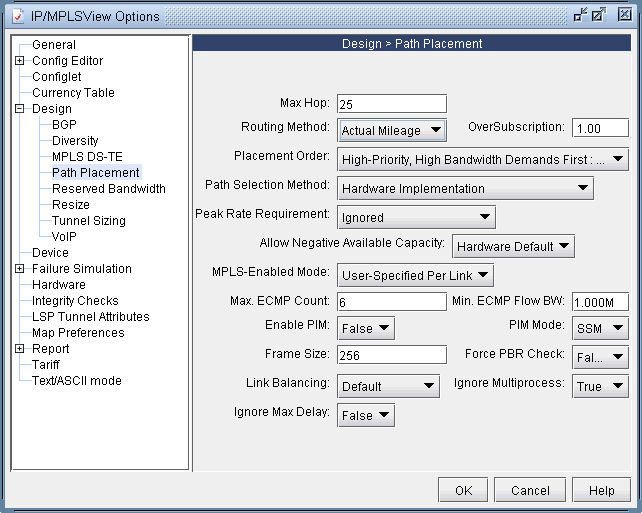
Another thing to note is that the design is performed based on IGP cost (i.e., OSPF cost in this case). You may also choose to have the design performed based on actual mileage cost, as real-time traffic is delay-sensitive. Make sure that the latitude and longitude coordinates have been specified for the node locations if you want to perform the design using the actual mileage. If that is the case, bring up the NorthStar Planner options window, select Design > Path Placement and set the Routing Method to be Actual Mileage, as shown in the following figure.