Viewing Inter-Area Tunnels
Once the LSP tunnels have been created, update the network state by clicking the “Update” button just below the main menus. Then, select Modify > Elements > Tunnels. Notice the @@ symbol in the Current Route field indicating the border between two areas.
Figure 1: Current Route of Newly Created Tunnels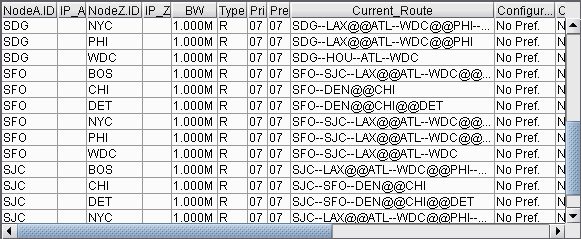
Click “Show Path”. On the Paths window right-click a column header and select “Table Options” and add the Area column as shown below.
Figure 2: Path of an Inter-Area LSP Tunnel between B2 and R2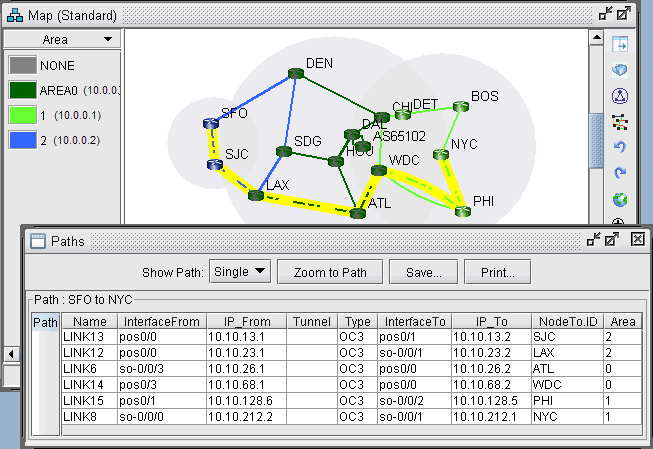
You can also view a detailed report of the LSP Tunnels. Go to Report > Report Manager. In the Report Manager, choose the Tunnel Path & Diversity Report under Tunnel Layer Network Reports > Tunnel Reports.