Deploy the vSRX as an Advanced Security Service in a VMware NSX-T Environment
Use the following procedures to deploy the vSRX as an advanced security service virtual machine (VM) in the VMware NSX-T environment. The vSRX VM is deployed in conjunction with Juniper Networks Junos Space Security Director and VMware NSX-T Manager.
Create a Security Group
You can create a security group by using the VMware NSX-T Manager. Each security group is a logical collection of objects which include VMs that you want to be members in the same security group and to which you will apply the vSRX as a Juniper security service. You can apply an advanced security service policy to all the objects contained in a security group.
To create a security group:
Discover the NSX-T Manager and Register vSRX as a Security Service
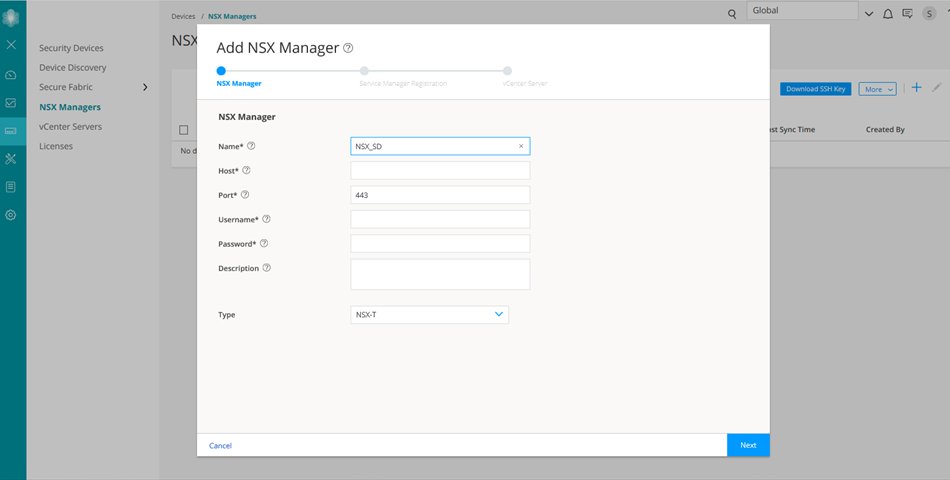
The NSX-T Manager is added as a device in Security Director, and its inventory is synchronized with Security Director.
Ensure that SNMP is disabled in Security Director while performing device discovery for the vSRX agent VM. If SNMP is enabled in Security Director, the vSRX agent VM discovery operation fails.
To discover the NSX-T Manager from Security Director:
After adding the NSX-T Manager, you must register the vSRX VM as a Juniper security service with the NSX-T Manager.
To register the vSRX instance as a Juniper security service:
-
Select the NSX-T Manager for which service needs to be registered, right-click or from the More list, select Register Security Service.
The Register Security Service page appears, as shown in Figure 3.
Figure 3: Register Security Service Page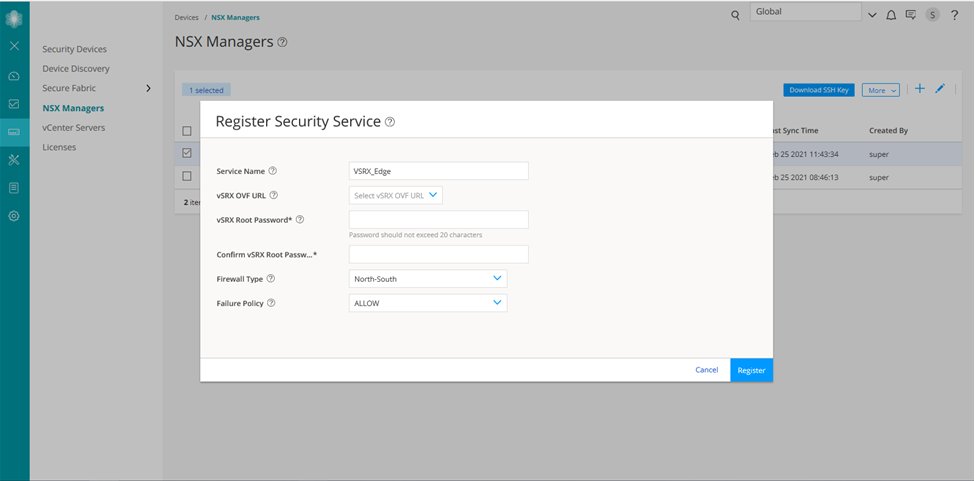
-
In the Service Name field, enter the name of the Juniper security service.
-
From the vSRX OVF URL list, select the available vSRX OVF image that you copied to the Policy Enforcer machine.
-
In the vSRX Root Password field, enter the root password of the vSRX instance. The same root password will be set for all the vSRX instances deployed in NSX.
-
Select the firewall type as North-South. This is the perimeter firewall for the north-south traffic. This provides a consistent north-south security for members of the security groups, if the members move across datacenters.
Note:By default, the firewall type is East-West.
-
Click Register.
A confirmation message indicates whether the registration is successful or not.
The vSRX is added as a network service that can be deployed by the NSX-T Manager.
In the VMware NSX-T Manager, verify the following:
-
Select System > Service Deployments and then select the CATALOG tab. Verify that the service name provided while registering the Security Service is listed in the table (the newly registered vSRX VM) as shown in Figure 4.
Figure 4: Service Definition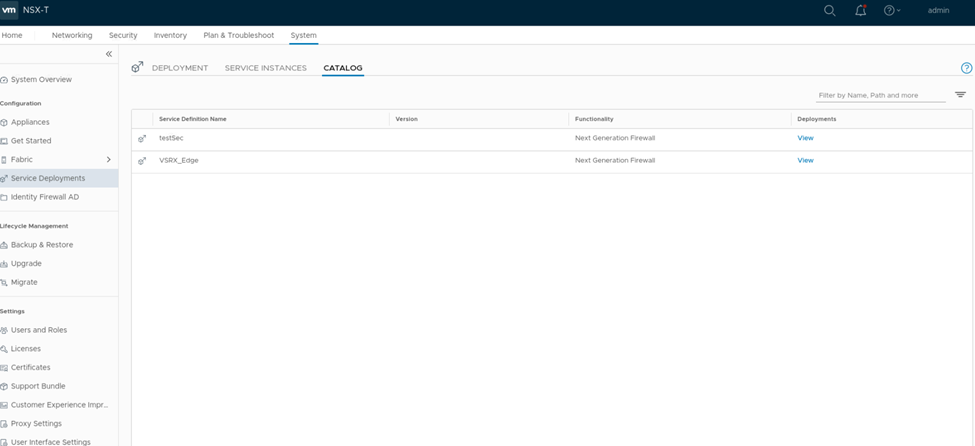
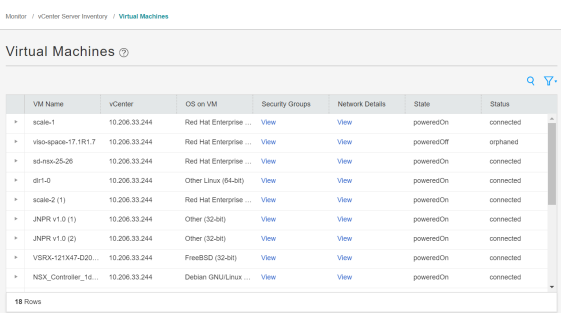
The NSX-T Manager and its inventory are now synchronized with the Security Director. All shared objects (such as security groups) are synchronized between the NSX-T Manager and Security Director. The shared objects include the IP addresses of all VMs, including the vSRX agent VMs. Security Director creates a dynamic address group(DAG) for each security group synchronized from the NSX-T Manager, along with the addresses of each member of the security group.
After you register a Juniper security service in the NSX-T Manager, the NSX-T Manager uses the vSRX agent VM to communicate the service status. The NSX-T Manager transmits messages to Security Director when any changes or activities are happening in the NSX-T Manager that are related to the Juniper security service.
If the firewall type is East-West, after registering the security service, you must add a service segment, service profile, and a service chain.
Navigate to Security > Network Introspection Settings and do the following:
In the SERVICE SEGMENT tab, add a service segment:
-
Click ADD SERVICE SEGMENT.
-
Enter the service segment name.
-
Select the transport zone.
-
Select the Tier0/Tier1 gateway to which the service segment is connected.
-
Click SAVE.
In the Service Profiles tab, add a service profile:
-
Select the partner service.
It is the service name used while registering the service in Security Director.
-
Click ADD SERVICE PROFILE.
-
Enter the service profile name.
-
Select the vendor template.
-
Click Save.
In the Service Chains tab, add a service chain:
-
Click ADD CHAIN.
-
Enter the service chain name.
-
Select the service segment.
-
Click the Set Forward Path link.
The Set Forward Path page is displayed.
-
Click ADD PROFILE IN SEQUENCE, select a service profile and click SAVE.
The service profile is mapped in the forward path.
-
Click SAVE.
Deploy vSRX as a Security Service
The next step is to deploy the Juniper security service.
To deploy the vSRX agent VM as a security service:
Verify vSRX Agent VM Deployment in Security Director
In Security Director, based on the NSX Manager discovery, NSX security groups are automatically synchronized with Security Director. For each service group in NSX Manager, Security Director creates a corresponding dynamic address group.
To verify that the vSRX agent VMs have been deployed:
Automatic Creation of Security Policy in the NSX-T Environment to Direct Traffic Through the vSRX Agent VMs
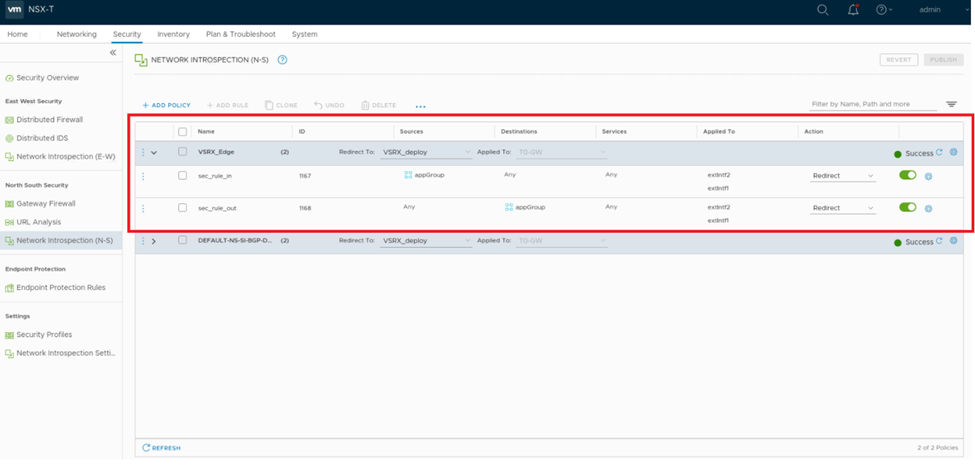
After you deploy vSRX agent VM security services, security policies are automatically created to redirect any network traffic originating from the VMs in a specific security group to the Juniper security service vSRX agent VM for further analysis.
To direct the traffic to the vSRX agent VMs by using the automatically created security policies:
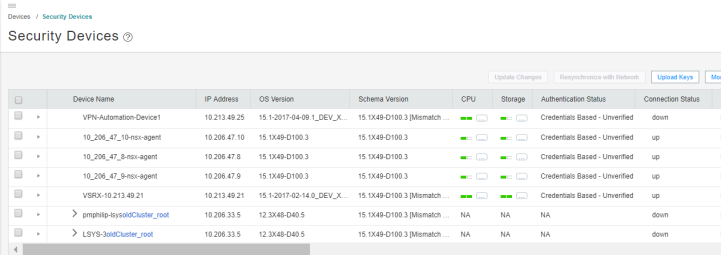
When you return to Security Director > Devices > Security Devices, you can view the active configuration for the vSRX agent VMs, as shown in Figure 7.
The NSX-T Manager is aware of the security groups that the Juniper security service monitors. If any changes occur in the security group, the NSX-T Manager notifies Security Director about those changes. If membership changes, NSX-T Manager notifies Security Director of the changes and Security Director updates its database based on the new membership.


