Install Security Director Insights With KVM virt-manager
Before You Begin
-
Ensure that there are no snapshots. You must delete the snapshot before expanding the disk size.
-
We recommend to create a backup by cloning the VM before expanding the disk size.
You can install and launch Security Director Insights with the KVM
virt-manager GUI package.
Before you begin, you must ensure:
-
You have already installed KVM, qemu, virt-manager, and libvirt on your host OS.
-
You have created a bridge network to access KVM through SSH.
In this document, a bridge network br0 is created with Netplan. Figure 1 shows an example configuration from the /etc/netplan/00-installer-config.yaml file.
Figure 1: Example Configuration of br0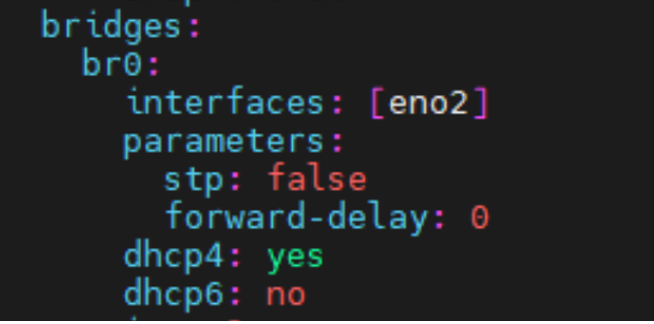
To install Security Director Insights with virt-manager:
-
On your host OS, type
virt-manager.The Virtual Machine Manager page appears, as shown in Figure 2.
Figure 2: Virtual Machine Manager Page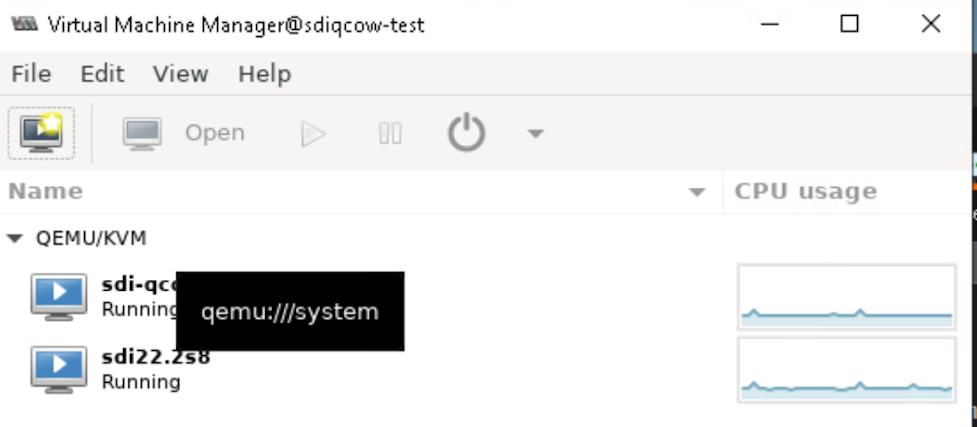 Note:
Note:You must have admin rights on the host OS to use
virt-manager. -
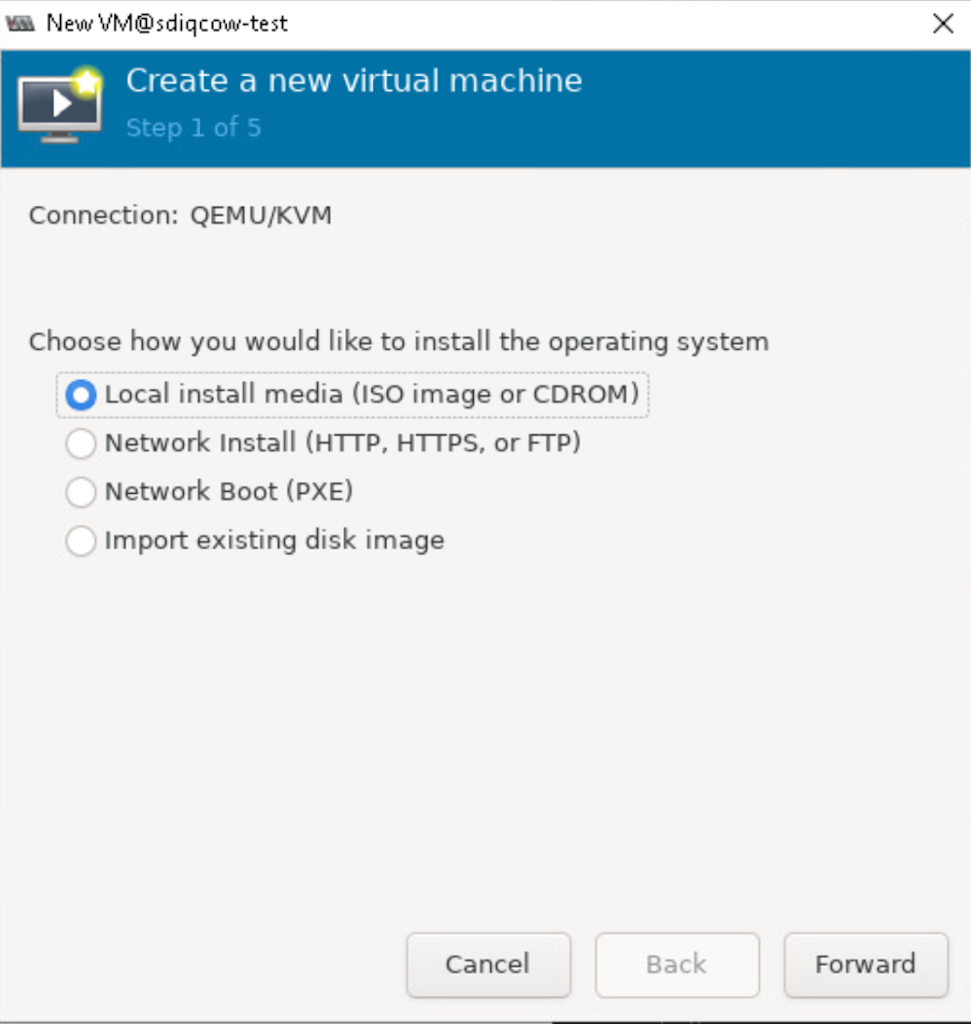
Click the Create a new virtual machine icon, as shown
in Figure 3.
The Create a new virtual machine page appears.
Figure 3: Create a New Virtual Machine
-
Select Import existing disk image, and click Forward.
Figure 4: Import Disk Image
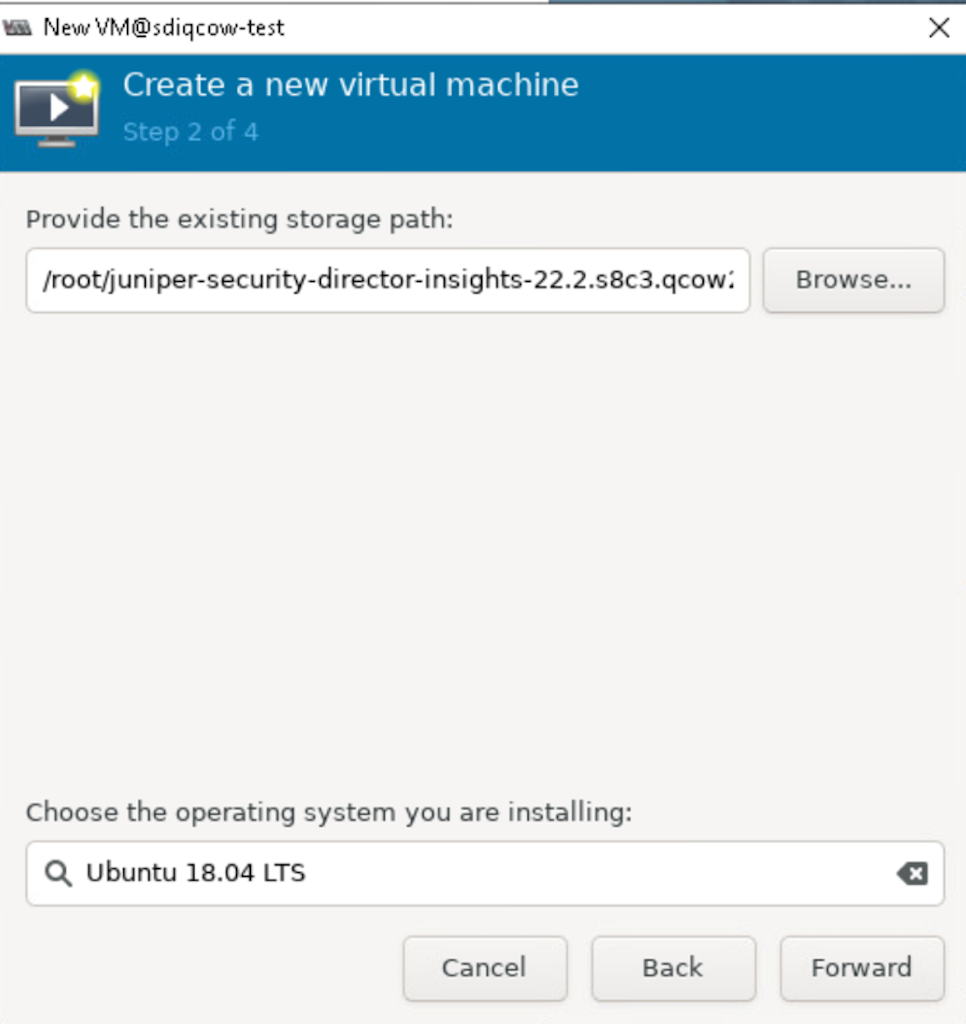
-
Browse to the location of the downloaded Security Director
Insights image and select the image.
Figure 5: Select Storage Path And Operating System
-
Set the RAM to 16384 MB and set CPUs to 8, as shown in Figure 6.
Figure 6: Configure Memory And CPUs
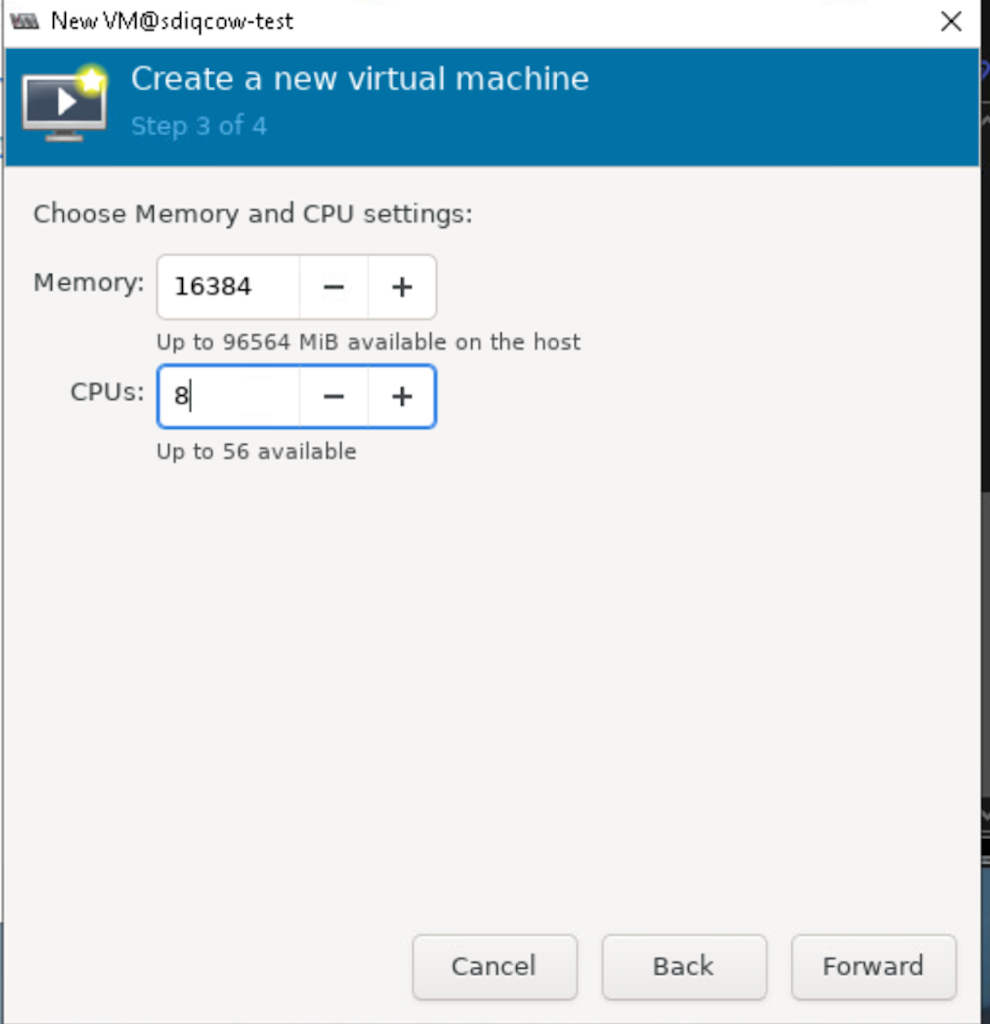
Click Forward.
-
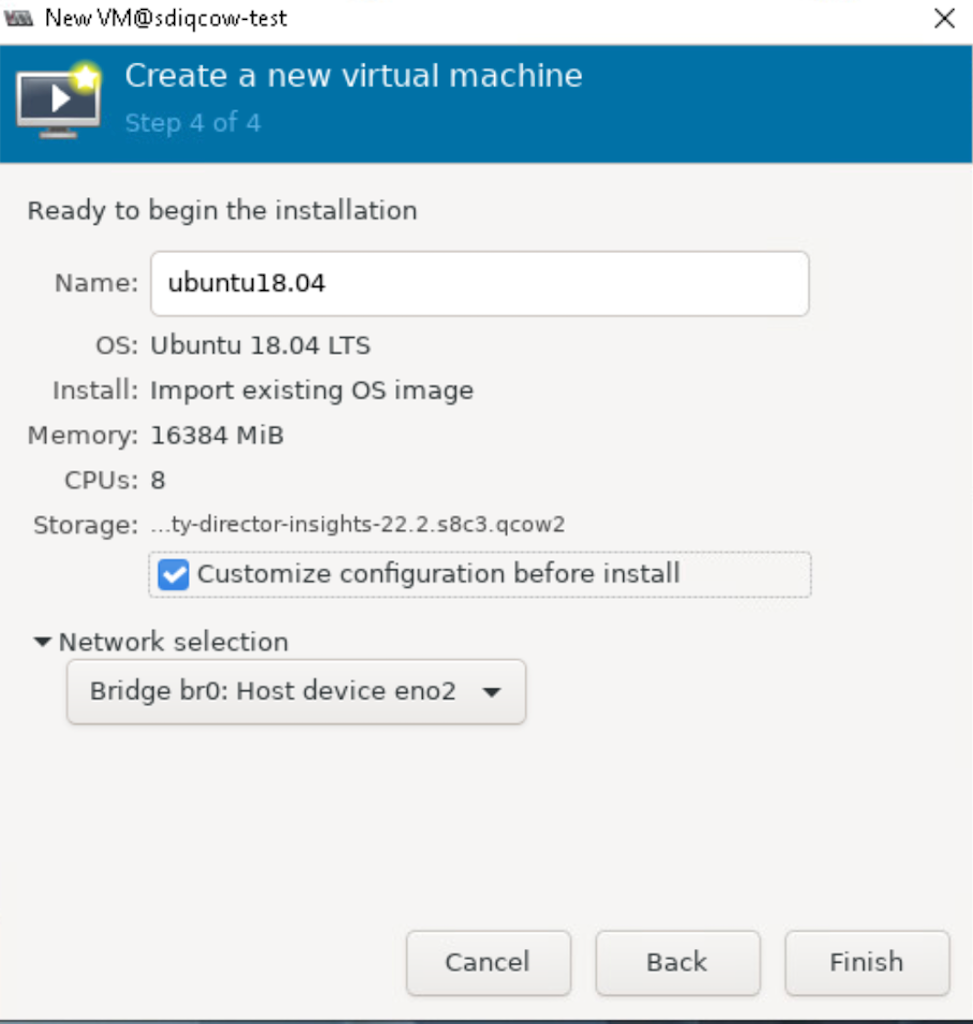
Select the Customize configuration before install option, as shown in Figure 7.
Figure 7: Network Selection Page
-
Click Add Hardware, as shown in Figure 8.
The Add New Virtual Hardware page appears.
Figure 8: Add Hardware Option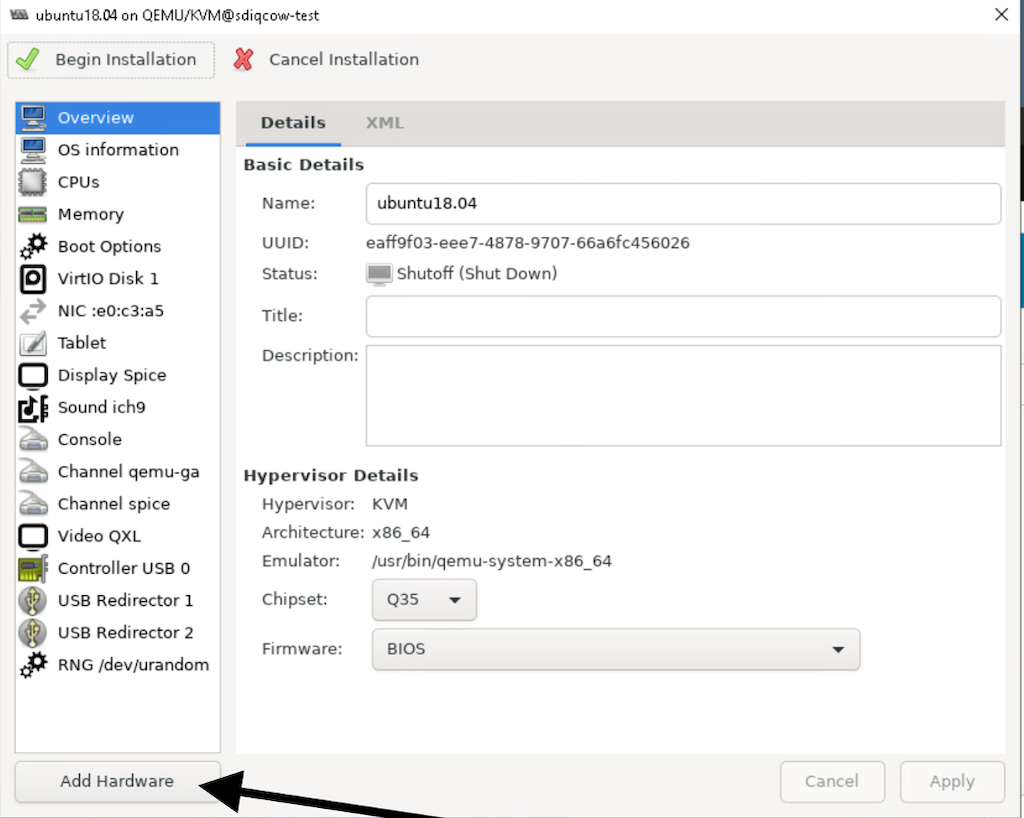
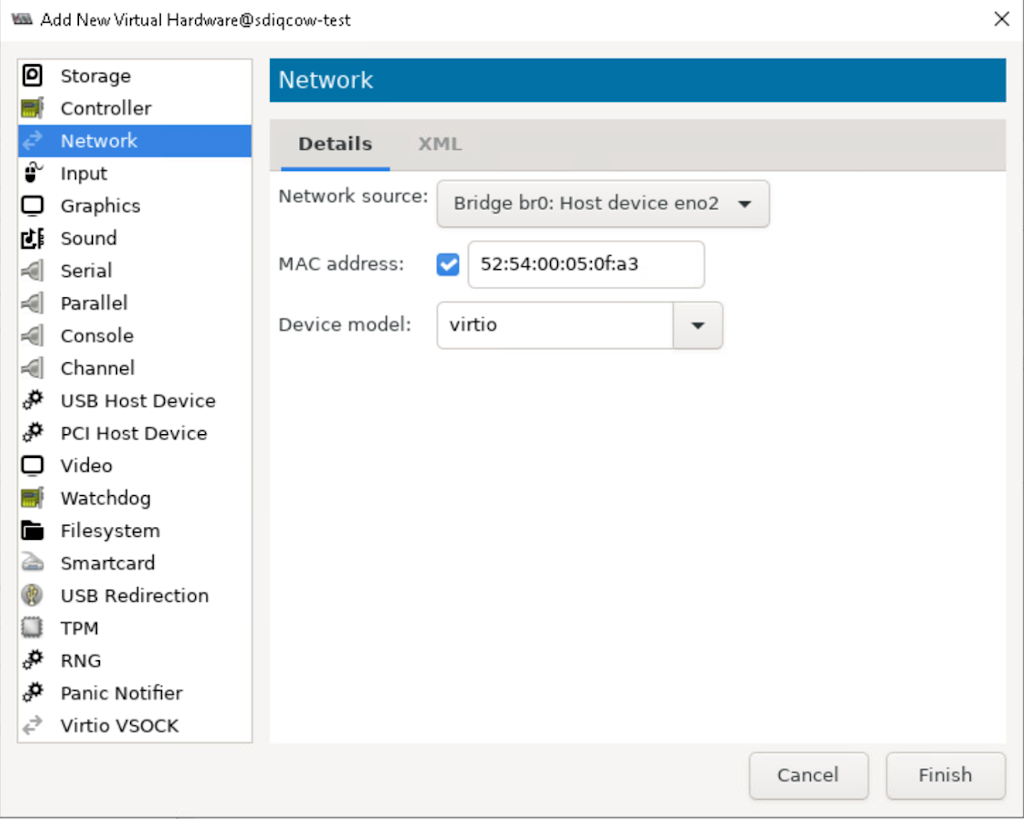
-
Select Network from the left side menu and
click Finish.
Figure 9: Network Details Page
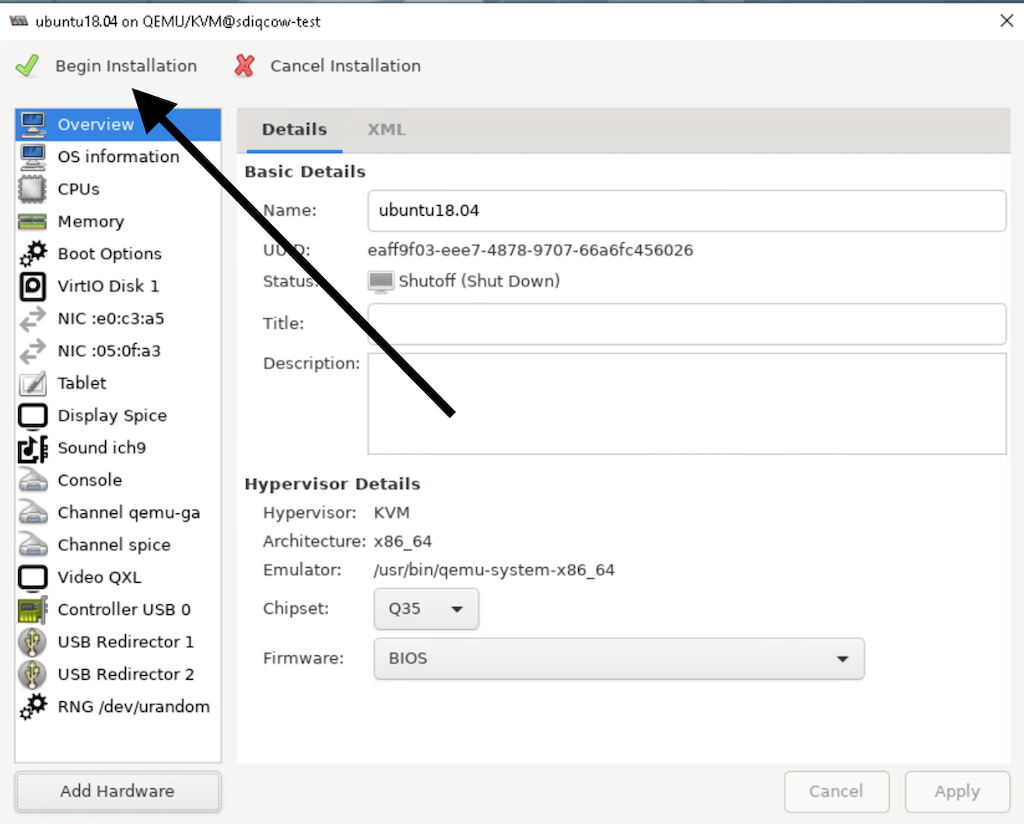
-
Click Begin Installation.
Figure 10: Begin Installation
The VM manager creates the virtual machine and launches the Security Director Insights console.
Expand the VM Disk Size
Procedure
To expand the disk to the maximum available size in a KVM virt-manager:
-
Log in to the host of the KVM and power down the VM, as shown in Figure 11.
Figure 11: Power Down the VM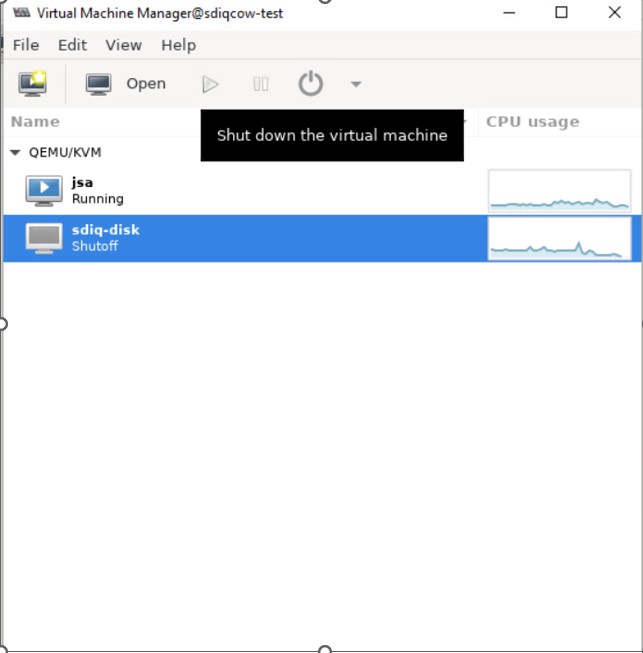
-
From the host, increase the disk size using the
qemu-img
resize vmdisk.img +XG
command, where vmdisk.img is the name of the image and XG is the size in GB you want to expand the disk to.
The size denotes how much you want to expand the disk. It is not the maximum size of the disk.
-
Power on KVM and log in to the Admin CLI. Switch to the server mode and run
set disk-partition-to-fullcommand.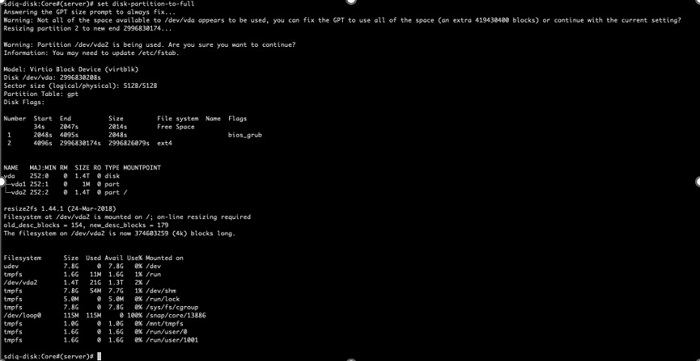
The new disk size is the size of /dev/vda2.