
Help us improve your experience.
Let us know what you think.
Do you have time for a two-minute survey?

Help us improve your experience.
Let us know what you think.
Do you have time for a two-minute survey?
We are excited to share a new optimization for those upgrading a large number of APs! Peer to Peer Upgrades improves the efficiency of WAN bandwidth by allowing firmware image downloads directly from peer APs, instead of relying on a cloud download for every single AP. How this works: A seed AP will first download the firmware files from the cloud. The remaining APs will then download the firmware files from the seed AP locally. By limiting the cloud download to just one AP, you can decrease the time needed for upgrading in batches.
To use peer to peer upgrades, navigate to your AP List page and select the APs you wish to upgrade. Clicking on Upgrade APs will bring up the firmware upgrade modal, and here you can select the check box on the bottom stating Faster upgrades using peer to peer communication.
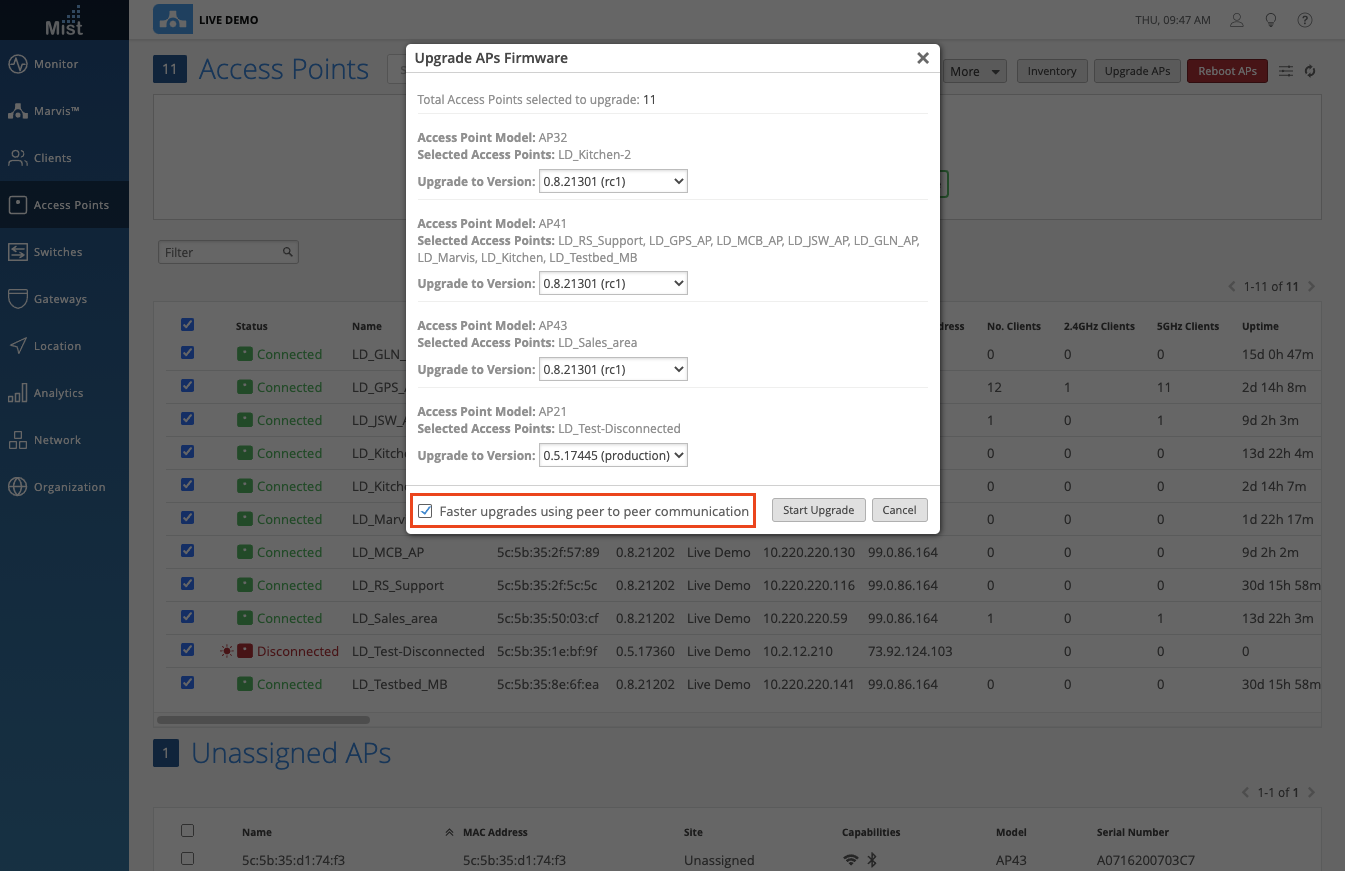
This has been a beta feature for the past few months, and now we are happy to release this as a GA feature for all users.
To help troubleshoot any network or AP problems, we have updated our AP LED blink codes with additional error identification states. Find the updated codes on this page, or click the Disconnected AP icon on your AP List page to pop up a modal which will describe to you what issue the LED code corresponds to.
See this page for the full list of LED codes and a video example here: https://www.juniper.net/documentation/us/en/software/mist/mist-wireless/topics/ref/ap-led-status.html
When looking through your list of WLAN Labels directly in the Labels page (Network > Labels), it may be hard to remember if a WLAN is part of a Config Template. To help make things easier for you, we are now also including the Config Template names next to their WLANs in the WLAN Label page.
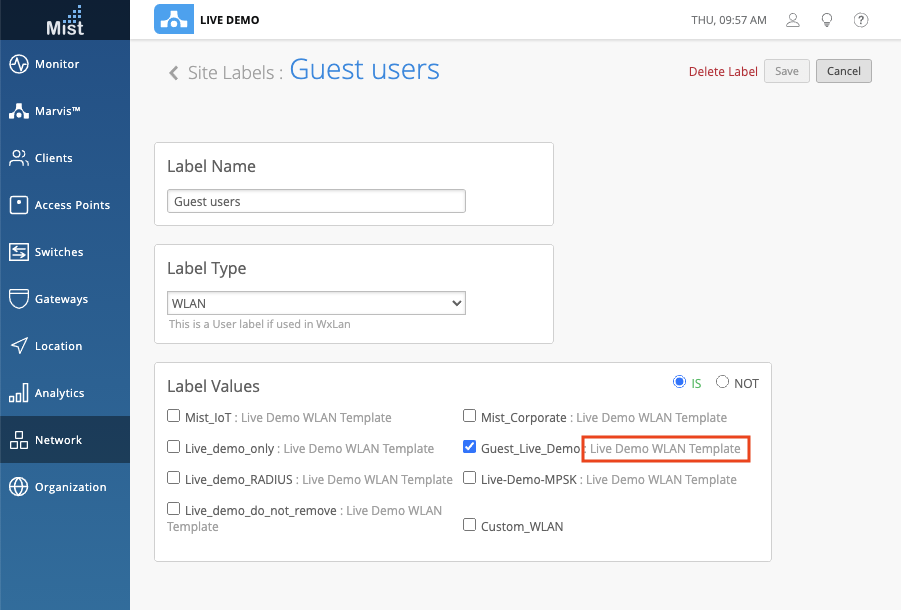
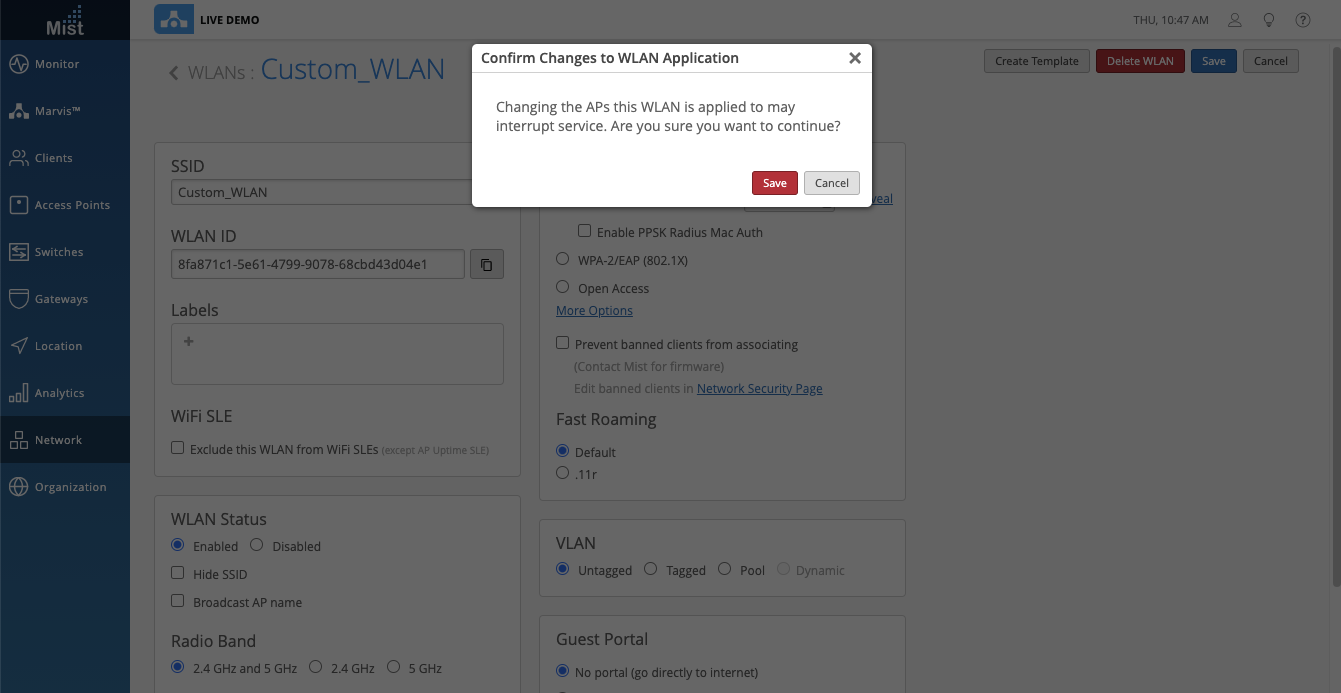
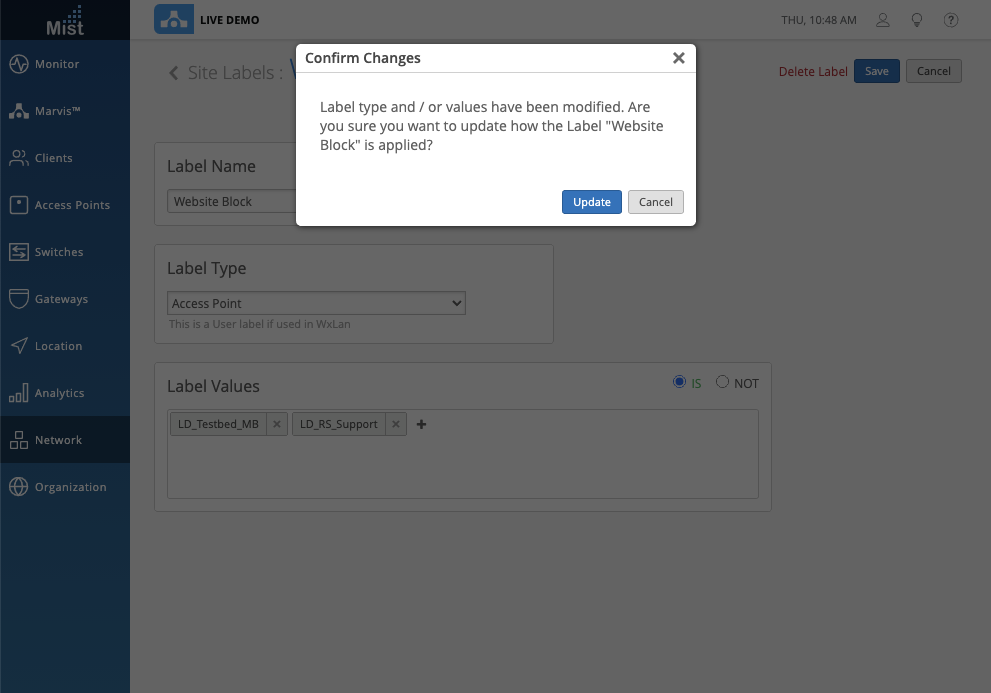
Configuration changes may have an impact on your network if it requires an AP to reinitialize its radio to apply the changes. To prevent accidental config changes from interrupting your network, we have confirmation pop ups whenever you make any network-impacting changes. This week we are improving on this by adding the confirmation pop up when you make the following changes:
WLAN – Apply to Access Points
Changing this will impact which Access Points broadcast your WLAN, and may interrupt any connected clients temporarily.
AP and WLAN label type/value
Making changes to these labels may impact Site Policies which are configured using labels
Auto-provisioning makes the process of auto-assigning APs to sites and device profiles simple by allowing you to create rules based on AP names, Subnets, and more. This week we are adding the functionality of Auto-Provisioning based on the AP model itself. Using this feature, you may auto-assign all APs of a certain model i.e. AP41 to your desired Site and Device Profile.
To configure Auto-Provisioning, go to your Organization Settings page (Organization > Settings), and select Configure Auto-Provisioning. Enable it for Site Assignment, and choose AP Model from the Source dropdown menu. Here, you may choose the AP Model and Site to assign the APs to.
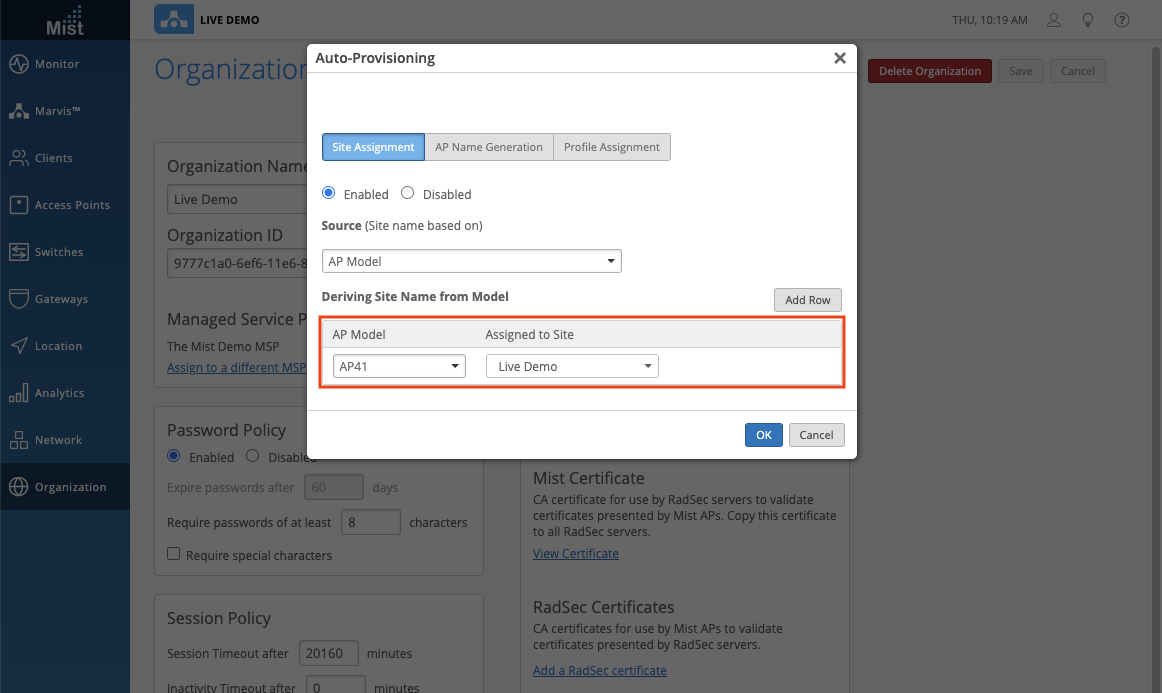
To learn more about the Auto-Provisioning feature, please refer to this page: https://www.juniper.net/documentation/us/en/software/mist/mist-wireless/topics/concept/auto-provisioning.html
Note: Site Assignment is available for everyone, but Profile Assignment is an advanced feature and has limited access. Please contact support@mist.com if you would like the Profile Assignment feature.
The Mist Captive Portal can be customized with sponsored guest access, which requires clients signing in to the portal to get approved by a sponsor via Email in order to successfully connect to the network. You can now customize this sponsor Email when configuring your Guest portal WLAN.
When configuring your Guest portal, in the Authorization tab, select Sponsored Guest Access and fill out the allowed email domains. After doing so, you will be able to select Customize Email.
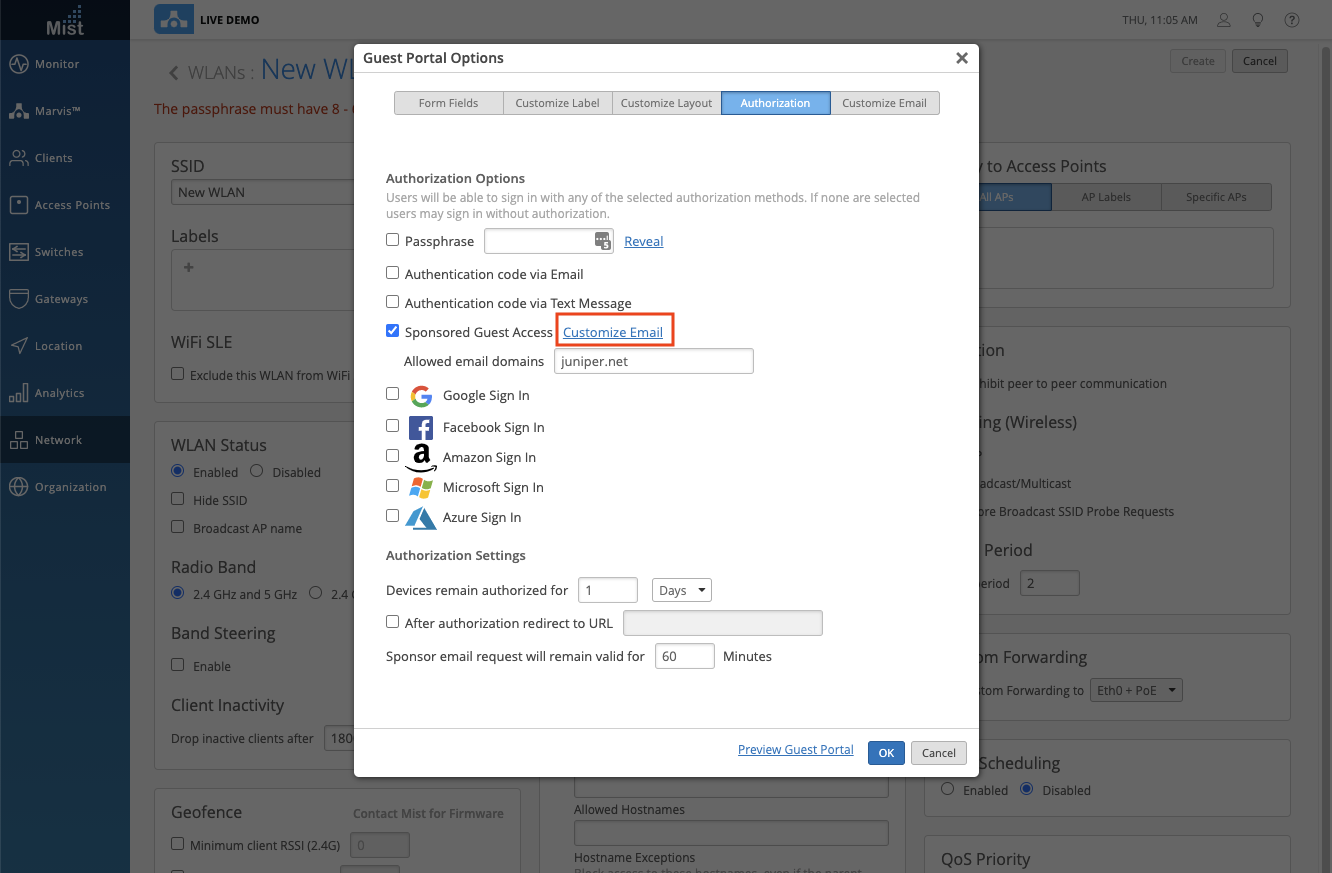
Here, you may edit the Email Template using HTML and see a preview of what your Email will look like.
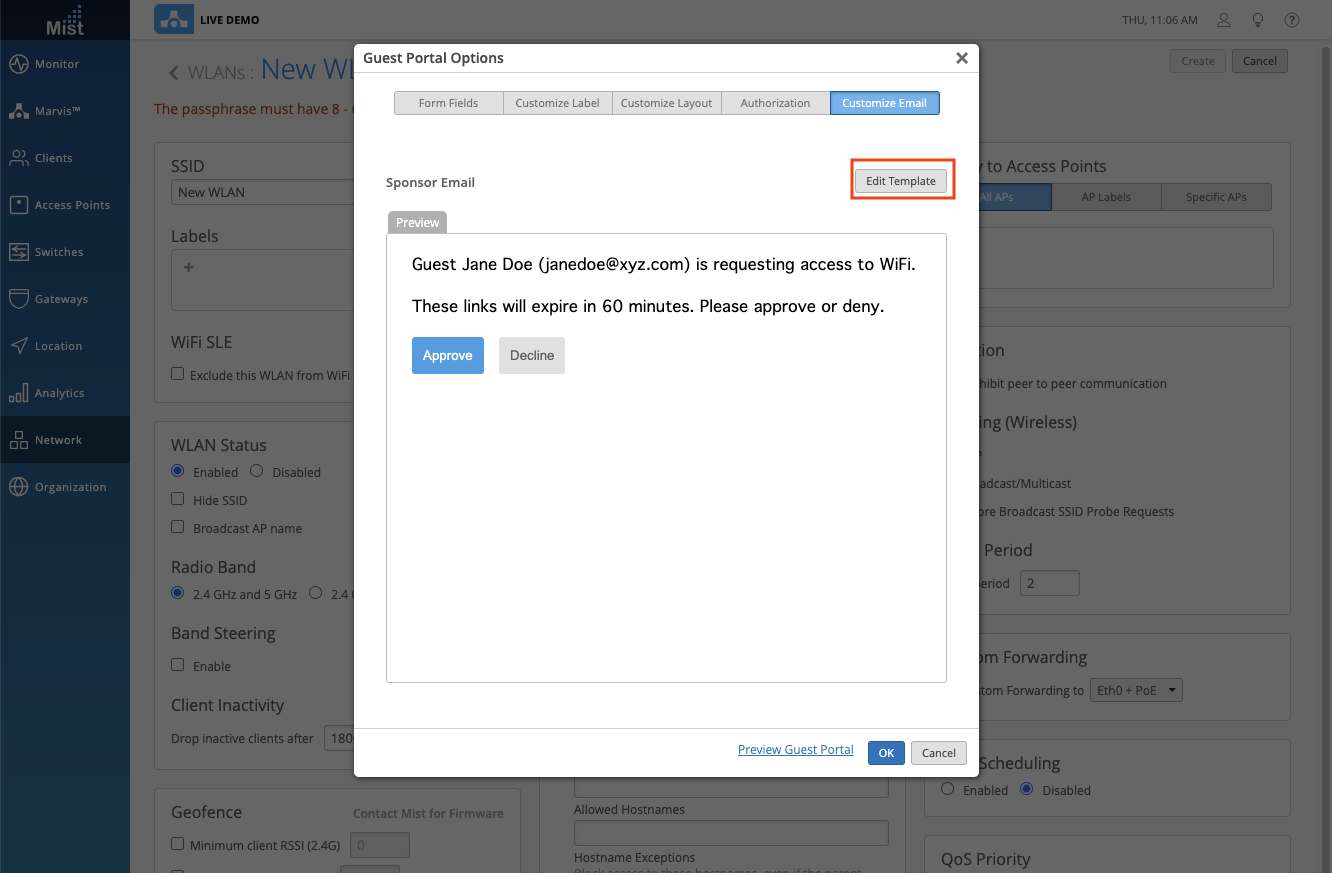
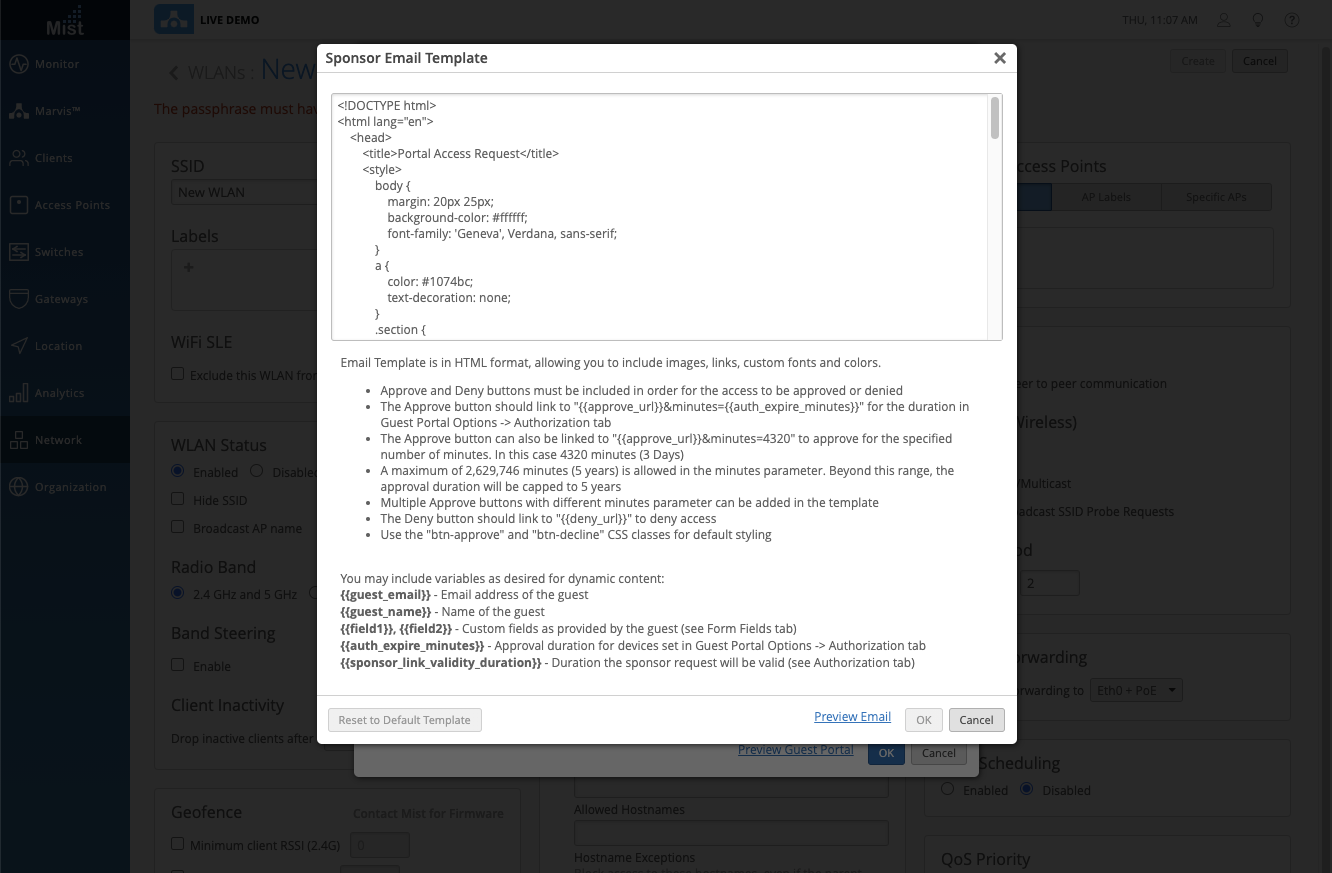
To learn more about Guest Portals and Sponsored Guest Access, please visit our Guest Access section in the documentation site: https://www.juniper.net/documentation/us/en/software/mist/mist-wireless/topics/concept/guest-access.html
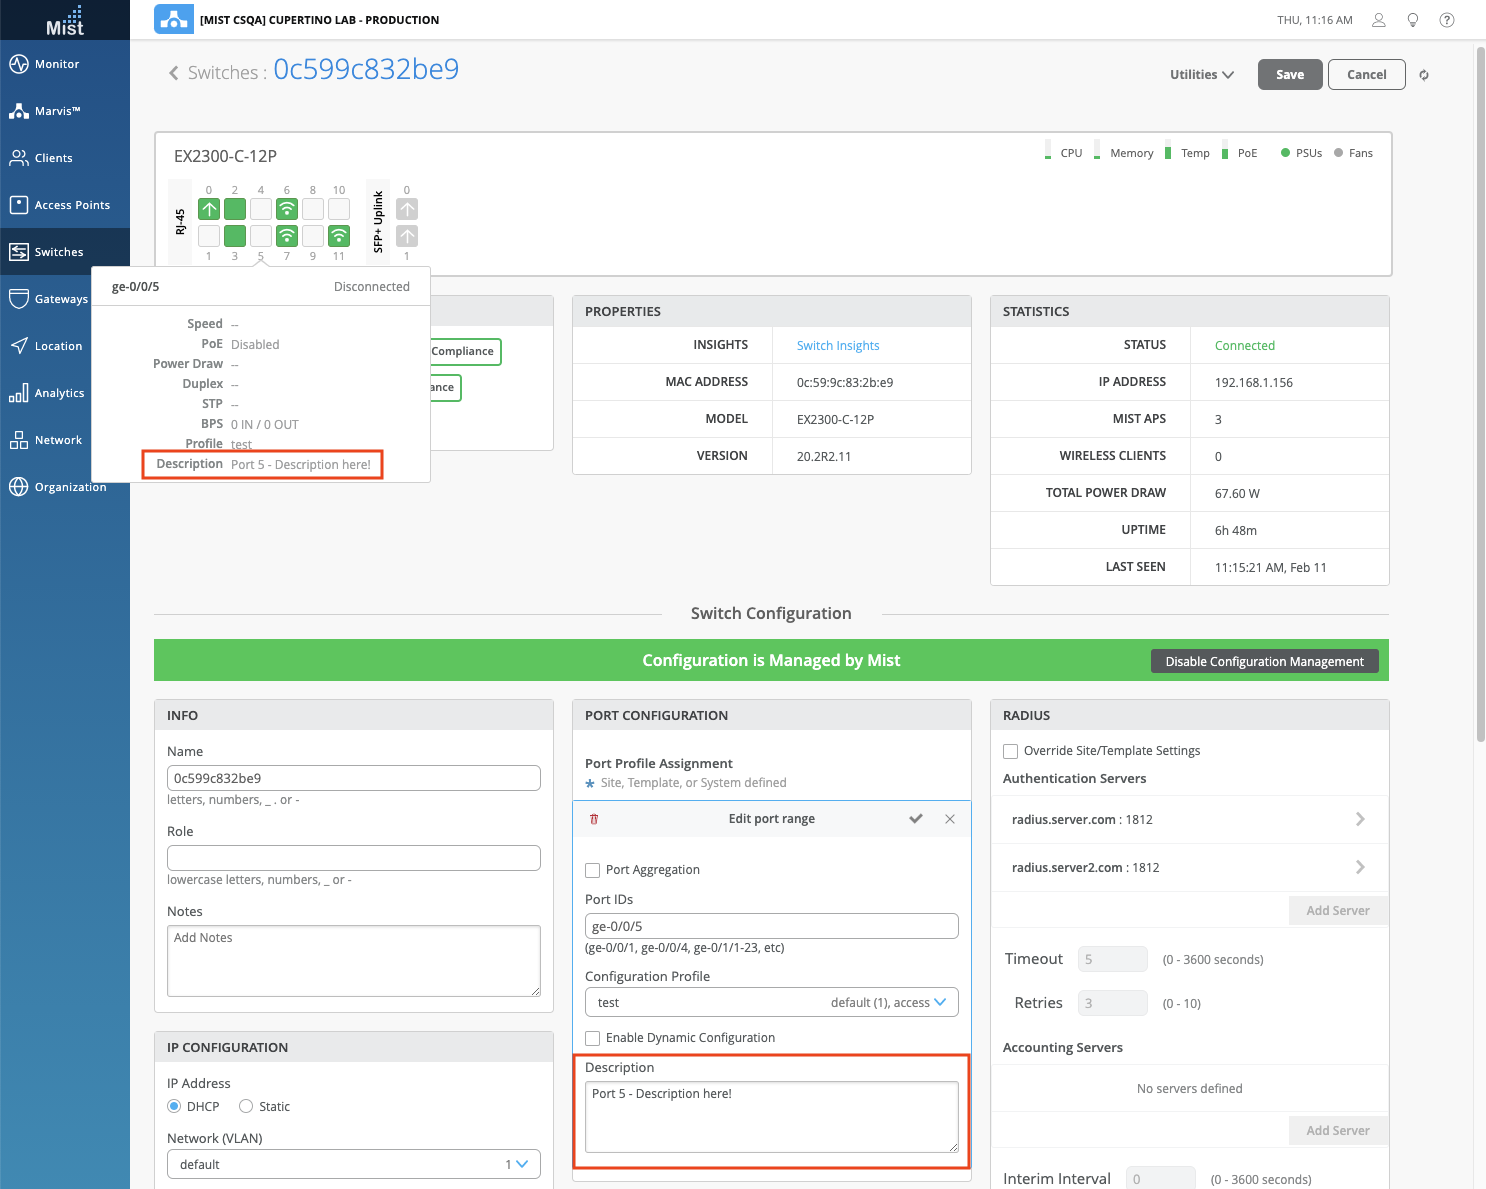
To keep track of the different ports on your switch, you may add descriptions or notes in the port profile configuration. This can be helpful if you have a group of ports for specific types of devices. Now, the text from the Description box will be visible when you hover over the ports on the Switch dashboard UI for easy viewing.
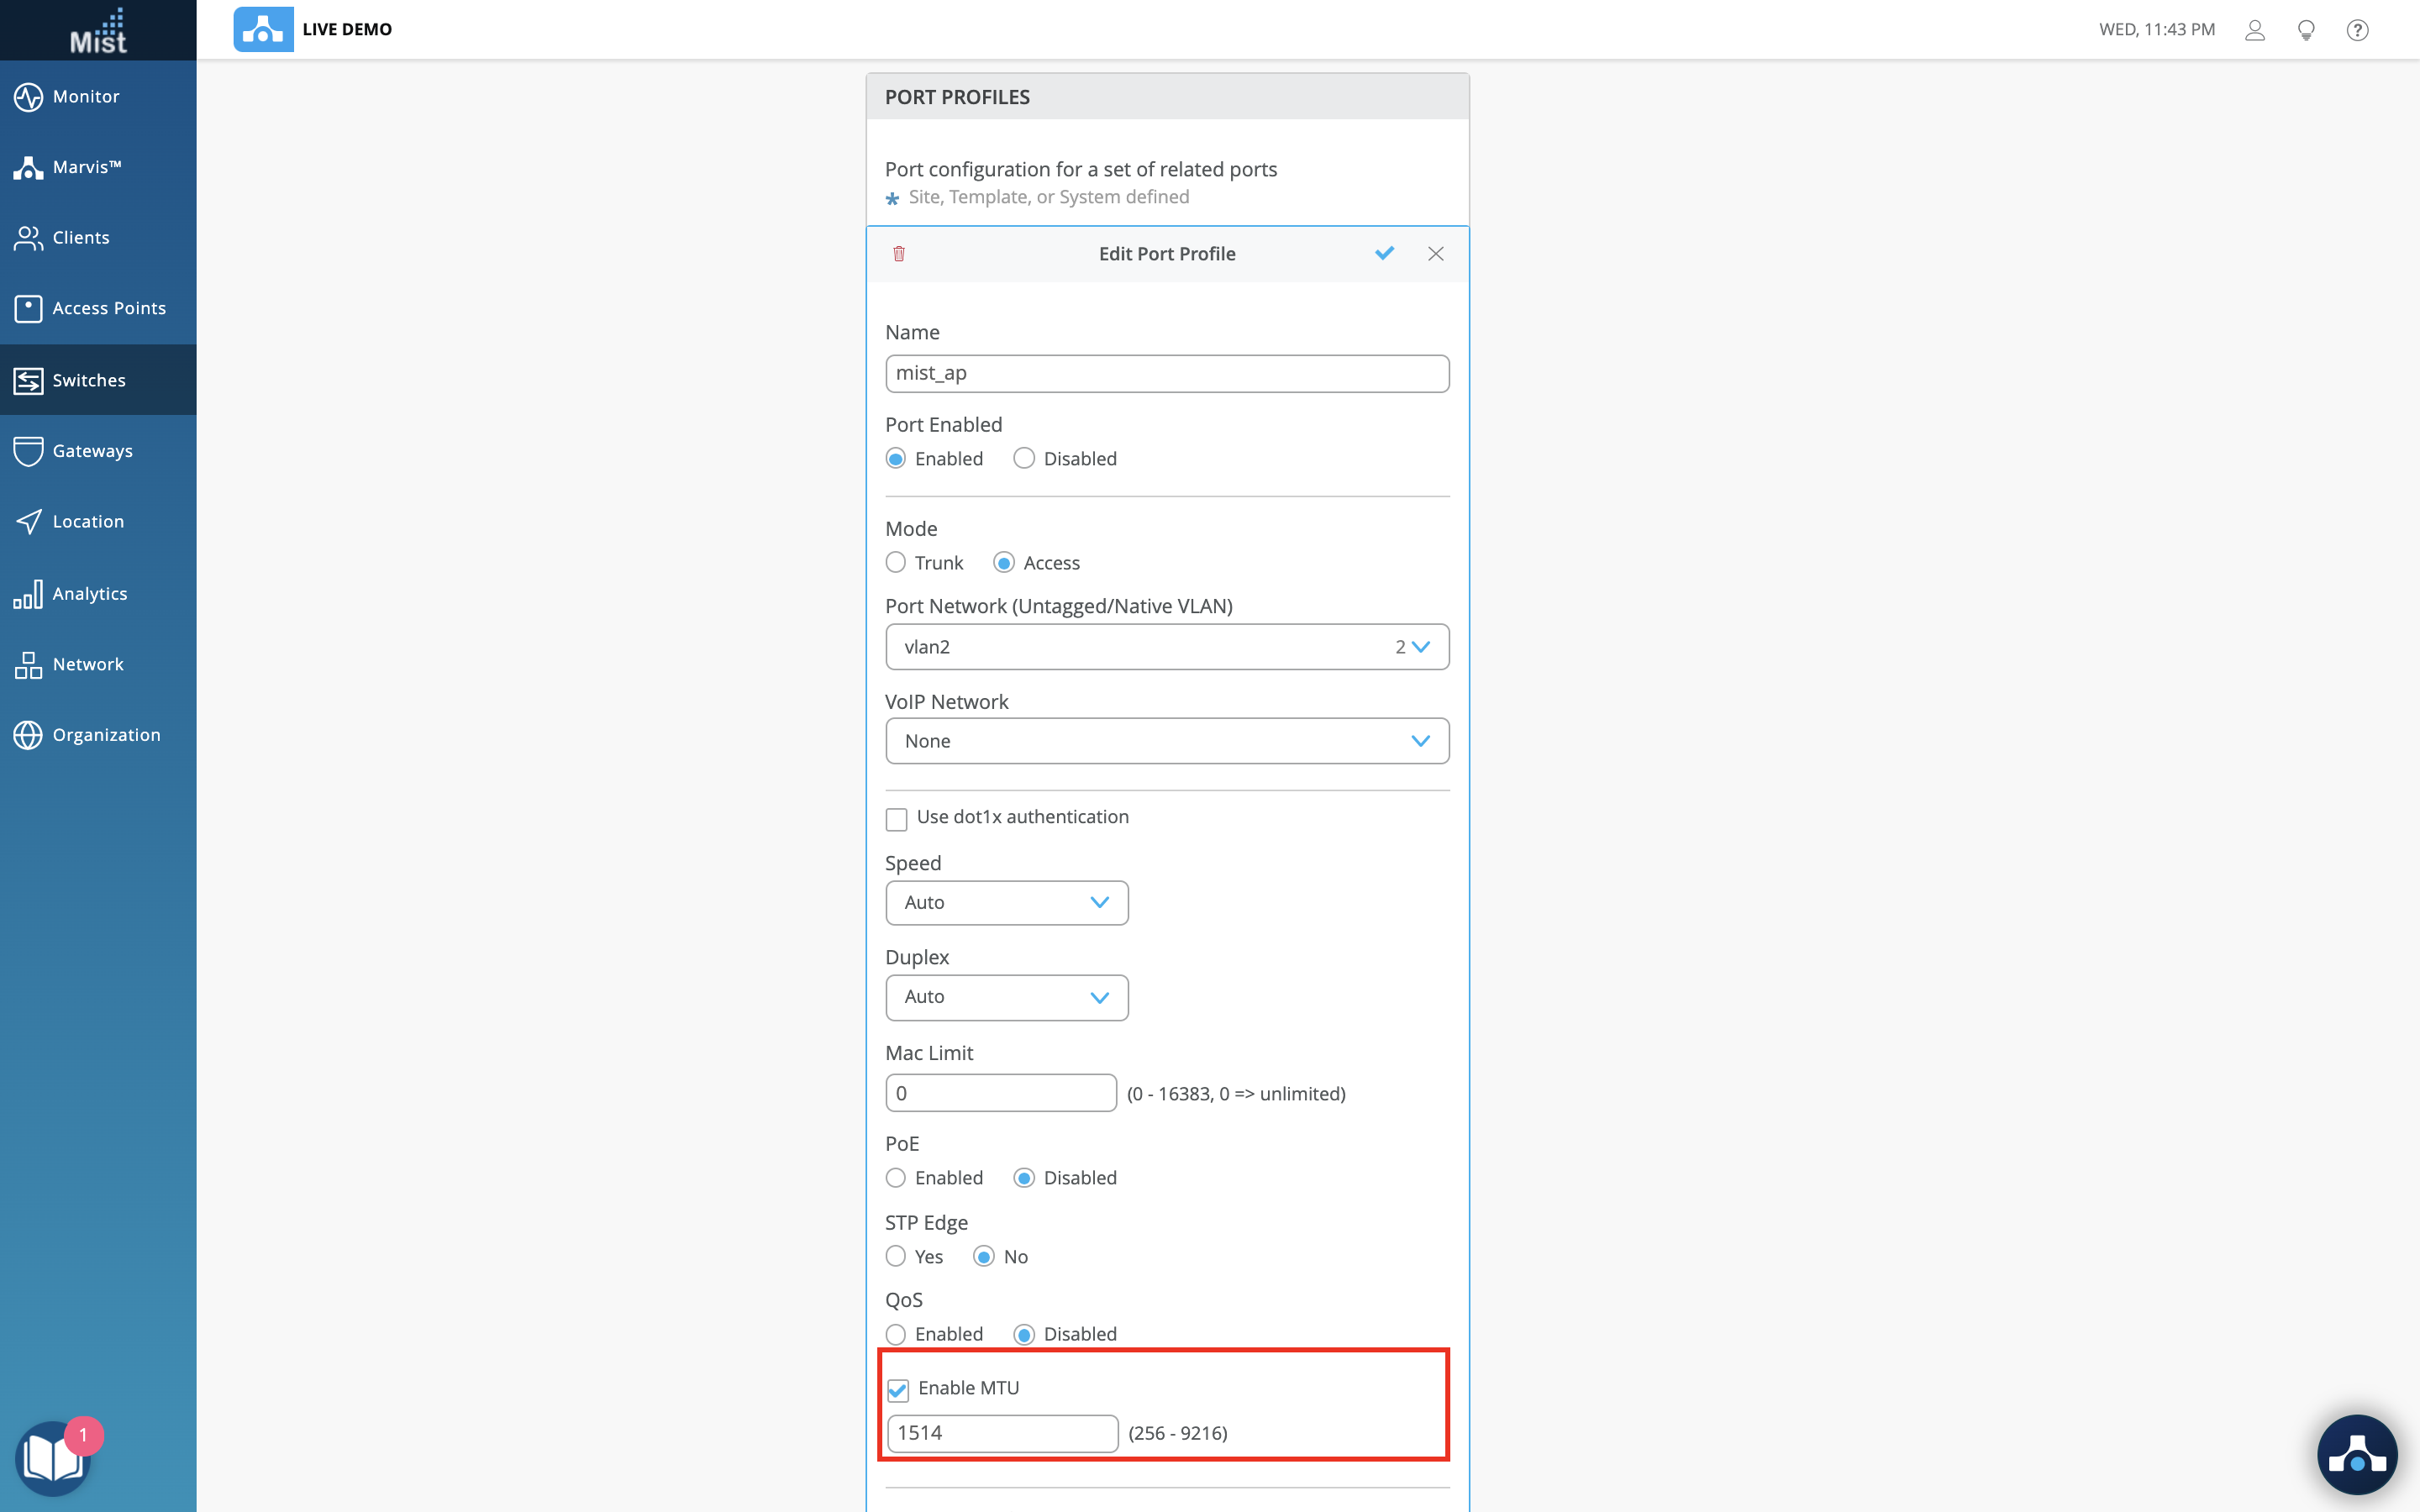
We now allow you to enable MTU in your port profiles under the Device configuration, Site Switch configuration, and Org Network Templates.
Learn more about Wired Assurance capabilities in our documentation section: https://www.juniper.net/documentation/product/us/en/mist/#cat=wired_switching
Now it’s easier than ever to claim Mist Edge devices into your Organization. We are enabling ZTP to make it an AP-like onboarding experience for you with Claim codes and Activation codes.
To claim a Mist Edge device, go to Organization > Mist Edges. Here, you can click on the Claim Mist Edge button which will bring up a familiar modal for you to enter your Claim/Activation code. Claimed Mist Edge shows up in mxedge-<serial-number> format.
Please check the service tag for Mist Edge claim code to ensure it is capable of this new onboarding experience. All Mist Edge shipping after March 1, 2021 will support the ZTP.
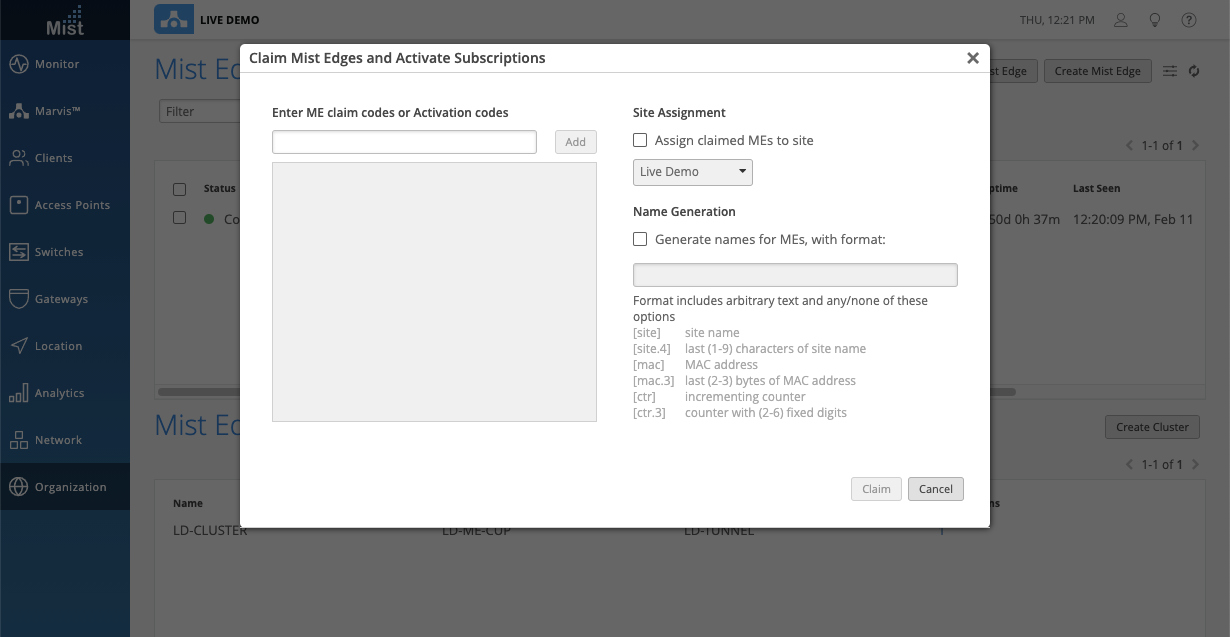
Mist Edge virtual machines will continue to support provisioning through generation of a Registration code generated by using ‘Create Mist Edge’.
We are working at phasing out older pages and replacing them with improved ones. This is a notice that Location Analytics and Reports will not be available after March 31, and are being replaced by Engagement Analytics and Network Analytics, both of which are already available.
See this FAQ page for more detailed information regarding the deprecation: https://www.juniper.net/documentation/us/en/software/mist/location-services/index.html