ON THIS PAGE
WAN Edge Testing Tools
Follow these steps to add Juniper Mist™ testing tools to your WAN Edge troubleshooting process.
The Juniper Mist portal offers power testing tools in the Mist portal for WAN Edge devices. Use these tools to maintain network health and diagnose issues. For example, you can use the tools to:
- Identify network bottlenecks, latency, and packet loss.
- Check connectivity and measure round-trip time.
- Identify the path taken by network traffic from source to destination for a specific application.
- Monitor BGP peering status and troubleshoot connectivity issues.
Find the WAN Edge Testing Tools
From the left menu of the Juniper Mist portal, select WAN Edges > WAN Edges and select your device.
In the top-right corner of the page, select Utilities > Testing Tools.
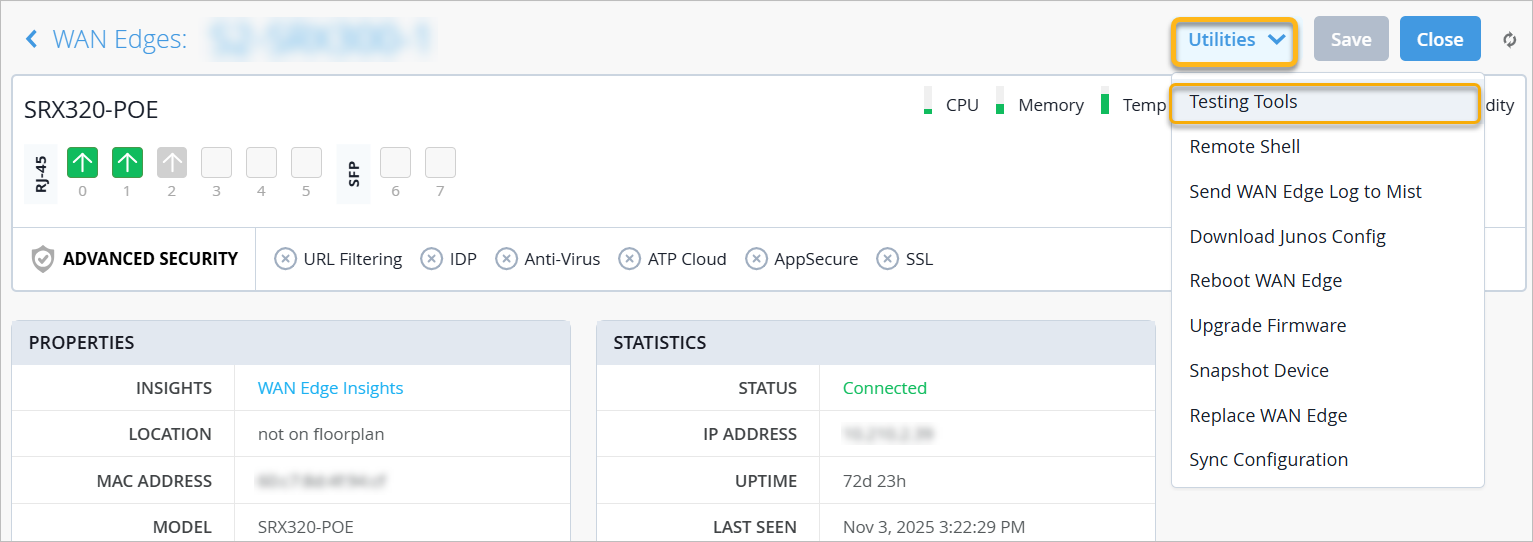
Testing Tools
On the WAN Edge Testing Tools page, use the buttons and tabs across the top to select a testing tool. The buttons represent testing categories, and the tabs represent specific testing tools within those categories.
| Category (button) | Tool (tab) | Description |
|---|---|---|
| Applications (SSR Only) | Path | Enter the application name, and then click Show Path. You'll see details for each application/service path, including the Next-hop address, priority (cost), capacity, and status (Up or Down). |
| Sessions | See the path information for a specific application. You can also delete sessions. Choose an application name to see only session information for that particular application. Then, click Show Sessions. You'll see details for each session. Deleting a session might be useful in situations where a stuck session was created and traffic is not sending due to upstream problems. To delete sessions:
|
|
| ARP (SSR Only) | Refresh ARP |
During troubleshooting scenarios, remove Address Resolution Protocol (ARP) entries from the WAN Edge device or the node's ARP cache. Enter the port name (required) and other details (optional). Then, click Refresh ARP. By specifying the optional details such as VLAN and IP Address, you specify which entries to remove. |
| Table | Click Show ARP to see all interface details including IP address and current state. | |
| BGP | Clear BGP |
Clear BGP sessions. You can clear BGP sessions for all BGP neighbors, or for a specific BGP peer. Enter the neighbor ID (required) and other details (optional). Then, click Clear BGP. |
| Advertised Routes |
Display all routes that have been advertised to the specified neighbor. Enter a neighbor IP (required) and Virtual Routing and Forwarding (VRF) (optional). Click Show Routes. You'll see the routes that your device has advertised to the peer router during the current BGP session. |
|
| Received Routes |
See the routes that your device has advertised to the peer router during the current BGP session. Enter a neighbor IP (required) and VRF (optional). Click Show Routes. You'll see the routing information as it was received by the specified neighbor. |
|
| Routes |
Debug the BGP routing table. Click Show Routes. Optionally, you can specify a prefix and VRF to narrow down the list of routes. You'll see how the sent or received prefixes from various neighbors are being handled and processed in the BGP table. |
|
| Summary | Click Show Summary. You'll see details for all BGP entries. | |
| FIB (SSR Only) | FIB Lookup |
View the forwarding information base (FIB) data associated with the WAN Edge device. Enter the network, destination IP, protocol (all required), and destination port (optional). Then click Lookup. FIB table entries will display. |
| FIB By Application | Select the application (required), VRF (optional), and Prefix (optional). Then
click Show FIB. FIB table entries for each application will display. |
|
| OSPF | Database | Click Show Database. To narrow down the results, you can
optionally select a Self Originate option of True and enter a
VRF. You'll see Area ID, LSA Type, and routing details for each VRF. |
| Interfaces | Click Show Interfaces. Optionally, to narrow down the
results, first enter a VRF. You'll see interface details for each VRF. |
|
| Neighbors | Click Show Neighbors. Optionally, to narrow down the
results, first enter Neighbor IP, Network Interface, or VRF. You'll see neighbor information for each VRF. |
|
| Routes | Click Show Routes. Optionally, to narrow down the
results, enter a route prefix or VRF. You'll see route details for each VRF. |
|
| Summary | Click Show Summary. Optionally, to narrow down the
results, enter a VRF. You'll see area details for each VRF. |
|
| Utility | Bounce Port |
Provisionally take down the port and bring it up without causing the external physical link to change. The connected devices will not see a link state change. Select the port from the drop-down menu, and then click Soft Bounce Port. |
| Ping |
Use the Ping tool to send Internet Control Message Protocol (ICMP) echo requests to a specified host. You can use this command to check if a particular host is reachable at a particular IP address. Enter the IP address and the port name. Click Ping. Optionally, you can specify the count (the number of requests to send, 1-100) or the ping packet size in bytes (64-65,535). |
|
| Show FIB (SRX Only) | Enter a route prefix or VRF, then click Show FIB. You will then see the route information displayed to you in the FIB table. |
|
| Traceroute (BETA for SSR) |
Traceroute is a network diagnostic tool that traces an IP packet's path to a host, revealing the sequence of routers (hops) it takes along the way. For SRX, enter a host, then click Traceroute. You can optionally enter a Protocol, Port, Timeout, and VRF. For SSR, enter a host (required), and optionally enter a network. Then click Traceroute. |
|
| WAN DHCP Release (SSR Only) |
Release client devices from their current DHCP lease. Select a port name, and then click Release. |