Audit Logs
Use the Audit Logs page to monitor logins and to see what actions were taken by each user.
Overview
On the Audit Logs page of the Juniper Mist™ Managed Service Provider (MSP) portal, you can see who logged in, when they logged in, and what they did.
When you first open this page, it shows all logins for all users and all sites on the current date. You can use the drop-down lists at the top of the page to select the time period, filter by users, filter by sites, or search for certain types of activities.
Find the Audit Logs Page
From the left menu of the MSP portal, select MSP > Audit Logs.
Select the Time Period
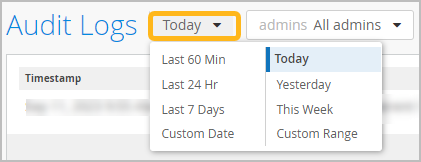
To select the time period: Use the first drop-down menu on the Audit Logs page.

Select preset times and days, select a date, or enter a range of dates.
-
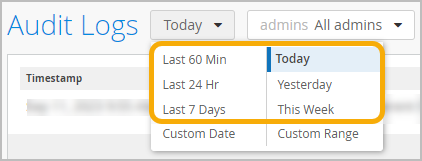
Preset Times and Days

-
Last 60 Min—From 60 minutes ago to the current time.
-
Last 24 Hr—From 24 hours ago to the current time.
-
Last 7 Days—From midnight 7 days ago to the current date and time.
-
Today—From midnight to the current time today.
-
Yesterday—From midnight to 11:59 PM on the previous day.
-
This Week—From midnight Sunday to the current date and time.
-
-
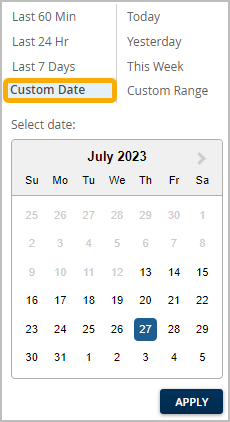
Custom Date—Select a date within the past 180 days. The Audit Logs page will show all logs from midnight to 11:59 PM on the selected date.
Custom Date Example

-
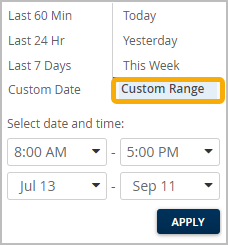
Custom Range—Specify a range of dates within the past 180 days. On the left, enter the start time and date. On the right, enter the end time and date.
Custom Range Example

Filter by Organizations
Search by Name or Email
To search for a particular user, start typing a name or email address in the Search by Admin Name or Email box at the top of the Audit Logs page.
Filter by Users' Tasks
To find records for specific tasks, such as accessing the organization or updating the site settings, use the Search by Message box at the top of the Audit Logs page.
To filter by users' tasks:
View Details
If the View details link appears, click it to see more information about the action.
To close the View details window, click X in the top right corner.
Reset the Page to the Defaults
To reset the Audit Logs page, click the Refresh button in the web browser's toolbar.
