Assign, Unassign, and Manage Site Groups
Follow these steps to create and manage the site groups for your organization.
-
In the Site Groups section, assign, unassign, add, and remove
site groups.
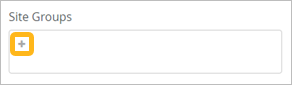
To assign this site to an existing site group, click + (the plus sign). Then click the site group.
-
To create a site group and assign this site to it, click + (the plus sign). Then enter the new group name in the text box and click Add. Juniper Mist creates the site group and assigns this site to the new group.
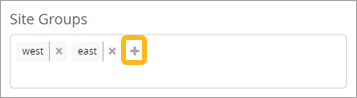
To unassign this site from a listed site group, click X (the close icon) for the site group.
Example
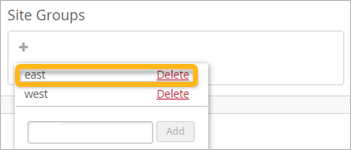
To delete a site group from your organization, click + (the plus sign), locate the site group in the pop-up window, and then click Delete. Juniper Mist deletes the site group and removes the site group assignment from all the member sites.
Example