Set a Password Policy for Your Organization
If you're not using an identity provider for user sign ons, follow these steps to set requirements for Juniper Mist™ portal passwords.
Configure a password
policy to govern how Mist users sign on to the portal. After you update the password
requirements, any users who don't already comply with the new standard will be prompted to
reset their password the next time they sign on.
The password policies configured here does not apply to single
sign-on authentication (which are enforced by the identity provider (IdP).
-
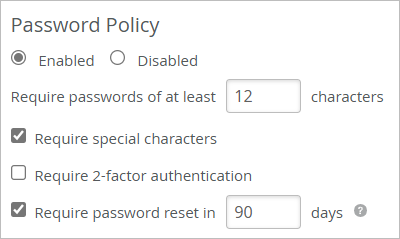
Enter the password requirements:
Table 1: Options for Passwords Feature Description Require passwords of at least Enter the number of characters that you want to require. Require special characters Users must include special characters in their passwords. Two factor authentication Two-factor authentication is available as an option for regional accounts, and mandatory for global SSO accounts. Mist supports both one-time passwords and most third-party authenticator apps. If enabled, users are redirected to the Account Settings page to set up two-factor authentication. Require password reset Set the number of days that passwords remain valid. Juniper Mist will prompt users to reset their passwords by displaying a reminder. It will appear in a banner, starting 14 days before password expiration. In this example, the password policy requires 12 characters, including special characters, and the password expires after 90 days.
After users register and validate their accounts, Mist prompts them to create a password that meets all the requirements.