Configure and Manage Alerts and Notifications
Enable alerts and email notifications to keep up to date on significant, user-impacting events as they happen. Optionally, create templates to configure different alerts and notifications for different sites.
Video Overview
This video provides an overview of the procedure for configuring alerts.
The one thing I wanted to show is the alert framework. We get asked a lot in terms of, hey, what can we do in terms of the different alerts that the system is looking at? So you can see here I have my information turned off. I'm going to turn that on.
But real quickly, I wanted to go through, we have this alert framework. And you can look at alerts based on a per site basis. You can look at alerts based on an entire organization.
You can look at alerts just like if you want to get granular on client insight capabilities, the network rewind stuff. So we do the same thing with alerts. You can look at alerts for today. You can look at them for the last 60 minutes. You can do custom dates and ranges and things like that to see what's been going on if something gets reported. Or you just want to look at the current status from an alert perspective.
You can go through, and you can actually sort on different alert types. So if I wanted to just click on security, for example, now I'm looking at the security alerts. I can look at any type. And then I can actually turn them off. So if I didn't want to look at informational alerts, I just click on that box and turn them off. OK, so just that's a quick at-a-glance alerts.
Now, how do you configure these things? What types of alerts are in there? So if you go over here and click on alert configuration, I'll click on this. So what you can do is that you can set up different alert templates. You can set it up for an entire organization.
You can set it up for an individual site. And you can actually mix them. So maybe you wanted to have specific alerts for an entire organization that you have out there. But for a specific site or specific sites, maybe you wanted to get some additional learning information out there for different reasons. So you actually have the ability to do that. So right now, you can see here that this applies to scope, for example, my entire organization.
If I wanted to do a particular site, I can do that, click plus, and then add a site to this if that's something I wanted to do. The other thing that you can do is over here, I can click on this button. And what it would do is that it would actually clone or provide a copy of this current template.
You can rename that and configure it and then apply it to something else if that's something that you wanted to do. So you can actually clone templates as well. The other thing that you could do is, what it will do is that it will send alerts, send these alerts to the admins of the organization. Or you can actually say, just send it to the site admins. And then you could actually add additional recipients. So maybe you have folks on the security team, for example.
So you wanted to set up a template that was specific to security alerts. And when those security alerts got triggered, for example, like a rogue AP, maybe you want to send an email to somebody on the security team. That's just an example of something that you could do.
So if you look at the alert types, we have these, they're kind of segmented into a few different categories. You have the infrastructure side where if devices are online or offline, you can actually enable an alert. There's kind of two columns here. You can enable the alert, it will show up in the dashboard. And then you could also click on this box to send an email notification. So you can configure it that way as well.
And then if you scroll down in here, you got the infrastructure alerts, you got Marvis alerts. I'll show you what a non-compliant AP is as well. You got different, like all the stuff that's available from a Marvis actions perspective.
AP is authentication, DHCP, DNS, switches, gateways, things like that. If there's stuff going on with those devices, you could actually have alerts configured to be sent on those. And then on the security side, maybe you want to know, hey, if a rogue AP pops up, I want to make sure I have an alert.
And then I want to send an email to someone in IT or security or both that I have that. So I encourage you all to kind of go in here and check out all the different alert types that we have and what you can actually set this thing up to alert on. Okay, so that's alerts.
And just wanted to point that out. Like I said, I encourage you all to go in there, check it out, play with it, test it, do all that fun stuff and see how it works for you.
Finding the Alerts Configuration Page
From the left menu, select Monitor > Alerts. At the top-right corner of the Alerts page, click the Alerts Configuration button.

Actions
On the Alerts Configuration page you can:
-
Configure the Default template. You can set up this template to apply to the entire organization or selected sites.
Note: You'll find the template names at the left side of the Alerts Configuration page. -
Use the Pause Alerts button to temporarily stop alerts and notifications. You'll find this button near the top-right corner of the Alerts Configuration page.
-
Use the Create Template button to create different templates for different sites. You'll find this button near the top-right corner of the Alerts Configuration page.
Recommended Alerts
Recommended alerts are pre-selected for you in the Default alerts template and when you create your own templates. You can keep these selections or clear the checkboxes to remove them.
After making changes, if you want to restore the recommended settings, click the Enable Mist Recommended Alerts button, near the top-right corner of the Alert Types section.
Select the Alerts Scope, Recipients, and Types to Monitor
To select alerts:
-
Under Alert Types, select the events that you want to monitor on
the Monitor > Alerts page (Enable Alert check box) or via email
(Send Email Notification check box).
-
For information about the various alerts, see Juniper Mist Alert Types.
-
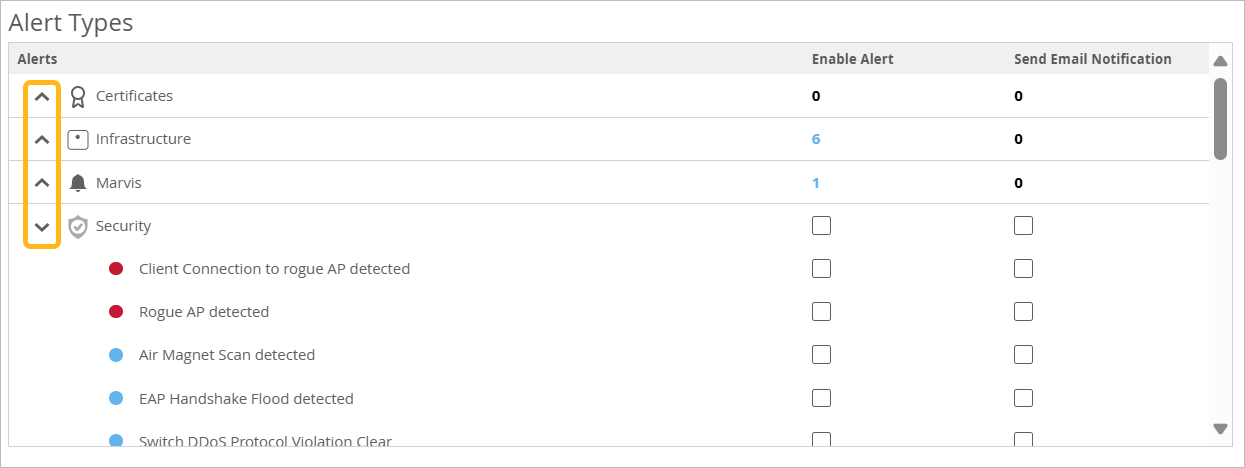
Use the expand/collapse icons on the left side of the alert Types section to focus on specific alert types.
-
-
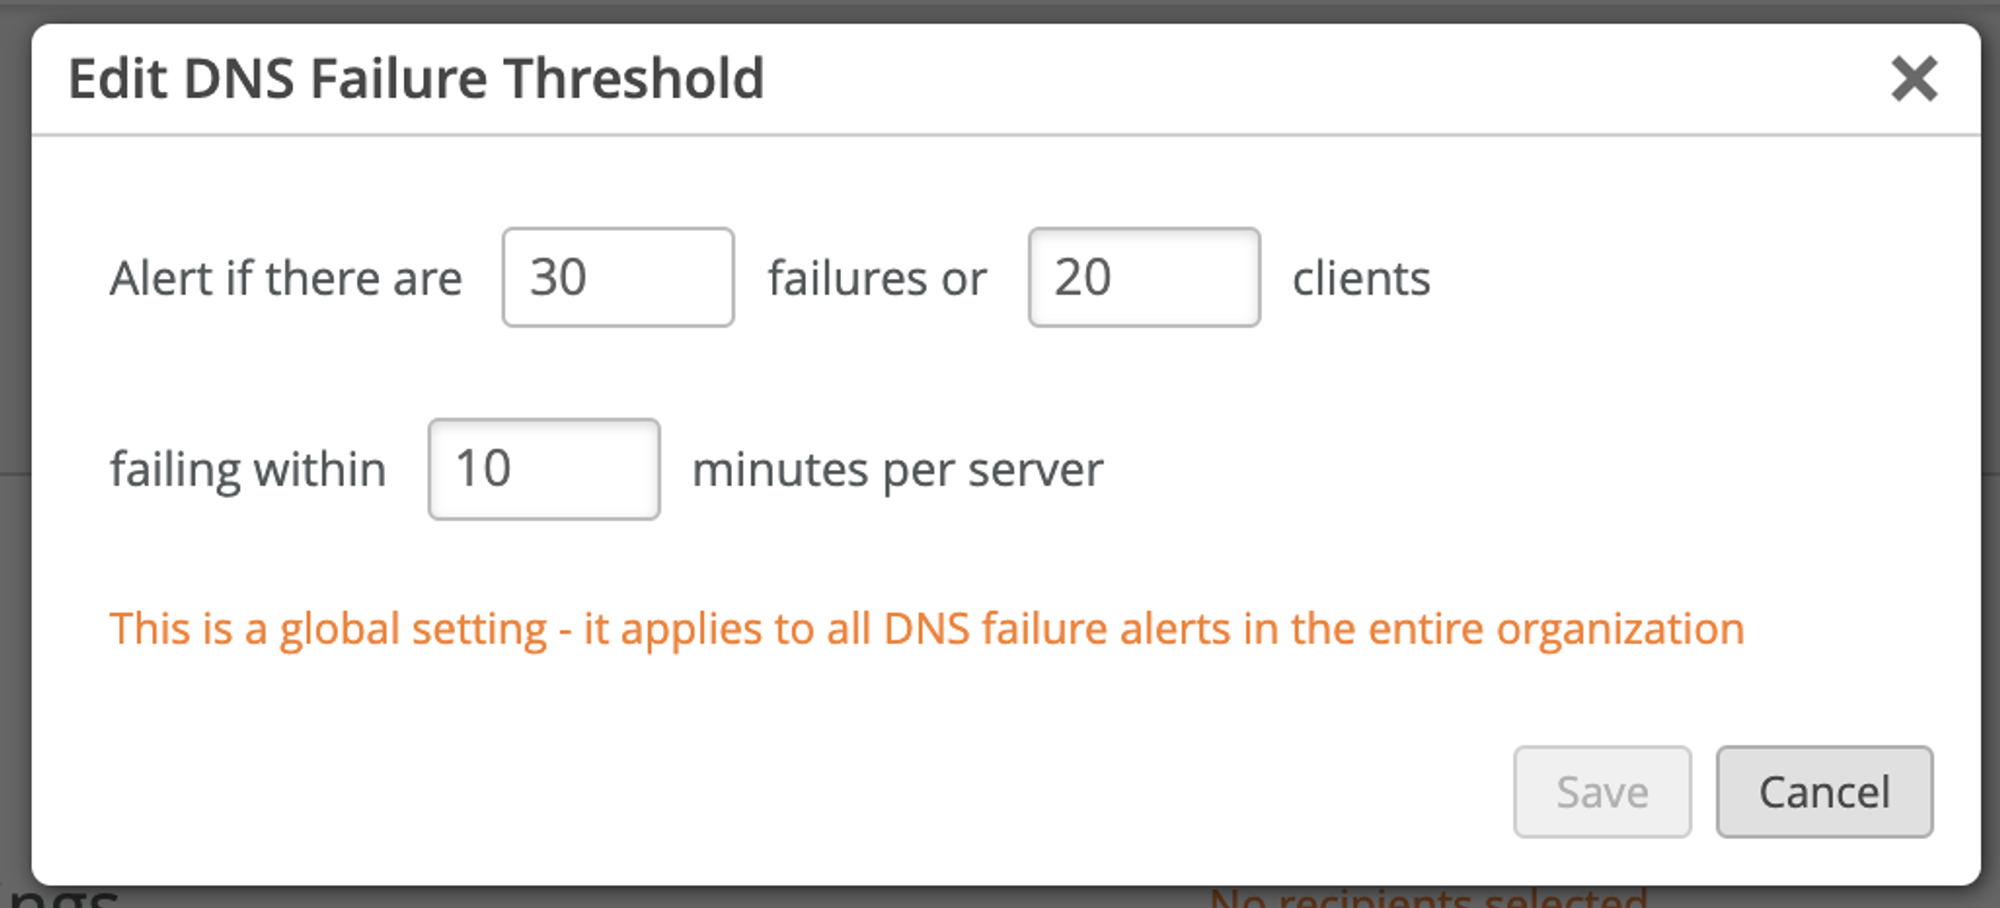
If an alert has a pencil icon, click it to configure the settings.
For example, if you click the pencil icon for DNS Failure, you can set the threshold based on the number of failures, the impacted clients, and the duration.
Create and Manage Alerts Templates
You can create different templates for different locations, personnel, or purposes.
-
To create a template—At the top-right corner of the Alerts Configuration page, click Create Template. Enter a template name on the left side of the page. Select the scope, recipients, and alert types. Then click Create at the top-right corner of the configuration area.
-
To create a template by copying—On the left side of the page, click the template that you want to copy. Then click the copy button at the top-right corner of the configuration area. A new template appears on the left side of the page, with the phrase Copy of at the start of the name.
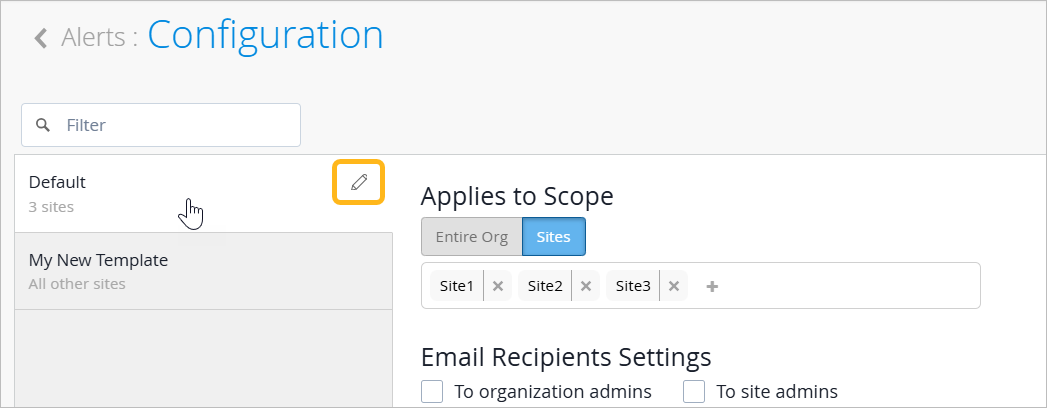
To rename a template—On the left side of the page, click the template name. Then click the pencil icon, enter the name, and click the checkmark button.
-
To change the settings in a template—On the left side of the page, click the template name. Make your changes, and then click Save near the top-right corner of the configuration area.
-
To delete a template—On the left side of the page, click the template name. Then click the delete icon near the top-right corner of the configuration area.
Temporarily Pause Your Alerts
You'll specify the time period and the scope. For example:
-
Pause alerts for all devices across your entire organization.
-
Pause alerts only for your organization-level devices like Mist Edge.
-
Pause alerts for specific sites.
-
Pause alerts for one site only.
During the specified time period, all alerts are paused for the specified devices and sites. You'll continue to get the normal alerts for any out-of-scope devices and sites. When the time period elapses, all enabled alerts resume as usual.
To temporarily pause your alerts:
-
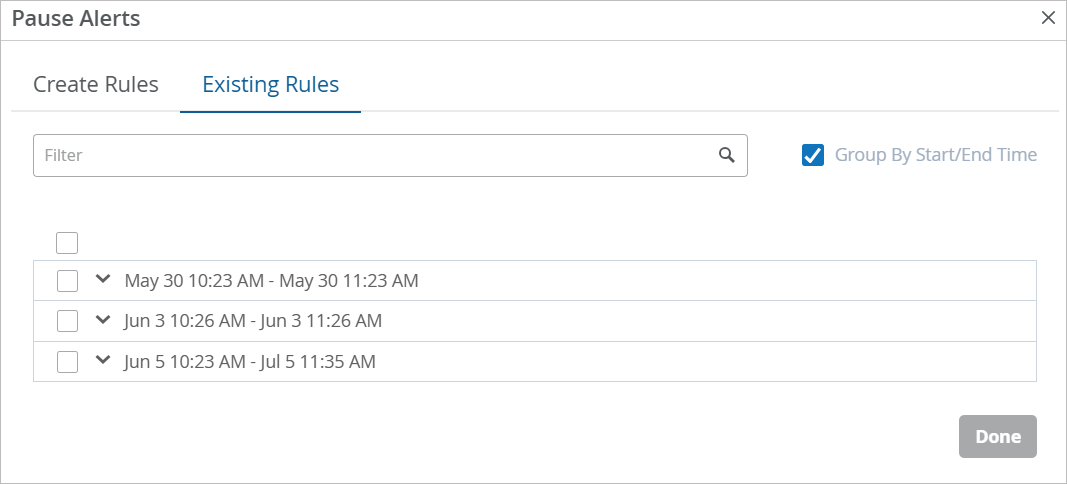
In the Pause Alerts window, use the Create Rules tab and the
Existing Rules tab to create and manage your pause rules.
Table 1: Create a New Pause Rule Scope of New Rule Instructions Pause all alerts across your entire organization. This approach covers your entire organization, though you can specify the types of devices to include. Click the Create Rules tab.
Click Entire Org.
Select one or both check boxes to specify the types of devices to include:
Organization—Check this box to include devices like Mist Edge that are assigned to an organization, not to a specific site. If the box is unchecked, you'll receive the normal alerts for organization-level devices.
Site—Check this box to include devices that are assigned to specific sites. This option includes most devices in your Mist organization, since onboarding typically involves assigning devices to sites. If this box is unchecked, you'll receive the normal alerts for site-assigned devices.
Select the Start Time and End Time.
Click Create to save your rule.
The Existing Rules tab appears. If you selected organization devices only, you'll see one new rule. If you selected site devices, you'll see a separate rule for each site in your organization.
Pause alerts for specific sites. This approach covers only the sites that you specify. You'll continue to get alerts for other sites as you normally do.
Click the Create Rules tab.
Click Site Group + Sites.
Click the + button, and then select a group or site.
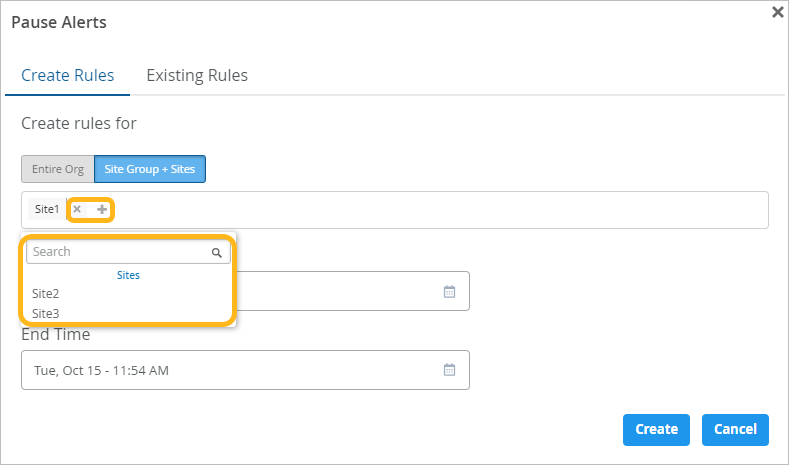
Repeat as needed to add all applicable sites.
Note: If you add an site by mistake, click X to remove it.Select the Start Time and End Time.
Click Create to save your rule.
The Existing Rules tab appears. You'll see one rule for each site that you selected.
Note: A site can have only one active pause rule. If your new rule includes a site that already has a pause enabled, a message pops up. Follow the on-screen instructions to override the old rule or to remove the specified site from the new rule.Table 2: Manage Existing Rules Task Options View the status of a pause. On the Existing Rules tab, look in the Active column. Green indicates an active rule.
Cancel a pause. On the Existing Rules tab, select the check box for each rule to delete. Then click Delete.
Filter the list of pause rules. On the Existing Rules tab, start typing in the Filter box. Matching rules appear.
Organize the pause rules by date. On the Existing Rules tab, select Group by Start/End Times. You can expand or collapse each dated section to show or hide the rules.