SCIM Integration with Microsoft Entra ID and Okta
The HPE Mist cloud uses OAuth 2.0 to integrate with Microsoft Entra ID (Azure AD) and Okta for secure user authentication and authorization. System for Cross-domain Identity Management (SCIM) integration enhances the authorization performance by enabling the Access Assurance cloud to maintain a locally synchronized repository of users and groups, reducing latency and dependency on external IdPs. Follow these steps to integrate SCIM with Entra ID or Okta.
The HPE Mist cloud integrates with external Identity Providers (IdPs) such as Microsoft Entra ID (Azure AD) and Okta using OAuth 2.0. With this integration, HPE Mist Networking Access Assurance manages the:
-
Authentication for EAP-TTLS and Admin-Auth
-
Authorization (retrieving user group information) for EAP-TLS, EAP-TTLS, and Admin-Auth through OAuth 2.0 connections to the IdPs
As the authentication and authorization operations involve real-time communication with external IdPs, each control-path call can introduce additional latency, affecting the overall response time for authentication and policy evaluation. It also adds a potential bottleneck and failure domain in cases where the IdP service is degraded.
To optimize the authorization process, HPE Mist Networking Access Assurance supports System for Cross-domain Identity Management (SCIM)-based integration with IdPs. A key benefit of SCIM-based integration is reduced latency during the authorization process.
The HPE Mist cloud utilizes SCIM to maintain a locally synchronized repository of user and group information for each customer organization. This repository enables the policy service to assess user group memberships and enforce authorization rules without requiring real-time lookups to the external IdP.
If the HPE Mist cloud encounters any error while retrieving group mapping from the SCIM data, it automatically reverts to the existing OAuth-based authorization by connecting to the external IdP.
Disabling SCIM will remove all synchronized user and group data and prevent any further synchronization from the IdP.
Prerequisites
Before you integrate SCIM, ensure to complete the following tasks:
Integrate HPE Mist with the Microsoft Entra ID or Okta IdP. See Microsoft Entra ID Integration and Okta Integration for detailed instructions.
Ensure that at least one client is onboarded with HPE Mist Networking Access Assurance before proceeding with the SCIM configuration.
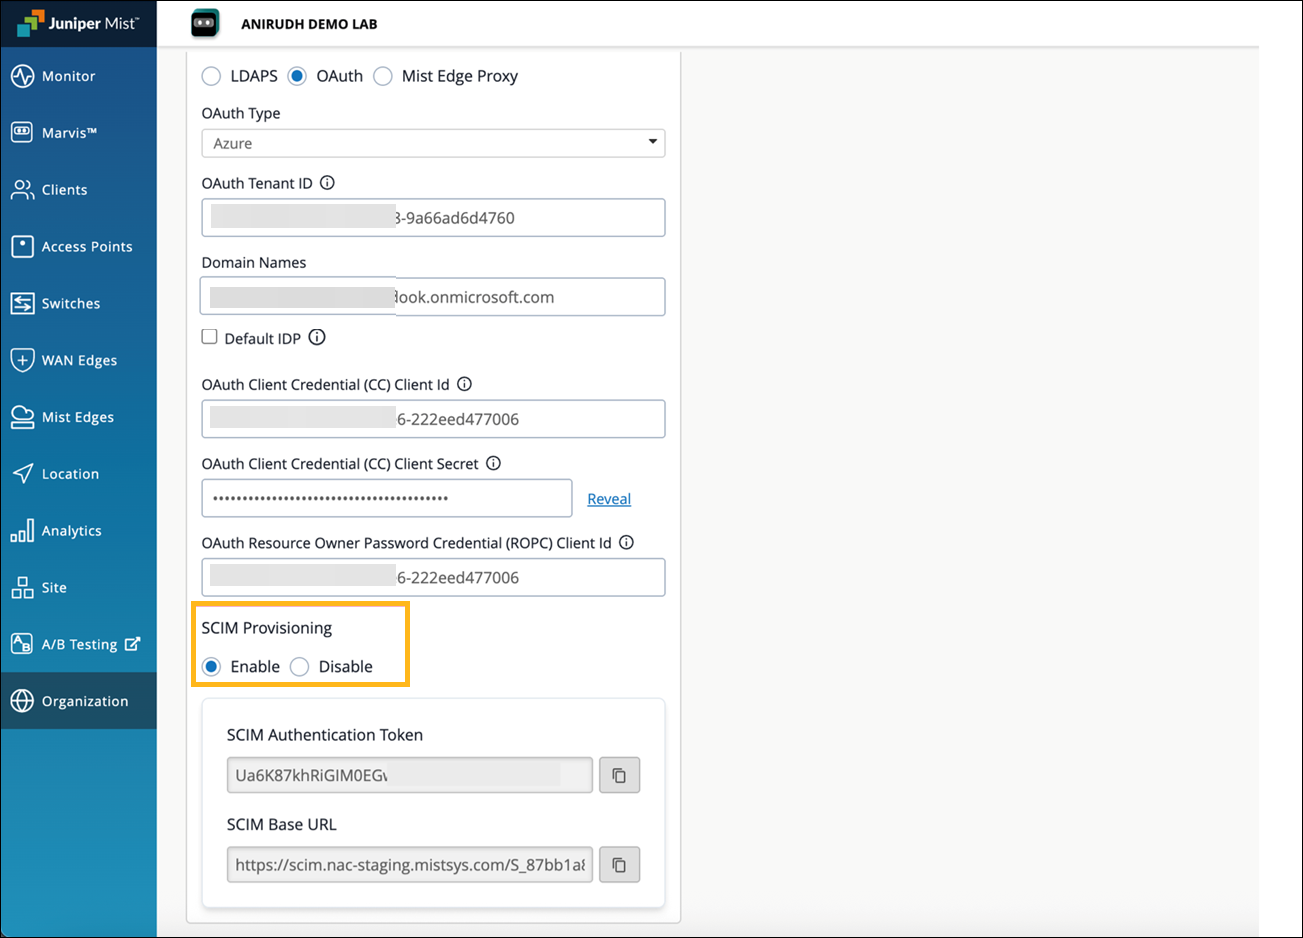
Enable SCIM provisioning in the IdP configuration. The SCIM Authentication Token and SCIM Base URL are automatically generated when you enable SCIM provisioning. These parameters are required for synchronizing user and group information from the IdP to HPE Mist Networking Access Assurance.
How to Integrate SCIM with Microsoft Entra ID
The screenshots from third-party applications are correct at the time of publishing. We have no way to know when or if the screenshots will be accurate at any future time. Please refer to the third-party website for guidance about changes to these screens or the workflows involved.
-
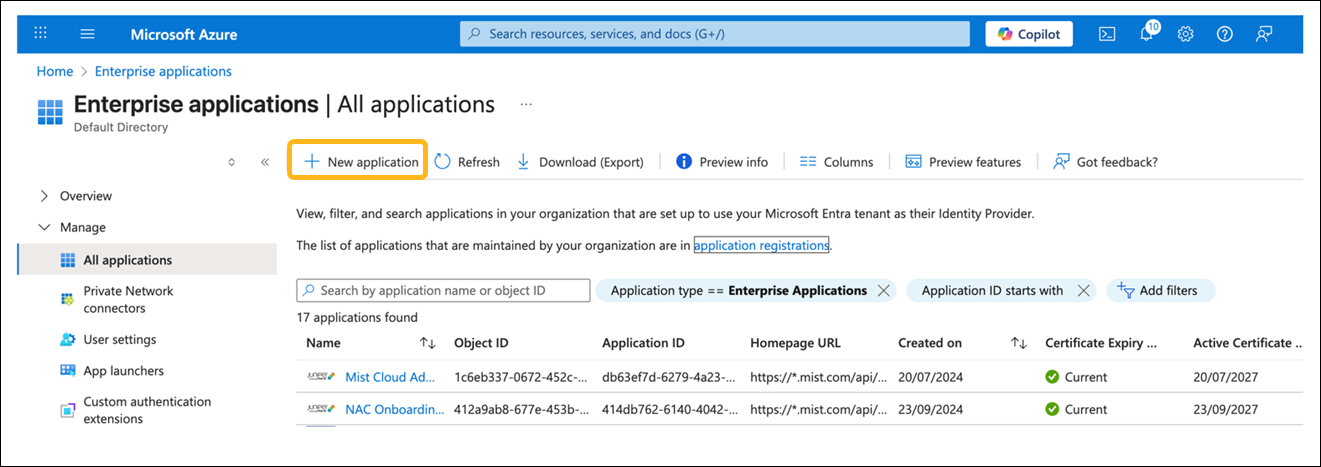
Sign in to Microsoft Entra Admin Center, navigate to Enterprise
applications, and then click New
application.
-
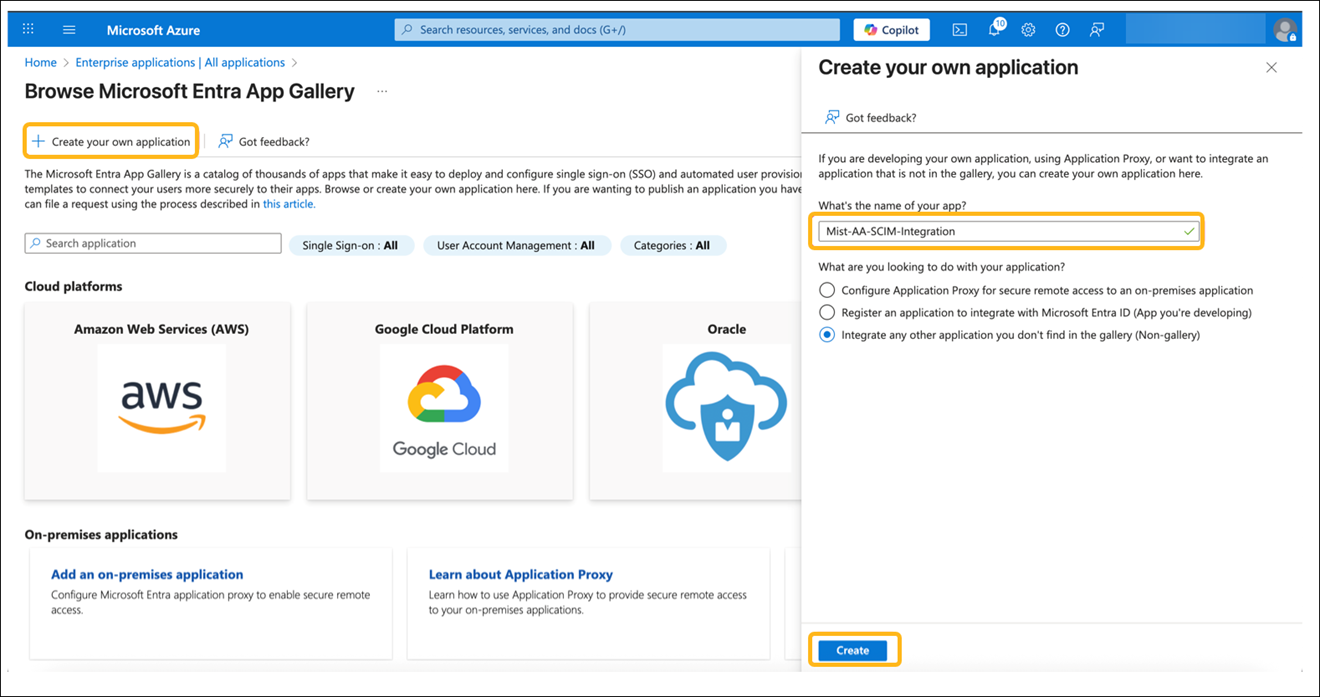
Click Create your own application. Enter a name for
the application and click Create.
-
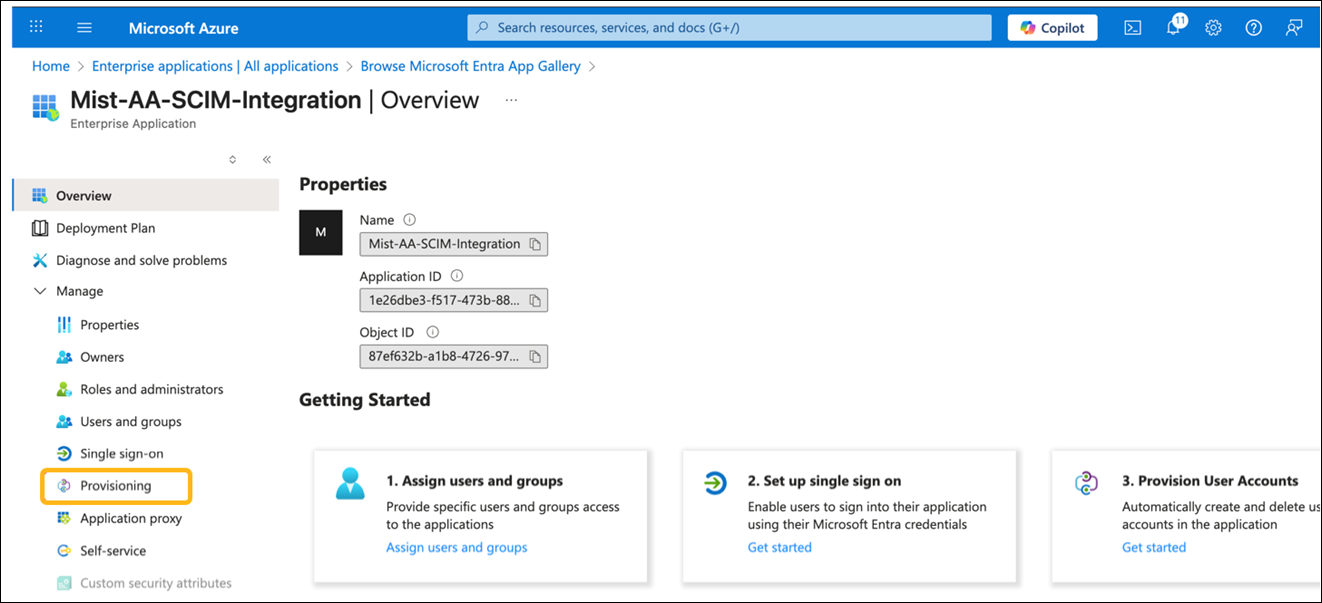
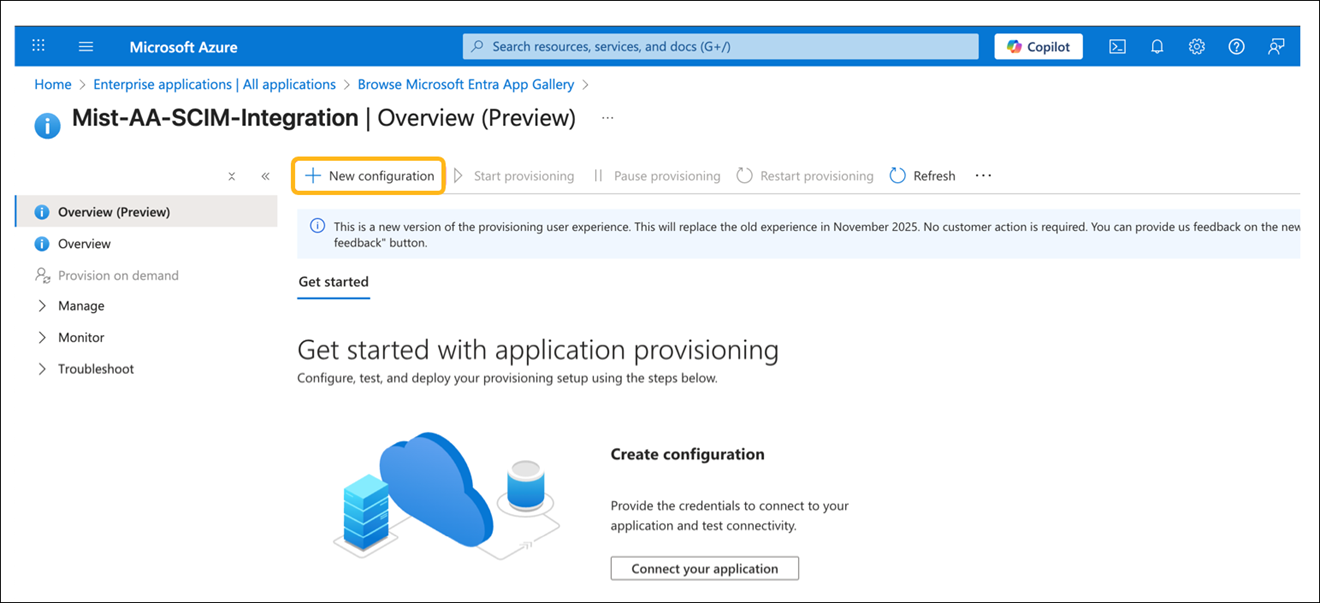
After the application is created, navigate to
Provisioning under the Manage section and click
New Configuration.
-
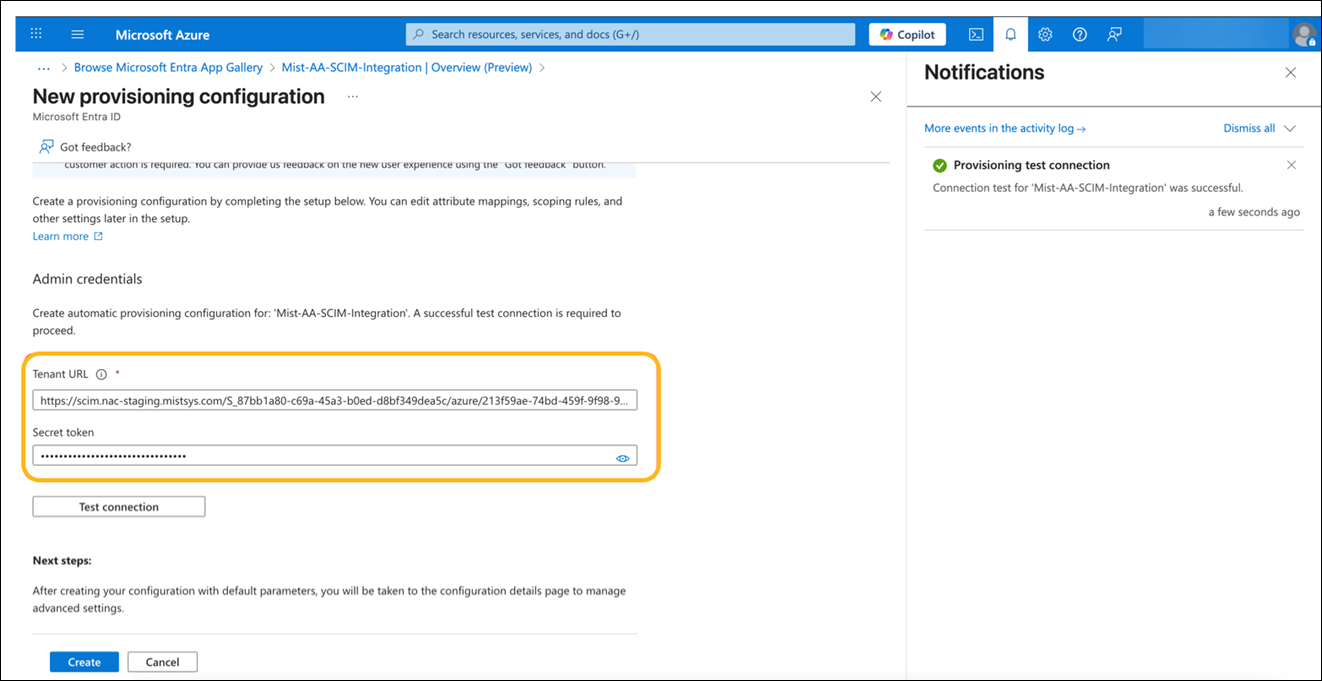
Enter the following details from the
HPE
Mist Networking Access Assurance IdP configuration:
-
Tenant URL—SCIM Base URL
-
Secret Token—SCIM Authentication Token
Click Test Connection and verify that the test is successful. Then, click Create.
-
-
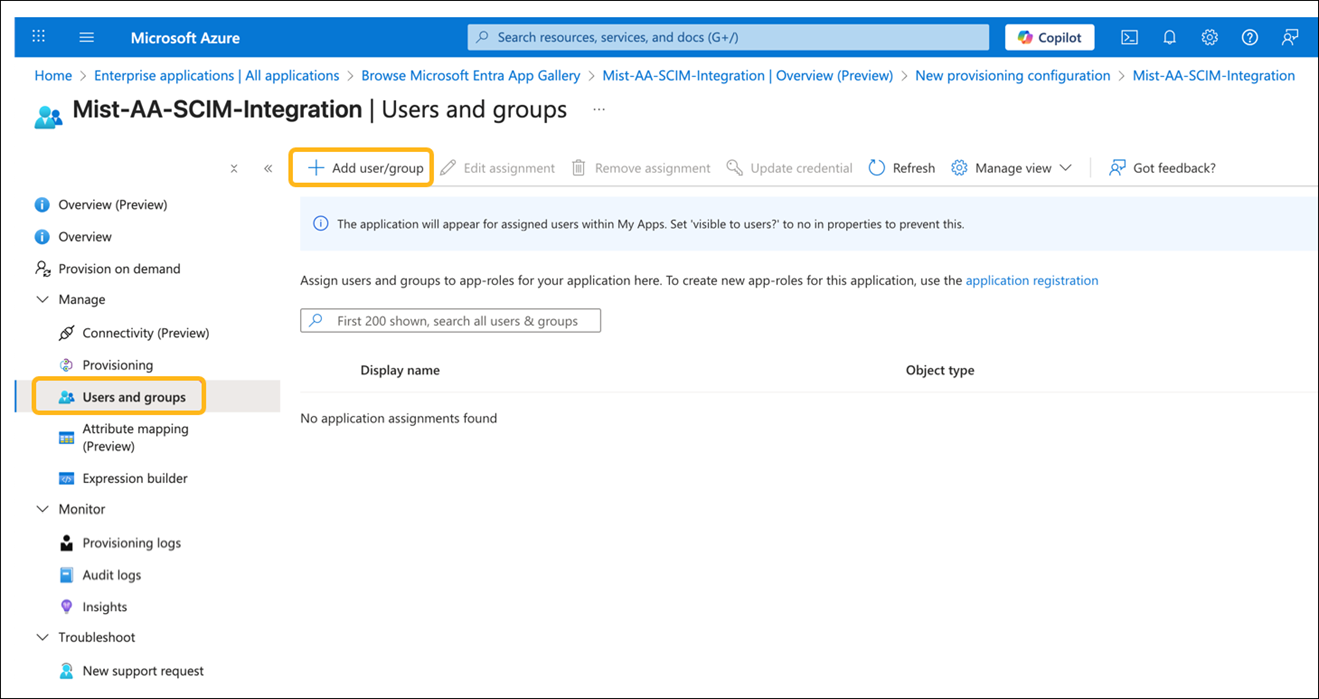
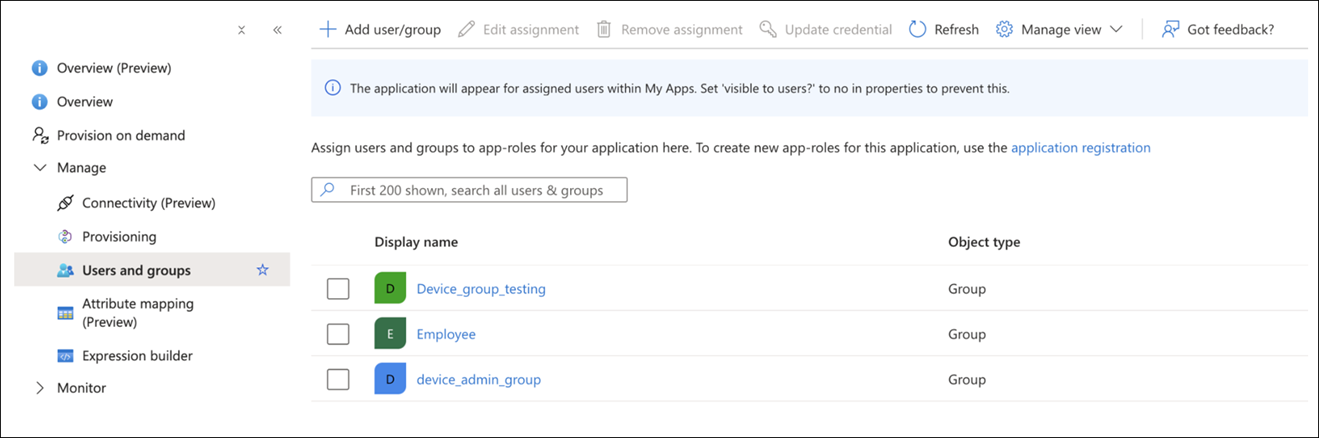
Select Users and groups under Manage, and click
Add user/group to assign groups for
provisioning.
-
Add the groups that need to be provisioned on the
HPE
Mist
cloud.
-
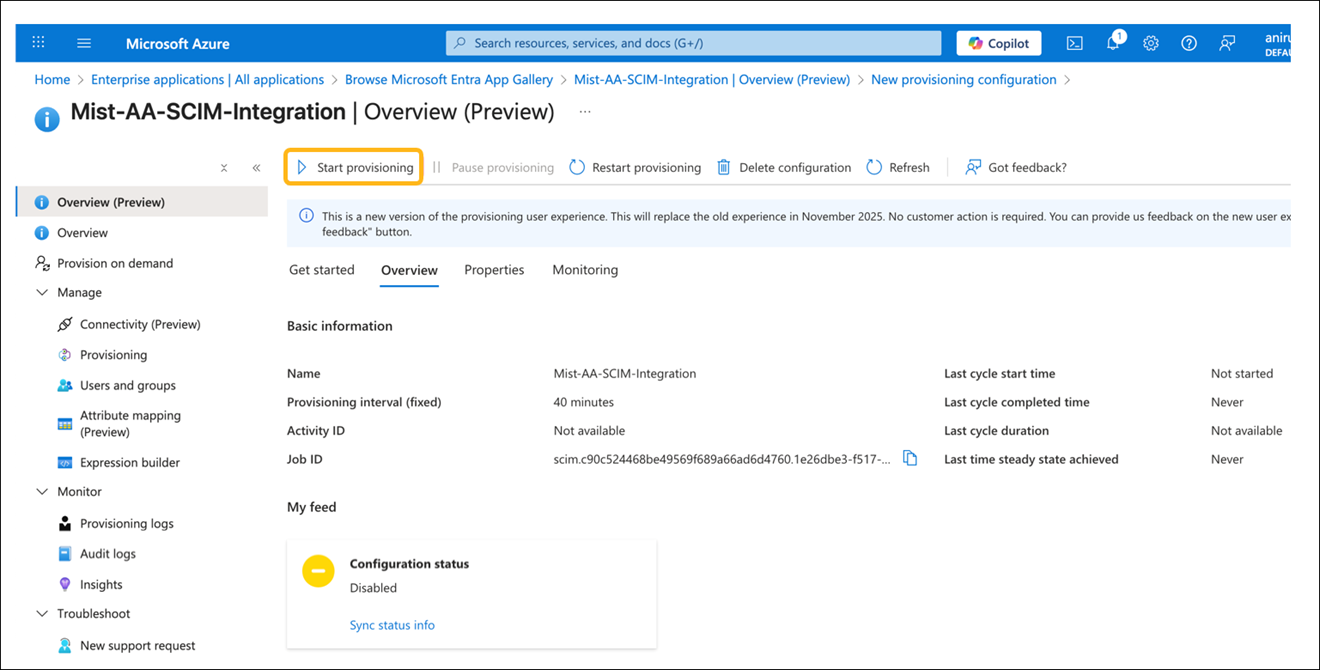
Click Start Provisioning.
Note: The provisioning interval in Microsoft Entra ID is approximately 40 minutes. You must wait for the next sync cycle to verify the provisioning status.
-
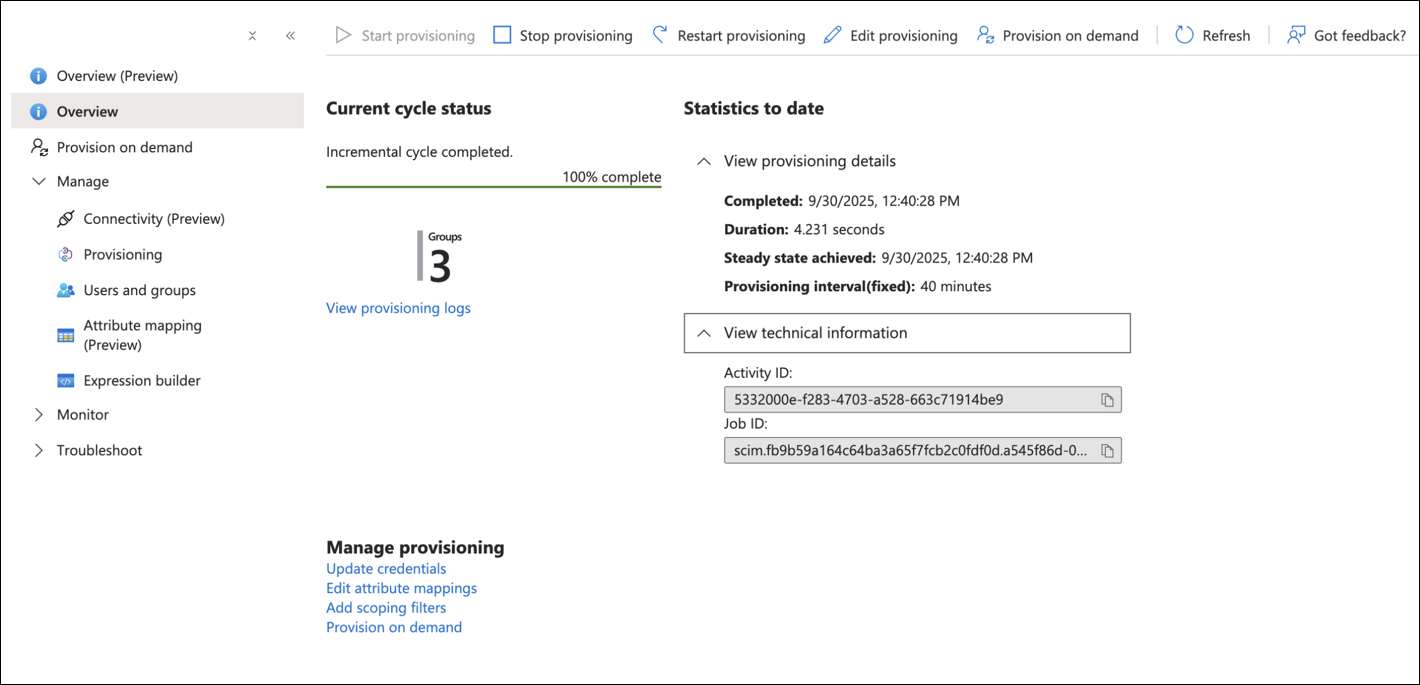
Verify that the provisioning status shows as Completed in Entra ID after
the 40-minute provisioning interval. The setup for SCIM provisioning with
Entra ID is now complete.
How to Integrate SCIM with Okta
Some of the screenshots included in this topic are sourced from third-party applications. Be aware that these screenshots might change over time and might not always match the current version of the applications.
-
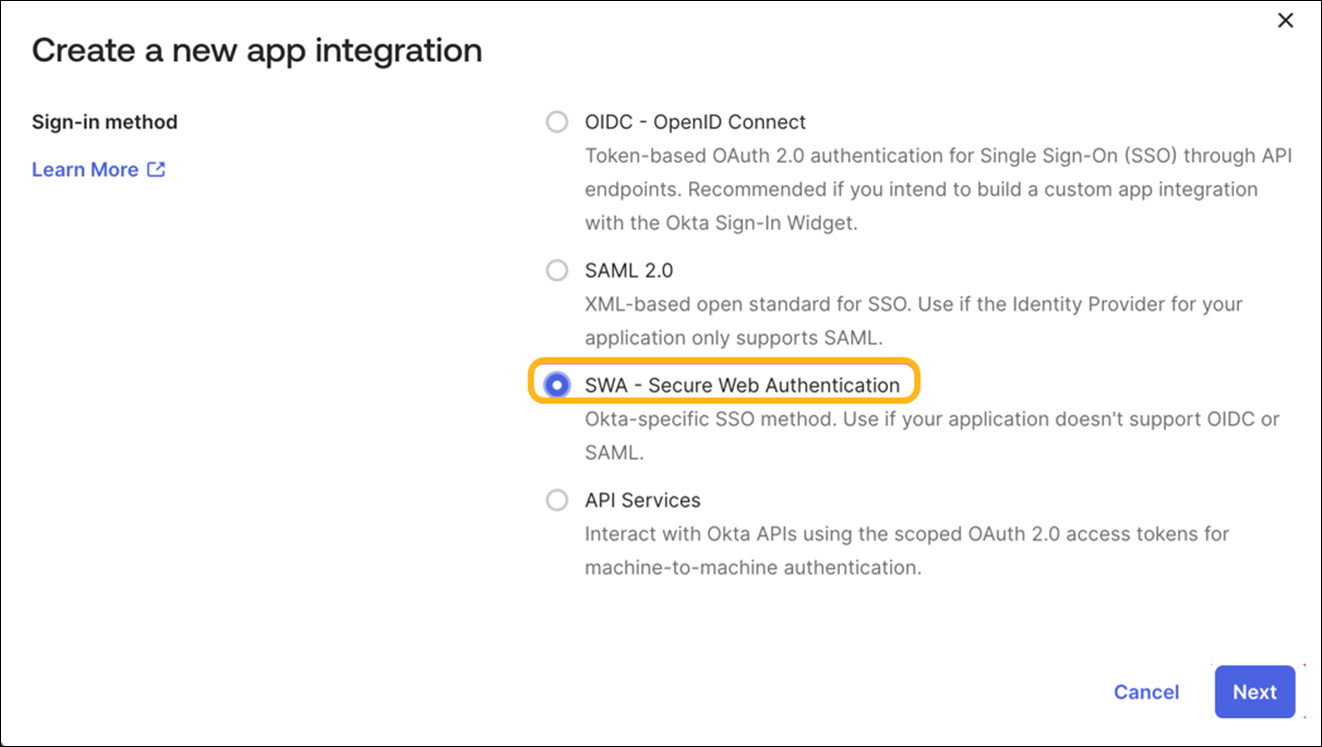
Select the Sign-in method as SWA - Secure Web Authentication
and click Next.
-
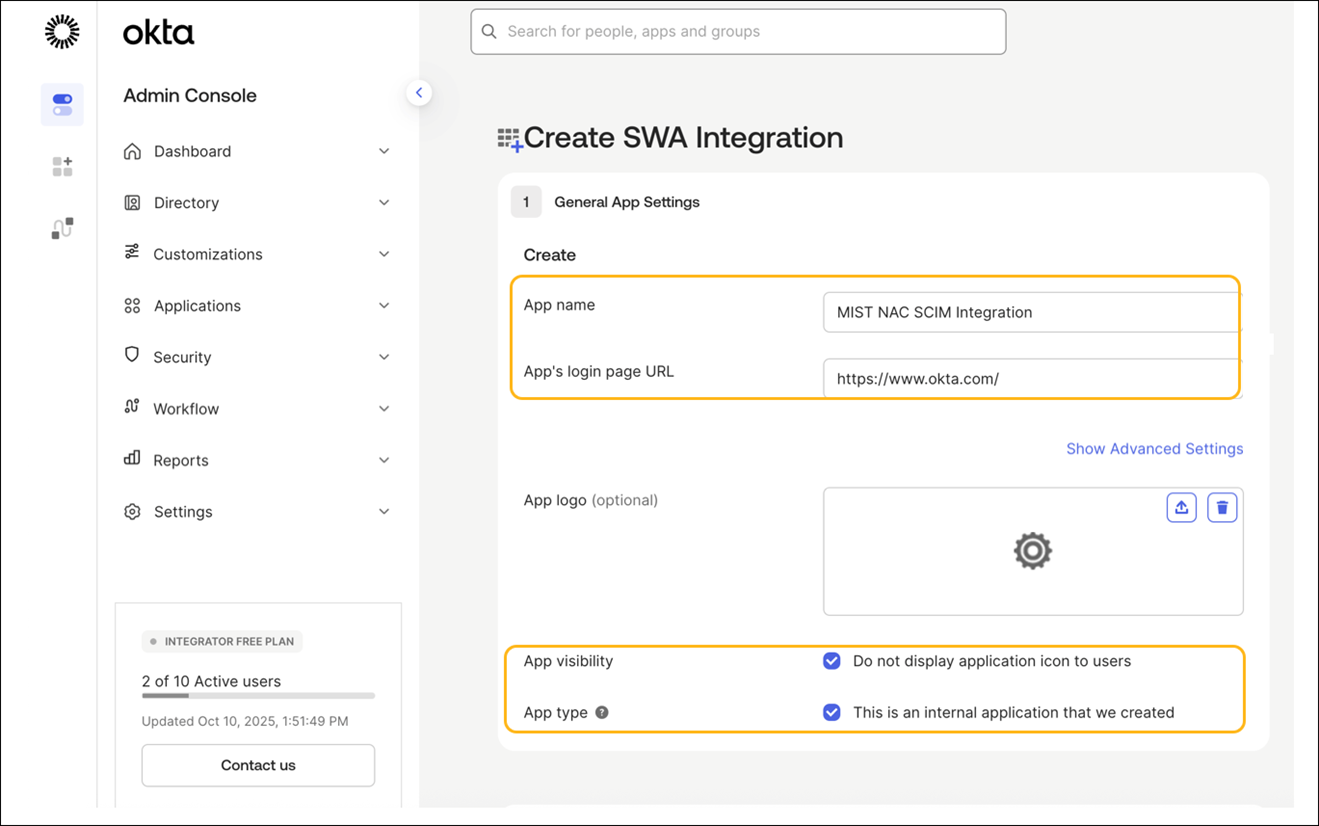
Enter a name for the application and specify the login page URL for the
app. Select the options for App Visibility and App Type, then click
Finish.
-
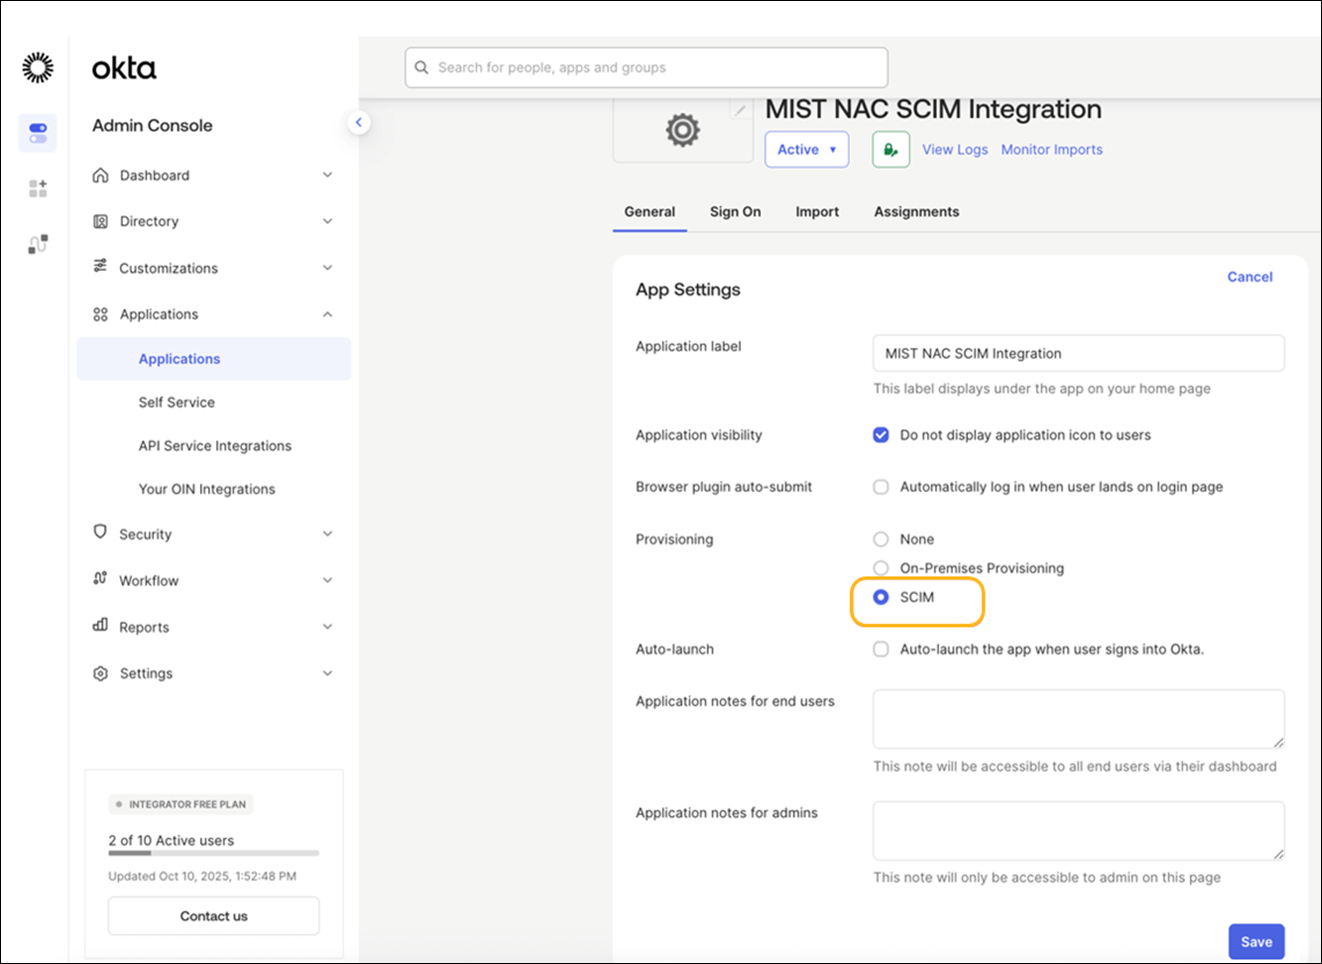
Switch to the General tab and click Edit Settings.
Set the Provisioning Type as SCIM and click
Save.
-
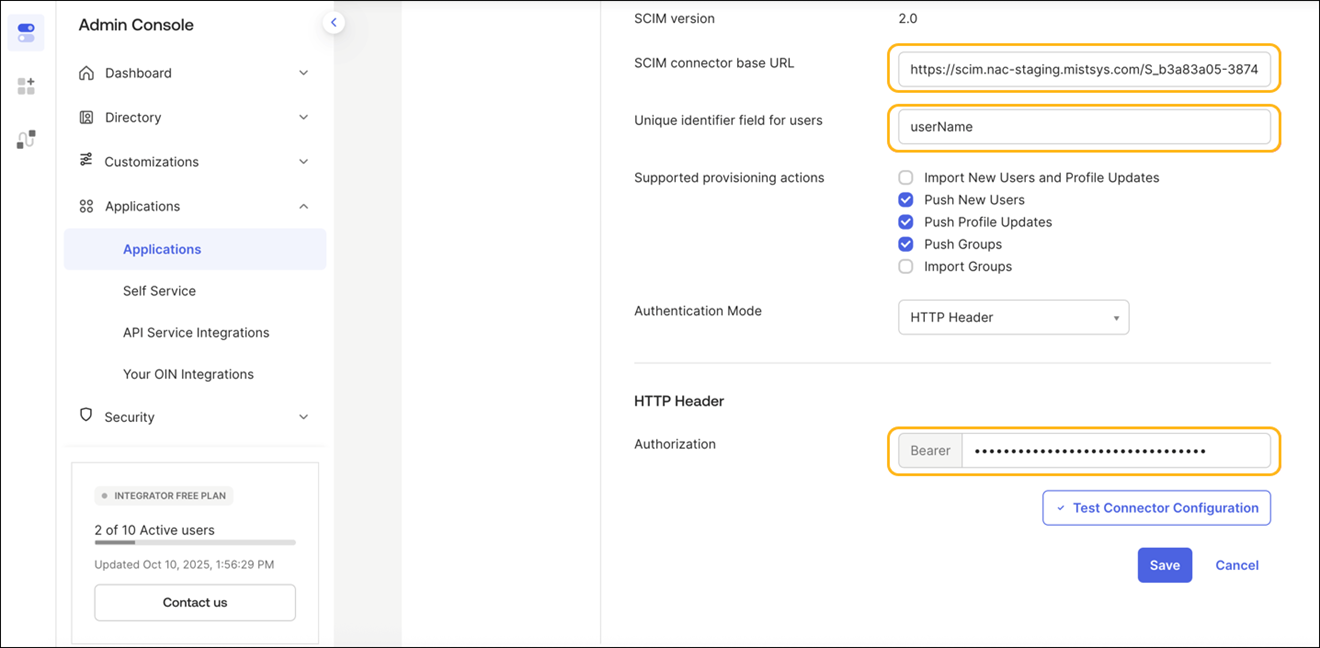
In the Provisioning tab:
Enter the following details:
- SCIM Connector Base URL—SCIM Base URL from the IdP configuration
- Unique Identifier Field for Users—userName
- Authentication Mode—HTTP header
Authorization—SCIM Authentication token from the IdP configuration
Enable the Push New Users, Push Profile Updates, and Push Groups checkboxes.
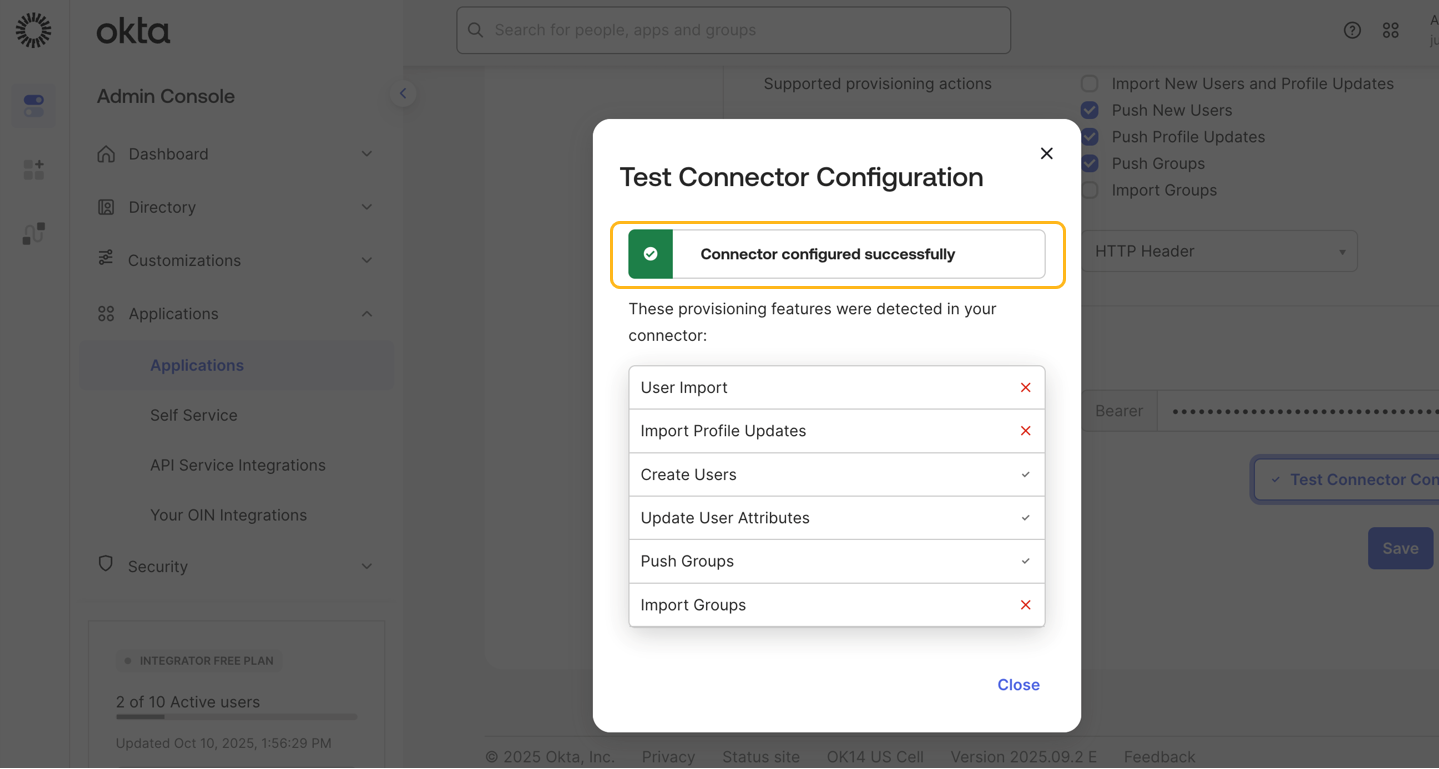
Click Test Connector Configuration. If you see a success message, click Save.
-
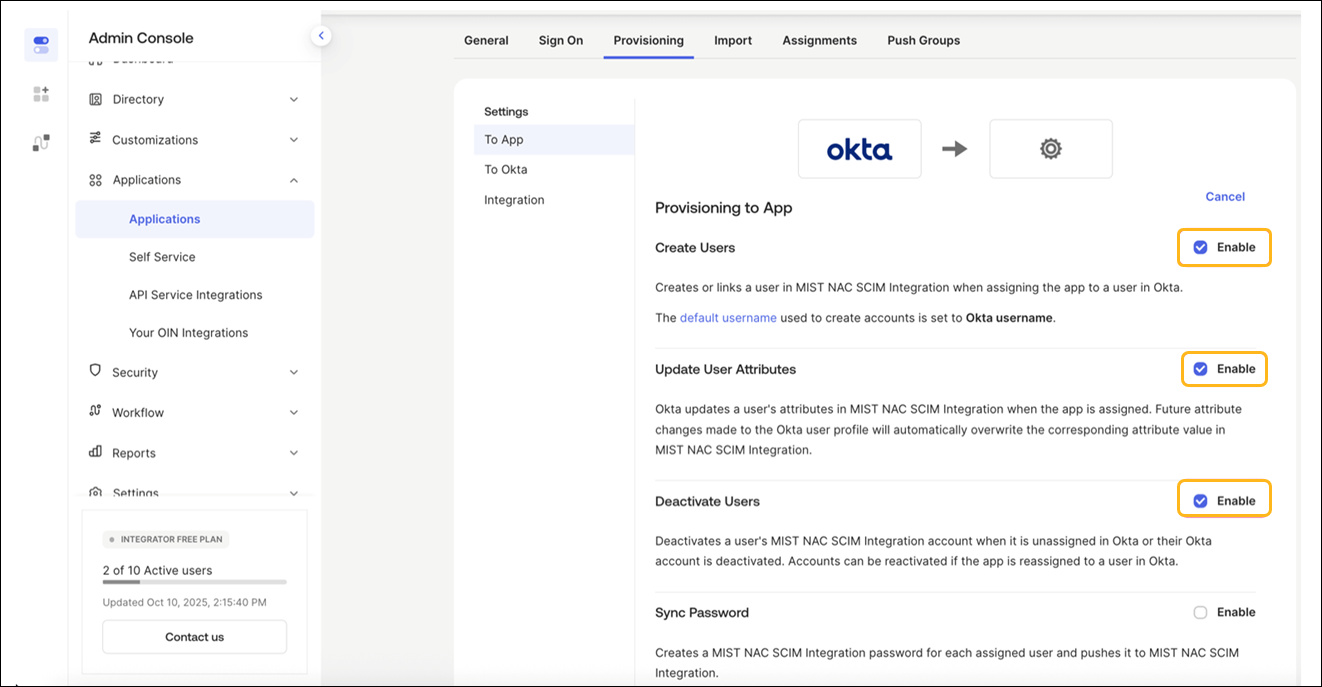
In the Provisioning Settings tab, enable the first three provisioning
options and click Save.
-
Create Users
-
Update User Attributes
-
Deactivate Users
-
-
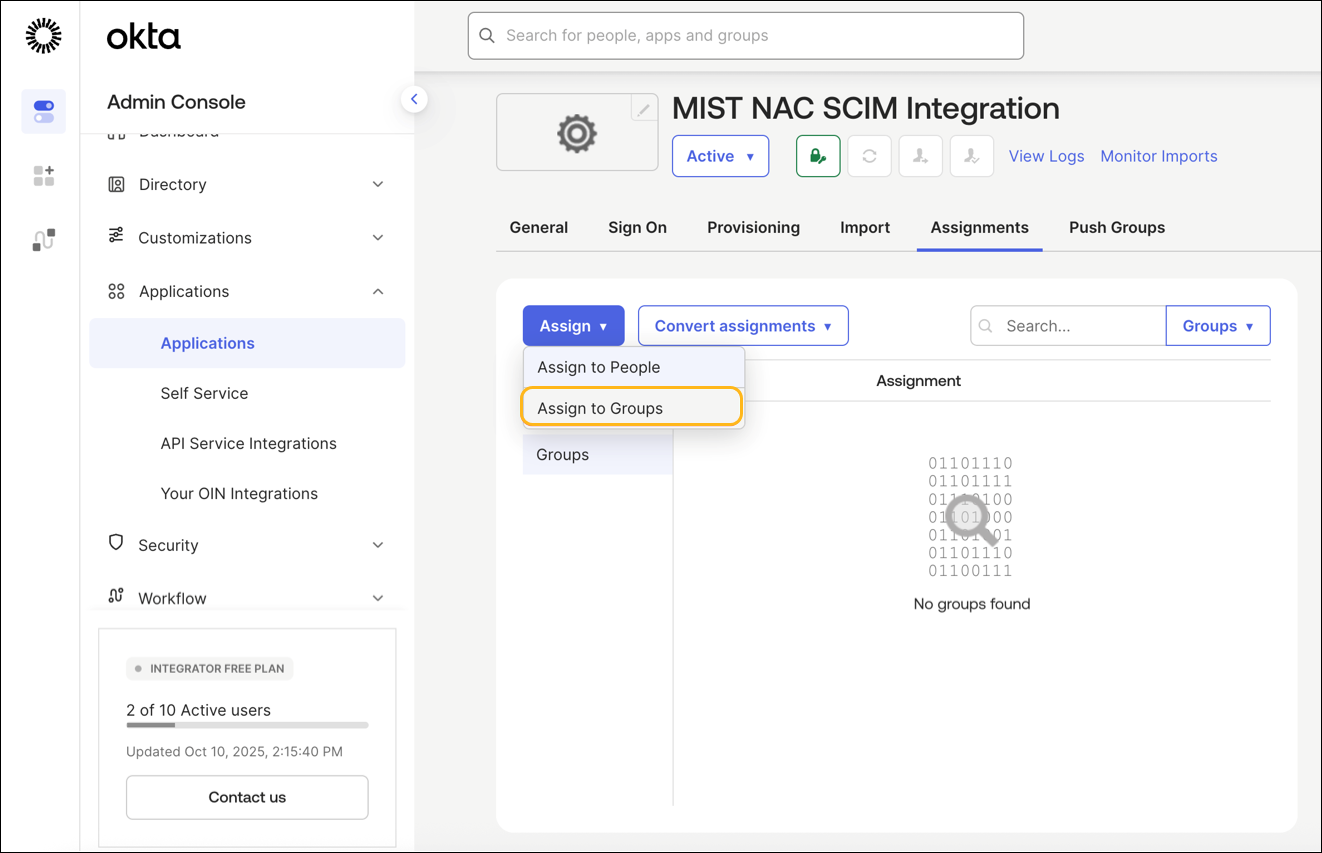
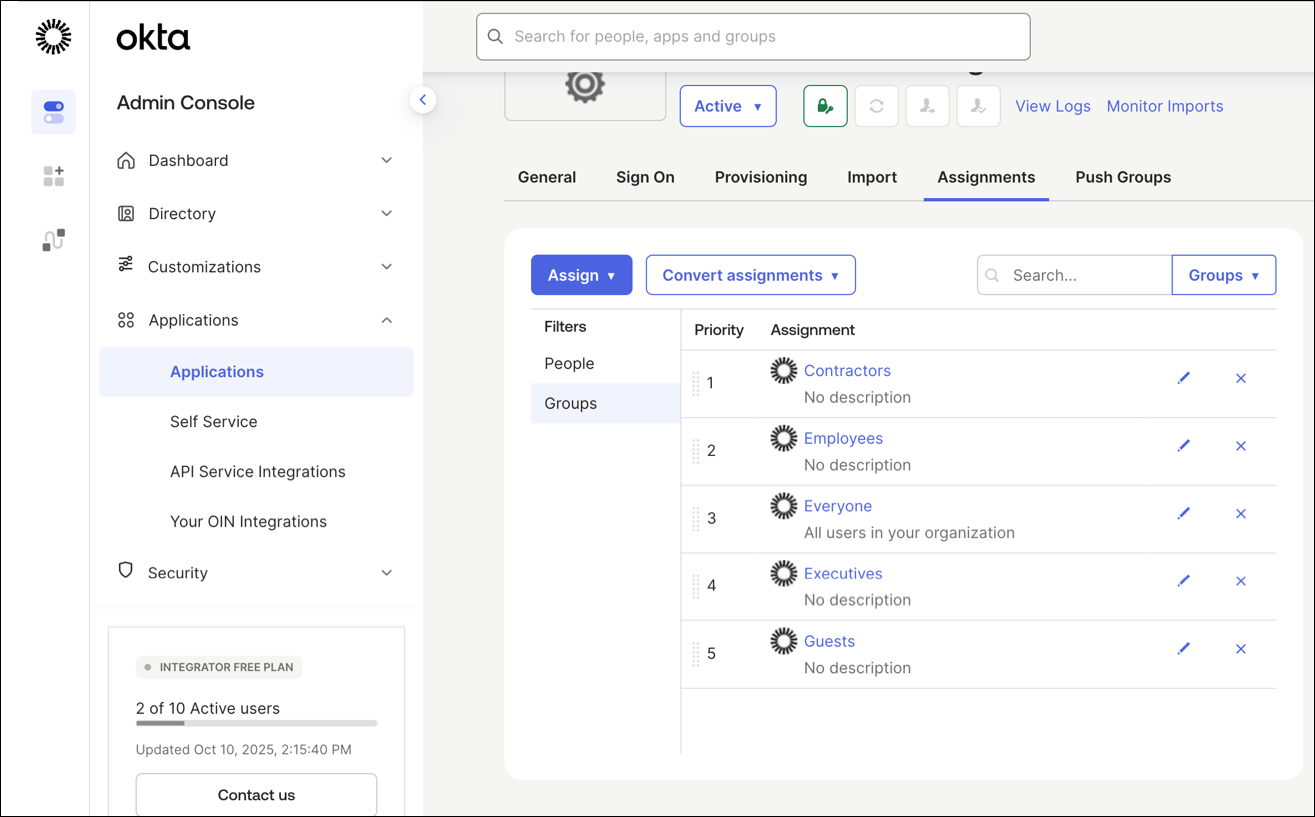
Select the Assignments tab and select
Assign>Assign to
Groups. Select and assign the groups that need to be provisioned for
HPE
Mist Networking Access Assurance.
-
Navigate to the Push Groups tab and click Push Groups
> Find groups by name. Push all the
required groups for provisioning.
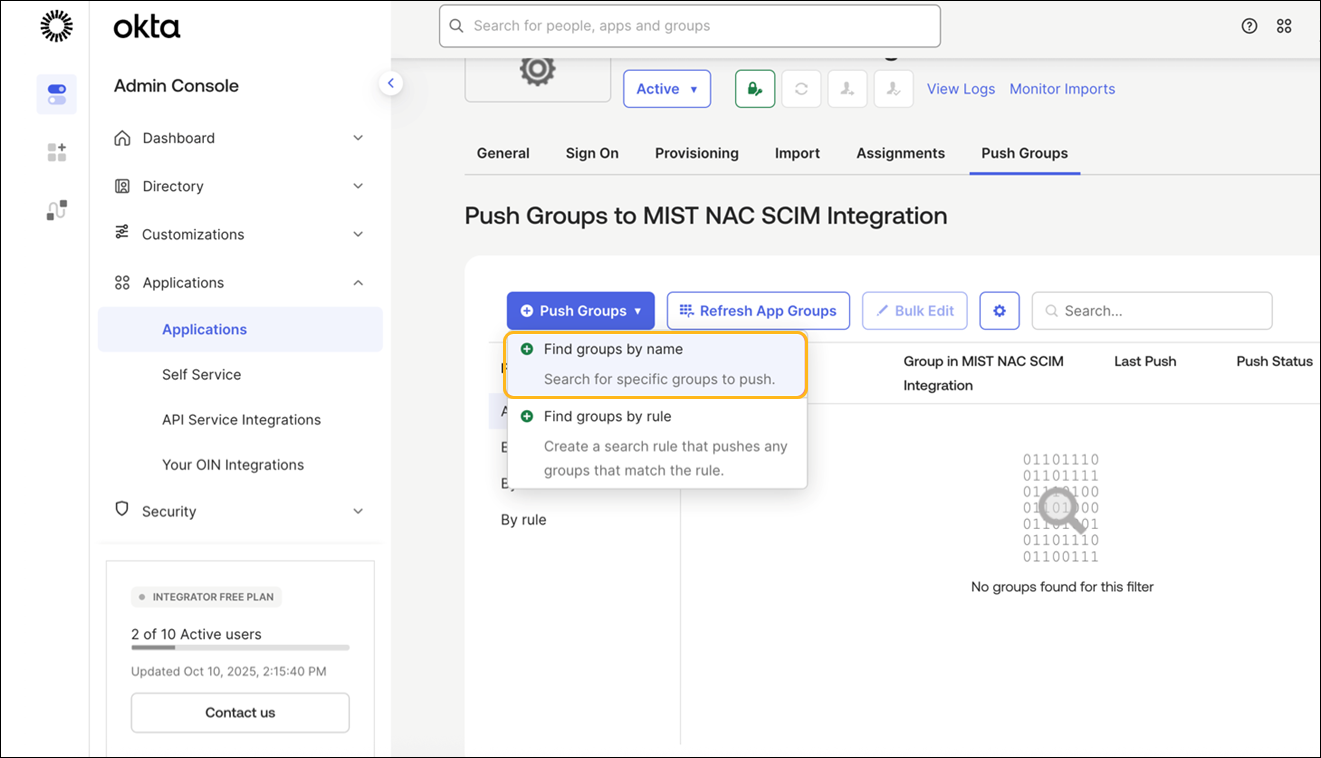
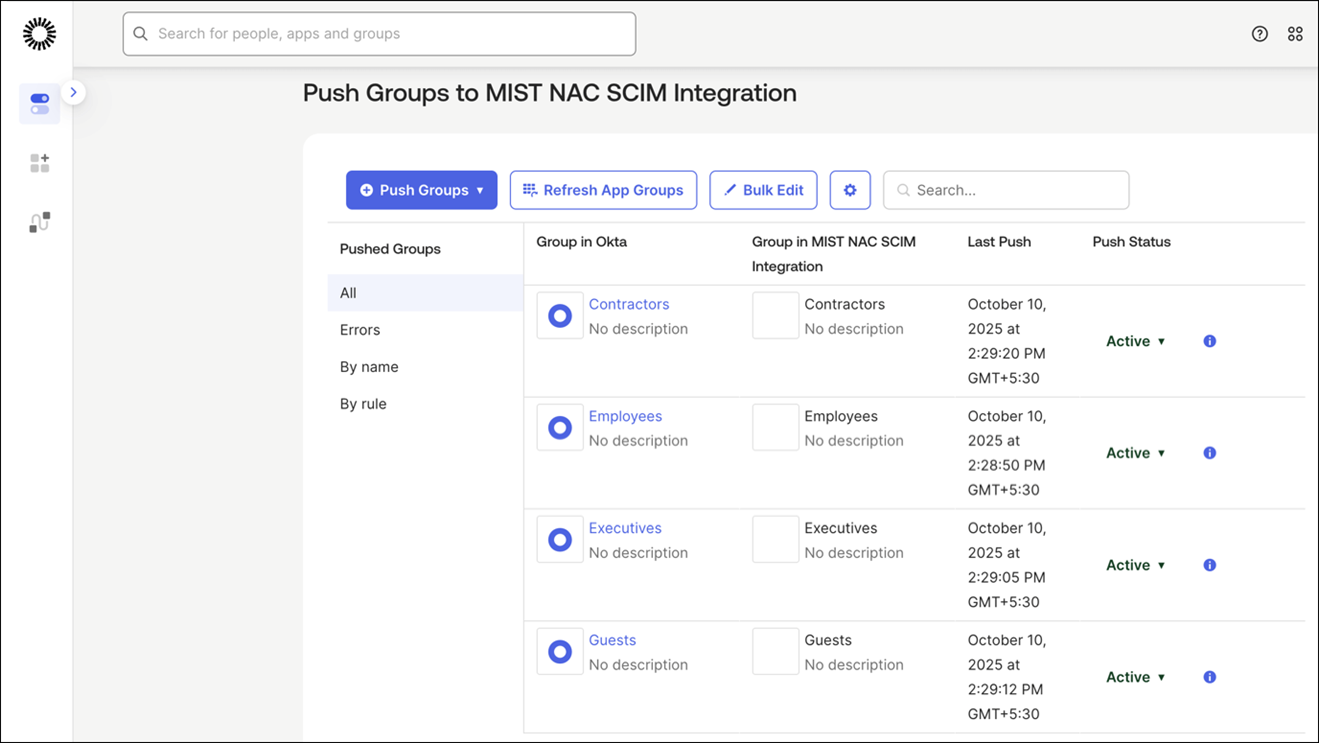
Verify that the Push Status shows as Active. The setup for SCIM provisioning with Okta IdP is now complete.
Client Connection and Verification
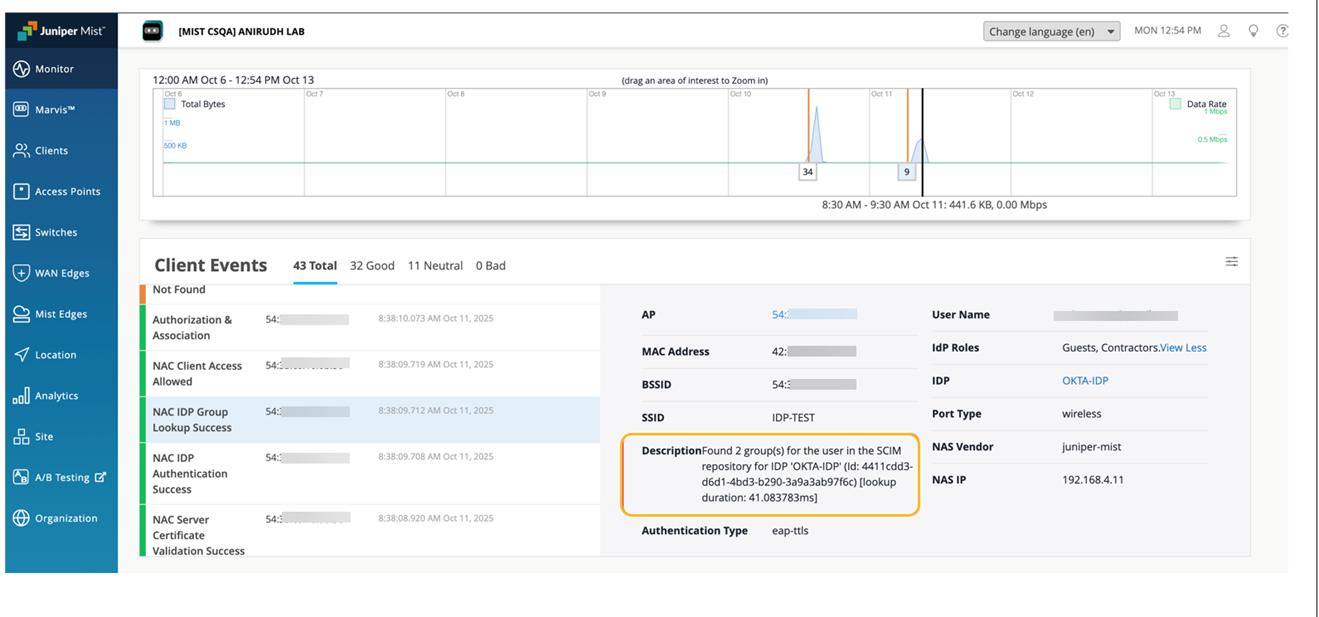
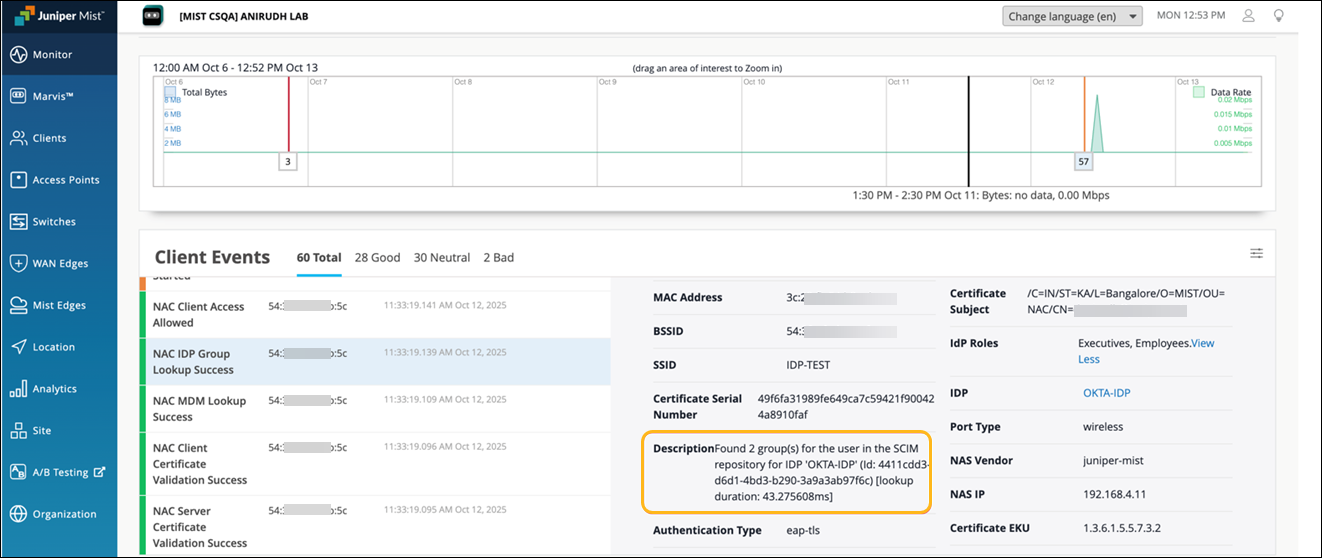
When a client is connected, you'll see the client events on the Insights page on the management portal. In the following examples, clients were connected using both EAP-TLS and EAP-TTLS authentication methods. In both cases, the authorization (that is, user group retrieval and mapping) was performed through the HPE Mist Networking Access Assurance SCIM database. This behavior can be verified in the event description, where the source of group information is shown as the SCIM repository.
Example 1: Client connected using the EAP-TLS authentication
Example 2: Client connected using the EAP-TTLS authentication