CrowdStrike Integration
Follow these steps to understand the CrowdStrike Falcon EDR integration. Learn how to authorize the CrowdStrike API with your HPE Mist organization, configure EDR-based policy rules, map endpoint security attributes to network access policies, and monitor CrowdStrike detection and endpoint events directly from HPE Mist.
HPE Mist Networking Access Assurance supports native integration with CrowdStrike Falcon EDR, enabling evaluation of endpoint security posture across devices. CrowdStrike Falcon EDR provides endpoint threat detection data with severity levels ranging from Informational to Critical. HPE Mist Networking Access Assurance evaluates the current threat severity and uses this information in authentication policies to enforce appropriate network access decisions.
Threat Severity Retrieval from CrowdStrike
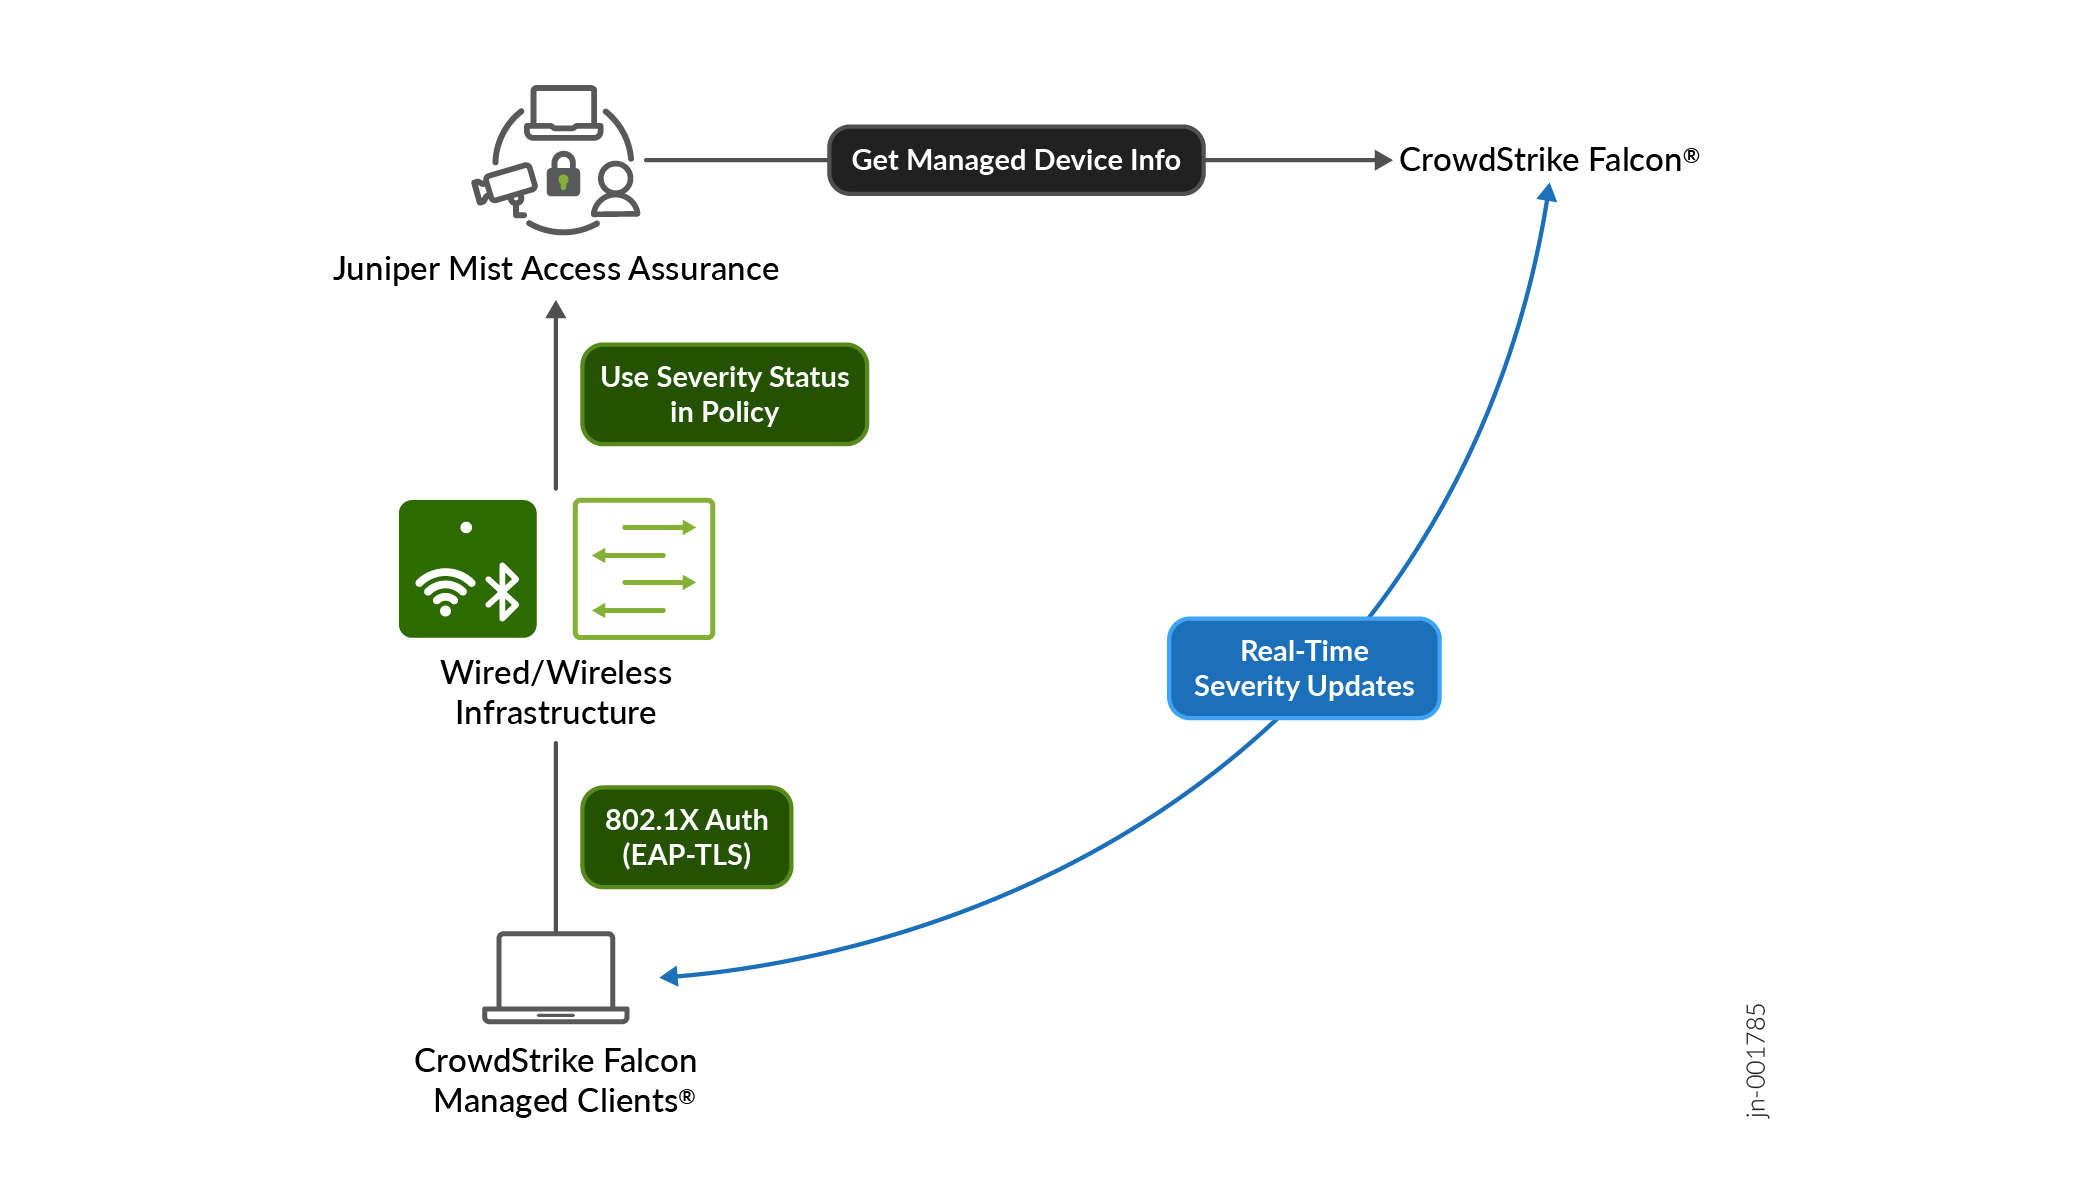
HPE Mist Networking Access Assurance integrates with CrowdStrike Falcon EDR using webhooks to receive real-time detection events. Whenever a detection is created, updated, or closed in CrowdStrike, a notification is sent to HPE Mist Networking Access Assurance.
CrowdStrike Falcon EDR assigns each detection a severity level of Informational, Low, Medium, High, or Critical. HPE Mist Networking Access Assurance evaluates all currently open detections for an endpoint and determines the effective threat severity based on the highest severity using the following priority: Critical > High > Medium > Low > Informational.
For example:
-
If an endpoint already has an open Low-severity detection and a new High-severity detection is reported, the effective severity is updated to High.
-
If an Informational detection is reported while a Low-severity detection remains open, the effective severity remains Low.
If an endpoint has no open detections, HPE Mist Networking Access Assurance classifies the endpoint as Healthy. Healthy is an HPE Mist Networking Access Assurance posture state and does not correspond to a CrowdStrike severity level.
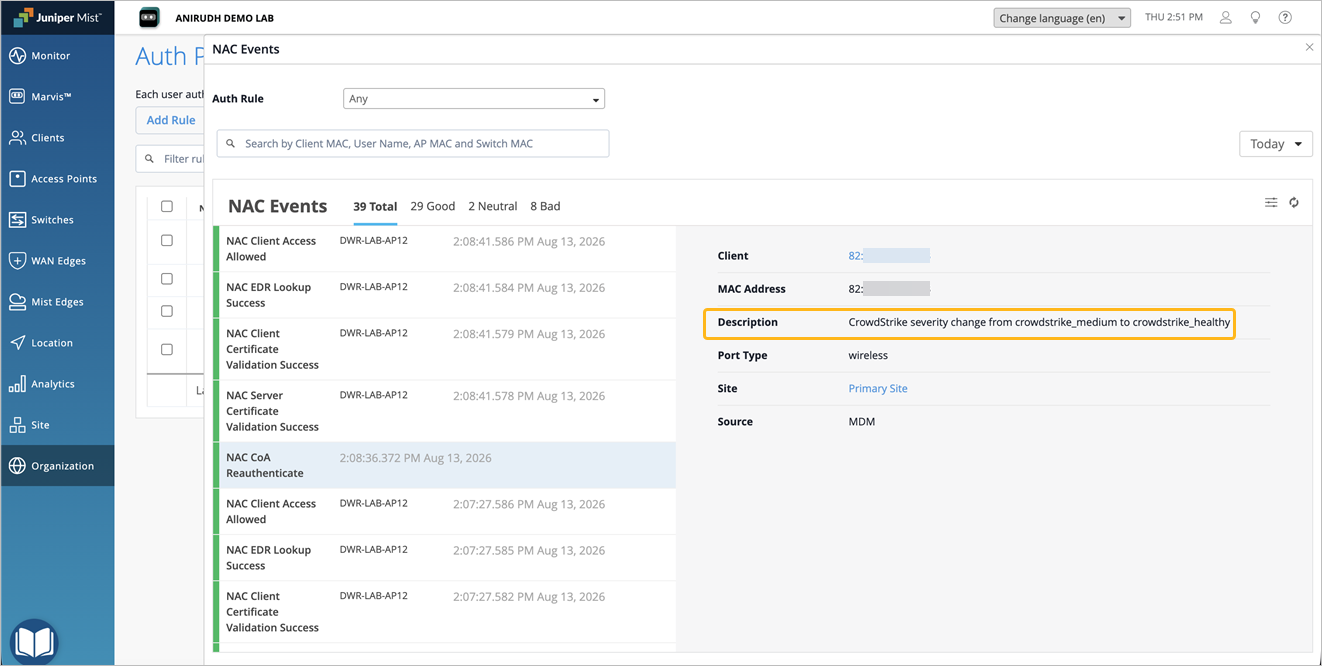
When a detection's severity changes or an open detection is resolved, HPE Mist Networking Access Assurance automatically triggers a Change of Authorization (CoA), when required, to re-evaluate the endpoint and apply the appropriate network access policy. This enables dynamic network access enforcement based on the endpoint’s current CrowdStrike threat status.
Figure 1 illustrates how HPE Mist Networking Access Assurance retrieves CrowdStrike-managed device severity status for authentication.
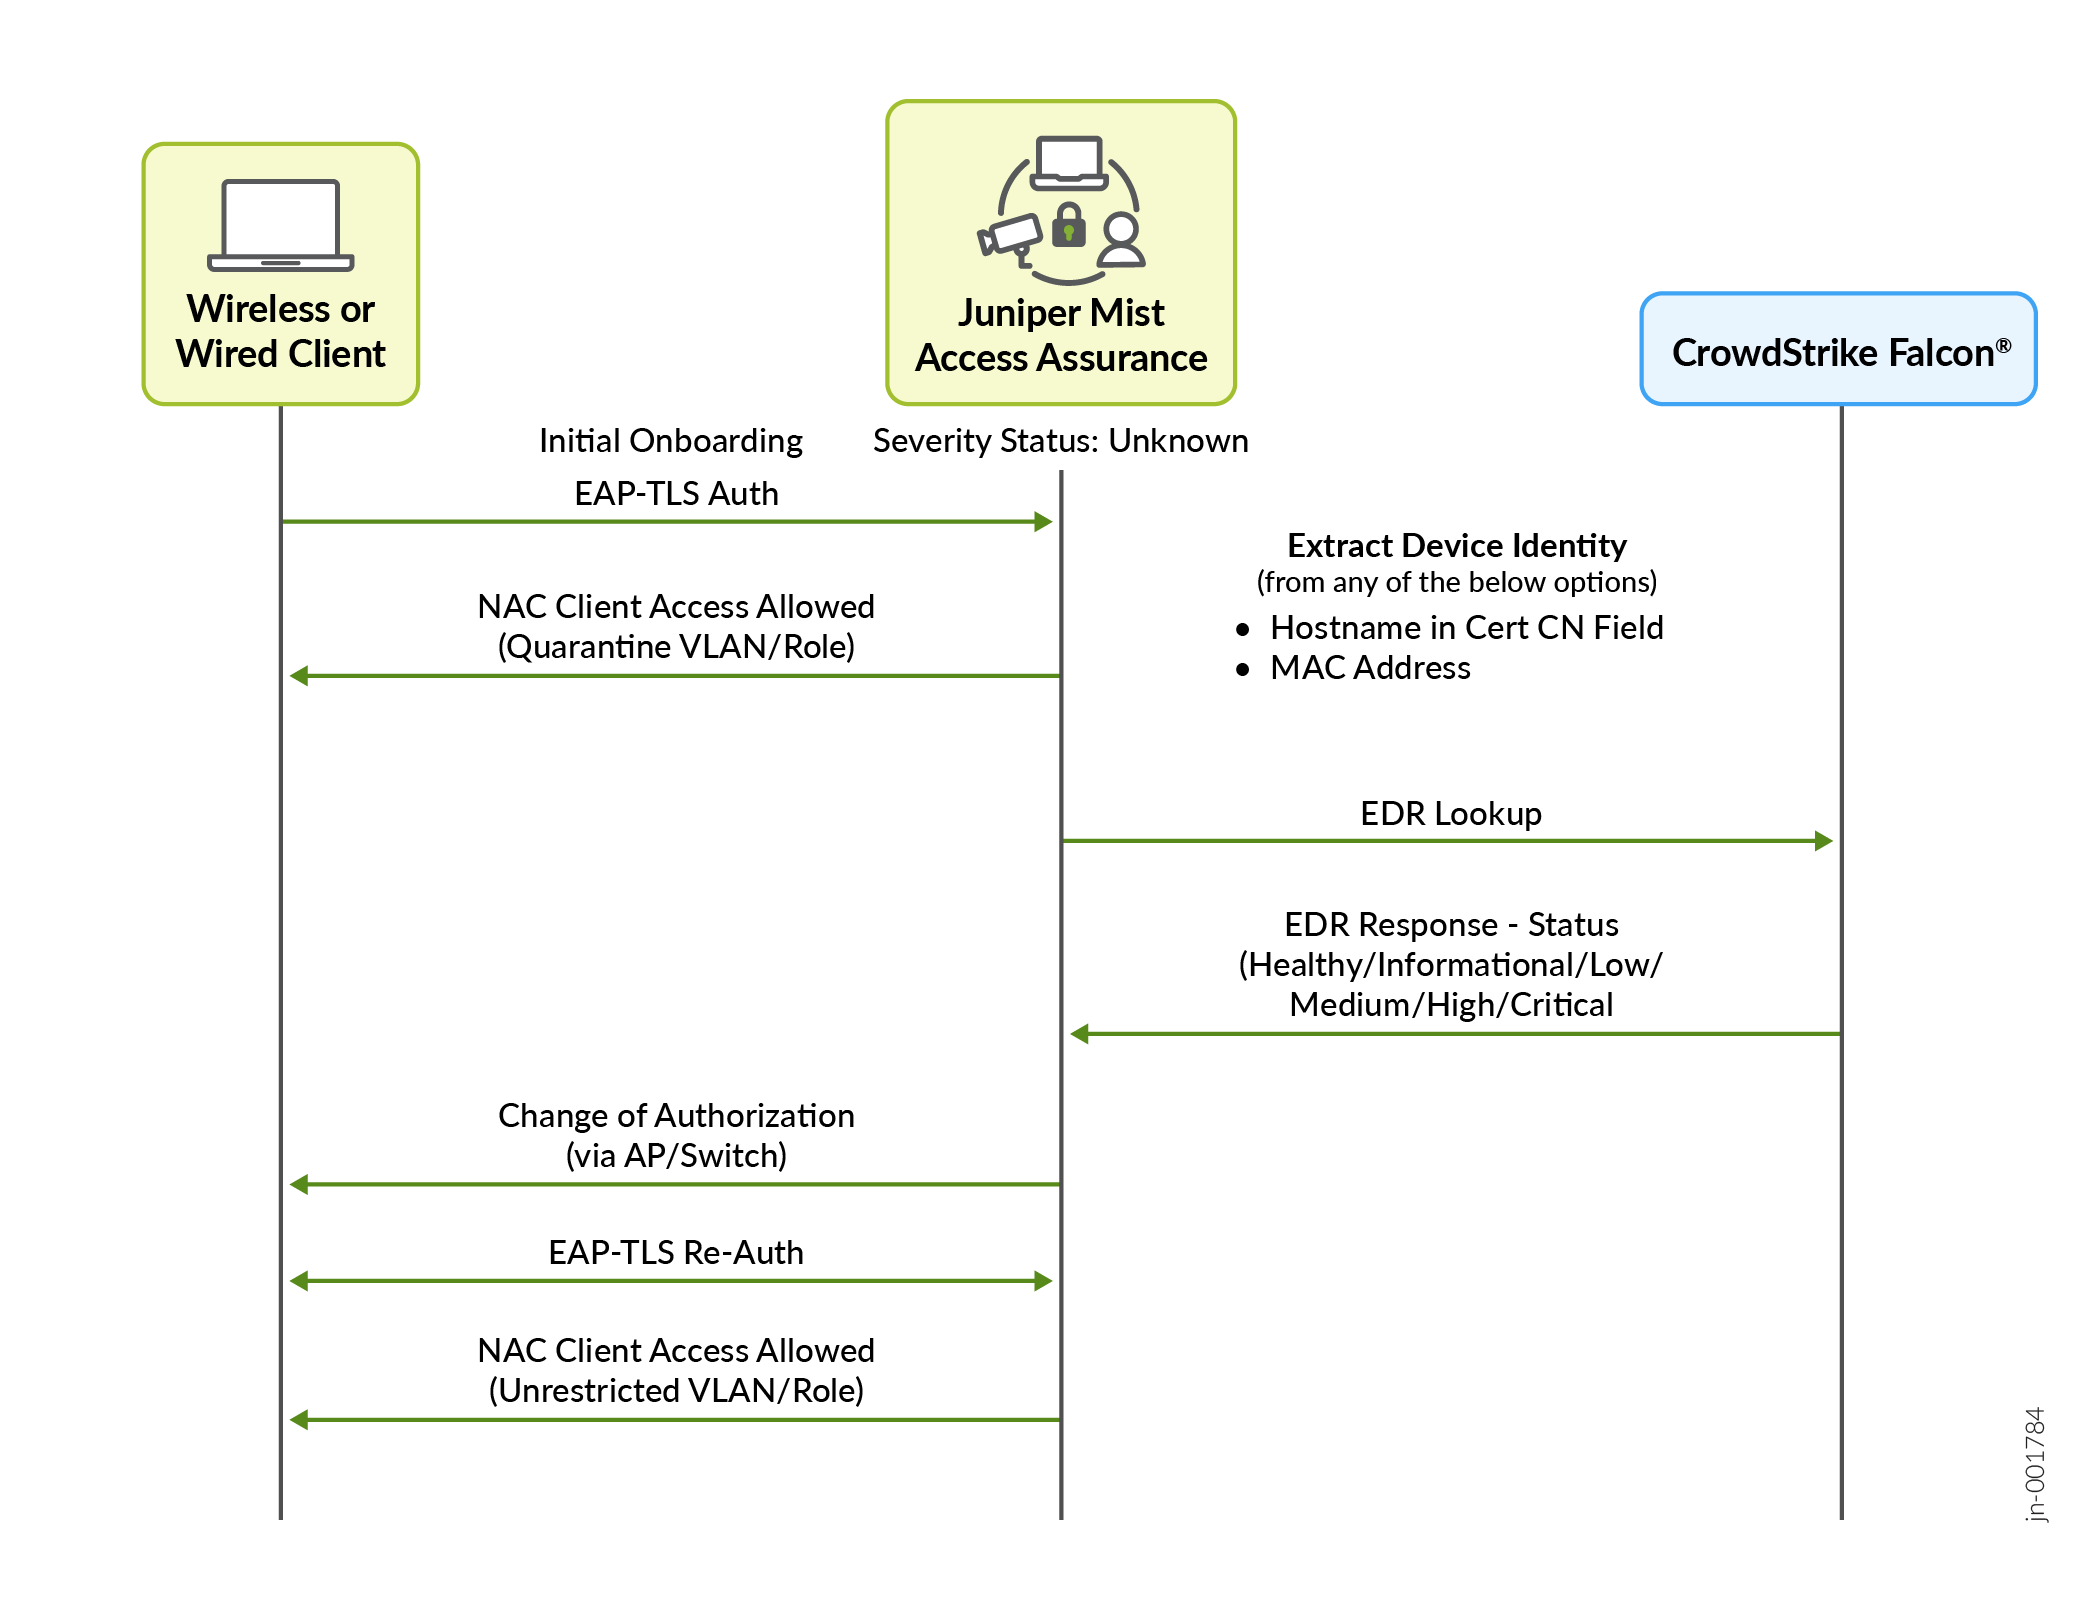
HPE Mist Networking Access Assurance uses the following information during client authentication to match a client with an endpoint record in CrowdStrike Falcon EDR:
-
Device certificate CN (Hostname)—For EAP-TLS authentication, HPE Mist Networking Access Assurance matches the certificate CN with the endpoint hostname reported by CrowdStrike Falcon. This hostname-based lookup supports both randomized and non-randomized MAC addresses.
-
MAC Address Fallback—If the endpoint cannot be matched using the certificate CN or hostname, HPE Mist Networking Access Assurance falls back to the client MAC address to locate the corresponding endpoint record in CrowdStrike Falcon. In this case, the client's current MAC address must be synchronized with the CrowdStrike endpoint record, regardless of whether the device is using a randomized or its original MAC address.
Configure Client ID and Secret in CrowdStrike Console
Link a CrowdStrike Account to a Mist Organization
-
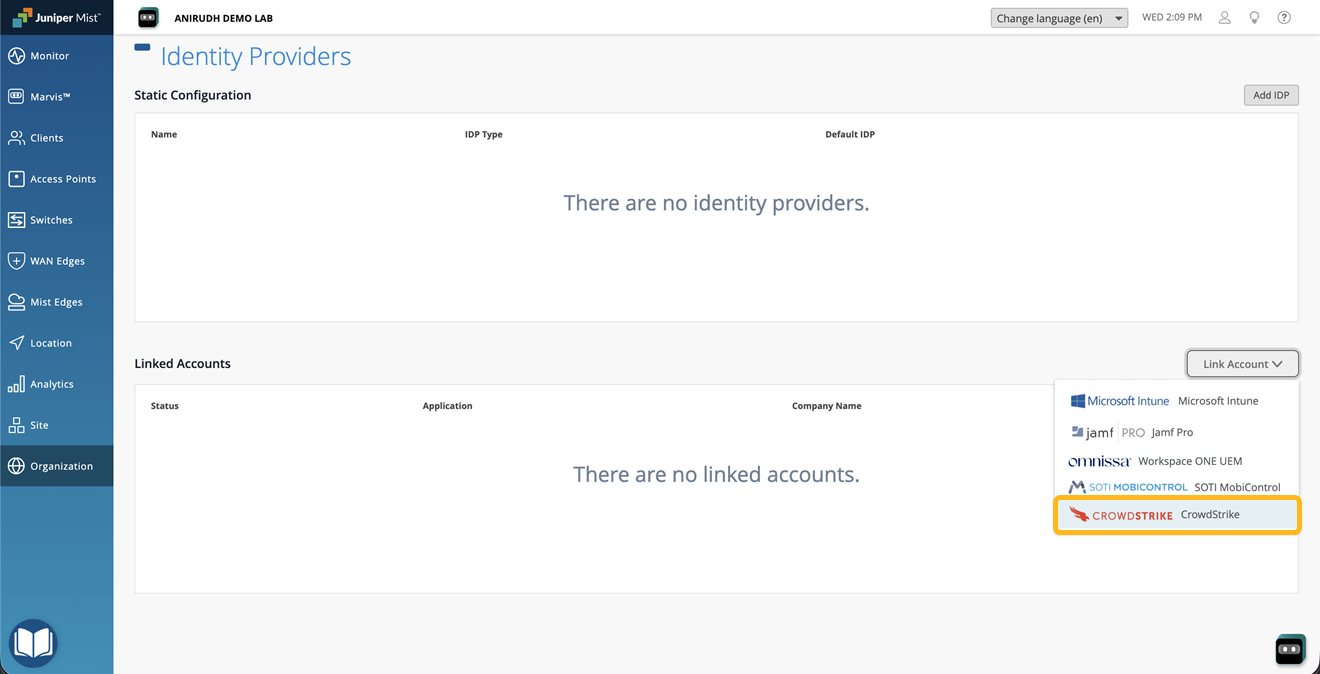
Log in to the Mist organization using an account with Super User
privileges. Navigate to
Organization>Access>Identity>Linked
Accounts, and select CrowdStrike.
-
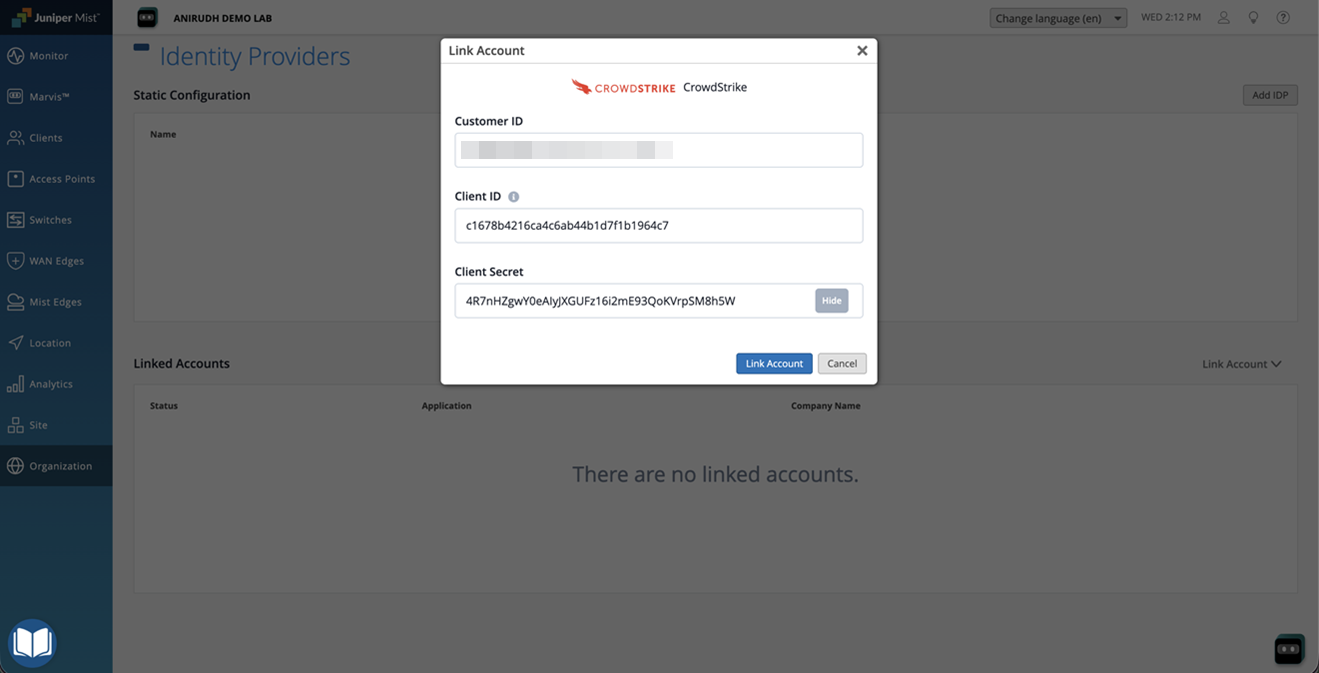
Enter the following details:
-
Customer ID (CID)—Available in the CrowdStrike Falcon Console under Host Setup and Management>Sensor Downloads.
-
Client ID and Client Secret—Generated during the creation of the CrowdStrike API client in Configure Client ID and Secret in CrowdStrike Console.
-
Click Link Account.
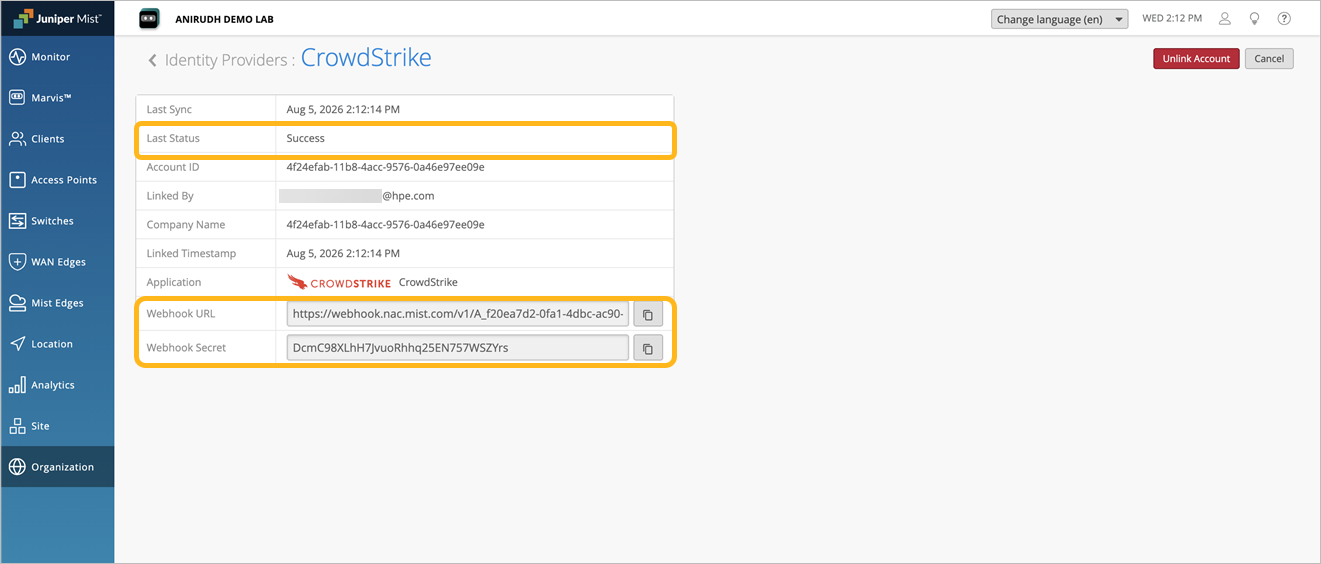
After the account is successfully linked, the Last Status field (which indicates the integration status) will display Success. A Webhook URL and Webhook Secret will also be generated. These values are required to configure event notifications from CrowdStrike to HPE Mist Networking Access Assurance.
-
Configure Webhooks in CrowdStrike Falcon
Configure Webhook Workflows
Configure a Webhook Workflow for Endpoint Severity Detections in CrowdStrike
Configure a Webhook Workflow for Audit Event Detections in CrowdStrike
To keep HPE Mist Networking Access Assurance synchronized with threat detection status updates, configure an audit event detection webhook workflow. This workflow enables CrowdStrike to forward detection status change events to HPE Mist Networking Access Assurance, including transitions from open to closed and from closed to reopened.
Endpoint Severity Evaluation
HPE Mist Networking Access Assurance determines an endpoint's severity state based on detection information retrieved from CrowdStrike. CrowdStrike classifies detections using the following severity levels:
-
Informational
-
Low
-
Medium
-
High
-
Critical
When an endpoint is onboarded, its initial severity state is set to Unknown. After initial authentication, HPE Mist Networking Access Assurance queries CrowdStrike to retrieve the endpoint's detection information.
If no open detections are found within the last 2 hours, the endpoint is classified as Healthy.
If an open detection is found, the corresponding CrowdStrike severity is assigned to the endpoint. When multiple open detections exist, the highest severity determines the effective endpoint severity, using the following precedence order:
Critical > High > Medium > Low > Informational
For example, if an endpoint has both a Medium and a High open detection, the endpoint severity is reported as High.
Configure Auth Policy Labels and Rules for CrowdStrike Severity States
-
Navigate to
Organization>Access>Auth
Policy Labels and click Add Label.
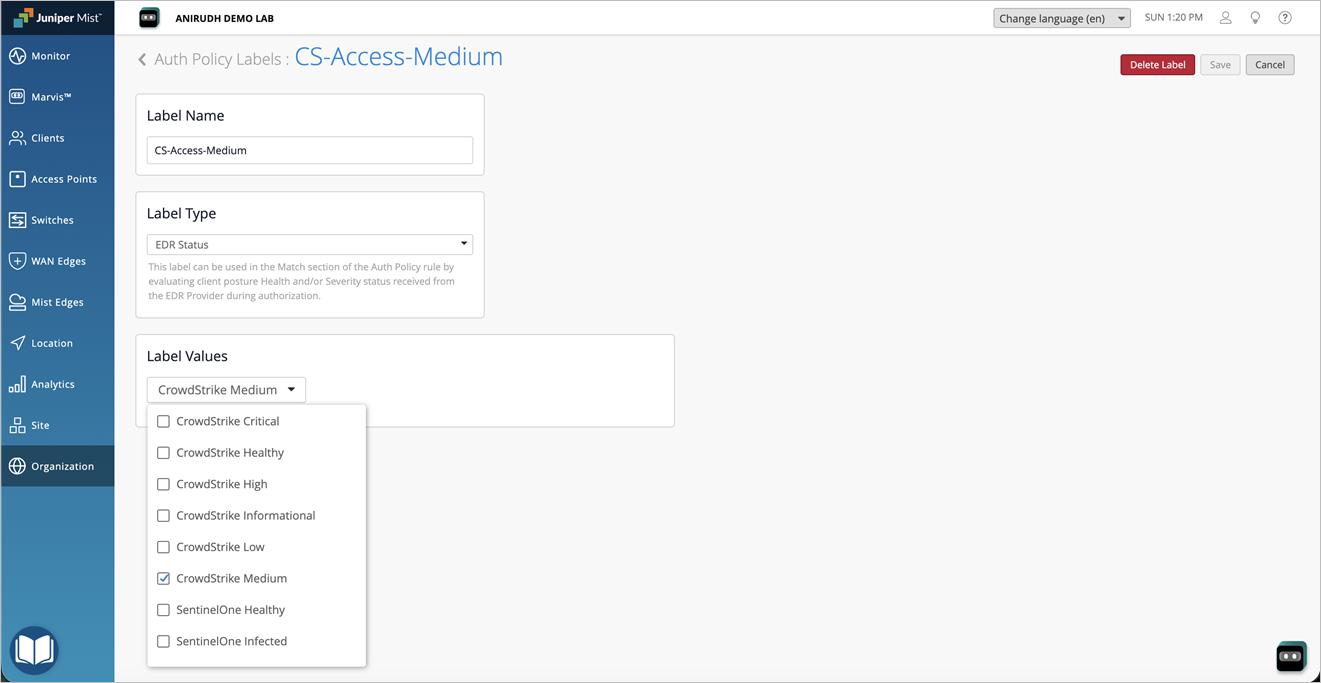
You can configure a label with a single severity value or multiple severity values. Supported values are Critical, High, Medium, Low, Informational, Healthy, and Unknown.
-
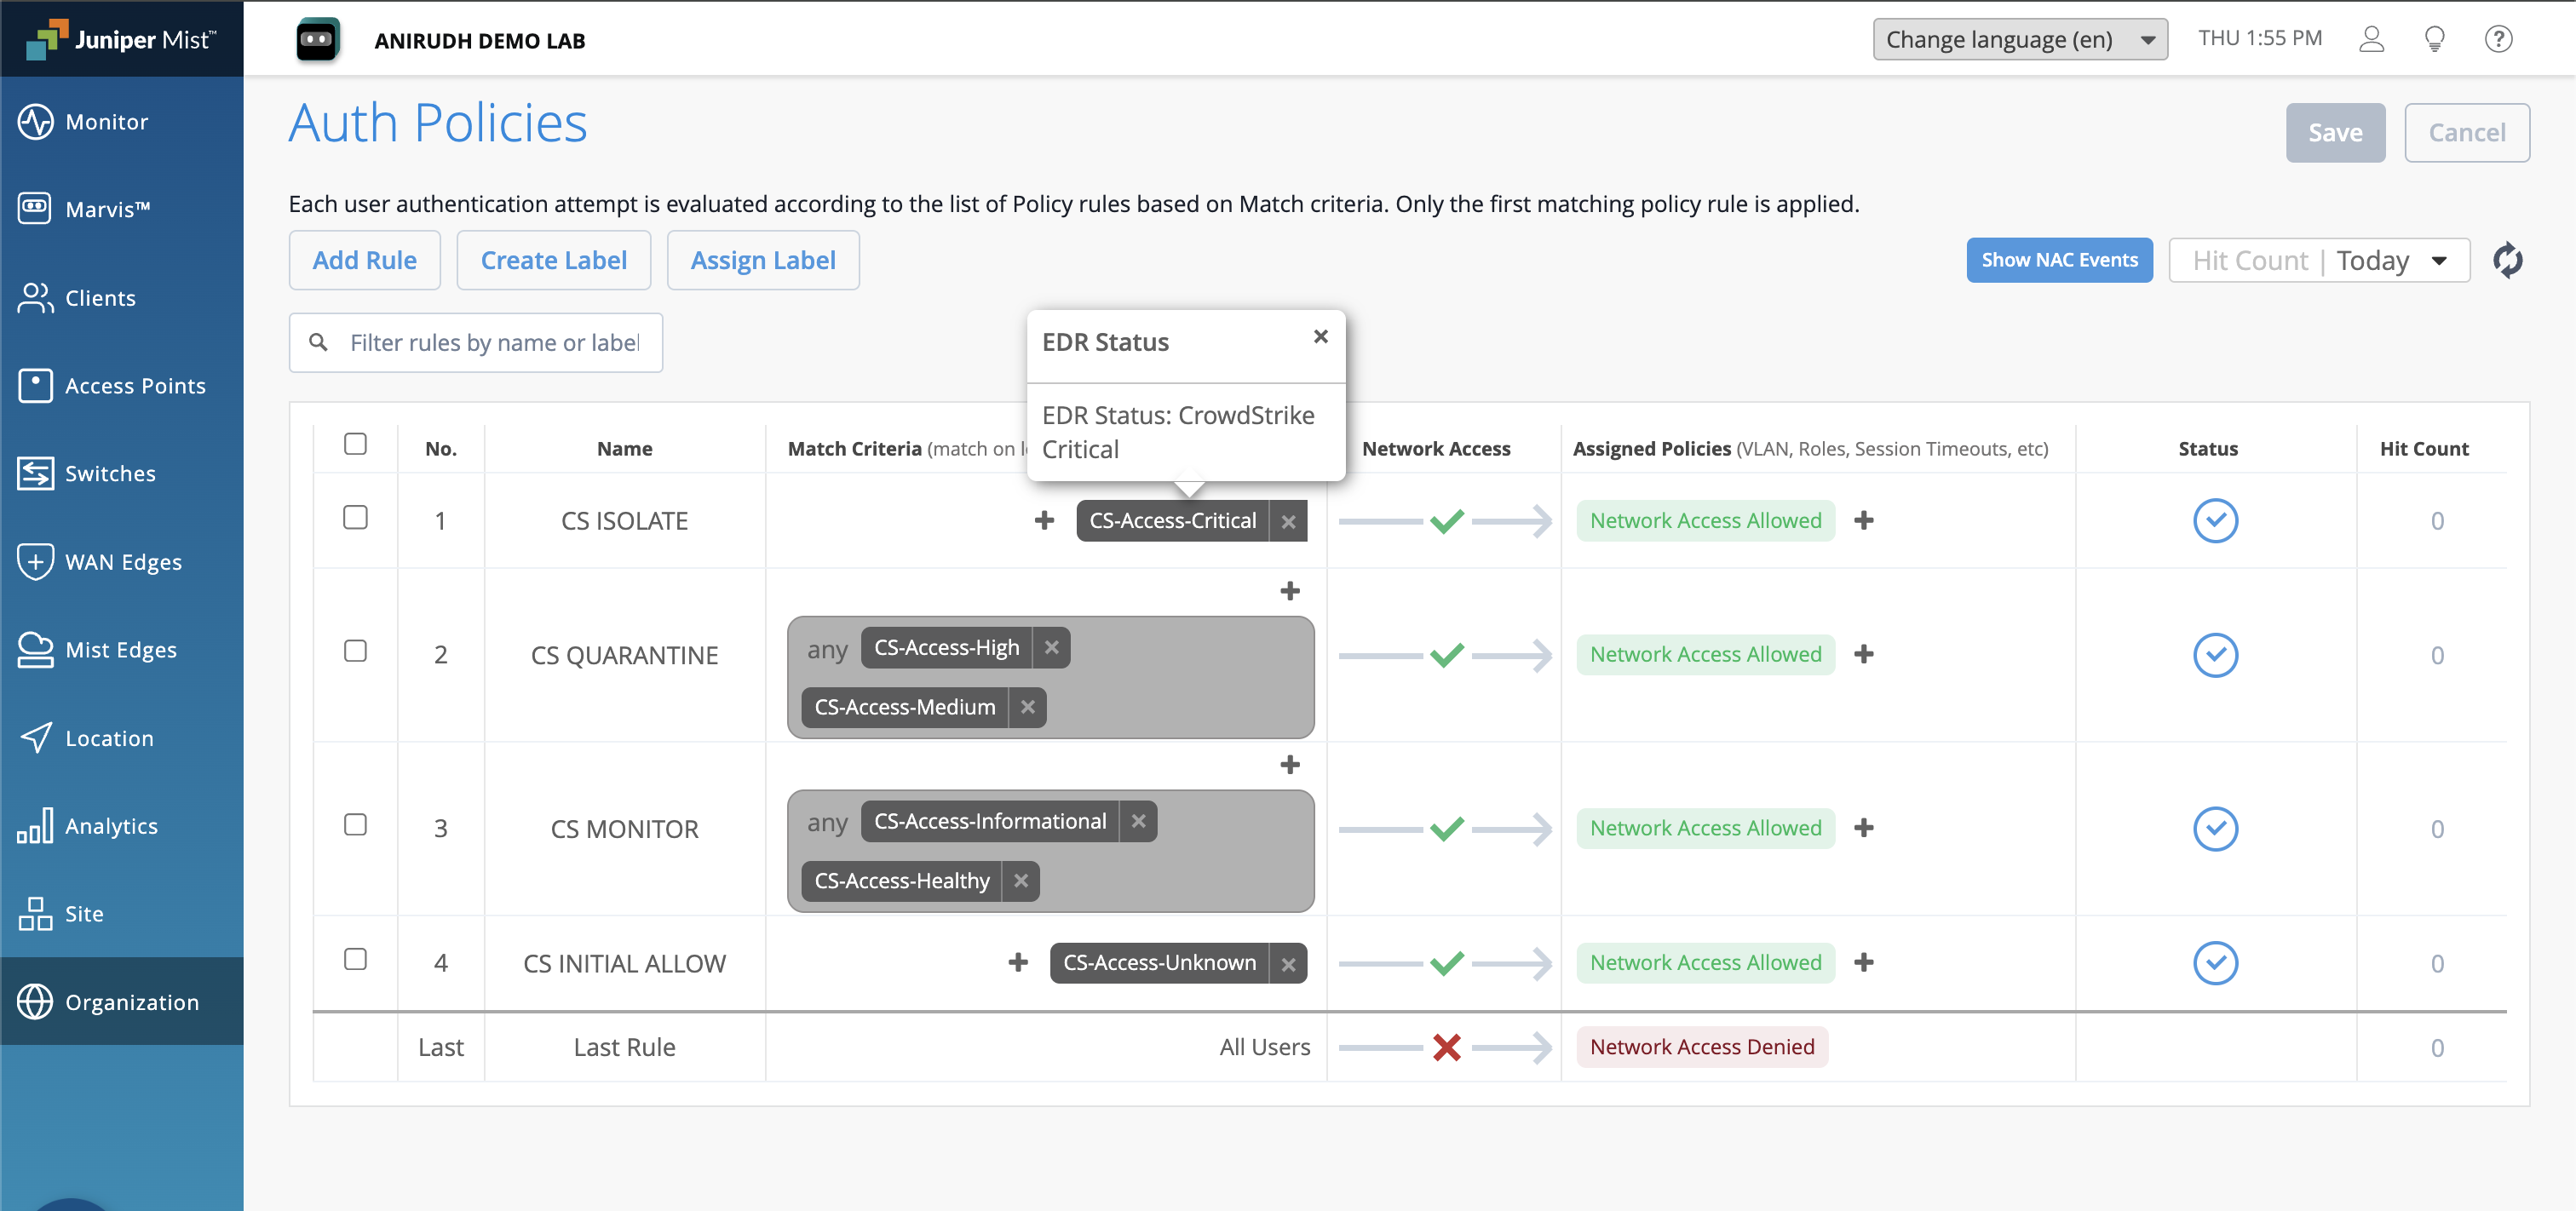
Create an authentication rule to allow the initial device connection. The
initial EDR lookup for a new client occurs after the device has been
authenticated for the first time. CS INITIAL ALLOW is the auth rule in the
following example.
Note: Do not include the EDR Severity labels in the match conditions for this rule. You can optionally use the Unknown Severity as a match criterion. Ensure that this rule is placed at a lower priority than the standard access policies.
-
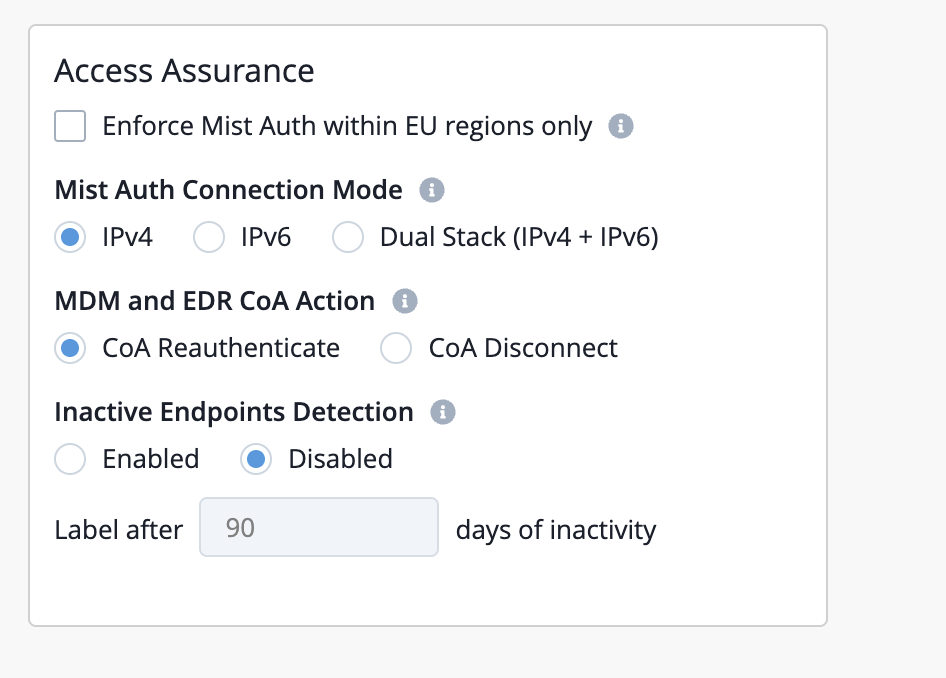
(Optional) Configure the CoA action to be taken when the endpoint’s
CrowdStrike severity changes and updated policies need to be applied.
Navigate to
Organization>Settings>Access
Assurance>MDM and EDR CoA Action.
Select one of the following actions: CoA Reauthenticate
(Default) or CoA Disconnect.
Client Connection and Verification
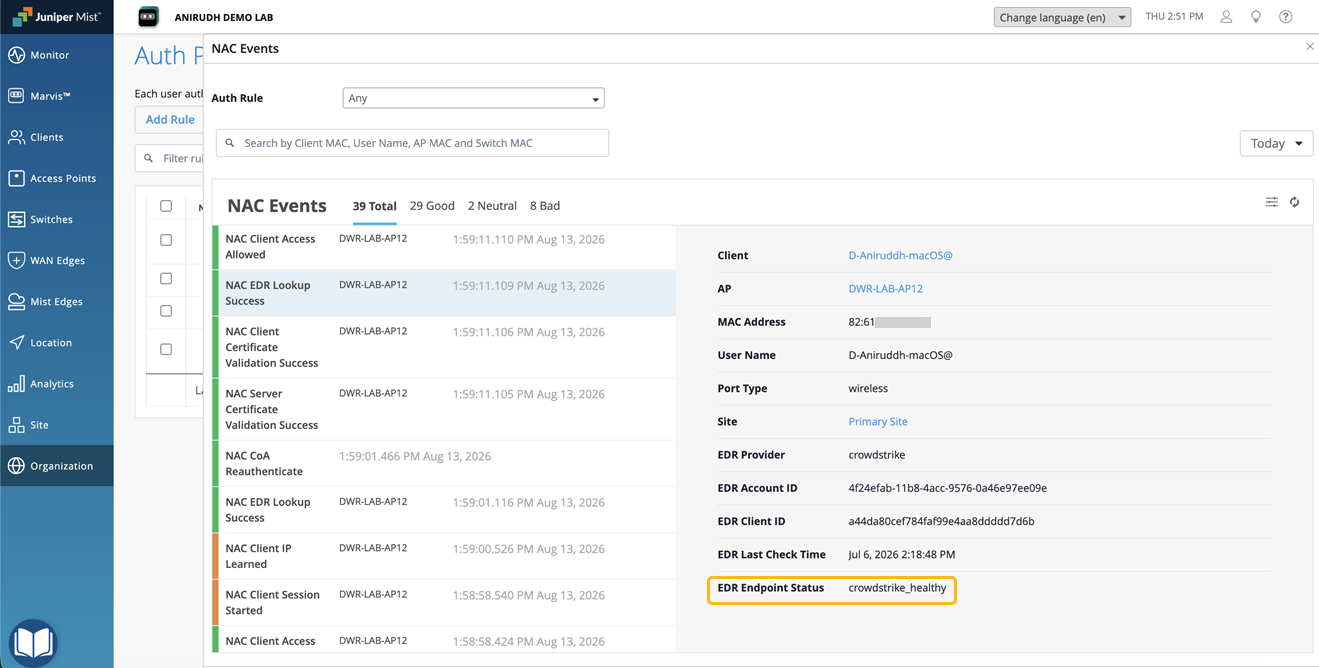
When a client is onboarded for the first time, HPE Mist Networking Access Assurance performs an EDR lookup after the client is authenticated. If no open detections are found within the past 2 hours, HPE Mist Networking Access Assurance assigns the client a CrowdStrike Healthy posture.
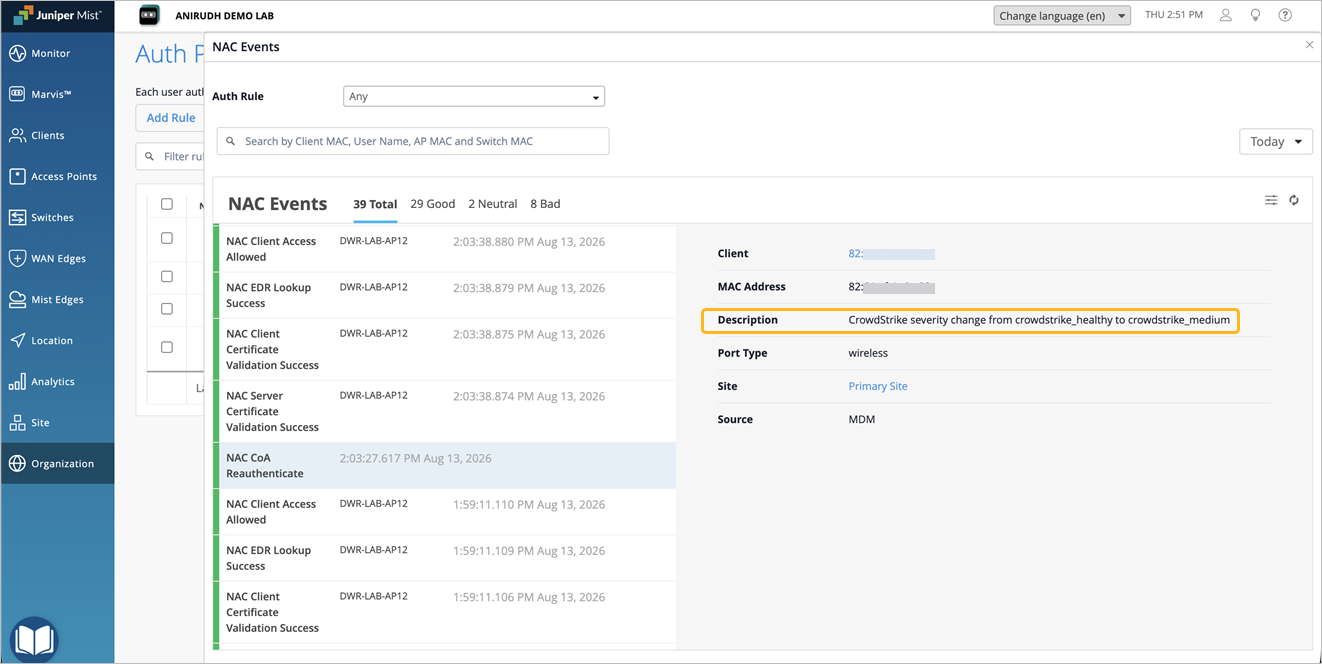
When a new detection is triggered (for example, Medium), CrowdStrike sends a webhook notification to HPE Mist Networking Access Assurance. Access Assurance then sends a CoA to the client and applies the updated access policy.
When the detection is closed, HPE Mist Networking Access Assurance receives the updated status, triggers another CoA, and applies the corresponding updated access policy.