Onboard CA and SCEP Integration for JAMF-Managed Devices
Onboard CA Configuration in Juniper Mist Access Assurance provides a cloud-native SCEP service that integrates directly with JAMF for automated client certificate distribution. This eliminates the need for an external PKI and simplifies secure Wi-Fi onboarding with EAP-TLS authentication.
Juniper Mist Access Assurance provides Onboard Certificate Authority (CA) configuration, which delivers a fully managed Simple Certificate Enrollment Protocol (SCEP) infrastructure. When the Onboard CA is enabled, Access Assurance automatically provisions all the elements required for seamless JAMF integration—the Jamf SCEP URL, Jamf Access Token, and Jamf Webhook URL. With only these values, you can integrate JAMF with Juniper Mist Access Assurance without deploying or maintaining any external PKI or on-premises SCEP service. The Onboard CA certificate provided by Access Assurance is then used to configure a SCEP profile within JAMF, enabling secure client certificate issuance to enrolled devices.
By leveraging the Access Assurance SCEP infrastructure, you can automate the distribution of client certificates to JAMF-managed endpoints, binding them to Wi-Fi profiles for EAP-TLS authentication. This feature ensures that every device connecting to the network is authenticated through strong, certificate-based trust while fully managed from the Juniper Mist Access Assurance cloud.
To enable JAMF to leverage Juniper Mist Access Assurance as its SCEP infrastructure for client certificate distribution, follow these steps:
Enable Onboard CA Configuration
To enable the Onboard CA configuration:
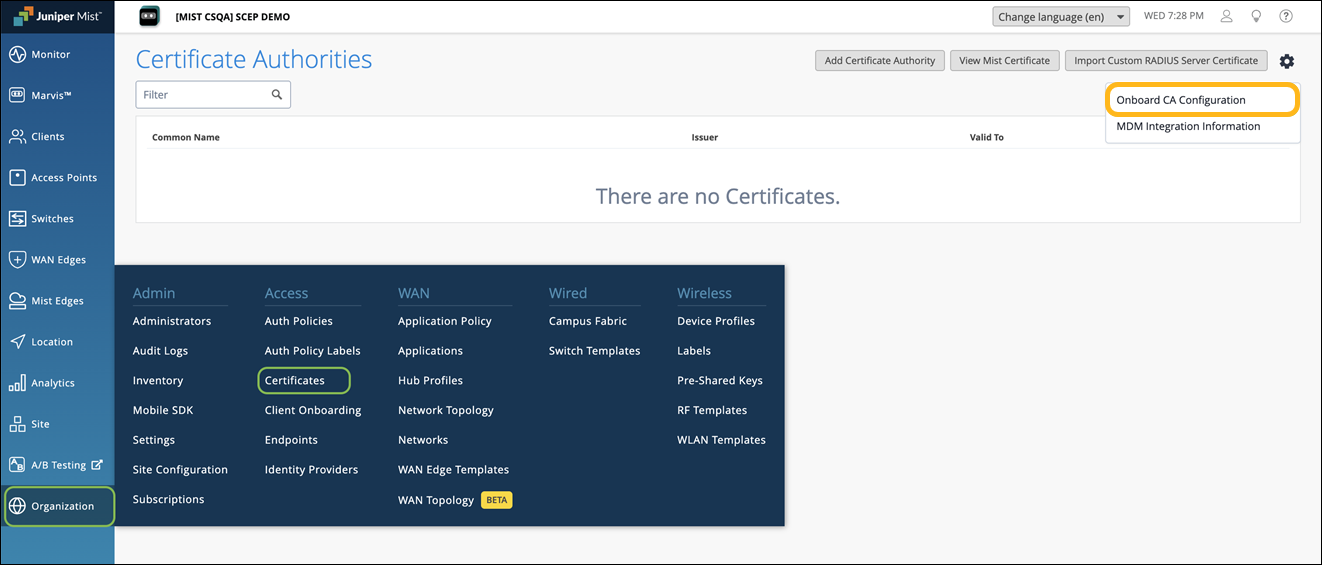
From the left menu of the Juniper Mist portal, select Organization > Access > Certificates.
The Certificate Authorities page appears.
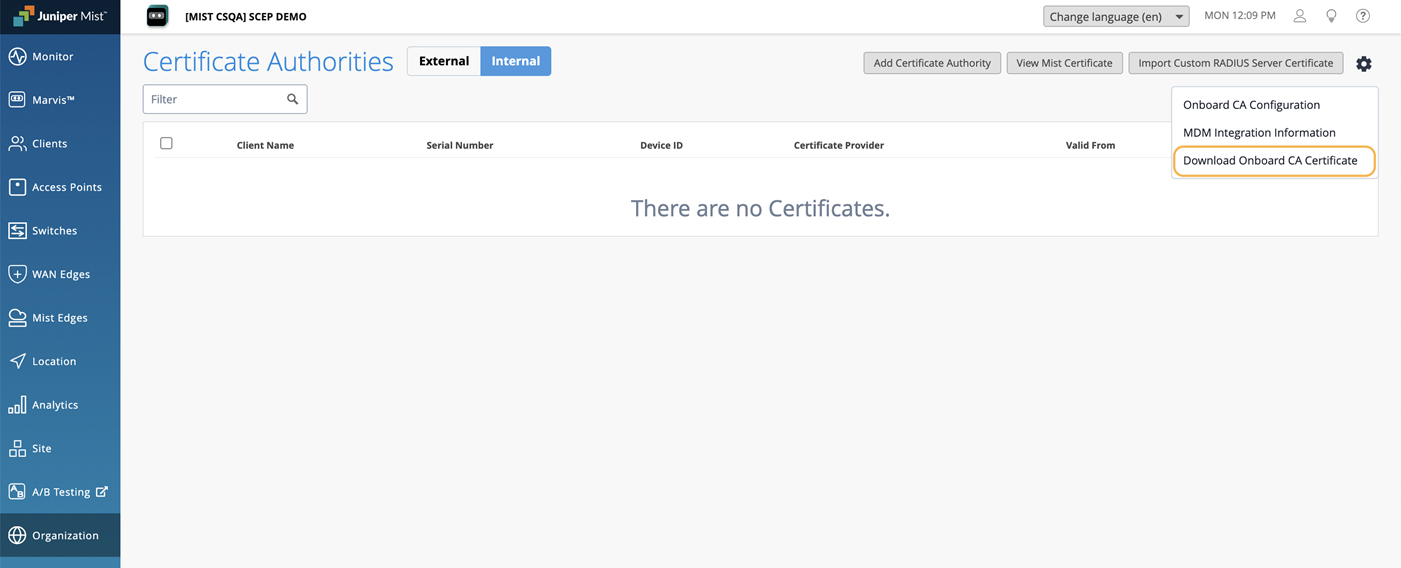
Click the settings icon on the upper-right corner of the page and select Onboard CA Configuration.
Select Active and click OK.

The onboard Certificate Authority service is enabled, and the respective SCEP endpoints are generated for each MDM.
When the Onboard CA configuration is activated, you’ll see the following tabs displayed:
External—Displays the details of the external CAs.
Internal— Displays the details of client certificates issued by the built-in CA through the NAC portal or MDM.
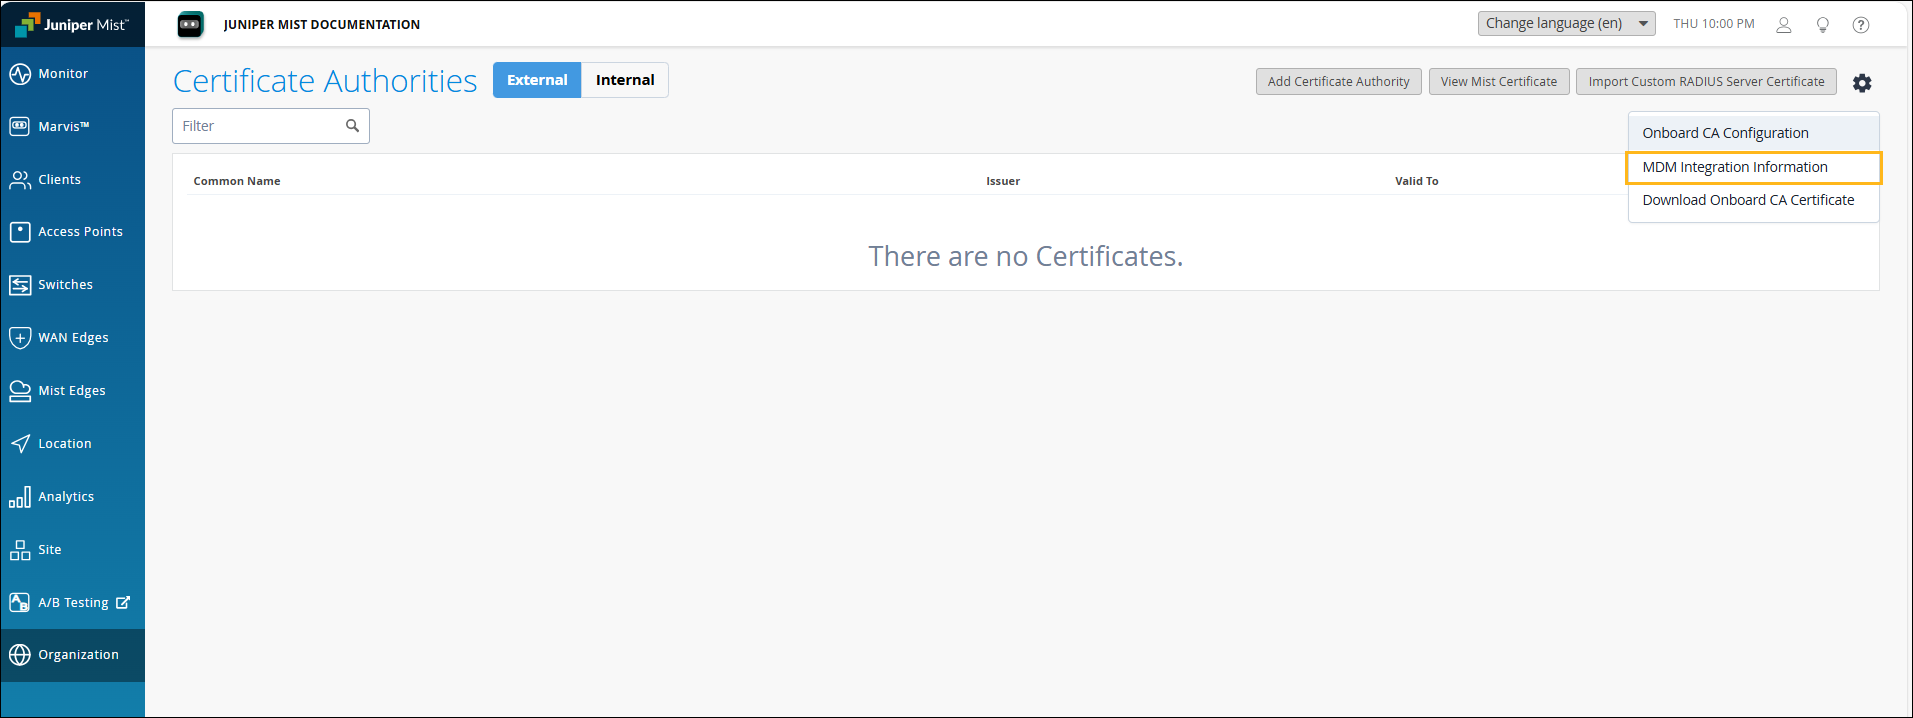
Click the settings icon on the upper-right corner of the page again and select MDM Integration Information.
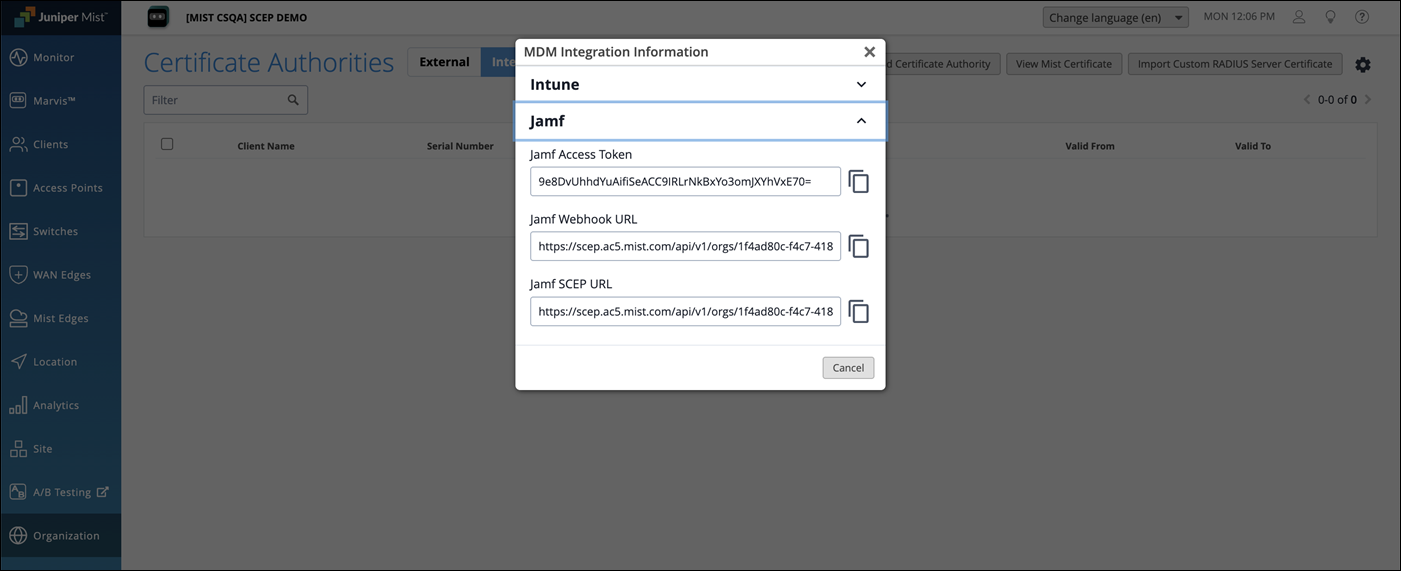
Copy the JAMF Access Token, JAMF Webhook URL, and JAMF SCEP URL. You'll need to use this URL in the JAMF SCEP profile.
Download the Onboard CA and Mist Org CA Certificates
The Mist Org CA certificate is required to configure JAMF managed clients to trust the RADIUS server certificate of the Mist Access Assurance service. The Onboard CA certificate is needed to configure the SCEP profile on JAMF.
Click the settings icon on the upper-right corner of the Certificates page and select Download Onboard CA Certificate. This certificate will be used as the SCEP certificate in Jamf.
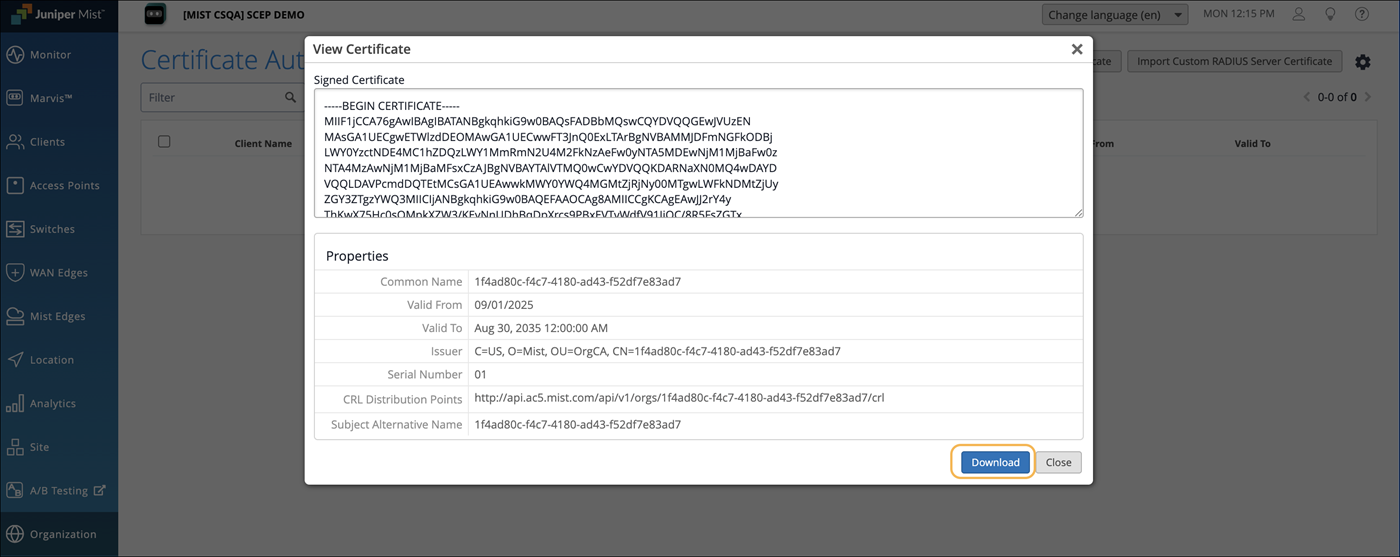
Navigate to Organization>Access>Certificates. Click View Mist Certificate and click Download. This certificate will be used as the Root certificate in Jamf.
 Note: If you are using a Custom RADIUS Server certificate, the Mist Org CA certificate is not required. You'll need to have the Root CA certificate of the Custom RADIUS Server certificate issuer.
Configure a JAMF Webhook
You'll need to configure a JAMF webhook to receive dynamically generated SCEP challenges for each certificate enrollment request.
The screenshots from third-party applications are correct at the time of publishing. We have no way to know when or if the screenshots will be accurate at any future time. Please refer to the third-party website for guidance about changes to these screens or the workflows involved.
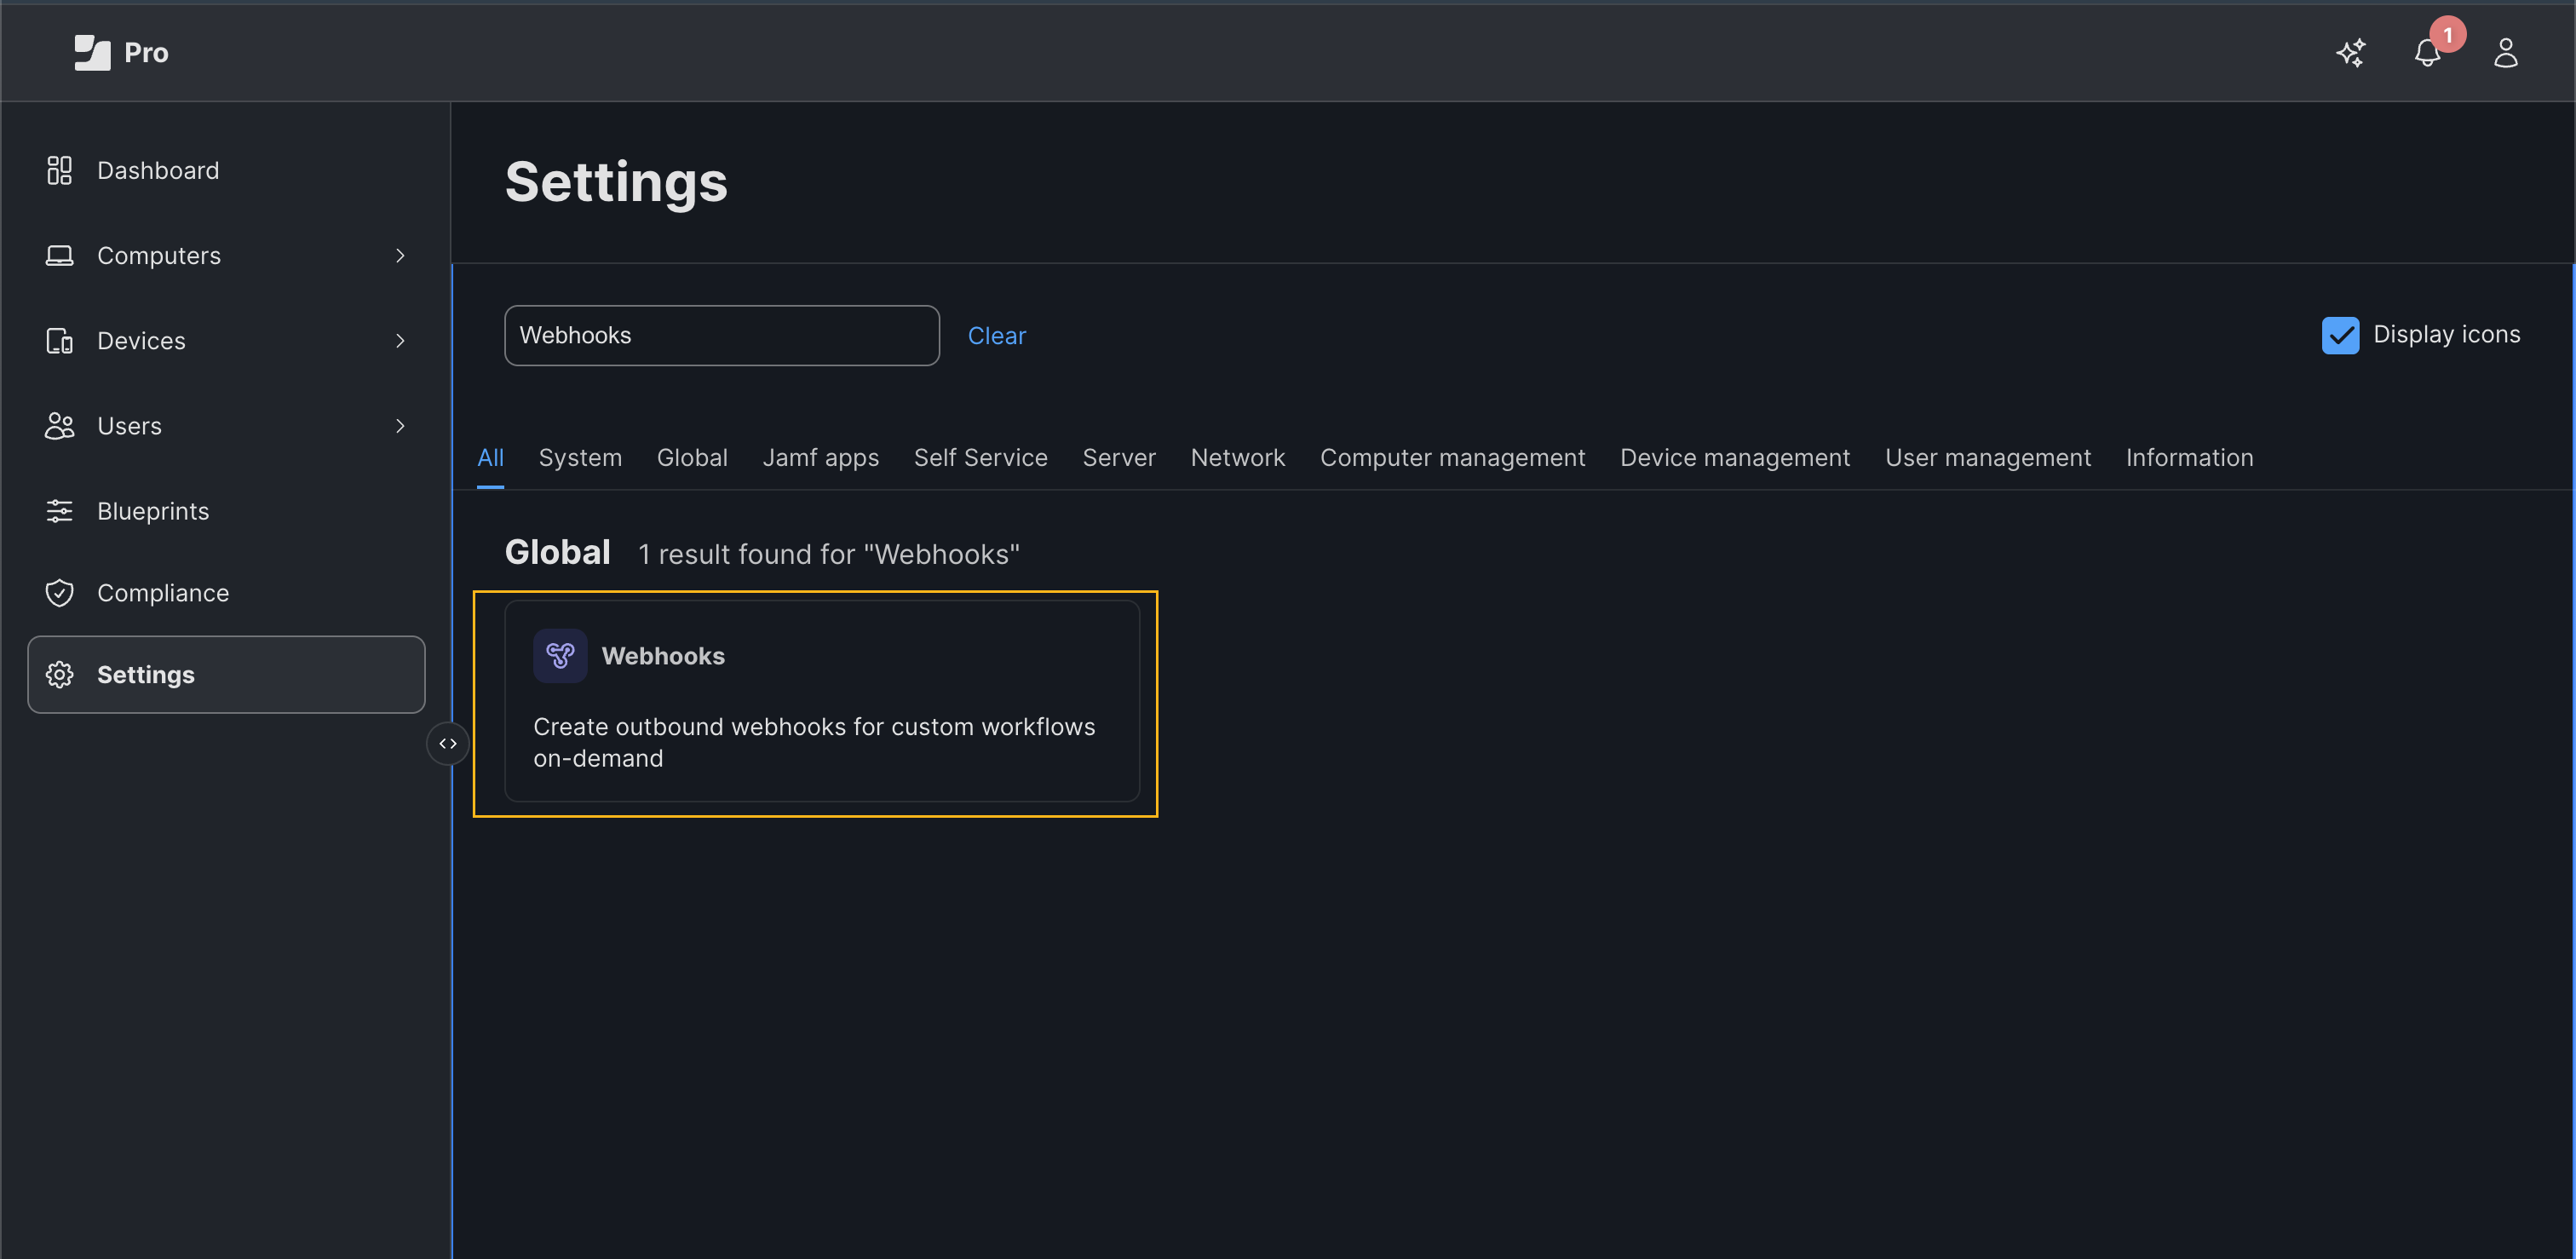
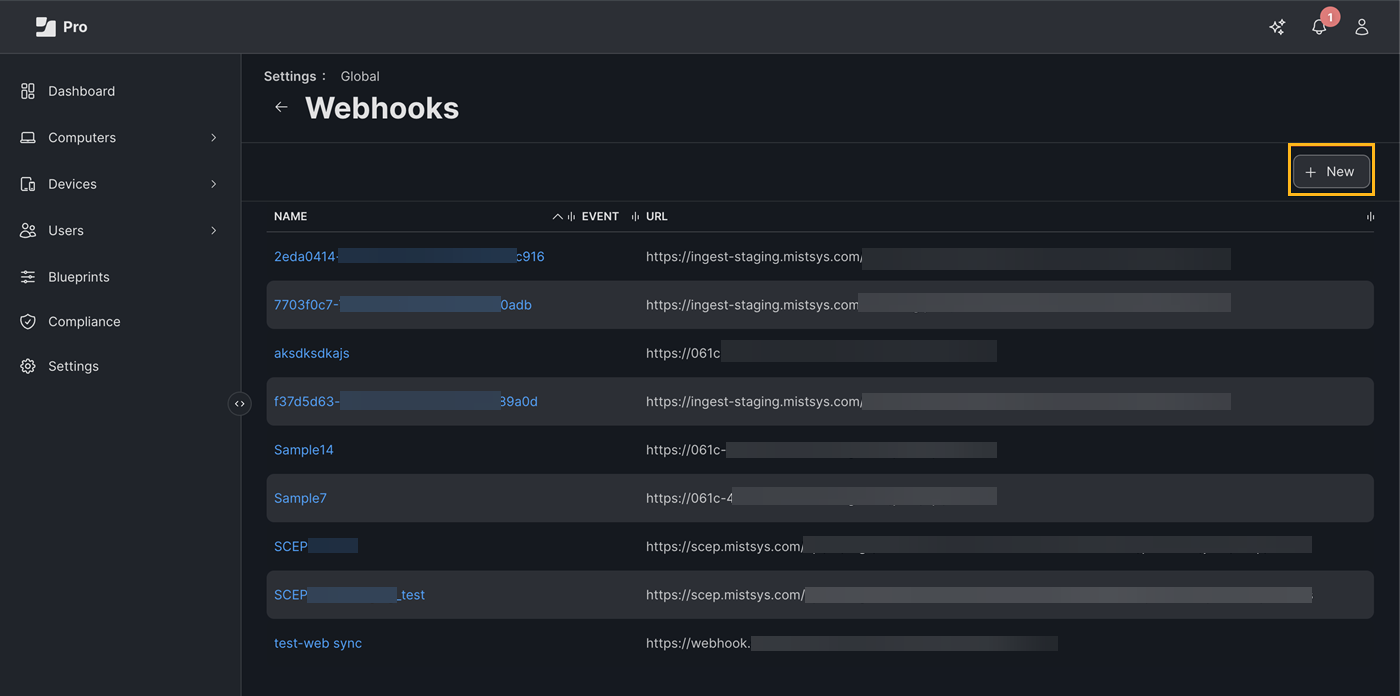
In the JAMF Pro dashboard, navigate to Settings>Webhooks, and click New.
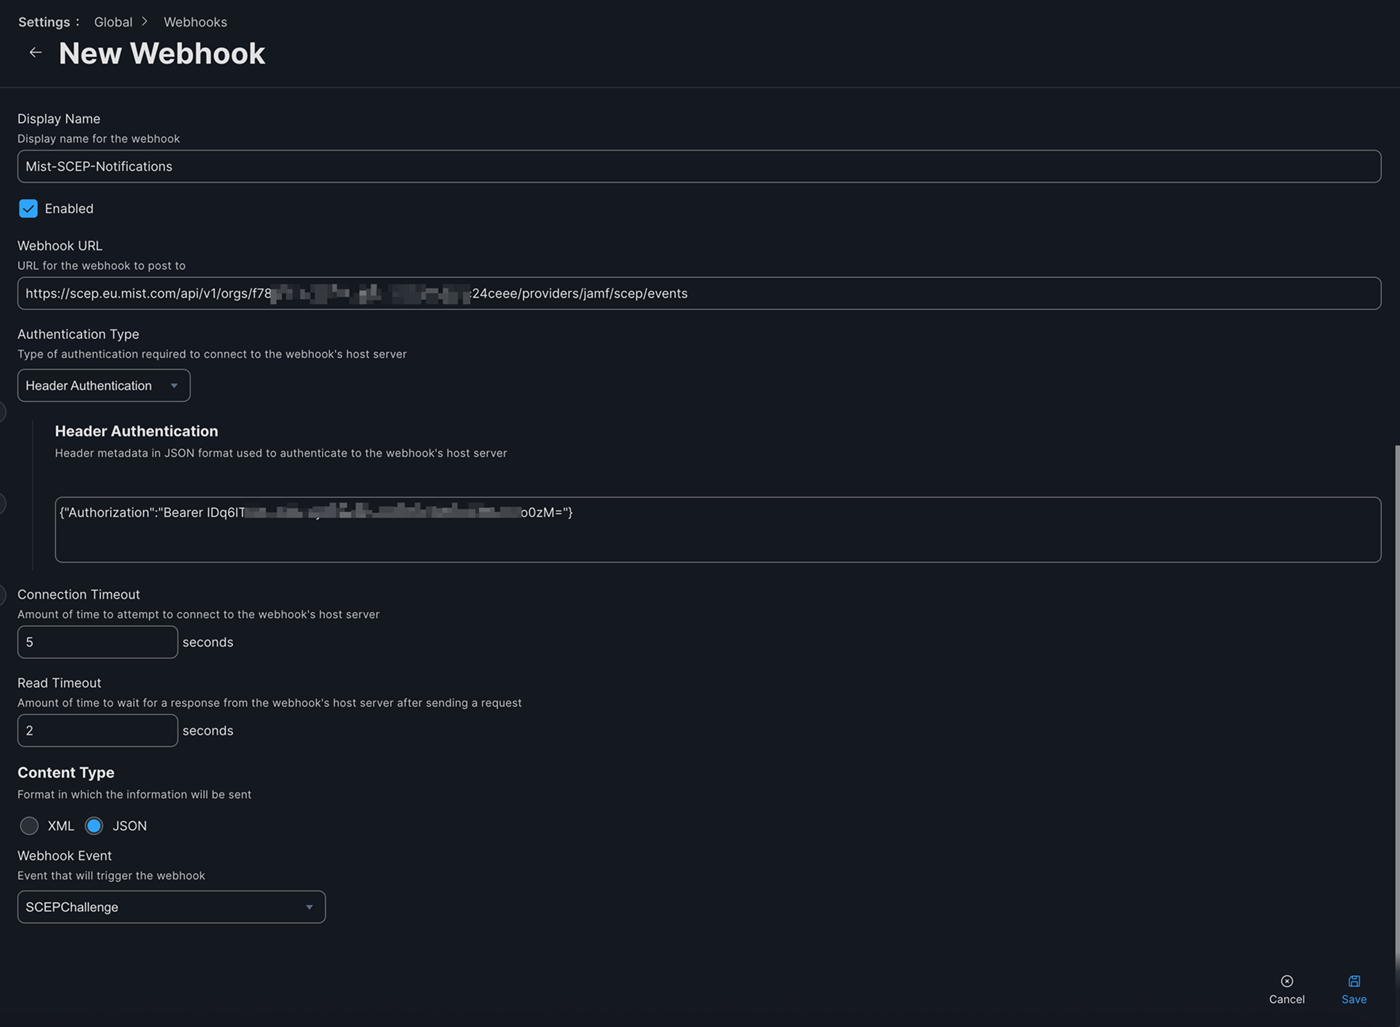
In the New Webhook page, enter the following information and click Save:
Display Name—Name for the webhook
Webhook URL.—Jamf Webhook URL that you copied earlier.
Authentication Type—Header Authentication
Header metadata—{"Authorization":"Bearer <Jamf Access Token"}
Connection Timeout—5 seconds
Read Timeout—2 seconds
Content Type—JSON
Webhook Event—SCEP Challenge
Create a Configuration Profile
We've used the macOS device as an example, but the steps are the same for iOS devices.
The screenshots from third-party applications are correct at the time of publishing. We have no way to know when or if the screenshots will be accurate at any future time. Please refer to the third-party website for guidance about changes to these screens or the workflows involved.
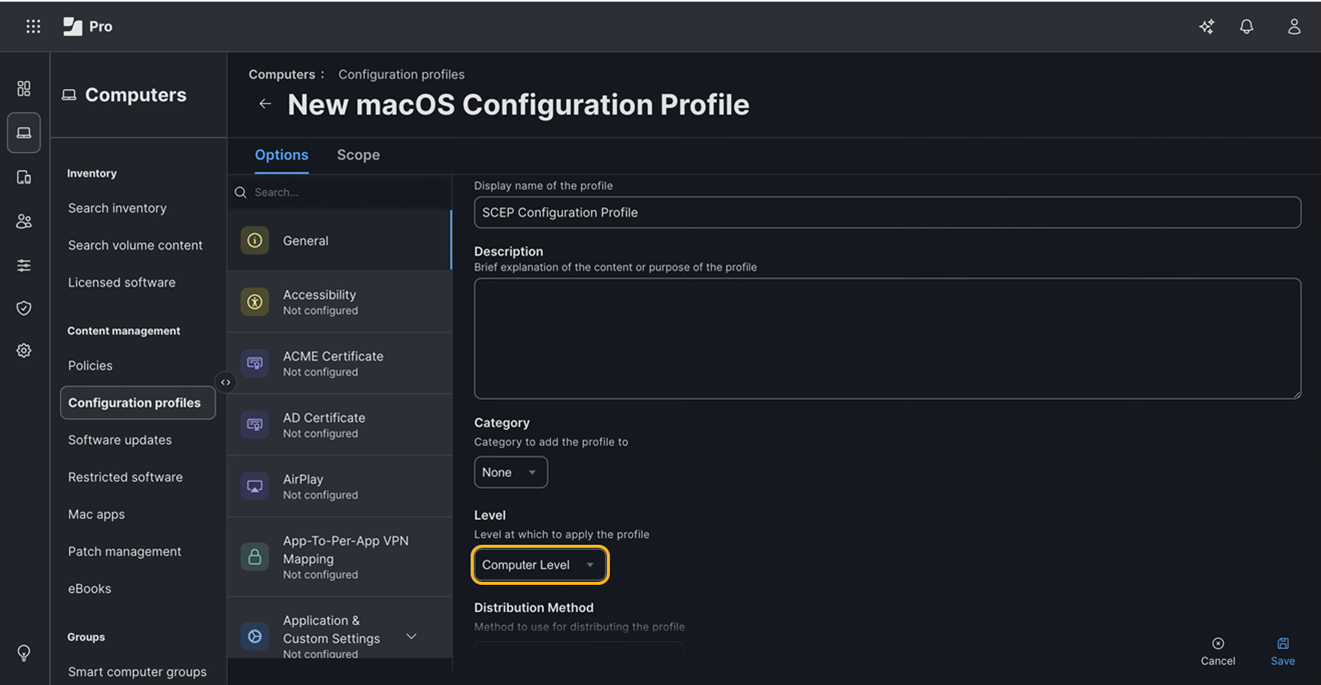
In the JAMF Pro dashboard, navigate to Computers >Configuration Profiles , and click New.

Ensure that the Level is set to Computer Level.
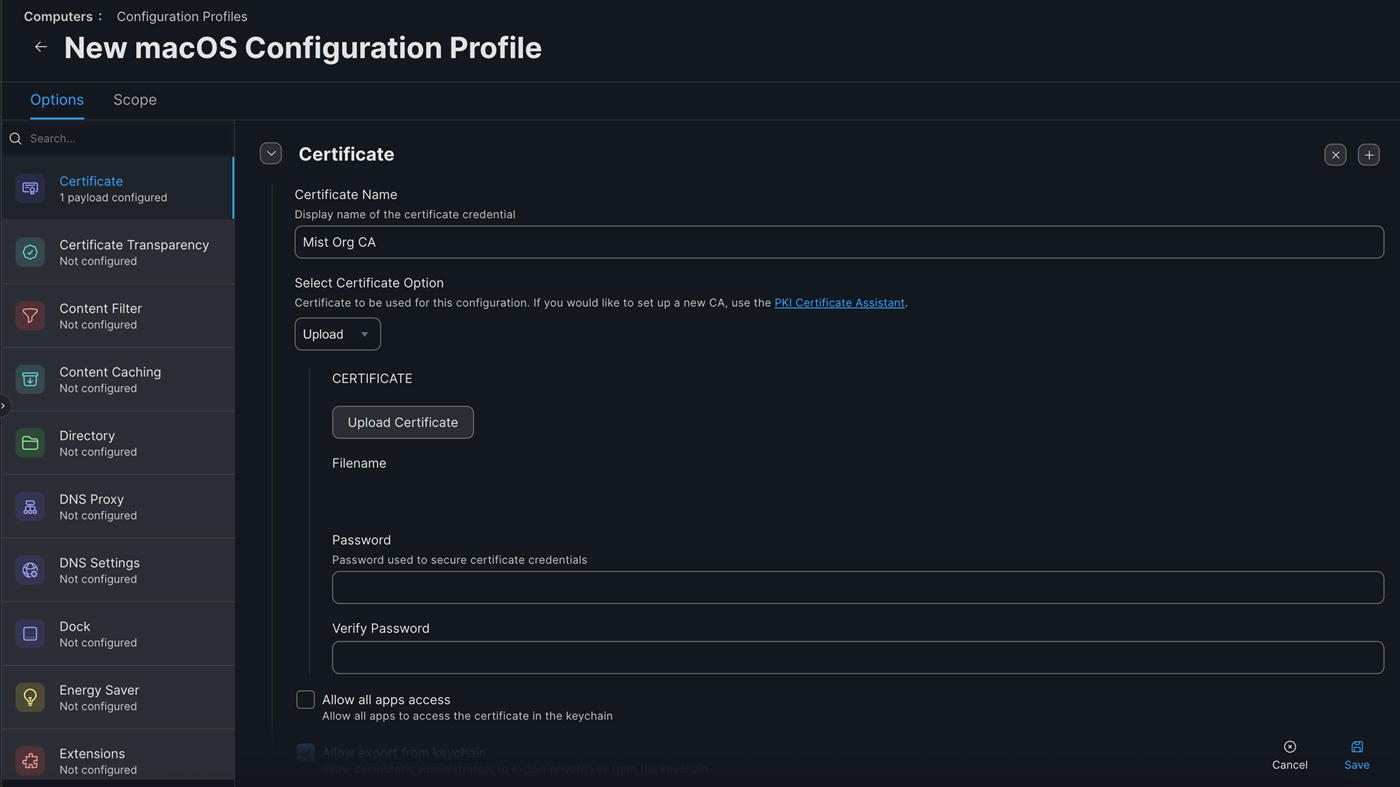
Select the Certificate tab, enter the following information and click Save:
Certificate Name
Click Upload Certificate and upload the Mist Org CA certificate that you downloaded earlier.
If you are using a Custom RADIUS Server certificate, the Mist Org CA certificate is not required. You'll need to have the Root CA certificate of the Custom RADIUS Server certificate issuer.
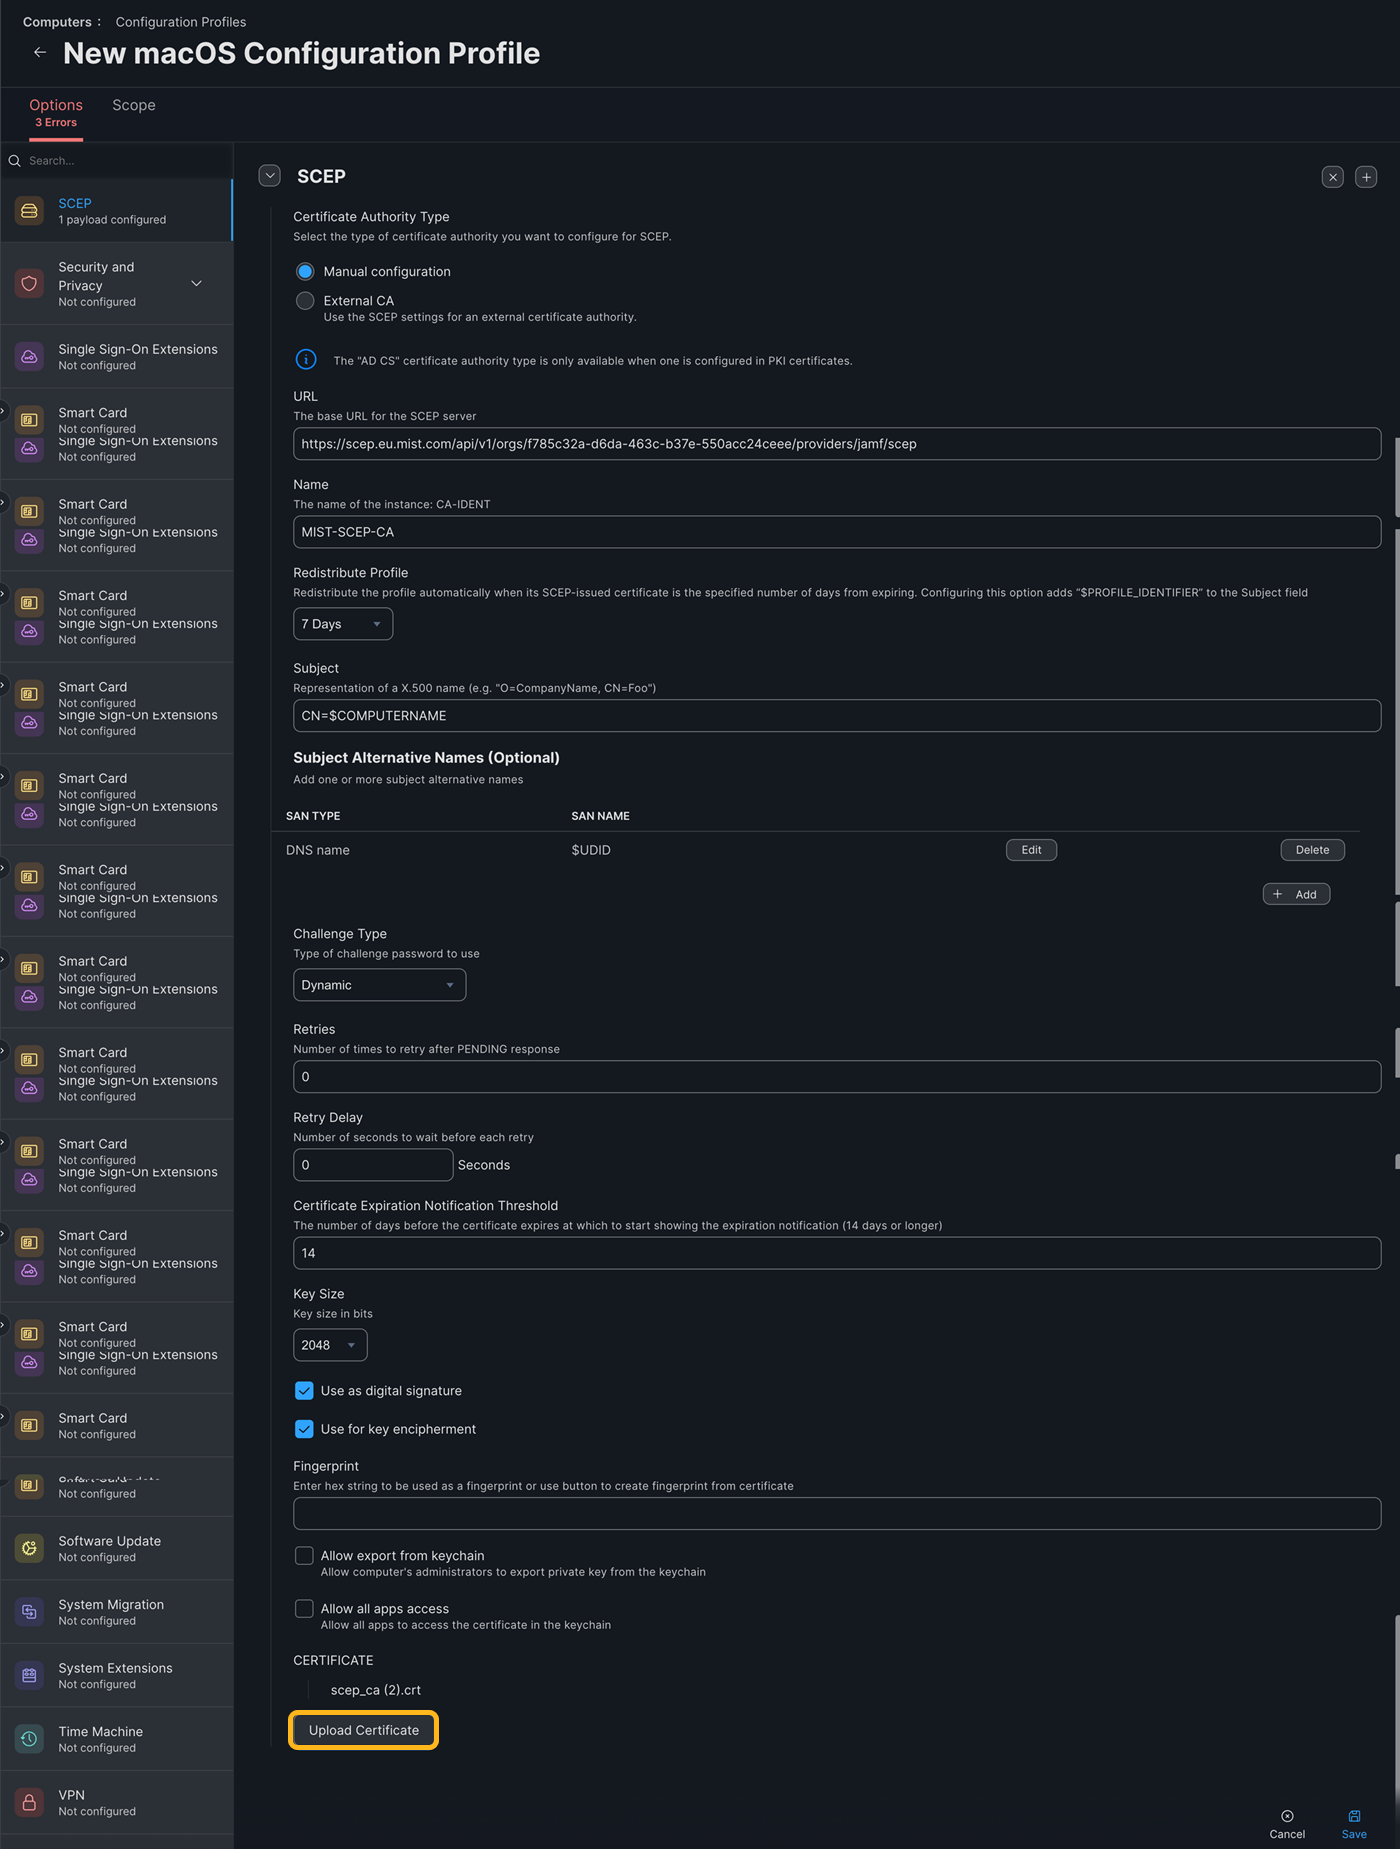
Select the SCEP tab, enter the following information and click Save:
- URL—Jamf SCEP URL
- Name—MIST-SCEP-CA
- Redistribute Profile—number of days before the certificate expiration date to push the profile again
- Subject—CN=$COMPUTERNAME
- SAN Type—add the DNS Name with value $UDIDNote:
Including the Device ID in the SAN:DNS field is mandatory because NAC uses this value for device identification and compliance checks.
- Challenge Type—Dynamic
- Retries—3
- Retry Delay—5
- Certificate Expiration Notification Threshold—number of days before the certificate expiration date to display the certificate expiration notification
- Key Size—2048
- Select the Use as digital signature checkbox
- Select the Use for key encipherment checkbox
- Do not select the Allow Export from keychain checkbox
- Certificate—Upload the Mist Onboard CA certificate that you downloaded in the earlier step.
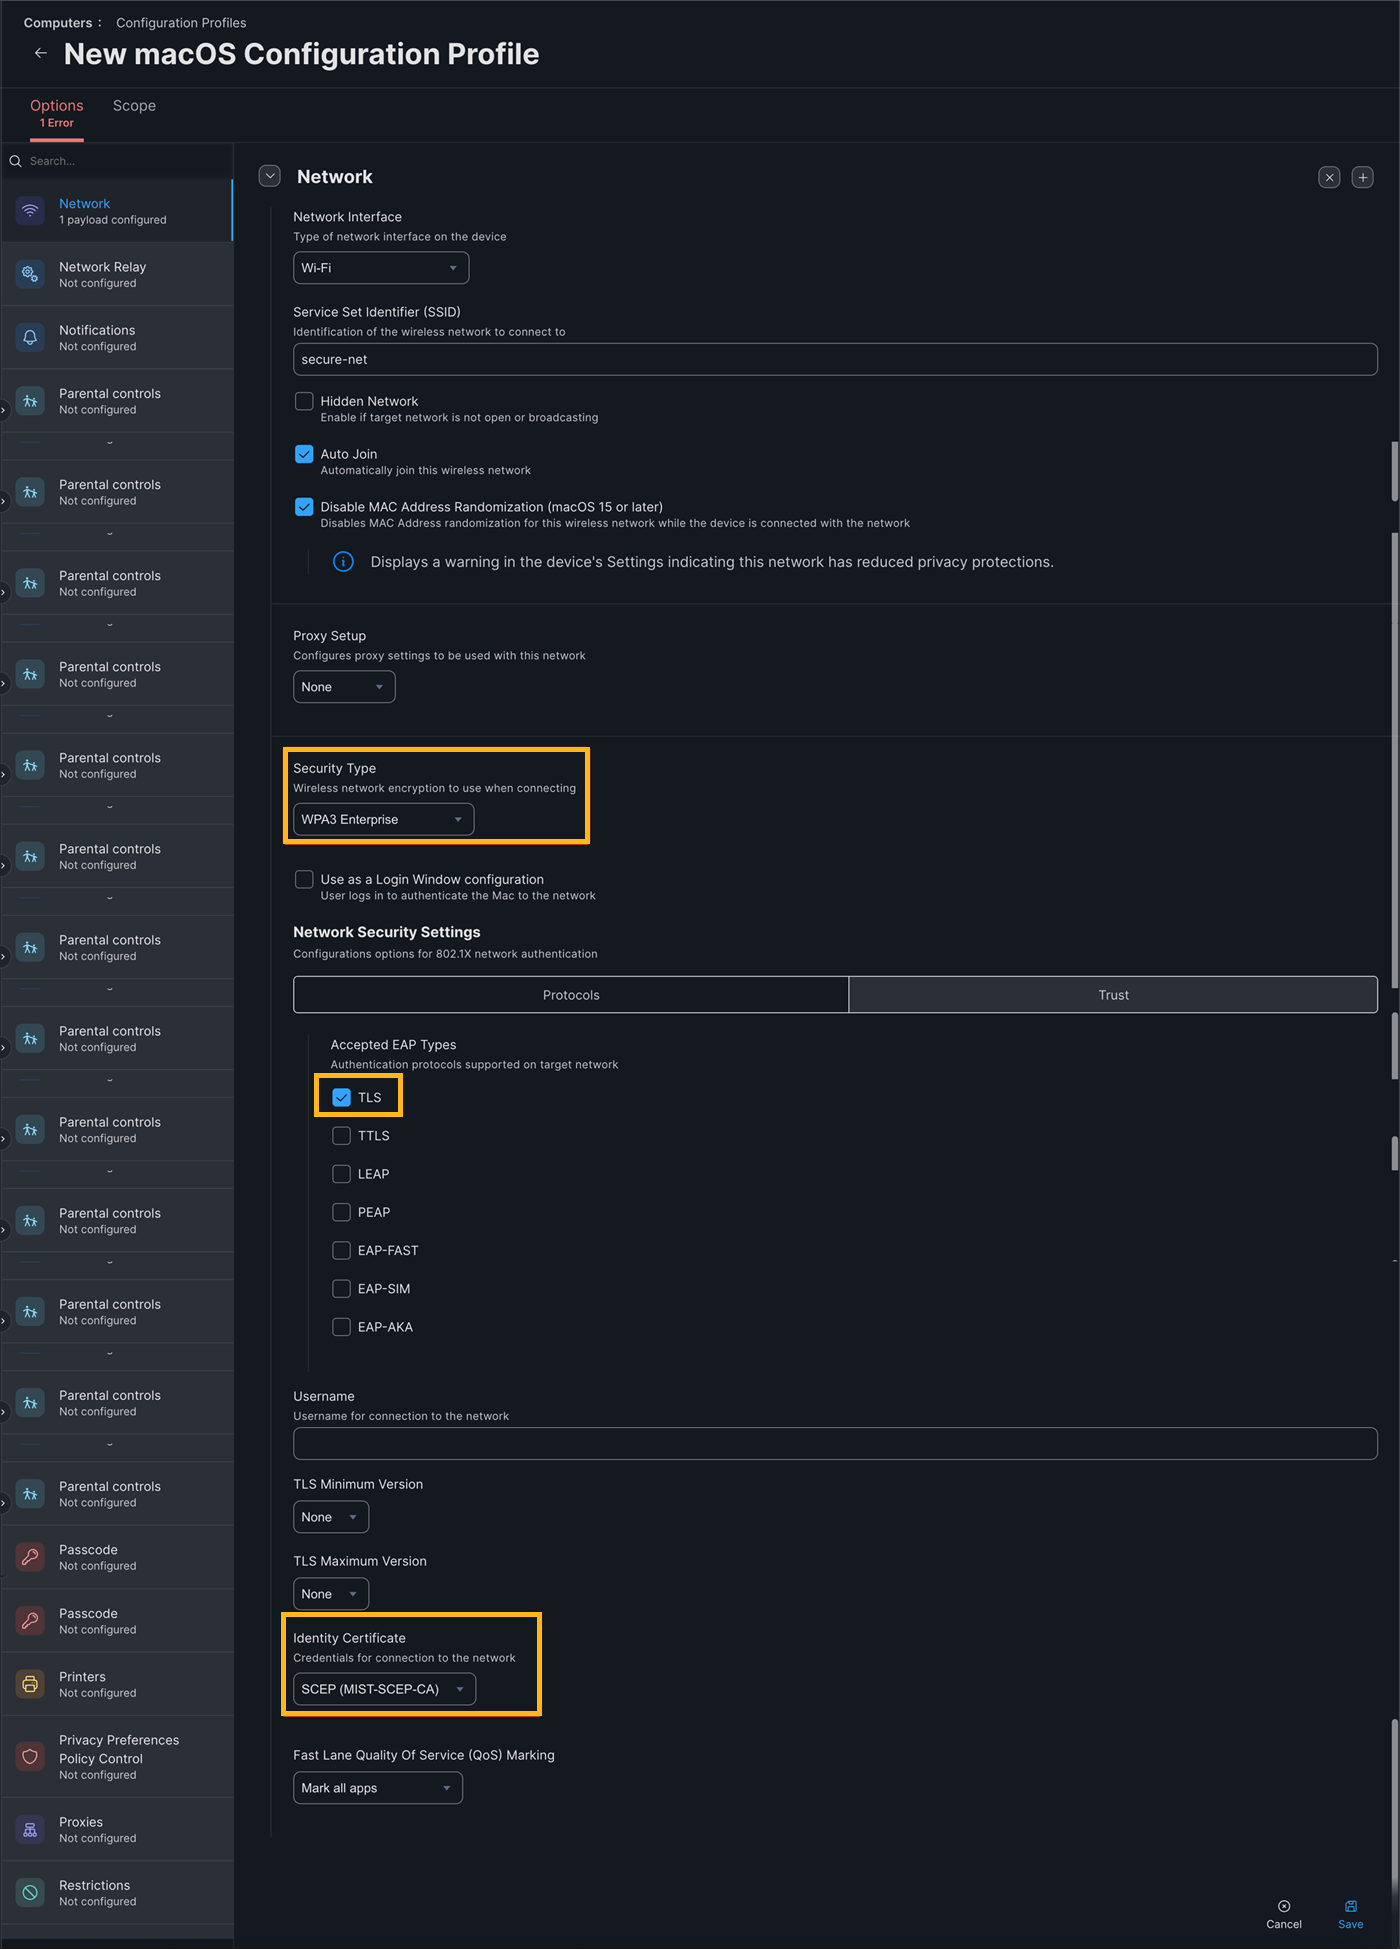
Select the Network tab, click Configure to enable the Wi-Fi profile. Enter the following information and click Save:
- SSID—Your SSID name
- Security Type—WPA2 or WPA3 Enterprise depending on your WLAN configuration
- Accepted EAP Types—TLS
- Identity Certificate—SCEP (MIST-SCEP-CA)
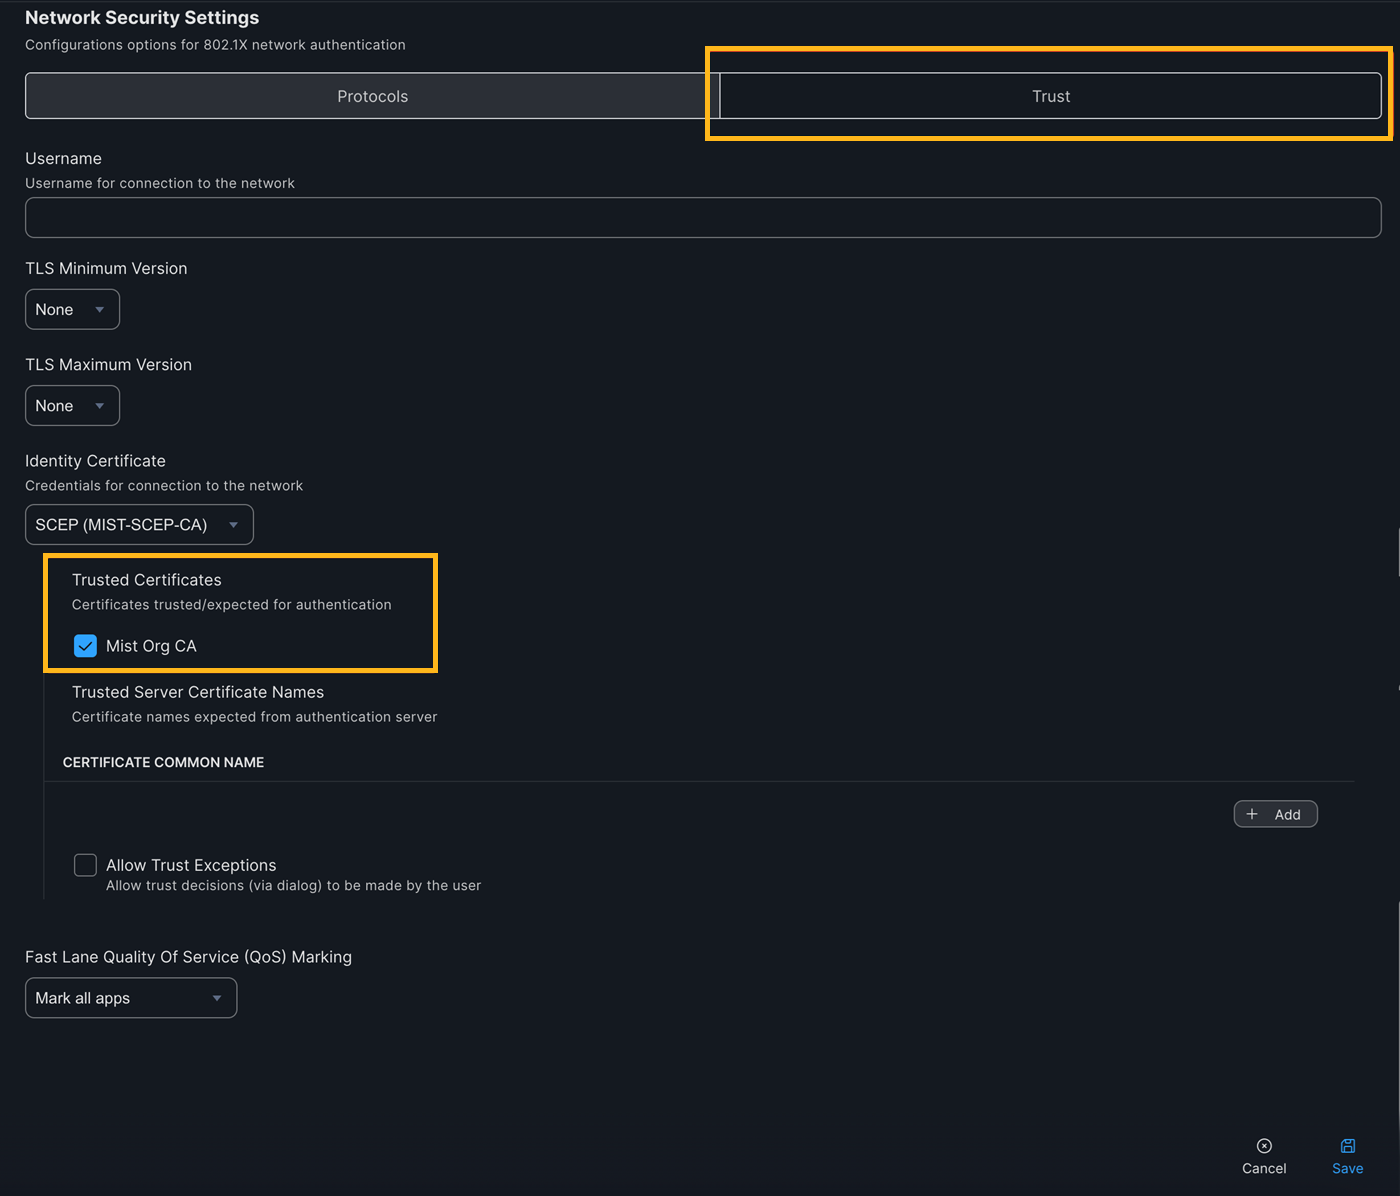
Ensure to select the Trust tab and check the Mist Org CA certificate for Server Certificate validation:
Select the Scope tab and assign the profile to your devices.
When the profile is pushed to the client, you'll see a new certificate issued to your macOS device under Keychain Access >My Certificates.
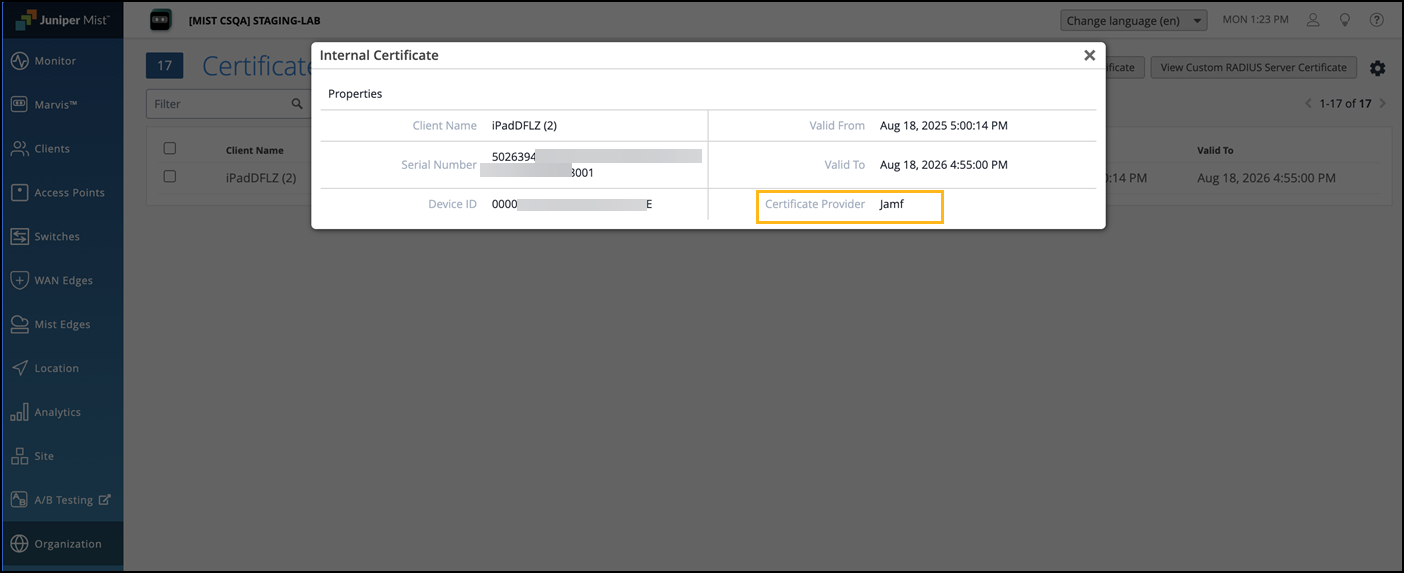
Switch to the Juniper Mist portal and confirm that the client certificate is issued under Certificates>Internal.
Configure Custom Client Certificate Validity in Mist SCEP for Jamf
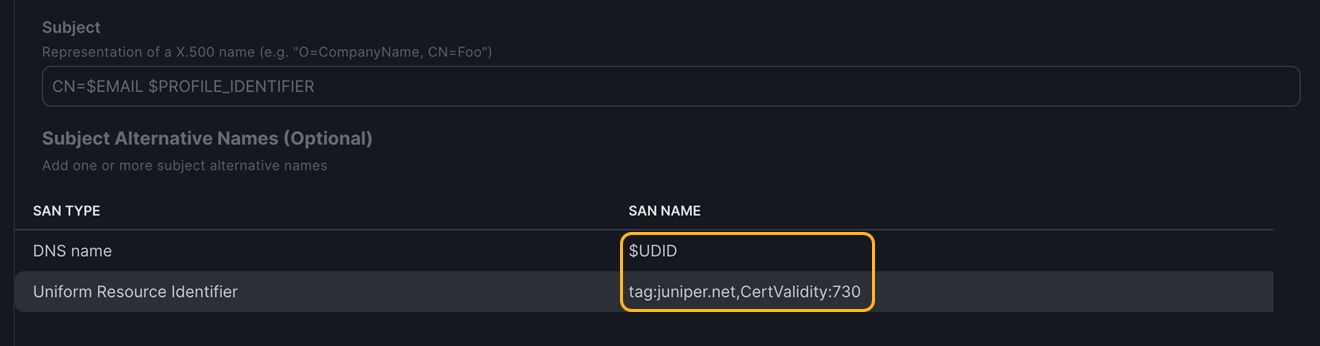
By default, client certificates issued through Jamf using Mist SCEP are valid for 1 year. To configure a custom certificate validity period, include a Uniform Resource Identifier entry in the Subject Alternative Name (SAN) field of the certificate profile. You must provide the following information:
-
SAN Type—add the DNS Name with value $UDID
-
Uniform Resource Identifier—enter the following:
tag:juniper.net,CertValidity:<validity-in-days>
For example: tag:juniper.net,CertValidity:730. In this example, the client certificate will be valid for 2 years from the certificate issuance date instead of the default 1-year validity period.