J-Web Interface—Application Package
This topic applies only to the J-Web Application package.
With the J-Web Application package, you can:
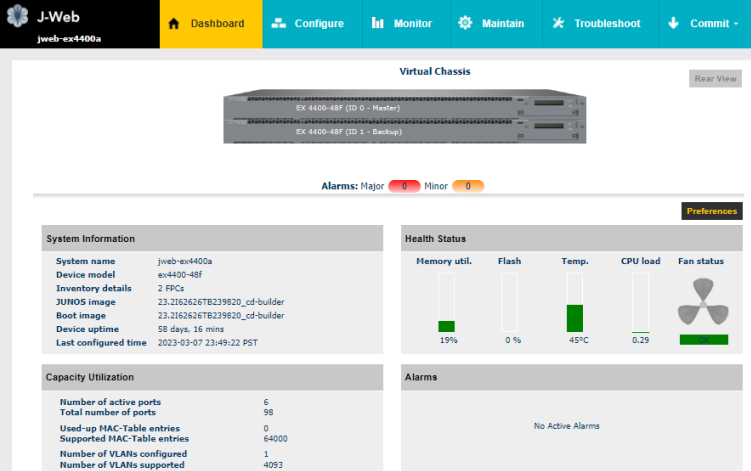
Get a high-level, graphical view of the chassis and the status of the switch, such as the system health information, alarms, or system status.
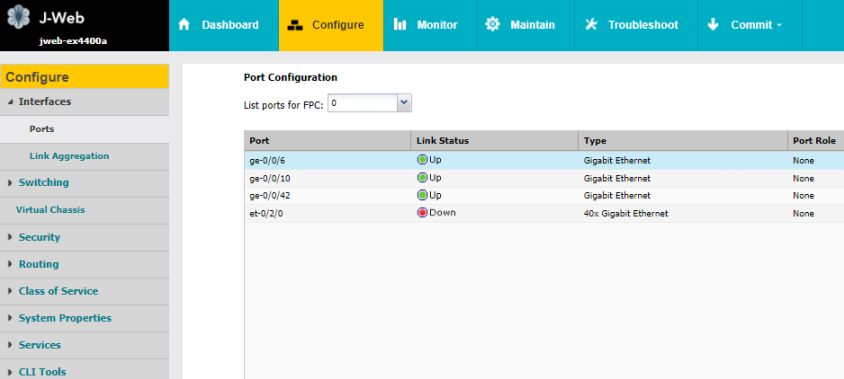
Configure the switch, and view the configuration history.
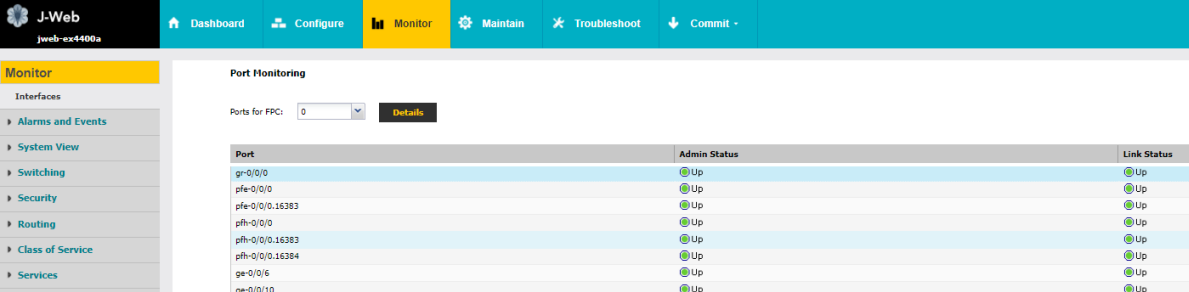
Monitor the switch by viewing information about configuration and hardware on the switch such as events, alarms, security, and routing options.
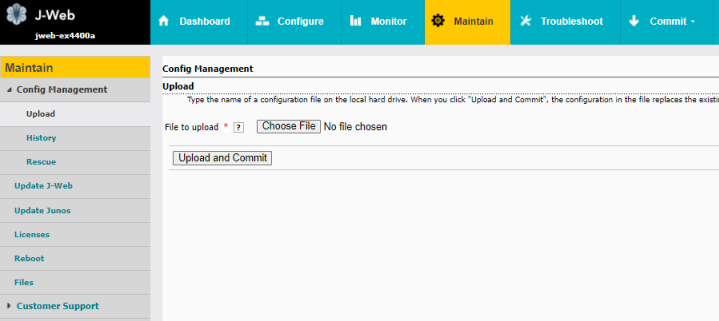
Maintain the switch by updating the J-Web interface, upgrading Junos OS, uploading configurations, managing licenses and files, or rebooting the switch.
Note:Juniper Networks devices require a license to activate the feature. Refer to the Licensing Guide for general information about License Management: Licenses for Network Management. To understand more about managing licences through J-Web, see Managing Licenses for the EX Series Switch (J-Web Procedure).
Troubleshoot network issues by running diagnostic tools. Troubleshoot interface configuration and faults by using ping, traceroute, or packet capture, or by using the CLI terminal.
J-Web Application Package—First Look
Each page of the J-Web interface is divided into panes (see Figure 1).
Top pane—It is located at the top of the page and displays the J-Web logo and hostname, tasks–Dashboard, Configure, Monitor, Maintain, Troubleshoot, Commit, Update Available logo (if available), and username and Help.
Side pane—It is located on the left side of the page. It displays suboptions of the tasks–Configure, Monitor, Maintain, or Troubleshoot – currently selected in the top pane. Click a suboption to access it in the work area.
Work area—This is the main work area of the J-Web interface, located below the top pane and to the right of the side pane. It displays various text boxes, selection boxes, buttons and other options corresponding to the suboption that you select in the side pane. It is the location where you monitor, configure, and manage (maintain) the switch.

The layout of the panes enables you to quickly navigate through the interface. Table 1 summarizes the elements of the J-Web interface.
The J-Web interface provides CLI tools that enable you to perform all of the tasks that you can perform from the Junos OS CLI, including a CLI Viewer to view the current configuration, a CLI Editor for viewing and modifying the configuration, and a Point & Click CLI editor that enables you to click through all of the available CLI statements.
Element |
Description |
|---|---|
| Top Pane | |
J-Web Hostname |
The J-Web logo and hostname of the switch. |
Taskbar—Dashboard |
Dashboard—Use the dashboard to view system information. When you log in to the J-Web user interface, the dashboard for the Juniper Networks EX Series Ethernet Switches appears. Figure 2: Example of the J-Web Dashboard Tab
|
|
Taskbar—Configure |
Configure the switch, and view the configuration history. Figure 3: Example of the Configure Tab
|
|
Taskbar—Monitor |
View information about configuration and hardware on the switch such as events, alarms, security, and routing options. Figure 4: Example of the Monitor Tab
|
|
Taskbar—Maintain |
Update the J-Web interface, upgrade Junos OS, upload configurations, manage licenses and files, and reboot the switch. Figure 5: Example of the Maintain Tab
|
|
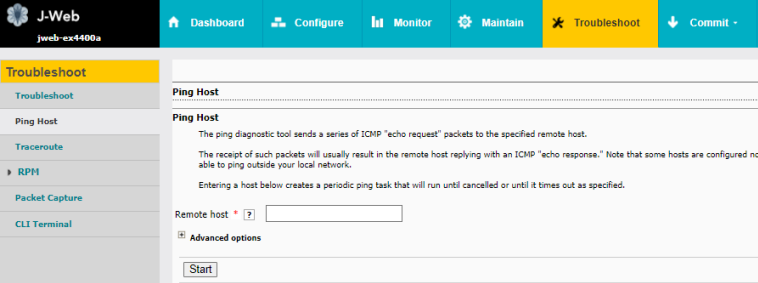
Taskbar—Troubleshoot |
Run diagnostic tools to troubleshoot network issues. Troubleshoot interface configuration and faults by using ping, traceroute, or packet capture, or by using the CLI terminal. Figure 6: Example of the Troubleshoot Tab
|
Commit Options |
A set of options using which you can configure committing multiple changes with a single commit.
|
Update Available |
This icon message appears only if there is a J-Web Application package update available on the Juniper Networks server. Mouse over the icon to know the latest version of J-Web Application package available on the Juniper Networks server. Click on the icon to update the J-Web Application package. |
username |
The username you used to log in to the switch. The down arrow option displays the Logout option. Logout ends your current session and returns you to the login page. |
Help |
Displays links to help topics and information about the J-Web interface.
|
Icon legend |
(Applies to the Point & Click CLI editor only) Explains icons that appear in the user interface to provide information about configuration statements:
|
| Work Area | |
Configuration hierarchy |
(Applies to the Junos OS CLI configuration editor only) Displays the hierarchy of committed statements in the switch configuration.
|