ON THIS PAGE
Example: Using the REST API Explorer
This example demonstrates how to optionally use the REST API Explorer on a Junos OS device on which the REST API has been configured.
Requirements
-
A routing, switching, or security device running a supported version of Junos OS is required.
| Behavior | Platform Notes |
|---|---|
| REST API Explorer operation | No platform-specific behavior |
Overview
The REST API Explorer allows you to conveniently test out single or multiple RPC calls. Its GUI provides you with options to select the HTTP method (GET or POST), the required output format (XML, JSON, or plain text), the RPC URL, the input data type when using POST requests (XML or plain text), and an exit-on-error condition.
In Junos, both GET and POST can be used to execute a single operational RPC (such as get-software-information). While both methods can retrieve the same information, POST is required when you need to execute multiple RPCs or include XML data in the request body (using the -d option).
When you submit the request, the REST API Explorer displays the request header, response header, response body, and equivalent cURL request, all of which are useful to your development efforts.
Configuration
To use the REST API Explorer on any device on which the REST API has been configured, perform these tasks:
- Enabling the REST API Explorer
- Opening the REST API Explorer
- Executing a Single RPC Using an HTTP GET Request
- Executing a Single RPC Using an HTTP POST Request
- Executing Multiple RPCs
- Viewing Error Messages
Enabling the REST API Explorer
Step-by-Step Procedure
To enable the REST API Explorer:
Configure the REST API on the device.
See Configuring the REST API and Example: Configuring the REST API for information and examples.
Check whether the REST API Explorer is enabled.
Use the
showcommand to see ifenable-explorer;appears in the REST API configuration. If it appears, the REST API Explorer has been enabled. If it does not appear, you must enable the REST API Explorer.[edit] user@R1# show system services rest http; traceoptions { flag all; } enable-explorer;Enable the REST API Explorer if necessary.
Use the
setcommand to ensure thatenable-explorer;appears in the REST API configuration.[edit] user@R1# set system services rest enable-explorer
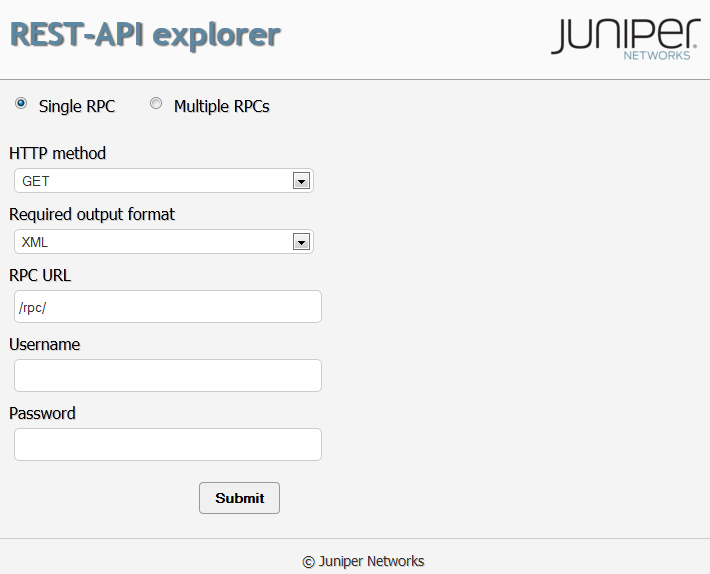
Opening the REST API Explorer
Step-by-Step Procedure
To open the REST API Explorer:
Ensure that the REST API Explorer is enabled, open a browser, and go to the following URL: scheme://device-name:port (for example, https://mydevice:3000).
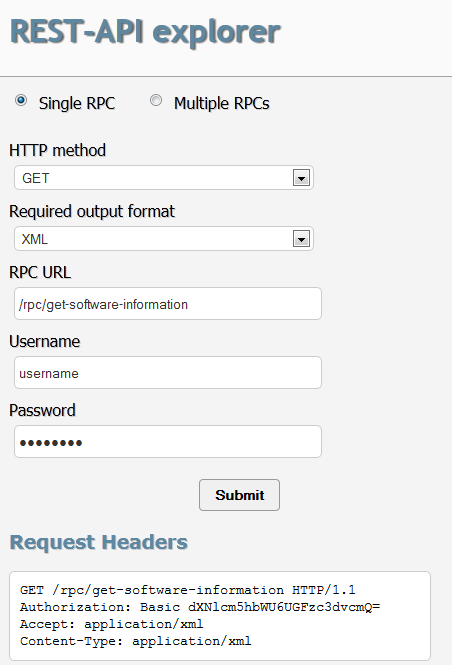
Executing a Single RPC Using an HTTP GET Request
Step-by-Step Procedure
To execute a single RPC using an HTTP GET Request:
In the HTTP method drop-down list, select GET.
Enter the RPC URL endpoint.
For example, type
/rpc/get-software-information.Enter your username and password.
Click Submit.
In this example, the default output format, XML, is returned in the Response Body:
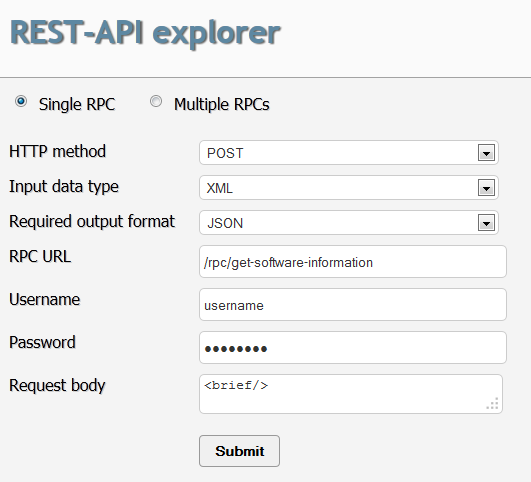
Executing a Single RPC Using an HTTP POST Request
Step-by-Step Procedure
To execute a single RPC using an HTTP POST Request:
In the HTTP method drop-down list, select POST.
In the Required output format drop-down list, select JSON.
Enter this RPC URL endpoint:
/rpc/get-software-information.Enter your username and password.
Enter the XML-formatted request in the Request body text area.
For example:
<brief/>
Click Submit.
In this example, the JSON output format is returned in the Response Body:
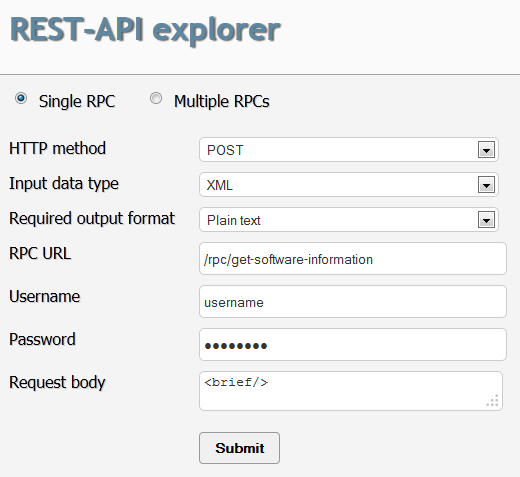
If you prefer a different output format, select one of the available choices in the Required output format drop-down list.
For example, you could select Plain text. When you click Submit, you will see plain text in the Response Body:
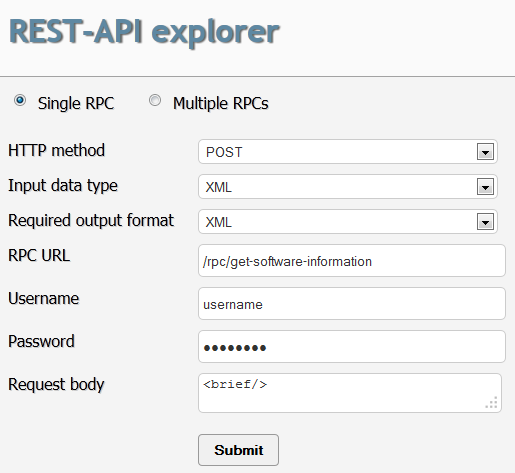
Similarly, if you select XML in the Required output format drop-down list, the response body will contain XML-formatted information:
Executing Multiple RPCs
Step-by-Step Procedure
To execute multiple RPCs:
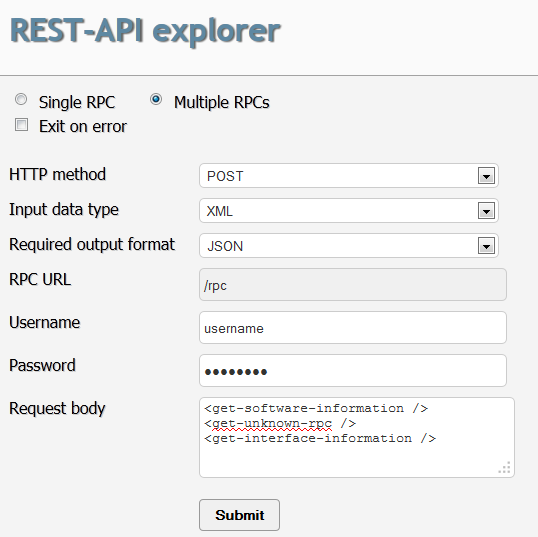
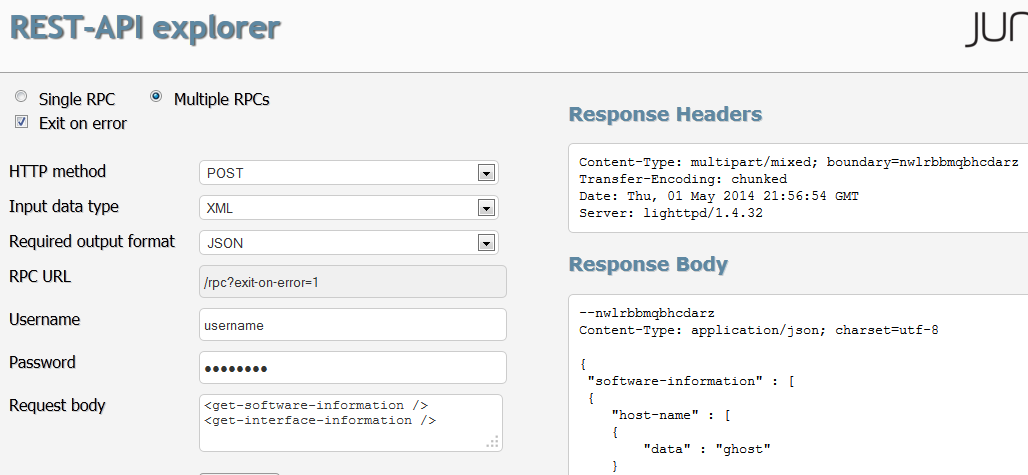
In the HTTP method drop-down list, select POST.
This is always required when executing multiple RPCs.
To set a conditional exit in the event of an error, select the Exit on error checkbox.
Select an output format in the Required output format drop-down list.
For example, you could select JSON.
This RPC URL endpoint will automatically populate:
/rpc?exit-on-error=1.Enter your username and password.
Enter the XML-formatted request in the Request body text area.
For example:
<get-software-information />
<get-interface-information />
Click Submit.
In this example, the JSON output format is returned in the Response Body:
Viewing Error Messages
Step-by-Step Procedure
When executing multiple RPCs, an error might occur. If you select the Exit on error checkbox, an error message will appear in the output if an error occurs.
To view error messages:
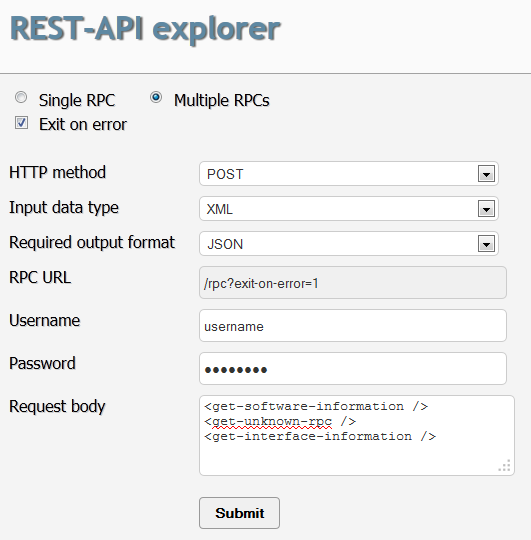
In the HTTP method drop-down list, select POST.
This is always required when executing multiple RPCs.
To set a conditional exit in the event of an error, select the Exit on error checkbox.
Select an output format in the Required output format drop-down list.
For example, you could select JSON.
This RPC URL endpoint will automatically populate:
/rpc?exit-on-error=1.Enter your username and password.
Enter the XML-formatted request containing an error in the Request body text area.
For example:
<get-software-information />
<get-unknown-rpc />
<get-interface-information />
Click Submit.
In this example, the JSON output format is returned in the Response Body, and you can see an XML-formatted error message at the end of the Response Body:
If you do not select the Exit on error checkbox, an error message will appear in the Response Body if an error occurs.
Execution will continue after the error is processed, and the results will also be included in the Response Body: