Help us improve your experience.

Let us know what you think.

Do you have time for a two-minute survey?


Connecting a Junos Space Appliance to the Network

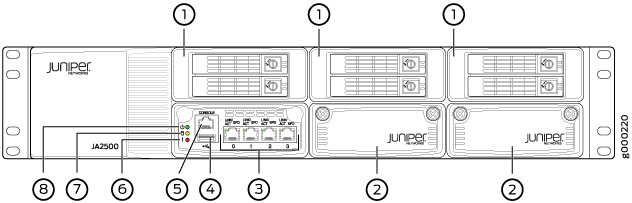
Though the Junos Space Appliance has four Ethernet interfaces, only three can be used; one of the Ethernet interface is reserved for future use. On the JA2500 appliance, the Ethernet interfaces that can be used are labeled 0, 1, and 3. The 2 Ethernet interface is reserved for future use.

For more information about Junos Space Ethernet interfaces, see Junos Space Ethernet Interfaces Overview.

To connect the appliance to the network, do the following:

  1. (Optional) Attach an electrostatic discharge (ESD) grounding strap to your bare wrist and connect the strap to an external ESD point.
  2. Plug one end of the Ethernet cable into the port labeled 0, as shown in Figure 1, on the front panel.
    Figure 1: JA2500 Appliance Front PanelJA2500 Appliance Front Panel
  3. (Optional) If you are using eth1 interface, take an Ethernet cable and plug one end of the Ethernet cable into the port labeled 1 and the other end into the network that contains the Junos Space nodes in the fabric.
  4. Plug the other end of the Ethernet cable into the network.
    Note:

    If you choose to connect the JA2500 appliance to more than one Ethernet interfaces, then you should plug the other end of the Ethernet cable into the network that contains the Web UI clients and the other Junos Space nodes in the fabric.