Help us improve your experience.

Let us know what you think.

Do you have time for a two-minute survey?


Add an L2 Circuit Service Instance

As a superuser or network administrator, you can use Routing Director to provision Layer 2 (L2) circuit services in your network. An L2 circuit is a virtual point-to-point L2 connection between two CE devices through a packet-switched network such as Multiprotocol Label Switching (MPLS), in the service provider's network. The CE devices running the same L2 protocol (such as Ethernet) connect to PE devices in the service provider network through a physical or logical attachment circuit.

Note:

LDP signaling without BGP autodiscovery is the only variant of L2 circuit that is supported in this release.

When you create and save an L2 circuit service instance, Routing Director saves the service as a candidate. A candidate is a draft version of a service instance that is saved but not provisioned in the network. You can modify and review the candidate before provisioning it as a service instance. Each service instance can have only one candidate at a time. After you provision the service instance, Routing Director activates the automated workflow for fulfilling the service order and provisions the service in the network.

Figure 1 illustrates the high-level workflow for provisioning an L2 circuit.
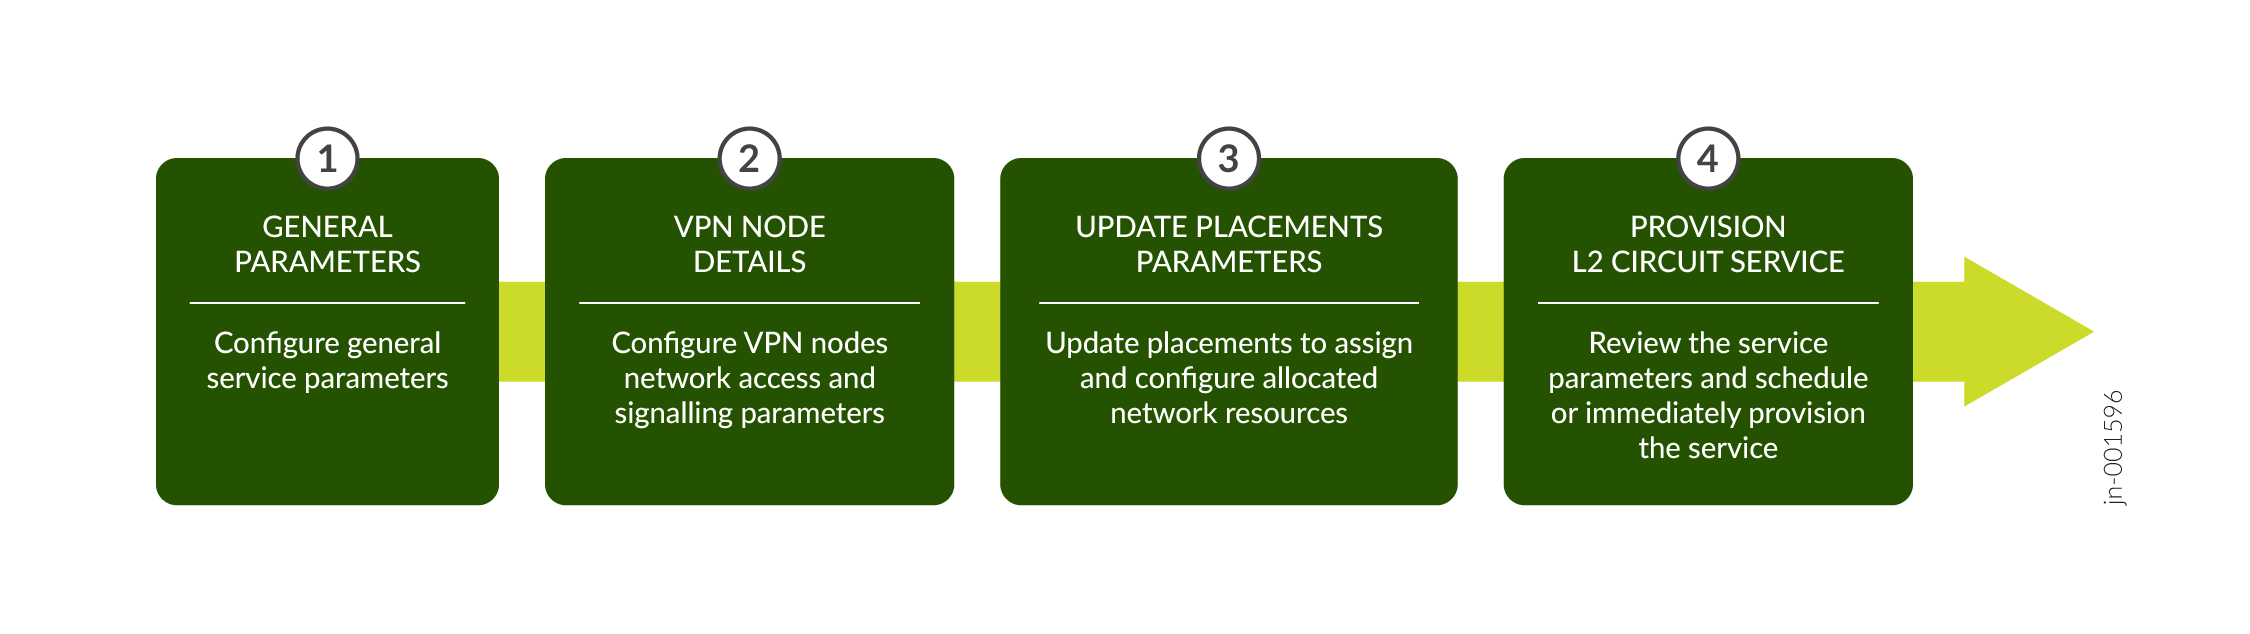
Figure 1: L2 Circuit Provisioning Workflow L2 Circuit Provisioning Workflow

To create an L2 circuit service instance, either upload a preconfigured JSON file or enter the details in the GUI fields on the Add E-Line L2Circuit NSM page.

To create an L2 circuit service instance:

  1. Click Orchestration > Instances.

    The Service Instances page appears.

  2. Click + > E-Line L2Circuit NSM.

    The Add E-Line L2Circuit NSM page appears.

  3. In the General section, enter the values by referring to Table 1.
    Note:

    Fields marked with an asterisk (*) are mandatory.

    Table 1: Fields on the Add E-Line L2Circuit NSM General Page

    Field

    Description

    Upload JSON File

    Click Browse to upload a preconfigured JSON file.

    You see a message that the file is successfully imported. The values specified in the file are automatically populated in the corresponding UI fields.

    Customer*

    Enter the name of the customer for whom you are provisioning the service:

    • If you already added the customer name by using the Customer Inventory page (Orchestration > Service > Customers), click the Customer field to see a drop-down with the customer names that you added. Select the customer name from the drop-down list.

    • Alternatively, click the Add Customer link to create a new customer. See Add a Customer.

    The customer name must be unique within an organization. For example, network-operator.

    Instance name*

    Enter a name for the service instance. For example, l2ckt-171.

    The instance name can be a set of alphanumeric characters and the special character hyphen (-). The maximum number of characters allowed is 64.

    Pinned Reservation

    Configure the service to use reserved resources (pinned resources).

    Brownfield

    Enable this flag if this is a brownfield service. When enabled, this service would be provisioned by using resources reserved for migrating brownfield services to Routing Director.

    Customer

    Enable this flag to allow the service to be provisioned by using resources that are exclusively reserved for the customer associated with this service.

    Instance

    Enable this flag to allow the service to be provisioned by using resources that are exclusively reserved for this service.

    Service Settings

    Enter common settings applicable for the service.

    VLAN Settings

    Enable to enter VLAN settings applicable for the service. This option is disabled, by default.

    S-VLAN

    Enter the S-VLAN ID for the L2 circuit service.

    Enable VLAN mappings for the service when you configure a valid S-VLAN ID.

    Range: 1 through 4096.

    Preserve C-VLAN

    Enable this option to preserve the customer VLAN (C-VLAN) for the L2 circuit. This configuration enables clear separation of customer traffic across the network while supporting C-VLAN preservation or translation, as required.

    When enabled, the C-VLAN ID is retained and carried across the service. On ingress, the service adds the S-VLAN using a push operation while preserving the C-VLAN. On egress, the service removes the S-VLAN using a pop operation.

    When disabled, the service performs a VLAN swap operation. The C-VLAN is translated to the S-VLAN, replacing the ingress C-VLAN with the S-VLAN. On egress, the service performs the reverse swap and translates S-VLAN back to the C-VLAN.

  4. Click Next to proceed to the VPN Nodes page of the Add E-Line L2Circuit NSM wizard. See Add L2 Circuit VPN Nodes.
  5. Configure post update placement parameters for the Add E-Line L2 Circuit NSM service. See Add L2 Circuit Service Post Update Placements Parameters.
  6. View summary of the Add E-Line L2 Circuit NSM service and then save and provision the service. See View Summary and Provision an L2 Circuit Service.