Help us improve your experience.

Let us know what you think.

Do you have time for a two-minute survey?


Install vLWC and Verify Installation

SUMMARY This section explains how you can install the vLWC vApp on a VMWare environment and verify your installation.

Install vLWC using vCenter Server

To install the vLWC vApp using the vCenter Server:
  1. Login to the vCenter Server using your username and password in the vSphere Client.
  2. Click Menu > Hosts and Clusters.

    The Hosts and Clusters page opens. This page lists all your data centers and clusters on the left pane.

  3. Right-click your data center and click Deploy OVF Template... from the Actions menu.

    The Deploy OVF Template page opens.

  4. Depending on where your OVA file is available, select the URL option and provide the URL to the OVA file, or select the Local file option and click Choose Files to browse the local drive and upload the vLWC OVA image. Click Next.

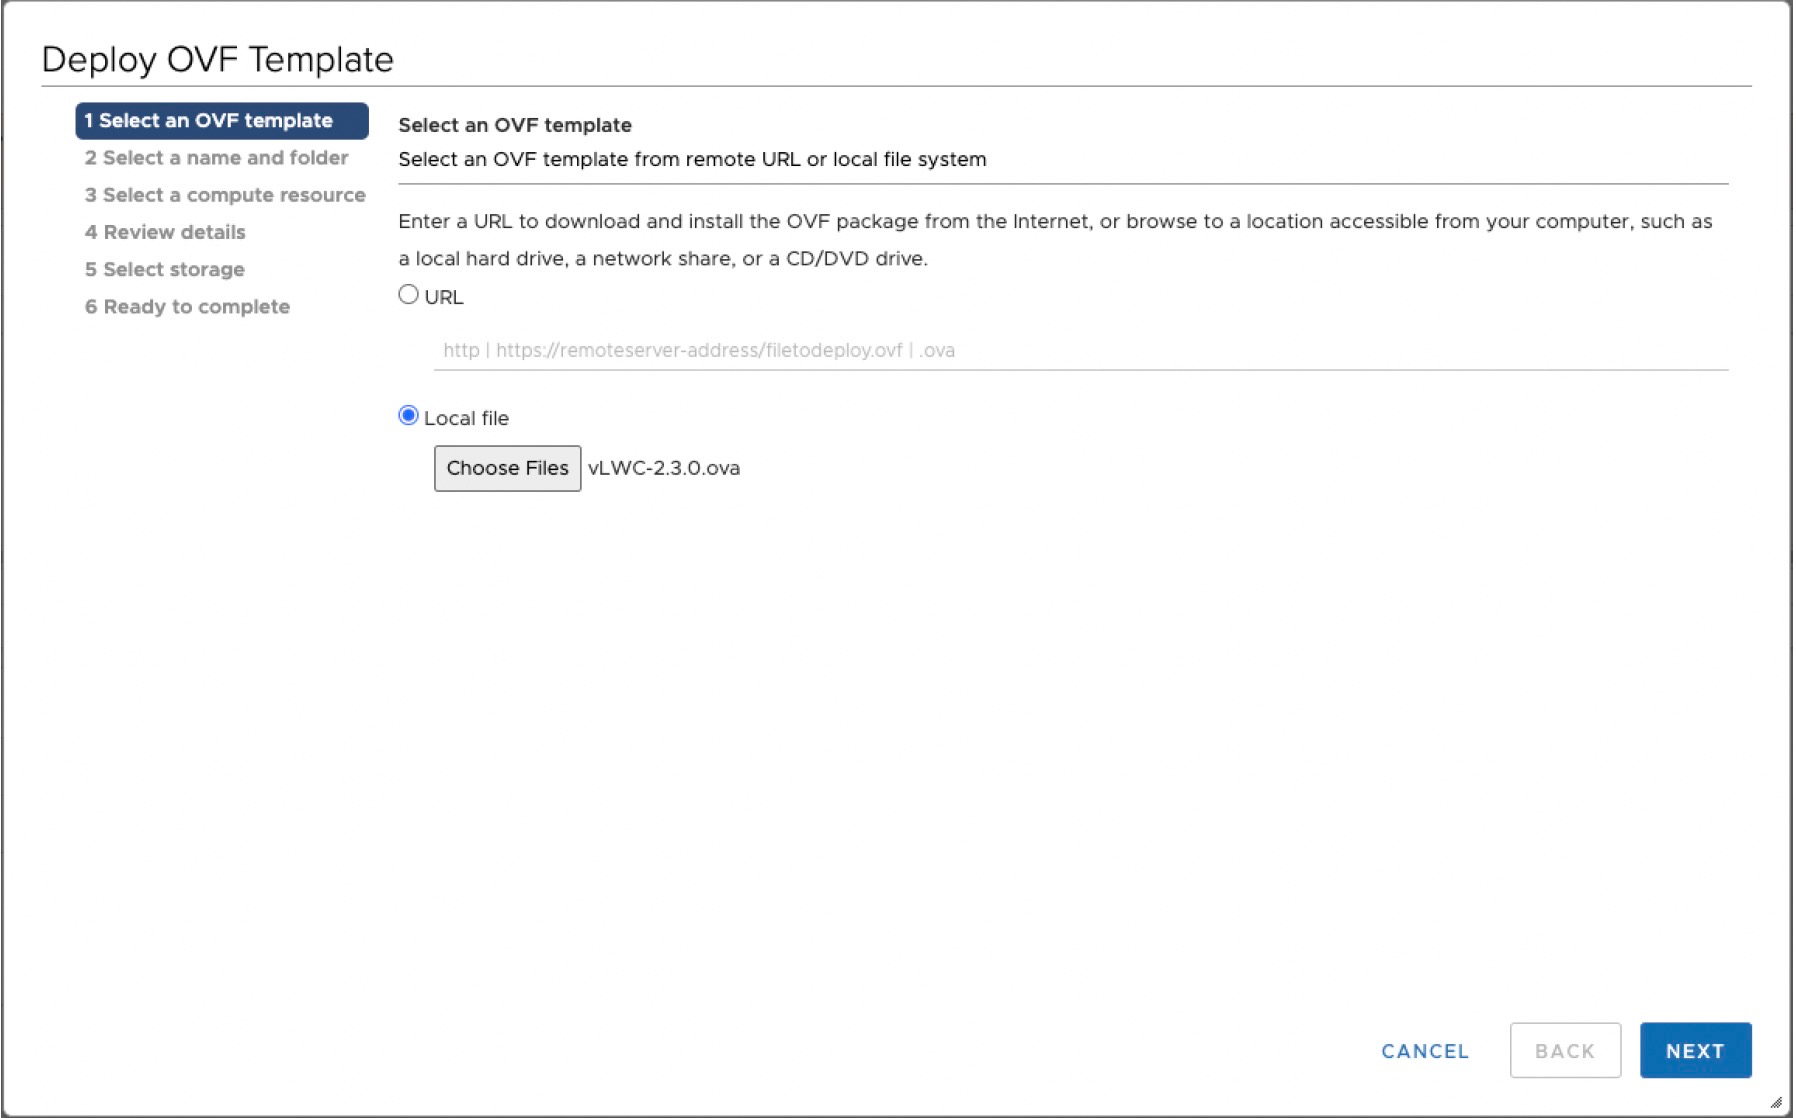
    The Select a name and folder page opens.

  5. Enter a unique name for the vLWC vApp. Select the data center where you want the vApp installed and click Next.
    The Select a compute resource page opens.
    The vLWC vApp name that you enter is for easy identification only, and has no effect on the vLWC. The default vLWC vApp name is the OVA file name.
  6. Select the compute resource (a specific host or a cluster) where you want to install the vApp installed, and click Next.
    The Review details page opens.
  7. Verify the details listed on this page to make sure everything looks correct with the product, version, vendor, downloaded vApp file size, and the storage capacity of the virtual disk. Once you have verified the details, click Next.

    The Select storage page opens.

  8. Select the datastore you want to use for storing the virtual disk of the vLWC. Select Thick Provision Eager Zeroed as the virtual disk format. Select your VM storage policy and click Next.

    The Select networks page opens.

  9. Select the VMWare network to attach to each network interface using the Destination Network drop-down for each of the source network. You can ignore the IP allocation settings as they are not used by the vLWC. Click Next.

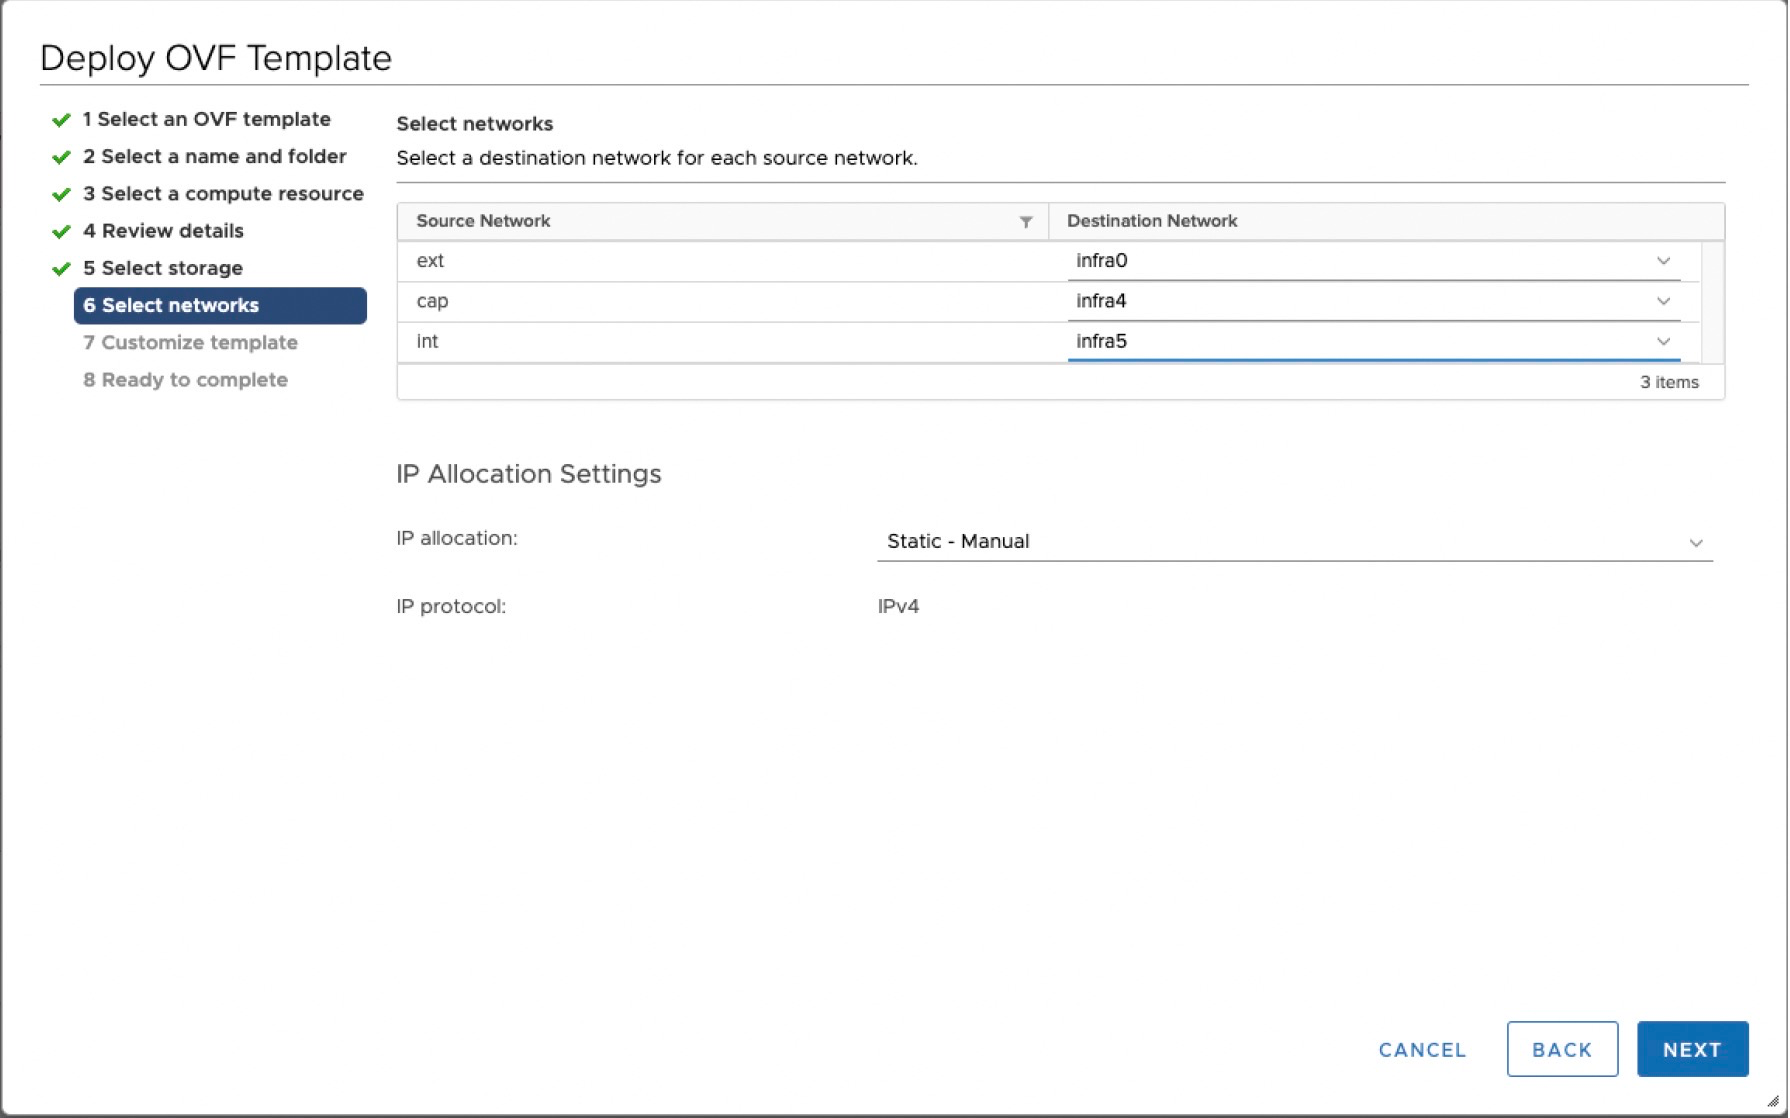
    The Customize template page opens.

  10. Specify the network settings for each vLWC interface over a series of 20 vApp properties. For each interface, select the correct address type. For static address, specify the necessary settings for that interface. You can use the same DNS server for all interfaces.
    Interface Supported IP Address

    Internal

    IPv4 or IPv6 address

    External

    IPv4 address only

    Management

    IPv4 address only

    Once you have configured your network, click Next.

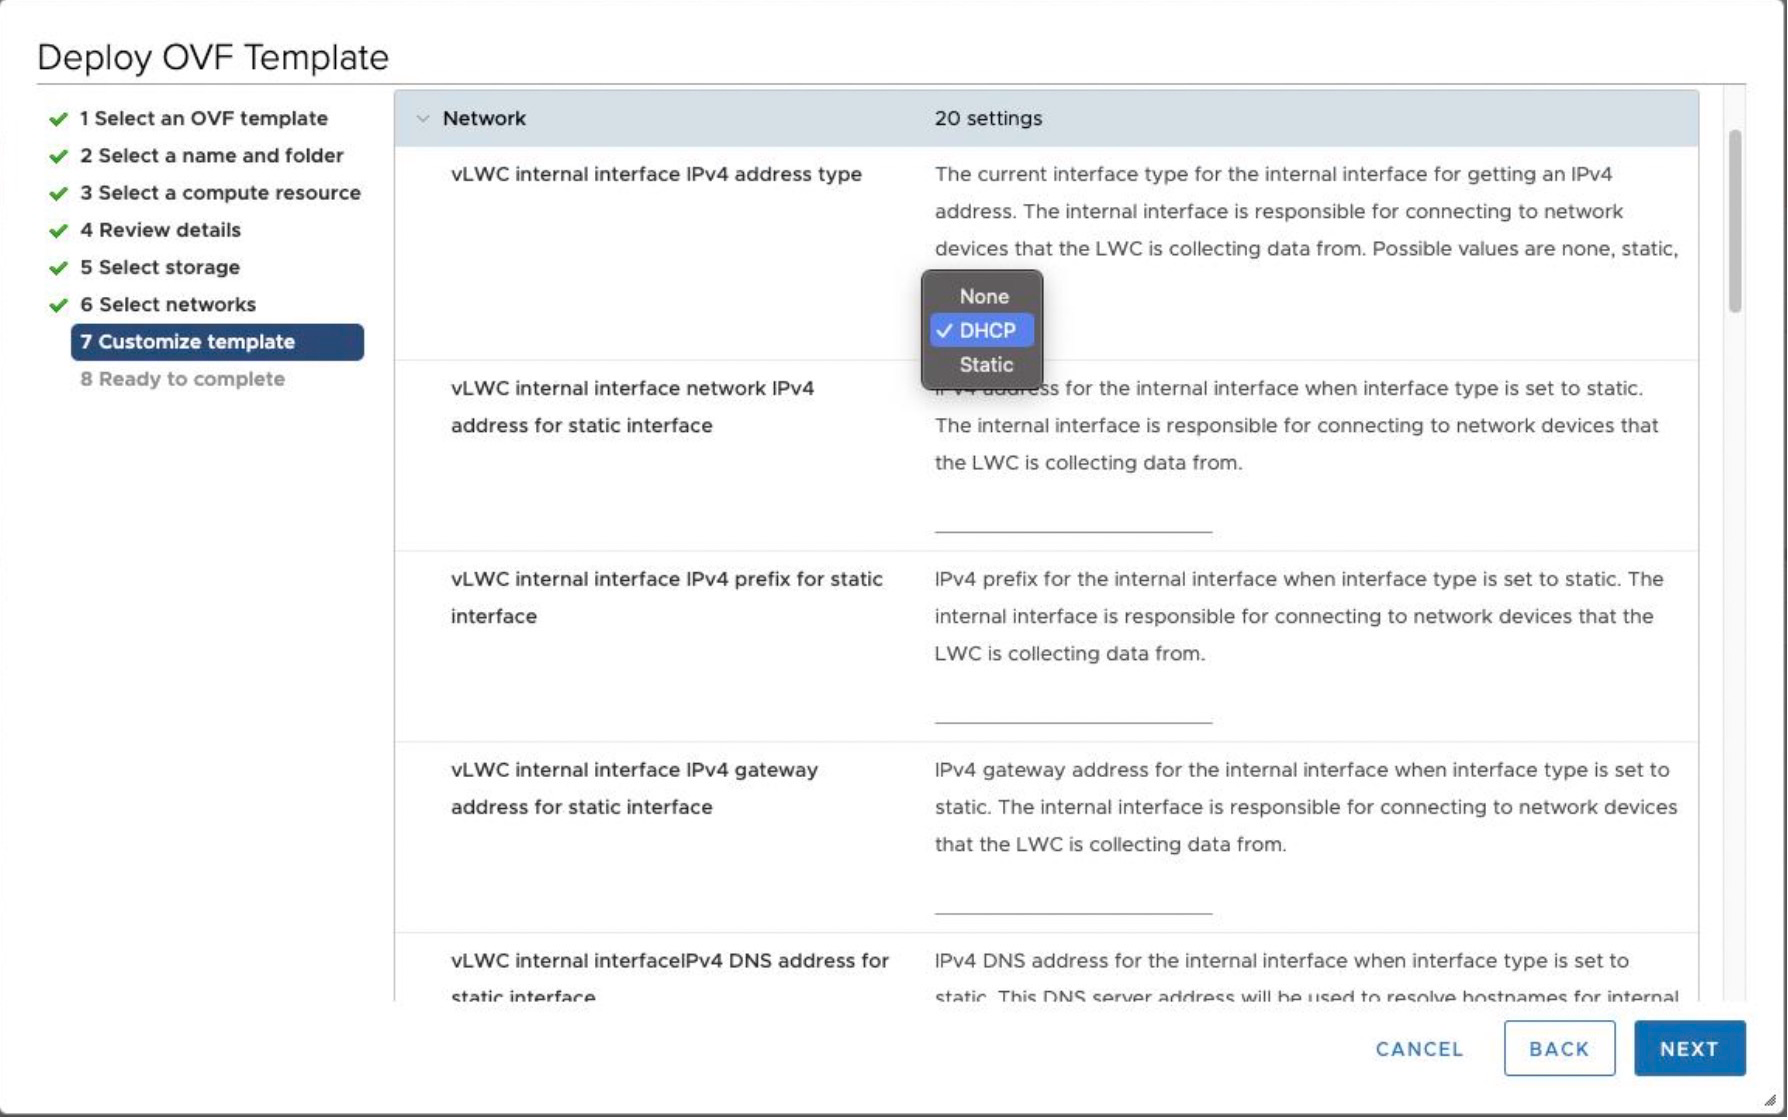
    The Ready to complete page opens.

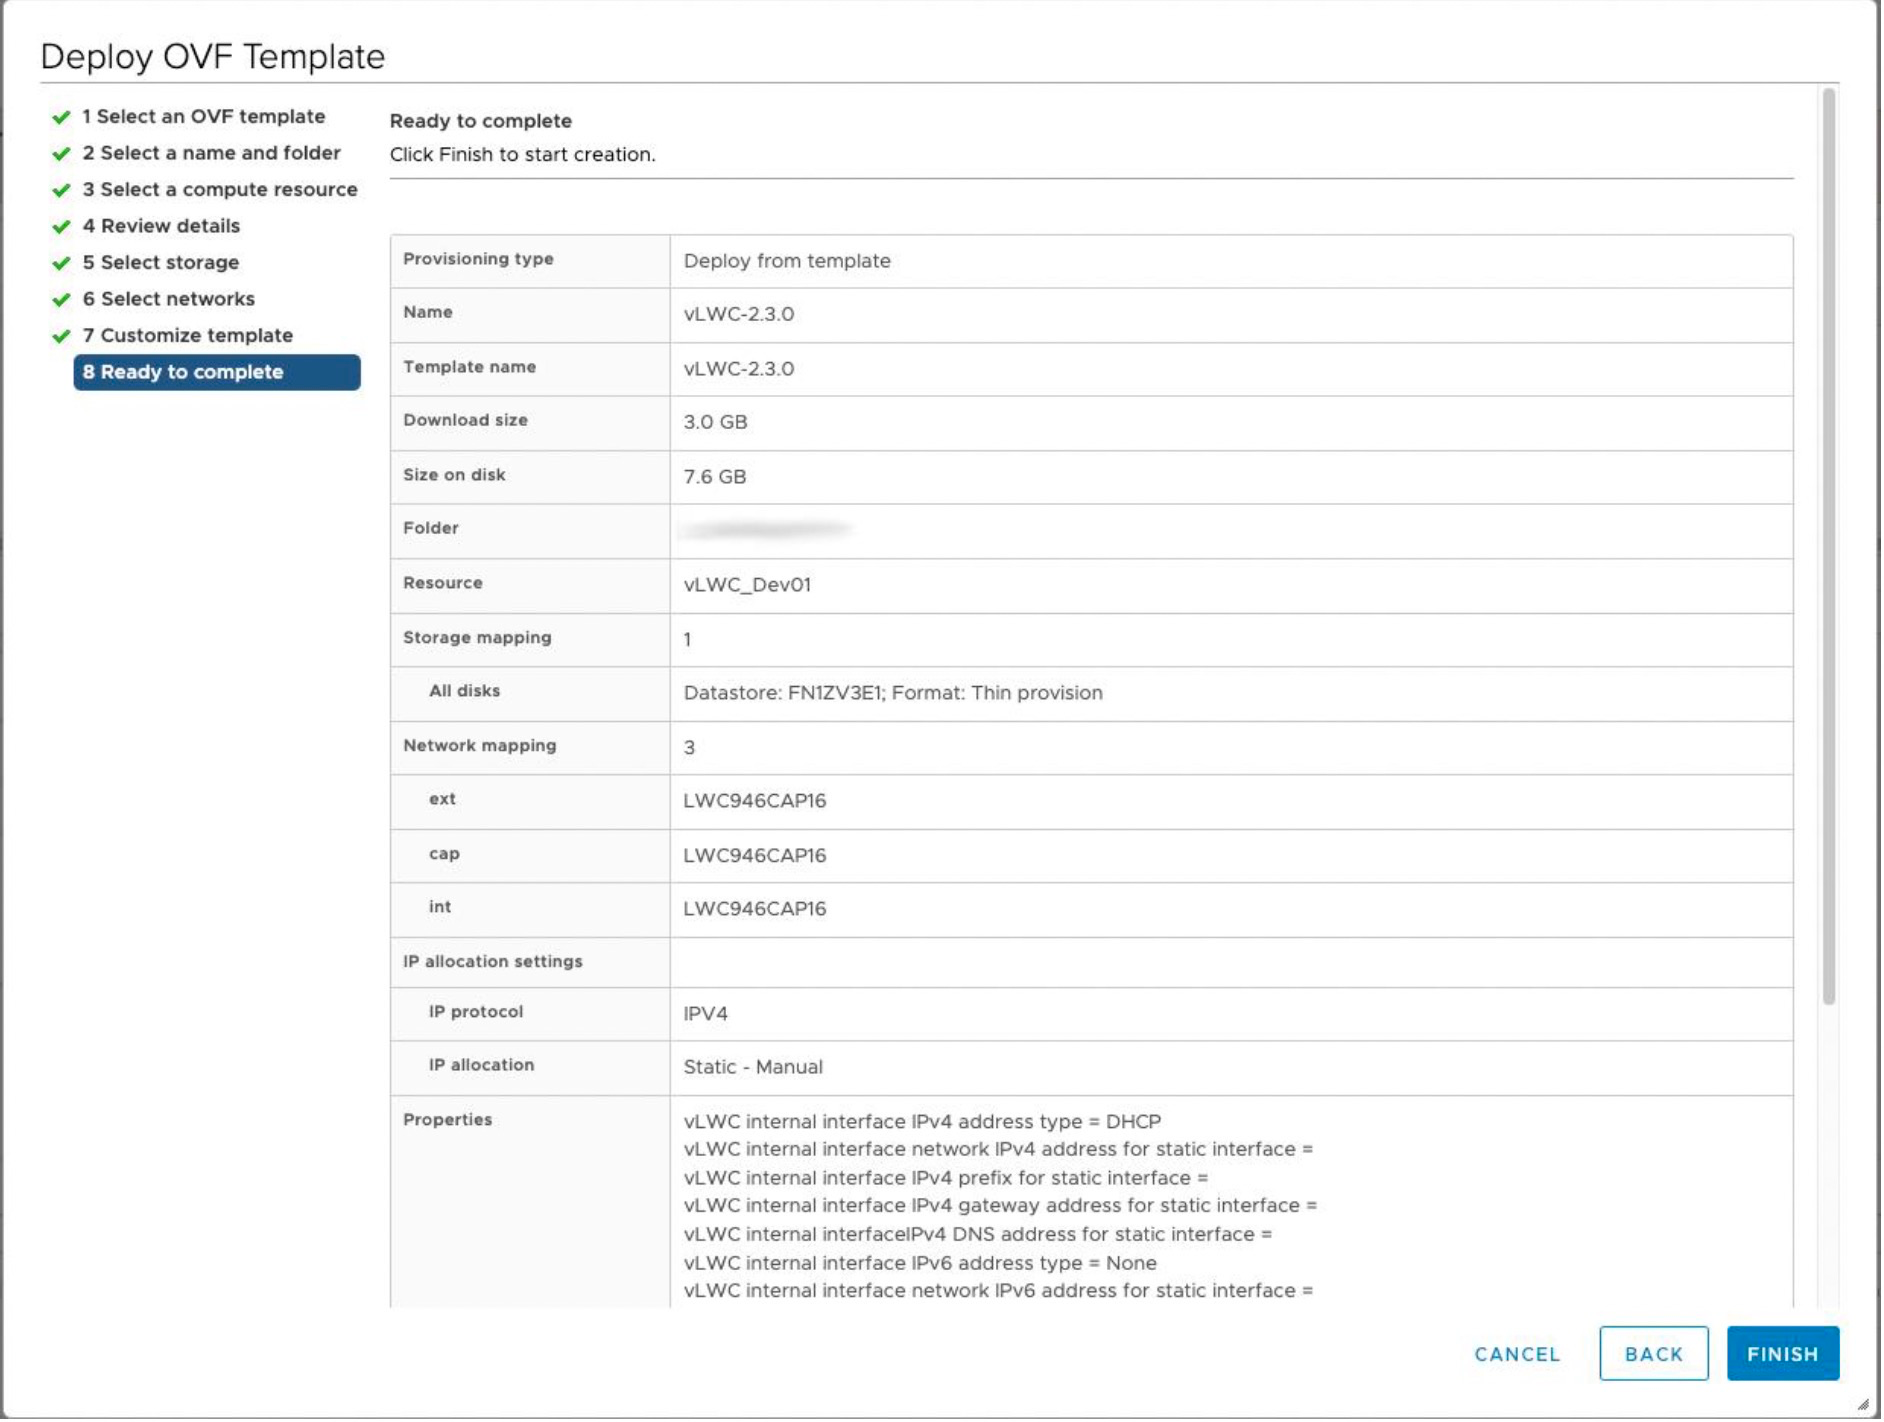
  11. Verify the configured settings for the vApp deployment and click Finish to start the deployment of the vLWC.
  12. Wait for VMWare to deploy the vApp. You should see progress bars in the recent tasks section indicating the progress of the vApp deployment. This process can take approximately 30 minutes or more depending on the speed of your cluster, datastores, and your connection to the vSphere.
    Note:
    • If you encounter the error message “Failed to deploy OVF package. ThrowableProxy.cause The operation is not supported on the object. The operation failed due to The operation is not supported on the object.”, check if DRS is enabled for the cluster in which you are deploying the vApp.

    • If you encounter any other error when you click Finish, it is possible that you took too long to complete the steps above and the deployment process timed out. You can reattempt the deployment process if this happens and if you encounter an error for the second time, open a Juniper TAC case for assistance.

  13. Once deployment is complete, to start vLWC, you can right-click the newly created vApp and click Power > Power On from the Actions menu.

Verify Installation

Once installation is complete and vLWC is powered on, you can confirm a successful deployment through the Summary page of the VM. The Summary page of the ggc-lnx VM is located under the vLWC vApp entry. It should show an Ubuntu Linux (64-bit) VM running with VMWare tools also running along with the IP addresses assigned to the VM in the IP addresses list. See Figure 1.

Figure 1: ggc-lnx VM Summary page ggc-lnx VM Summary page

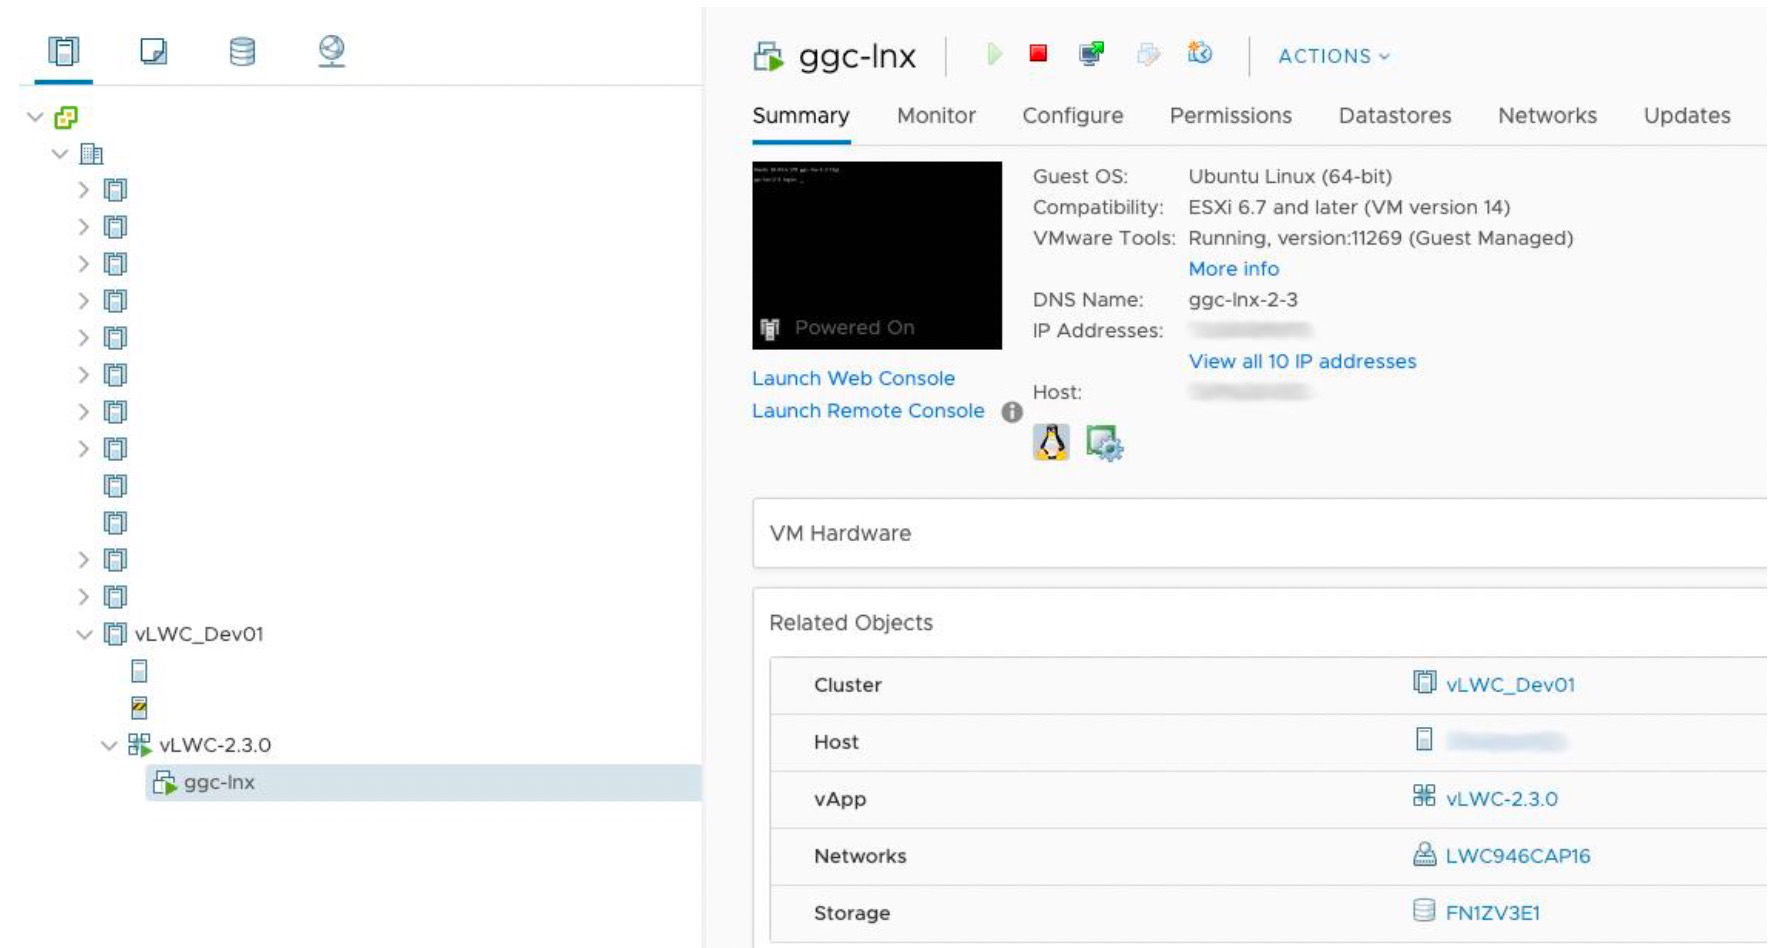
From the Summary page, you can also launch a console connection to the VM and view the current network status through the JSI Shell.