ON THIS PAGE
Edit Site Examples
This topic provides examples on how you can use the edit site feature to configure a site for different real-time deployment scenarios. Once you have onboarded a site, you can easily configure a site by modifying the required site parameters without disrupting traffic through the site.
We start with an SD-WAN site connected to CSO through an OAM WAN link. You require only one OAM WAN link to onboard a site using ZTP.
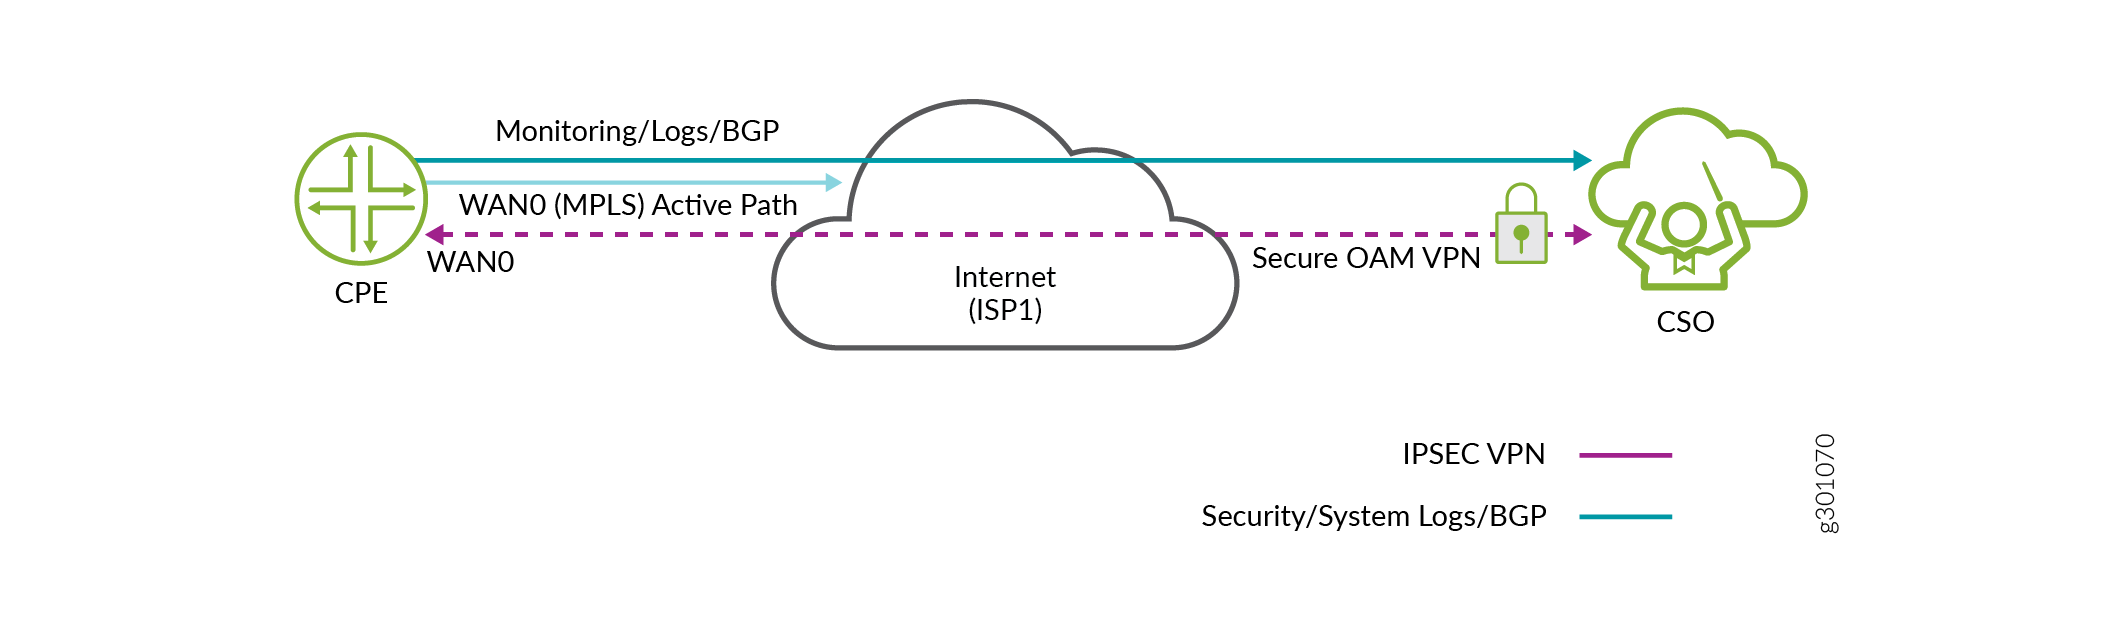
Figure 1 shows a simple site onboarding topology with a single WAN link (WAN0). The WAN0 link has secure OAM tunnels and iBGP peering with vRR configured on it. Stage-2 configurations can be applied to the device.
You can now edit the site properties to deploy services such as SD-WAN or NGFW on this site.
To edit the WAN properties of the site in Customer Portal:
Click Resources > Site Management.
The Site Management Page appears.
Select the site you want to edit and click the Edit icon (pencil).
The Edit Site page appears.
Note:You can edit the parameters of a site in Configuration-Failed, Provisioned, or Partially-Provisioned state.
Click Next.
The WAN tab appears displaying all the WAN links and its link parameters. For more information on each parameter, see Edit Branch and Enterprise Hub Site Parameters.
You can now follow the examples in this topic to know how you can edit the WAN properties for different deployments. An SD-WAN Customer Premise Equipment (CPE) is used as a branch router in the following examples.
Example 1: Configure a Site with a LAN segment, WAN link, and Local Breakout Enabled
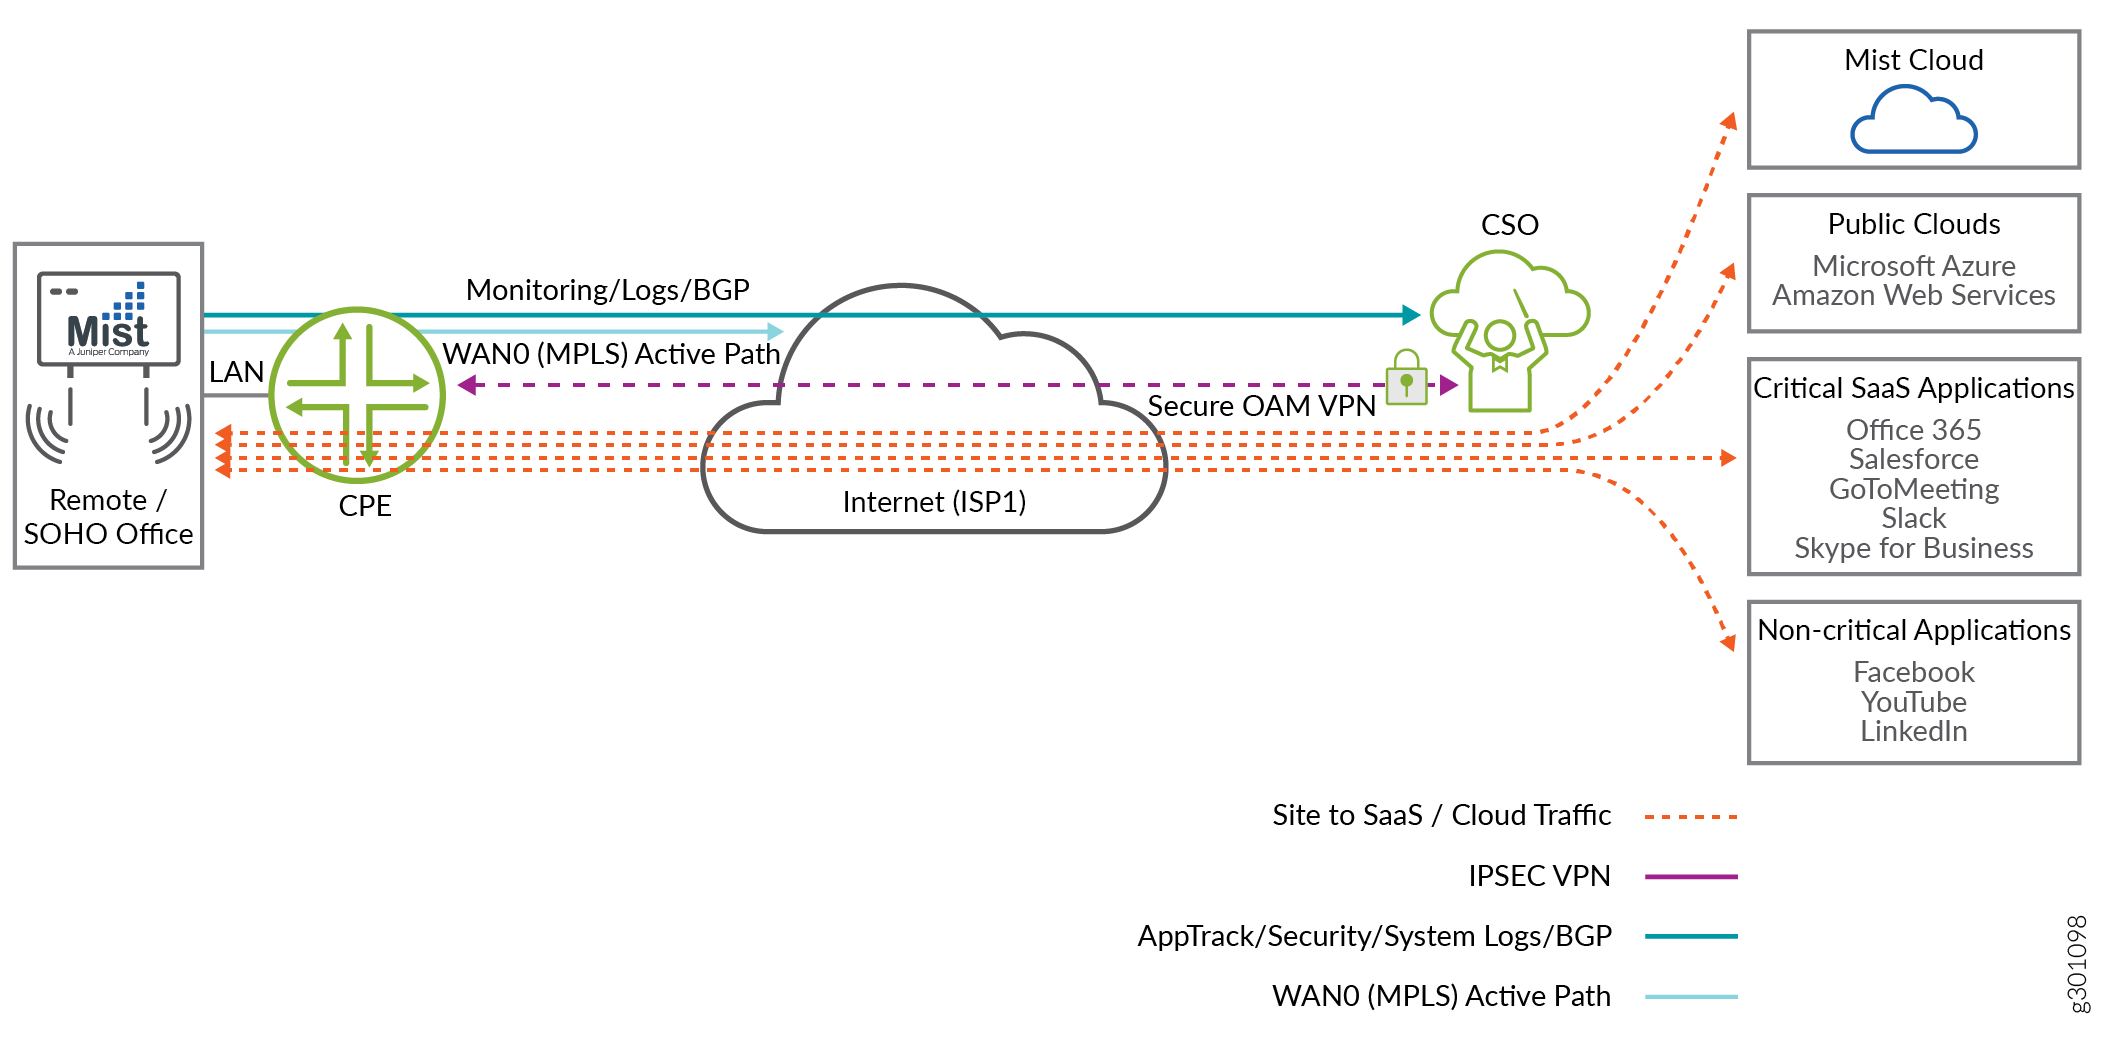
Figure 2 shows a remote site with a LAN segment, and an active WAN link (WAN0) with local breakout and automatic NAT rule creation enabled. For information on adding LAN segments, see Managing LAN Segments on a Tenant Site.
Traffic passes through the WAN0 link to the internet or cloud applications.
To enable local breakout and autocreate NAT rules on the WAN0 link, on the WAN tab of the Edit Site page, in the Advanced Settings, click Enable Local Breakout and Autocreate Source NAT Rule toggle buttons. Post activation of the site, basic firewall policy is auto-deployed on the WAN0 link.
Example 2: Configure a Site with a LAN Segment, Active WAN Link, Backup WAN Link, and Local Breakout Enabled
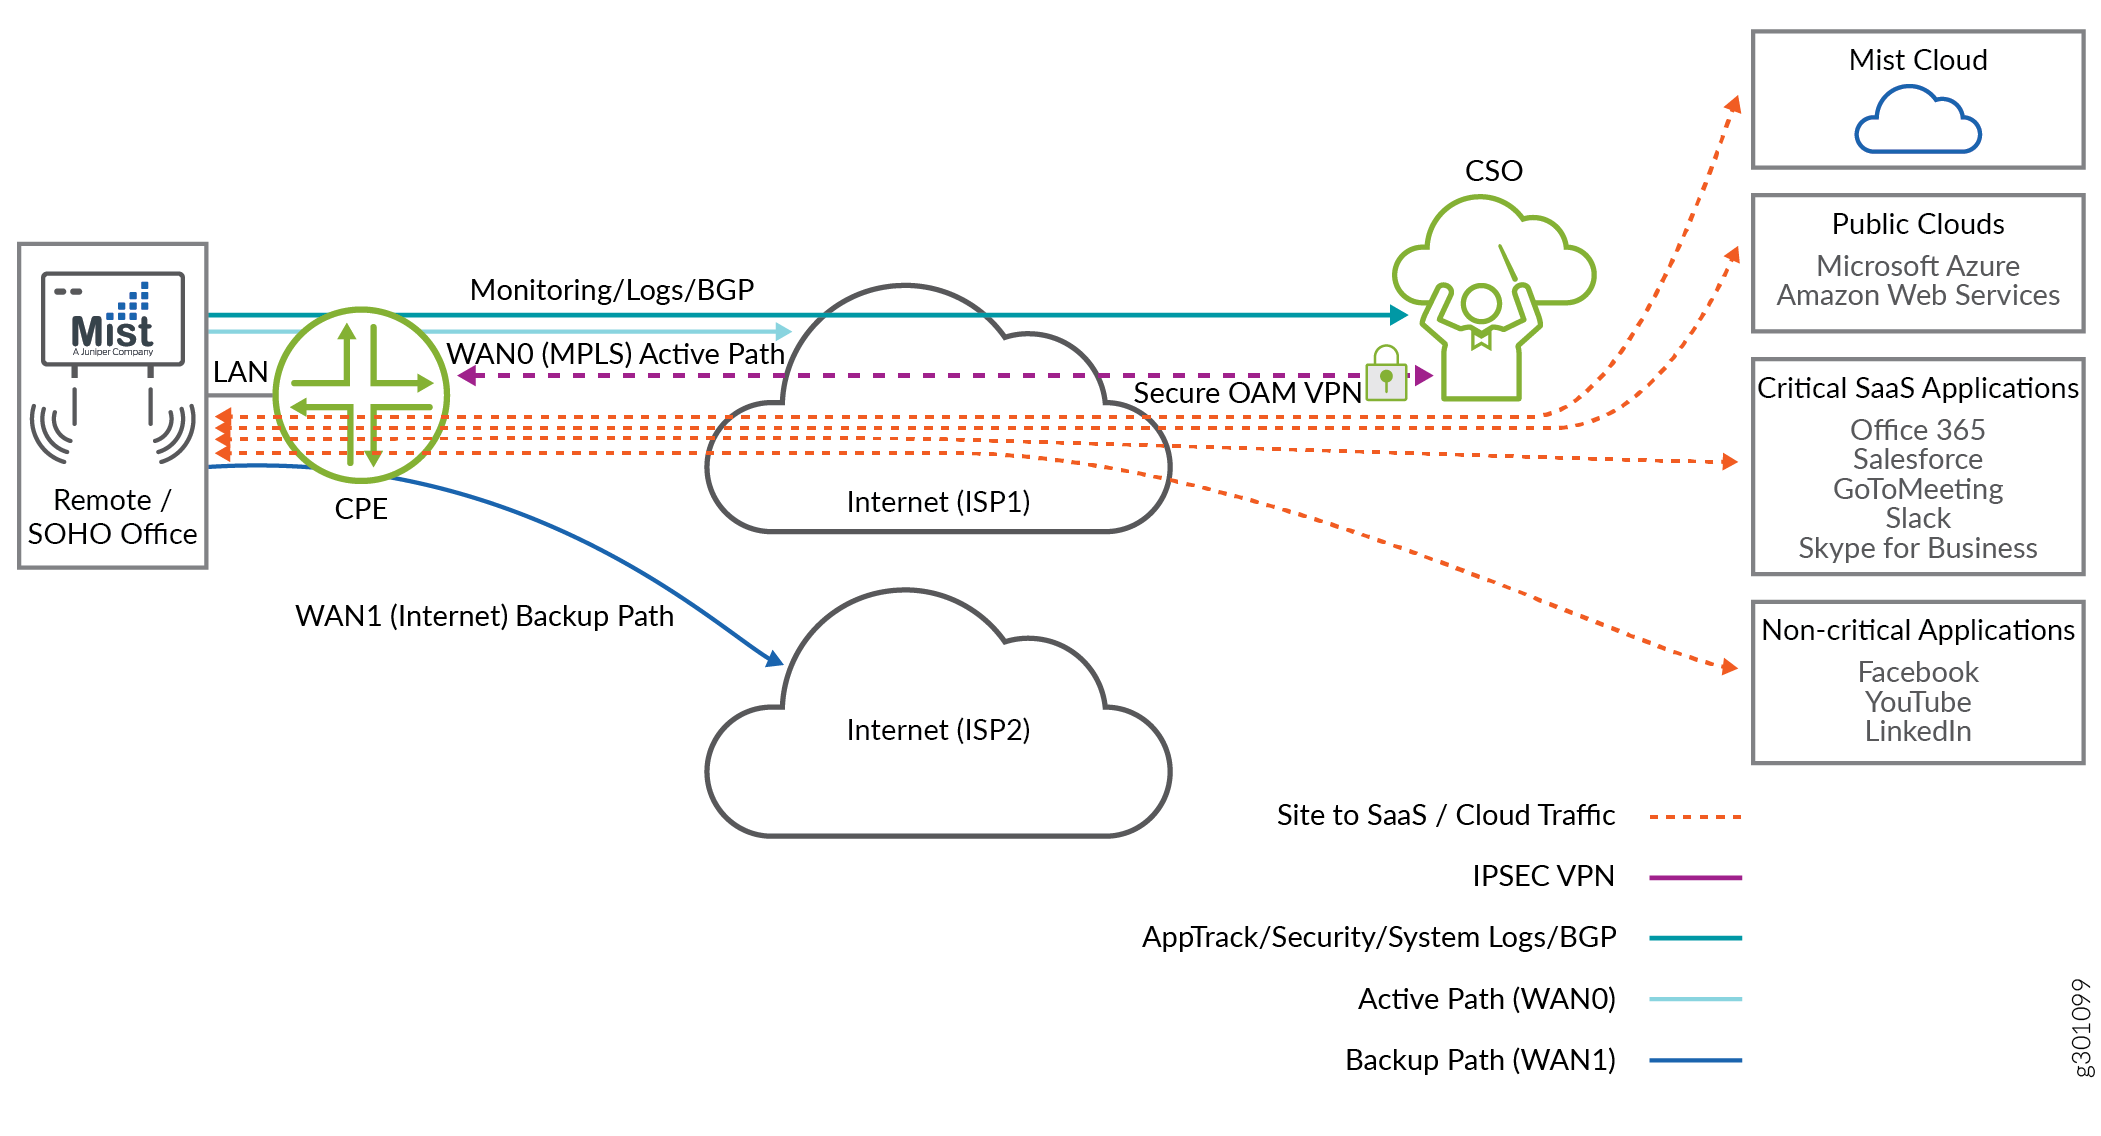
Figure 3 shows an alternative deployment scenario to Example 1: Configure a Site with a LAN segment, WAN link, and Local Breakout Enabled by adding a backup WAN link (WAN 1).
To add the WAN1 backup link, on the WAN tab of the Edit Site page:
Enable an additional WAN link by clicking the toggle button on the right of the WAN link.
In the Advanced Settings of the newly enabled WAN link, click the Backup Link toggle button.
The site now has local breakout with automatic NAT rule creation enabled on both the WAN links (WAN0 and WAN1). By default, the traffic goes through the WAN0 link. If there is a failure on WAN0 link, the traffic is directed to the WAN1 link.
Example 3: Configure a Site with a LAN Segment and Two Active WAN Links
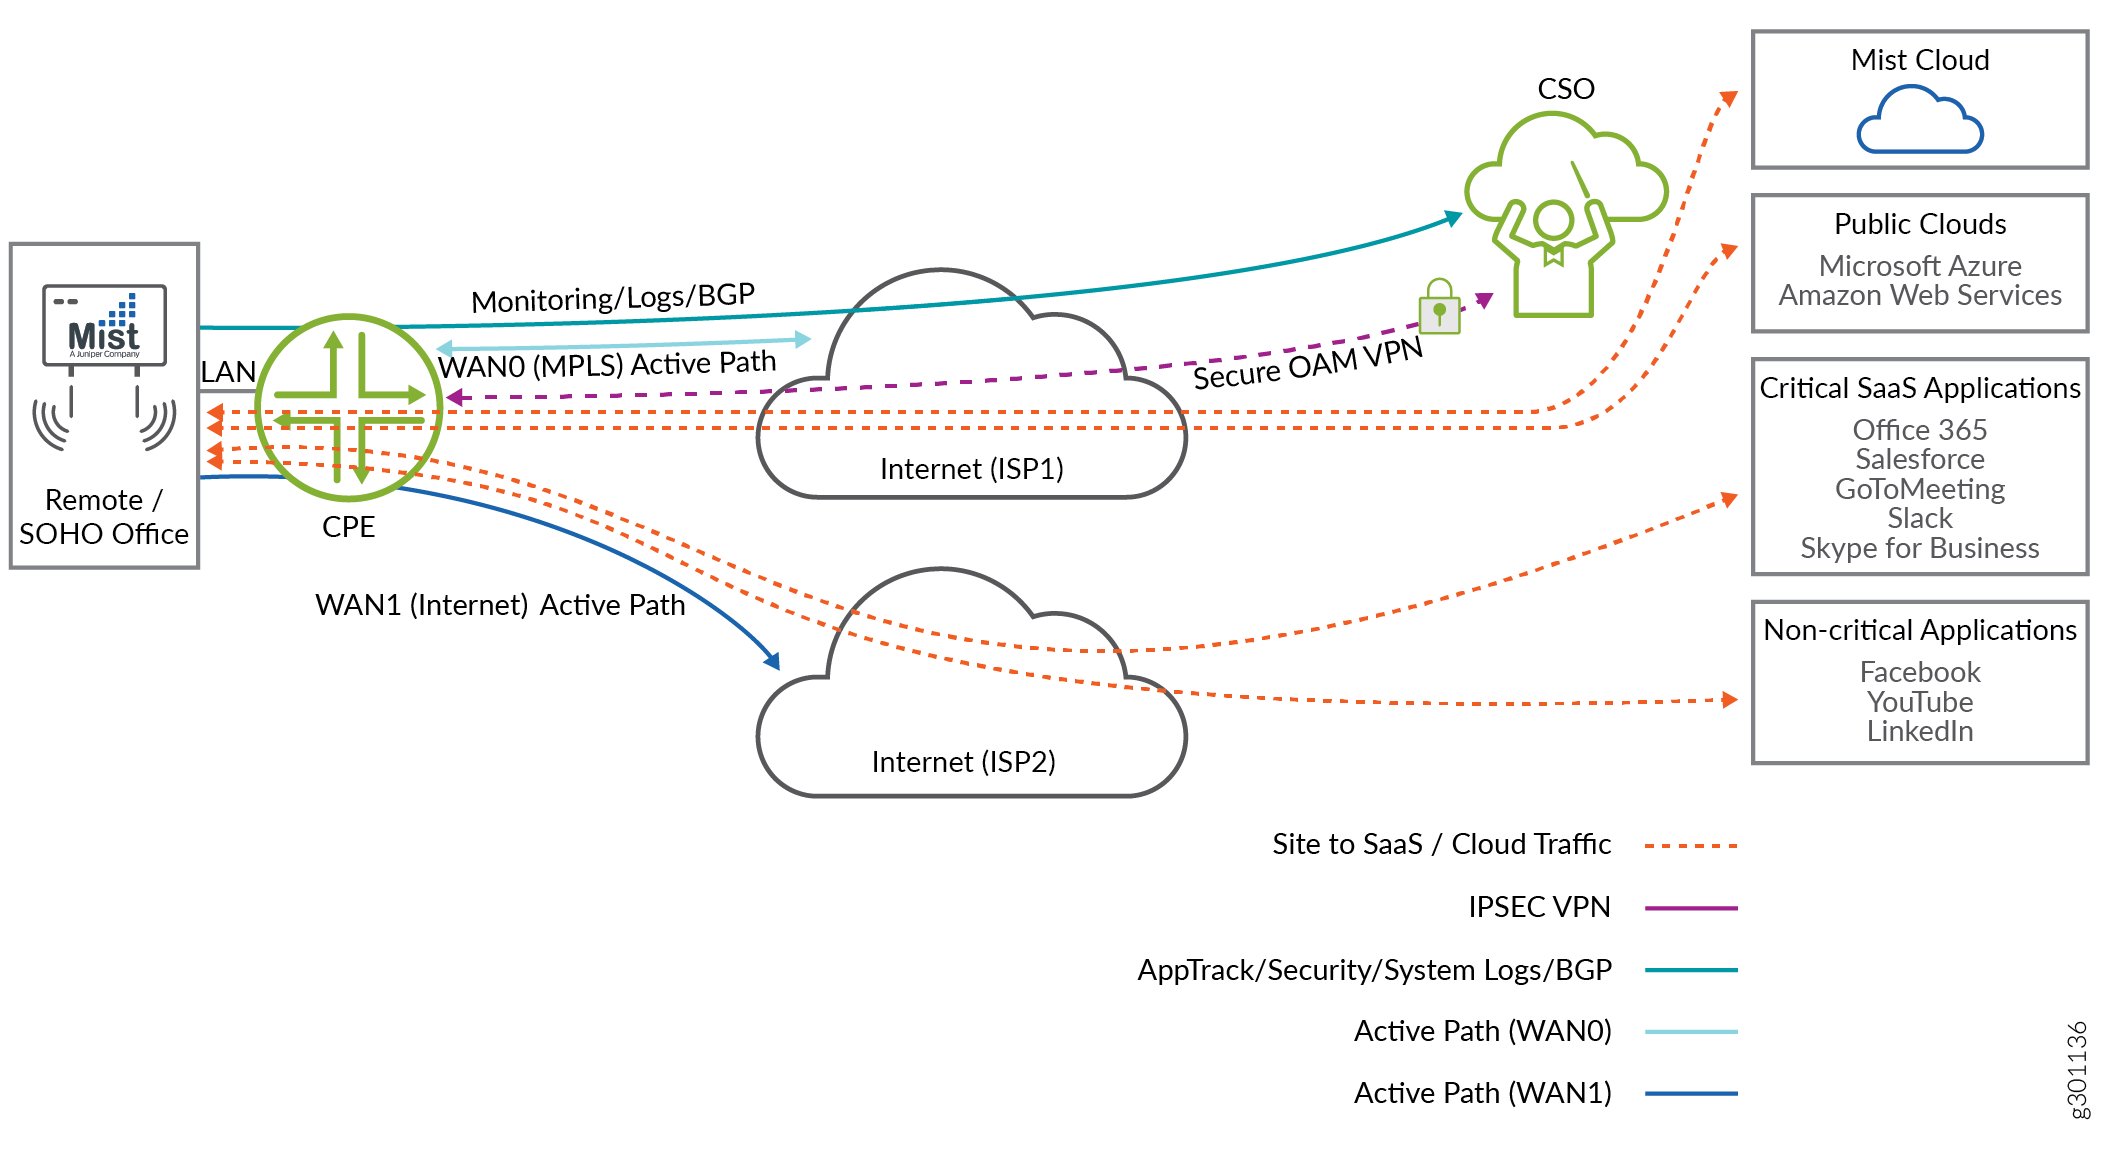
Figure 4 shows an alternative deployment scenario to Example 2: Configure a Site with a LAN Segment, Active WAN Link, Backup WAN Link, and Local Breakout Enabled. You can configure the SDWAN policy such that some applications use MPLS link and others use Internet links. In this example, the site is configured with two active WAN links: WAN0 as an MPLS link and WAN1 as an Internet link.
To edit the link type of a WAN link, on the WAN tab of the Edit Site page, select MPLS or Internet from the Link Type list.
You can add two active WAN links or change the backup link to an active link.
To change the backup link to an active link, in the Advanced Settings of the selected WAN link, disable the Backup Link toggle button.
The application traffic passes through both the active links based on the type of traffic from different applications. In this example, for traffic from non-critical applications like YouTube, an Internet link is used.
Example 4: Configure a Site integrated with Zscaler
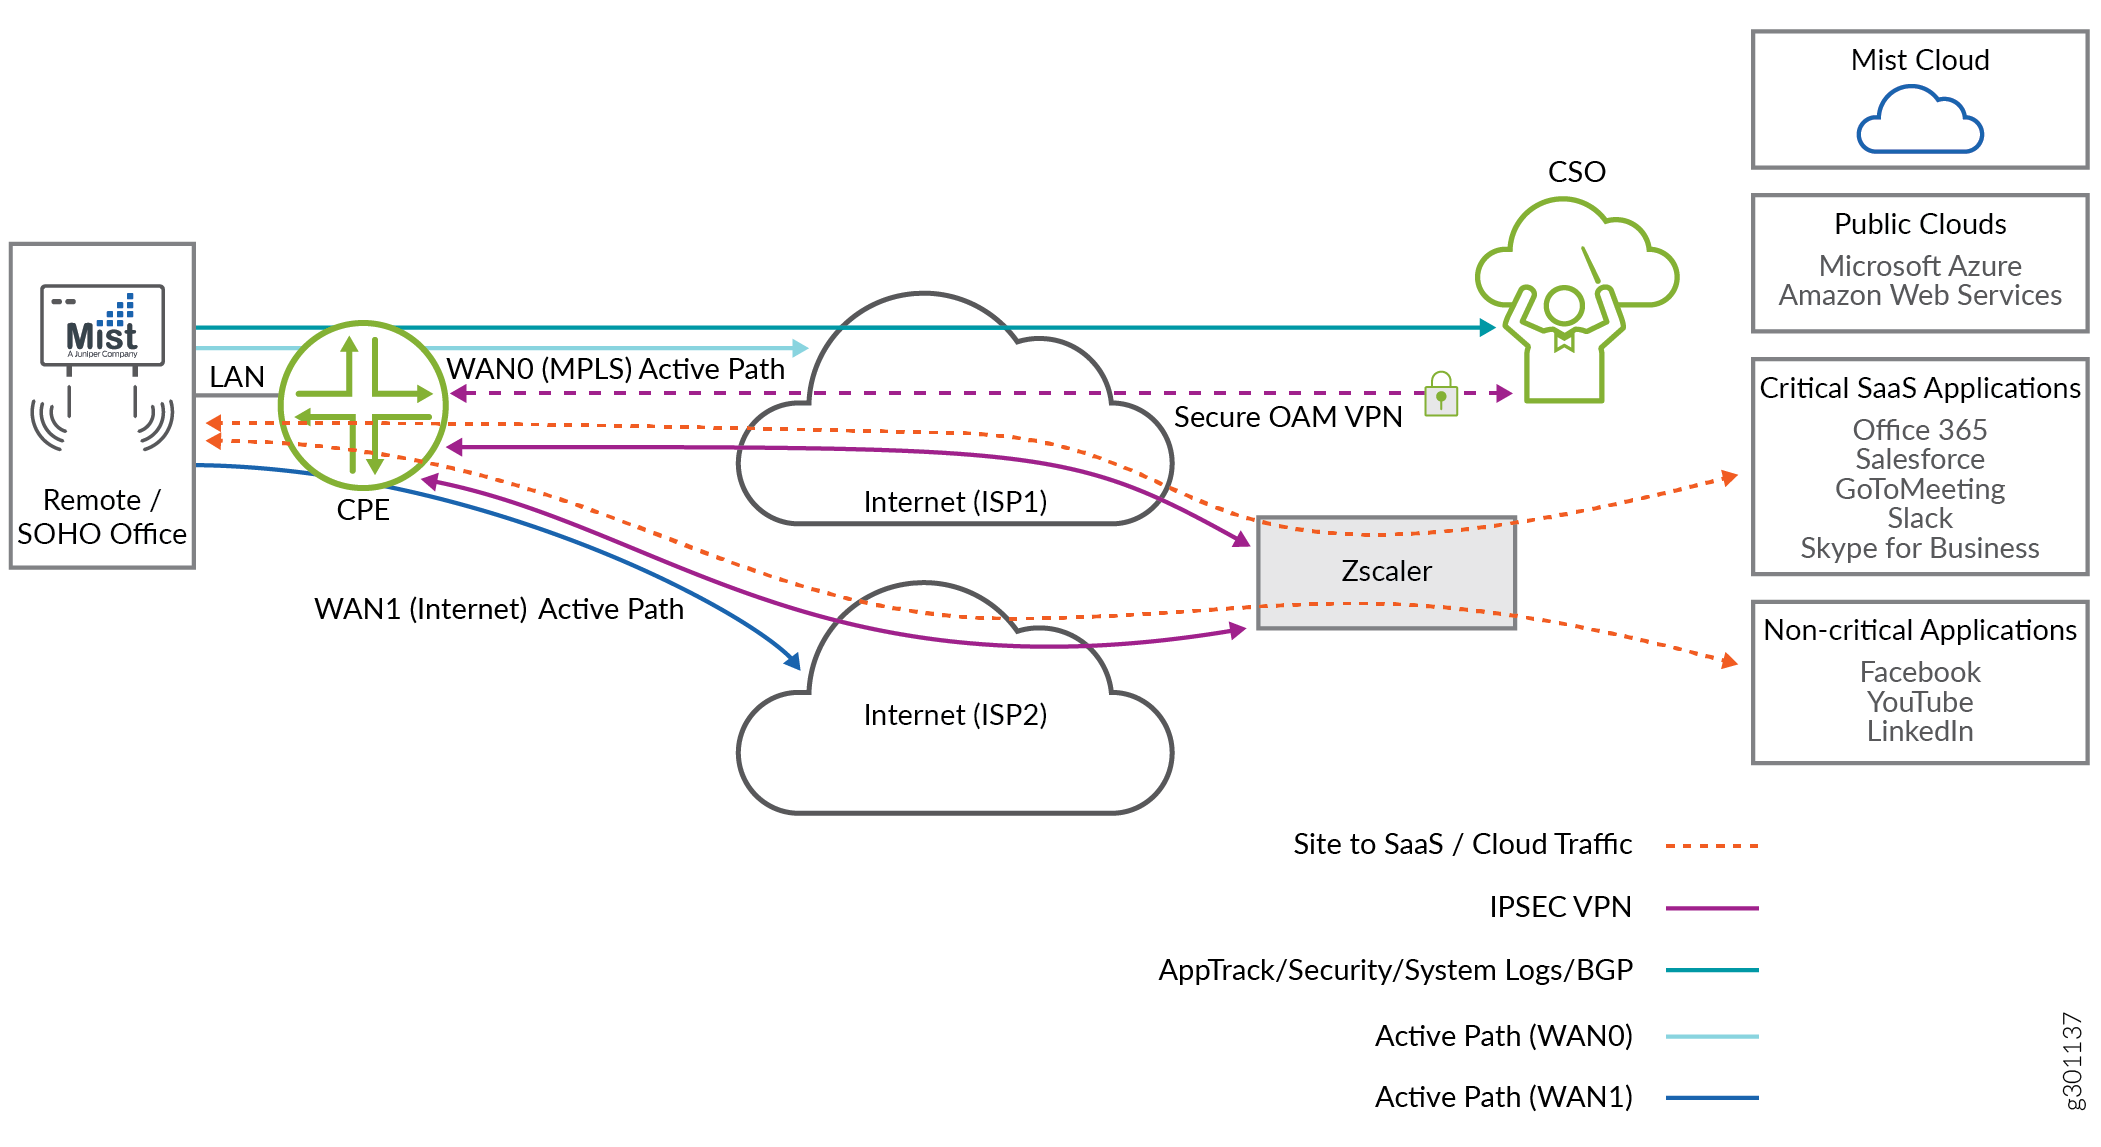
Figure 5 shows Zscaler, a cloud-based security platform, integrated to the active WAN1 link. If you select the cloud breakout option, GRE or IPsec tunnels are formed between the CPE device to the Zscaler device and all internet traffic breaks through this tunnel. For more information, see Adding Cloud Breakout Settings.
Example 5: Configure Site-to-Site Traffic Through DVPN Tunnels
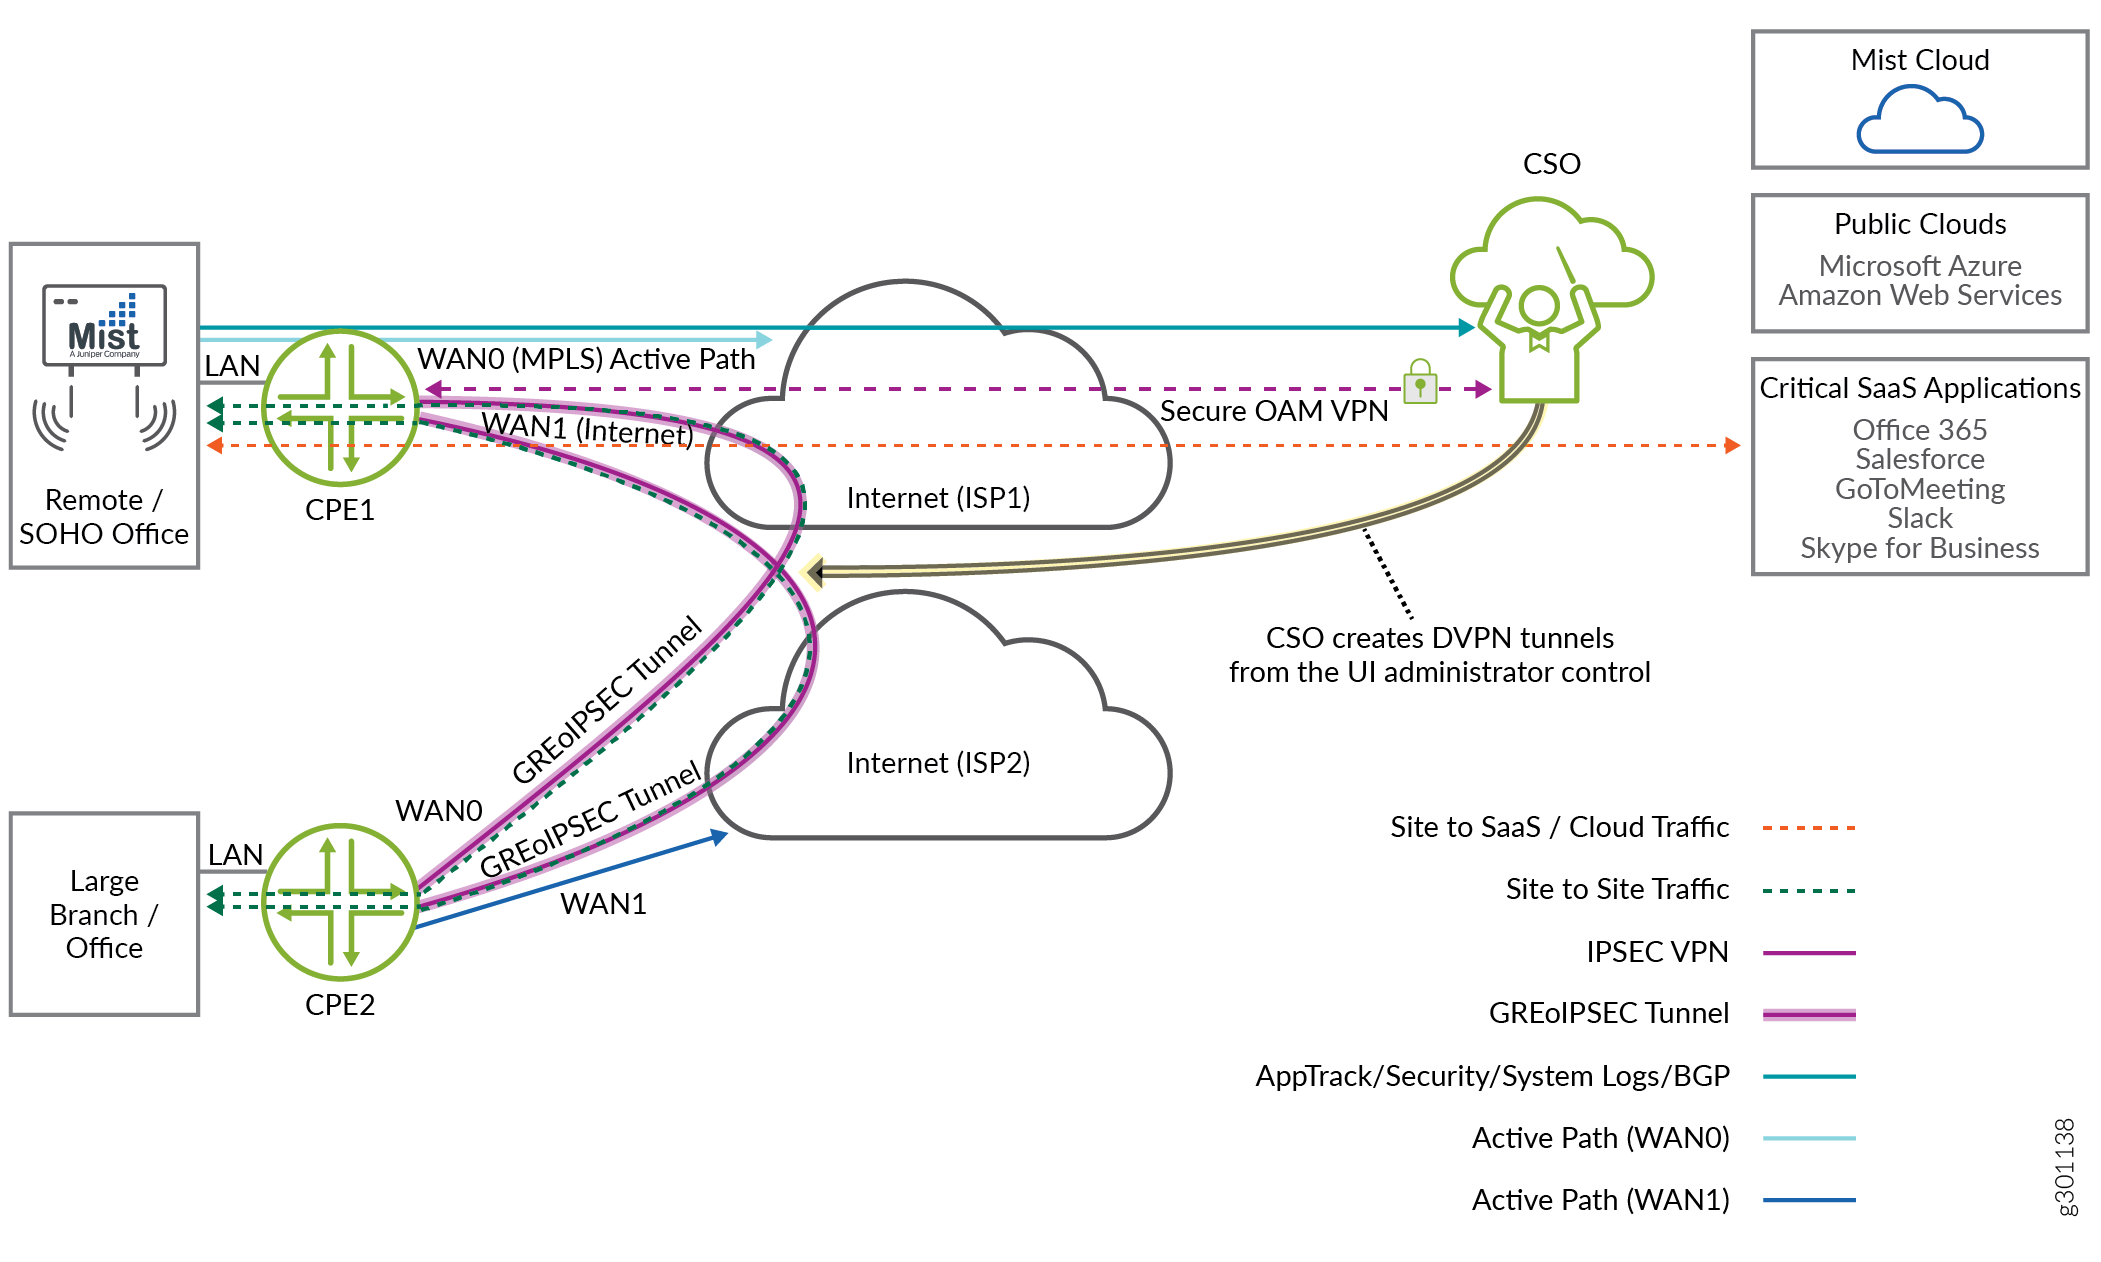
Figure 6 shows a deployment scenario with two SD-WAN CPEs connected through Dynamic VPN (DVPN) tunnels, without connecting to any hubs.
To enable the DVPN tunnels between the two CPEs:
Enable full mesh on the WAN links
Add matching mesh tags on the WAN links
To enable full mesh a WAN link and select the required mesh tag, on the WAN tab of the Edit Site page, in the Advanced Settings:
Click Use For Fullmesh toggle button
Select the required Mesh tag from the list.
Example 6: Configure a Fully Functional Site with Enterprise and Provider Hubs
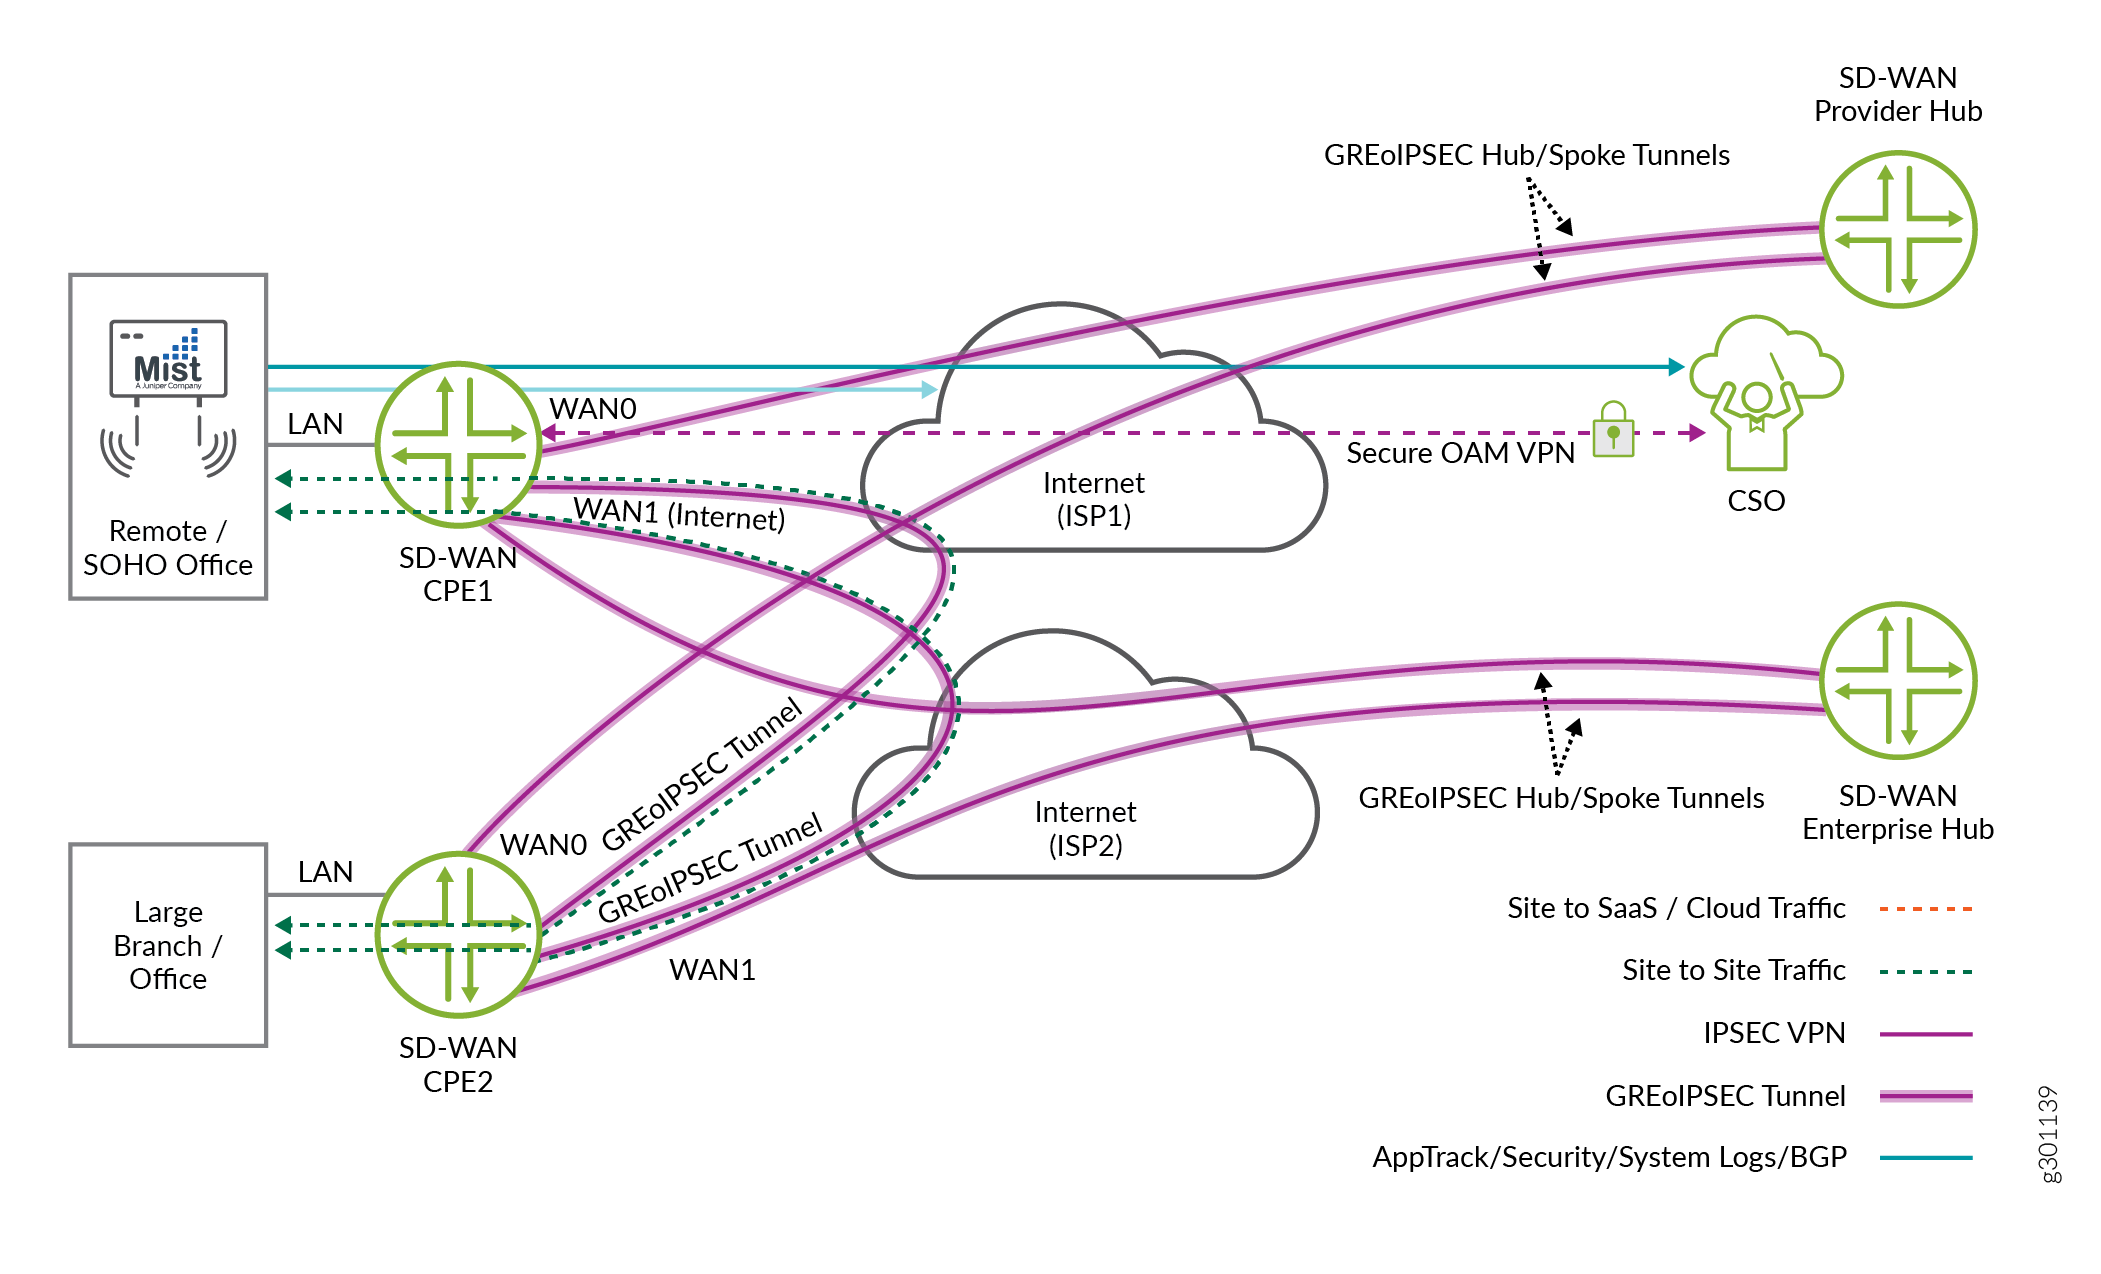
Figure 7 shows how SD-WAN CPE1 and SD-WAN CPE2 are connected to a provider hub and an enterprise hub in all network topologies: hub-and-spoke, partial mesh using DVPN, and full mesh. You can enable AppQoE, central breakout, and other functions on the WAN links to create a fully functional SD-WAN CPE.
To connect CPEs to hubs, on WAN tab on the Edit Site page, in the Advanced Settings, click Connects to Hubs and select the Overlay Peer Interface and Overlay Tunnel Type.