Configuring Policy Generation
To configure policy generation:
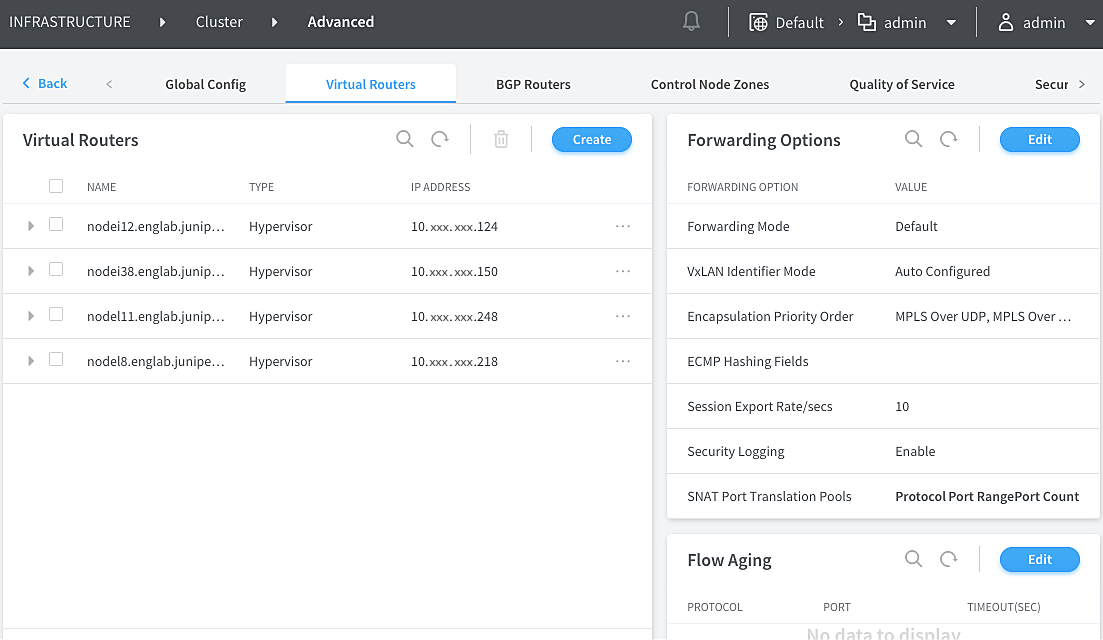
- Specify the session export rate. Navigate to INFRASTRUCTURE
> Cluster > Advanced Options.
Click the Virtual Routers tab, click Edit under Forwarding Options and enter the Session Export Rate/secs value.
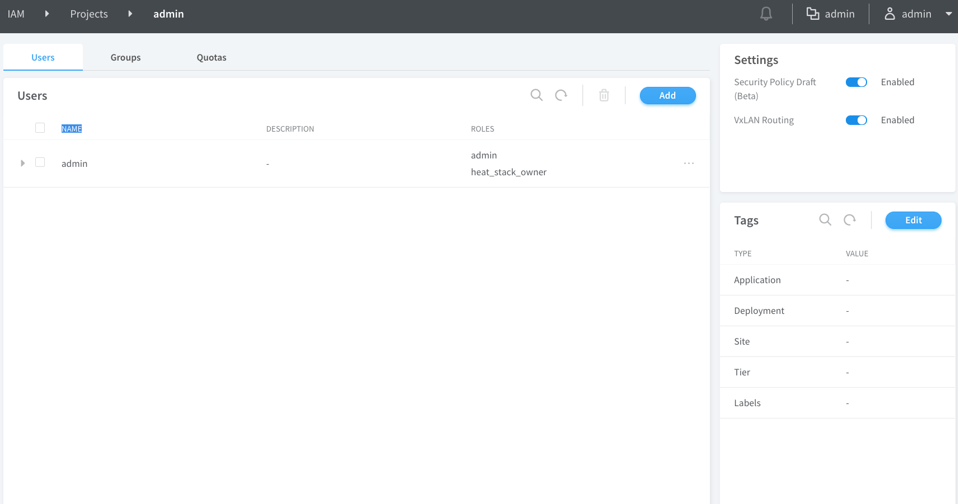
- Enable the security policy draft mode, either for the
Project scope or for Global scope depending on your requirement.
For Project scope, navigate to IAM > Projects, select and click the project and enable the Security Policy Draft mode under Settings.
For Global scope, navigate to INFRASTRUCTURE > Cluster > Advanced Options, and click the Global Config tab. The Edit System Configuration page appears. Click Edit and enable the Security Policy Draft mode. Click Save.
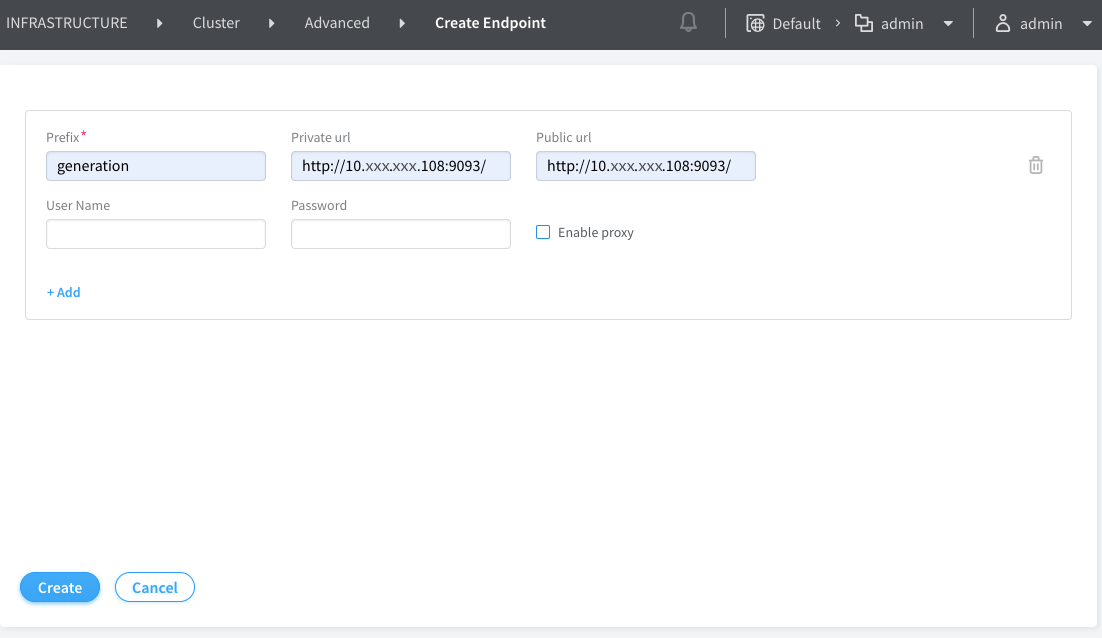
- Enter generation under Prefix and
enter the required URLs. Click Create to save the endpoint.
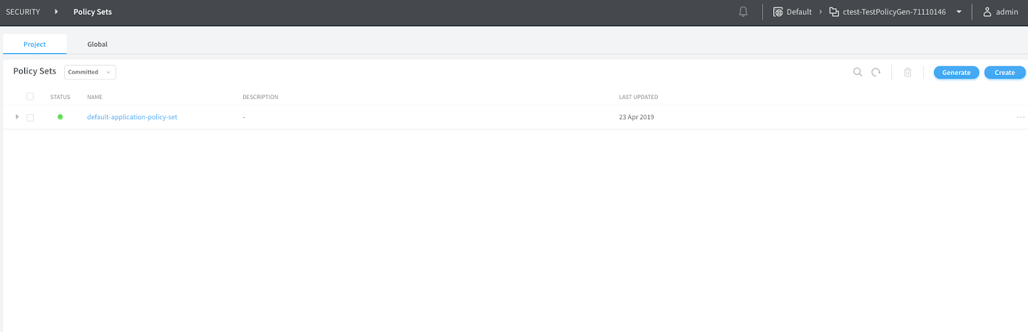
- Generate policies.
Navigate to Security > Policy Sets and click Generate Policy. The Generate Project Policy page appears.
The Generate Project Policy page has three steps.
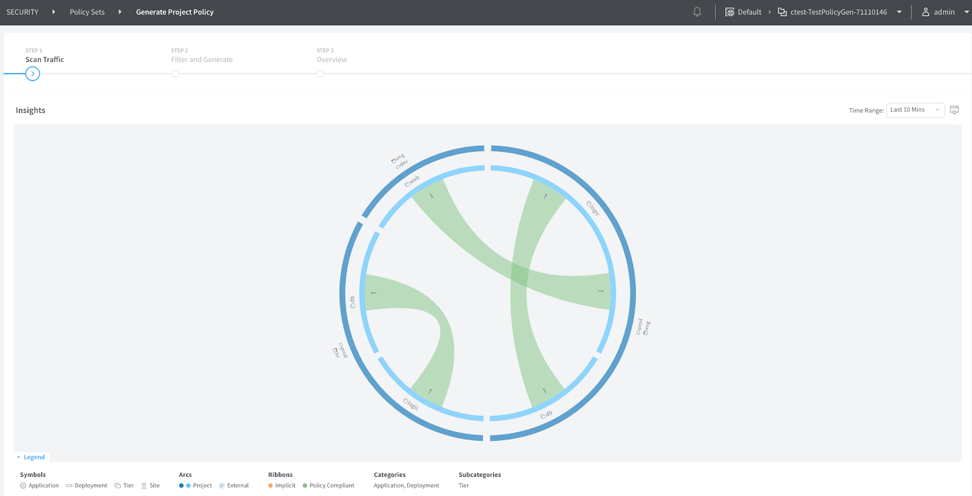
Step 1 Scan Traffic
Each vRouter scans the traffic it sees between and within applications. The controller analyzes the observed traffic patterns and displays the observed traffic in a graphical visualization. Arcs inside the circular graph represent the different observed flows. Mouse over the arcs to view additional details about the applications involved in that flow, other tags associated with the endpoints, and other flow characteristics.
The period of traffic considered as an input for policy generation can be customized by editing the Time Range. The default time range is 10 minutes. Click Next to proceed with policy generation.
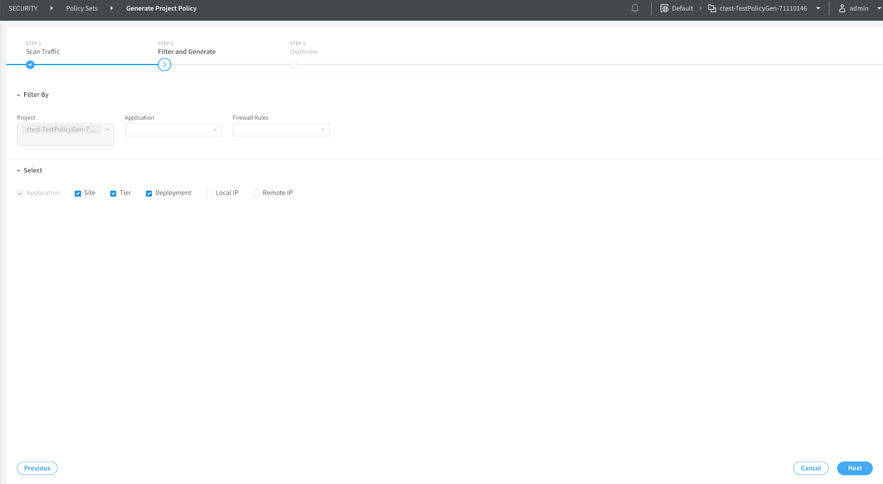
Step 2 Filter and Generate
You can filter traffic and generate a draft policy based on the selected filters. By default, the current project is selected and the predefined tags, application, deployment, tier, and site are selected. Selected tags must be associated with the workloads, because not having these tags in flow records creates unknown flows.
If you haven’t attached any of the predefined tags to workloads and you don’t need the tags to be part of the policies, deselect them. However, it is mandatory to select at least the application tag, else flows designated with unknown are displayed.
Click Next. The default firewall rules allow all traffic.
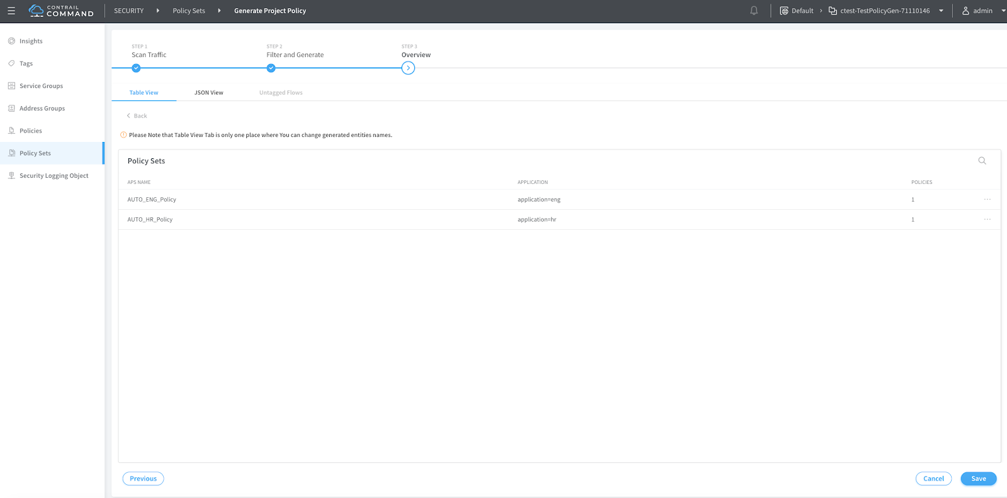
Step 3 Overview
You can view the application policy sets based on the selected input parameters. You can view the application policy sets in a tabular format as well as JSON format. You can also view traffic flows for untagged applications.
Click Save to save the application policy set and generate the draft policy.
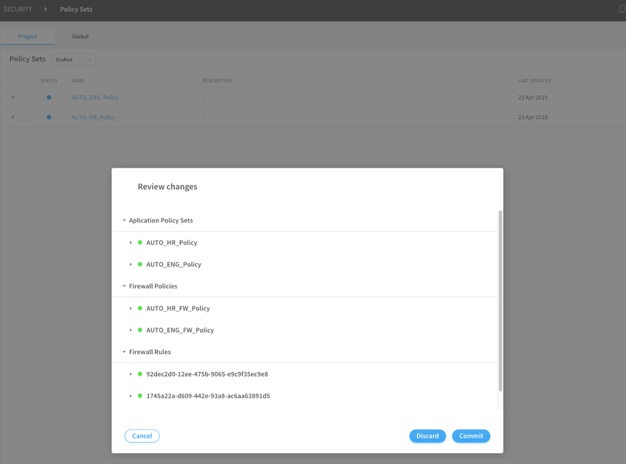
- The Review Changes page appears listing the
policies in the draft mode. You can review the draft policy, edit
it as required and click Commit to enforce the application
policy set.
Alternatively, click Discard to discard the generated application policy set.
Sample inventory.yml file
all:
  hosts:
    localhost:
      ansible_connection: local

  vars:
    PATH_POLICY_GENERATION_CONFIG: '/etc/contrail/securityapps/'
    # Policy generator API port
    rest_api_port: {{ pg_port }}
    # Policy generator API server ip address
    rest_api_ip: {{ pg_ip }}
    # Policy generator logs and log level
    log_file: '/var/log/contrail/policy-generation-server.log'
    log_console_level: logging.DEBUG

    # Registry inventory
    CONTAINER_REGISTRY: {{ pg_registry }}
    CONTRAIL_VERSION: {{ pg_version }}
    ansible_user: 'root'

    # Config API server
    api_server_listen_port: {{ config_port }}
    api_server_ip: {{ config_ip }}

    # Analytics IP & Port 8081 for remote host, 8181 for localhost
    analytics_ip: {{ analytics_ip }}
    admin_port: {{ analytics_port }}

    # Keystone credentials with user
    admin_password: {{ admin_password }}
    admin_tenant_name: {{ admin_tenant }}
    admin_user: {{ admin_user }}
    auth_host: {{ auth_host }}
    auth_port: {{ auth_port }}
    auth_protocol: {{ auth_protocol }}
    auth_version: {{ auth_version }}
    auth_type: password
    user_domain_name: Default
    project_domain_name: Default
    region_name: RegionOne