Help us improve your experience.

Let us know what you think.

Do you have time for a two-minute survey?


Creating a Virtual Network with OpenStack Contrail

You can create virtual networks in Contrail Networking from the OpenStack. The following procedure shows how to create a virtual network when using OpenStack.

  1. To create a virtual network when using OpenStack Contrail, select Project > Network > Networks. The Networks page is displayed. See Figure 1.
    Figure 1: Networks PageOpenStack dashboard showing Networks section under Project tab with test-network listed as active and admin state UP.
  2. Click Create Network. The Create Network window is displayed. See Figure 2 and Figure 3.
    Figure 2: Create NetworksCreate Network wizard interface showing Network tab with fields for Network Name: test-network, Enable Admin State checked, Shared unchecked, Create Subnet checked. Navigation buttons: Cancel, Back, Next.
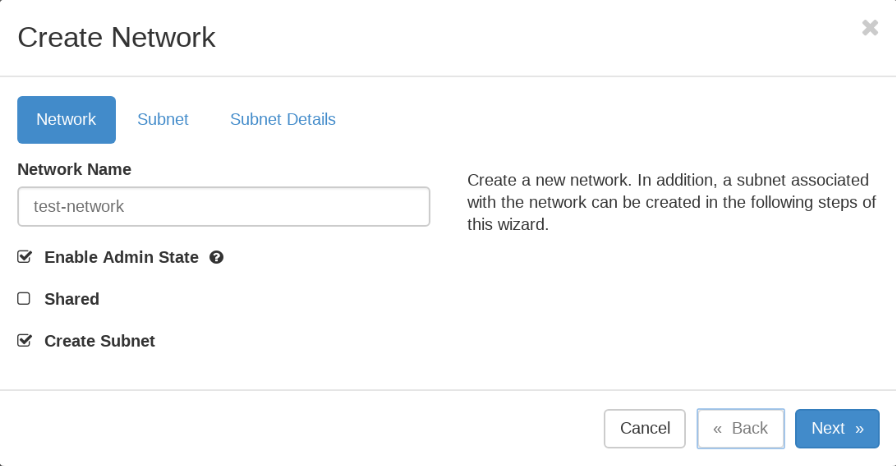
    Figure 3: Subnet and Gateway DetailsForm for creating a network subnet with fields for Subnet Name, Network Address, IP Version, Gateway IP, and Disable Gateway option. Navigation buttons at the bottom.
  3. Click the Network and Subnet tabs to complete the fields in the Create Network window. See field descriptions in Table 1.
    Table 1: Create Network Fields

    Field

    Description

    Network Name

    Enter a name for the network.

    Subnet Name

    Enter a name for the subnetwork.

    Network Address

    Enter the network address in CIDR format.

    IP Version*

    Select IPv4 or IPv6.

    Gateway IP

    Optionally, enter an explicit gateway IP address for the IP address block. Check the Disable Gateway box if no gateway is to be used.

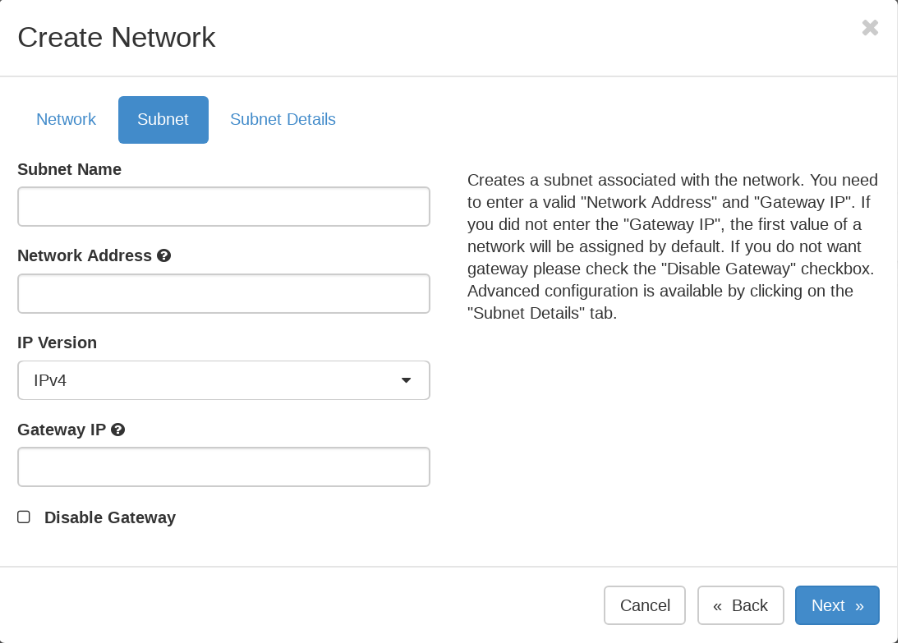
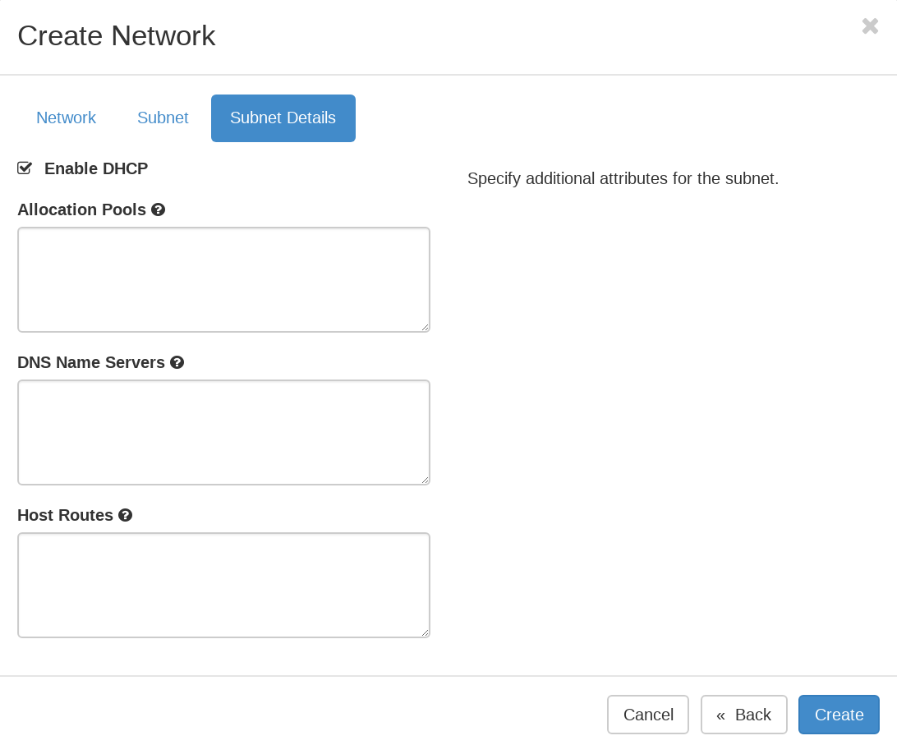
  4. Click the Subnet Details tab to specify the Allocation Pool, DNS Name Servers, and Host Routes.
    Figure 4: Additional Subnet AttributesSubnet Details section with options to enable DHCP, specify allocation pools, input DNS servers, and define host routes. Navigation buttons: Cancel, Back, Create.
  5. To save your network, click Create , or click Cancel to discard your work and start over.