Installing a Nested Red Hat OpenShift Container Platform 3.11 Cluster Using Contrail Ansible Deployer
This topic covers Contrail Networking in Red Hat Openshift environments that are using Contrail Networking Release 21-based releases.
Starting in Release 22.1, Contrail Networking evolved into Cloud-Native Contrail Networking. Cloud-Native Contrail offers significant enhancements to optimize networking performance in Kubernetes-orchestrated environments. Cloud-Native Contrail supports Red Hat Openshift and we strongly recommend using Cloud-Native Contrail for networking in environments using Red Hat Openshift.
For general information about Cloud-Native Contrail, see the Cloud-Native Contrail Networking Techlibrary homepage.
You can install a nested Red Hat OpenShift Container Platform 3.11 cluster along with Contrail Networking using Contrail Ansible deployer.
Prerequisites
Ensure that the following prerequisites are met for a successful provisioning of a nested Contrail-OpenShift cluster.
The recommended system requirements are:
System Requirements
Primary Node
Infrastructure Node
Compute Node
CPU/RAM
8 vCPU, 16 GB RAM
16 vCPU, 64 GB RAM
As per OpenShift recommendations.
Disk
100 GB
250 GB
A running Red Hat OpenStack Platform Director (RHOSPD) 13 cluster with Contrail. OpenShift Contrail release must be same as RHOSPD 13 Contrail release.
RHOSPD environments require that the Contrail vrouter, Contrail config and OpenStack keystone are in “internal-api” network. Modify the ServiceNetMap parameters in the contrail-services.yaml file to configure in “internal-api” network.
parameter_defaults:
  ServiceNetMap:
    ContrailDatabaseNetwork: internal_api
    ContrailAnalyticsNetwork: internal_api
    ContrailAnalyticsAlarmNetwork: internal_api
    ContrailAnalyticsDatabaseNetwork: internal_api
    ContrailAnalyticsSnmpNetwork: internal_api
    ContrailConfigNetwork: internal_api
    ContrailControlNetwork: internal_api
    ContrailWebuiNetwork: internal_api
    ContrailVrouterNetwork: internal_api
    ContrailCertmongerUserNetwork: internal_api
    KeystoneAdminApiNetwork: internal_api
Ensure that the vRouter gateway in the contrail-services.yaml file is part of “internal-api” network.
# Custom Contrail container configuration settings
  ContrailSettings:
    VROUTER_GATEWAY: 10.1.0.254
OpenShift nodes (VMs) must have Internet connectivity.
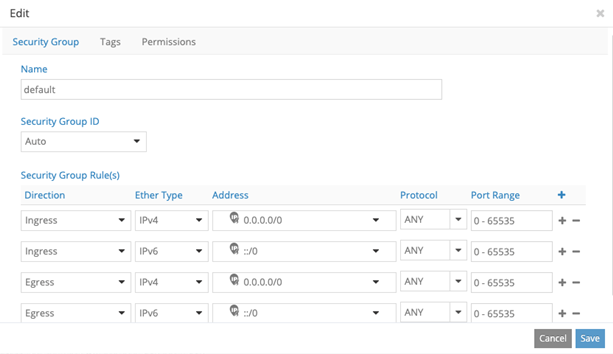
Default security group of the virtual-network where OpenShift nodes are launched must be modified to allow all ingress traffic to communicate with OpenShift networks provided in the OpenShift inventory file.
Provisioning Nested OpenShift Cluster
Provisioning a nested OpenShift cluster is a two-step process.
Create link-local services in the Contrail-OpenStack cluster.
A nested OpenShift cluster is managed by the same Contrail controller that manages the underlying OpenStack cluster. Hence, the nested Openshift cluster needs IP reachability to the Contrail controller and OpenStack keystone service. Since the OpenShift cluster is actually an overlay on the OpenStack cluster, we use the Link Local Service feature of Contrail to provide IP reachability to and from the overlay OpenShift cluster and OpenStack cluster.
To configure a Link Local Service, we need a Fabric IP and Service IP. Fabric IP is the node IP on which the Contrail Controller and OpenStack services are running. Service IP is a unique and unused IP in the entire OpenStack cluster and is shared with the OpenShift cluster to reach Contrail Controller and OpenStack services. Service IP (along with port number) is used by the data plane to identify the fabric IP. For each node of the OpenStack cluster, one service IP must be identified.
You must configure the following Link Local Services in Contrail.
Contrail Controller and OpenStack Process
Service IP
Service Port
Fabric IP
Fabric Port
Contrail Config
<Service IP for the running node>
8082
<Node IP of running node>
8082
Contrail Analytics
<Service IP for the running node>
8086
<Node IP of running node>
8086
Contrail Msg Queue
<Service IP for the running node>
5673
<Node IP of running node>
5673
Contrail VNC DB
<Service IP for the running node>
9161
<Node IP of running node>
9161
Keystone
<Service IP for the running node>
35357
<Node IP of running node>
35357
K8s-cni-to-agent
<Service IP for the running node>
9091
<Node IP of running node>
9091
For example, consider a sample cluster of seven nodes.
Contrail Config : 192.168.1.100
Contrail Analytics : 192.168.1.100, 192.168.1.101
Contrail Msg Queue : 192.168.1.100
Contrail VNC DB : 192.168.1.100, 192.168.1.101, 192.168.1.102
Keystone: 192.168.1.200
Vrouter: 192.168.1.201, 192.168.1.202, 192.168.1.203
Allocate seven unused IP addresses for the seven nodes.
192.168.1.100  --> 10.10.10.1
192.168.1.101  --> 10.10.10.2
192.168.1.102  --> 10.10.10.3
192.168.1.200  --> 10.10.10.4
192.168.1.201/192.168.1.202/192.168.1.203  --> 10.10.10.5
Note:One Service IP address can represent all vRouter nodes.
The following link-local services must be created:
Contrail controller and OpenStack process
Service IP
Service Port
Fabric IP
Fabric Port
Contrail Config
10.10.10.1
8082
192.168.1.100
8082
Contrail Analytics 1
10.10.10.1
8086
192.168.1.100
8086
Contrail Analytics 2
10.10.10.1
8086
192.168.1.101
8086
Contrail Msg Queue
10.10.10.2
5673
192.168.1.100
5673
Contrail VNC DB 1
10.10.10.1
9161
192.168.1.100
9161
Contrail VNC DB 2
10.10.10.2
9161
192.168.1.101
9161
Contrail VNC DB 3
10.10.10.2
9161
192.168.1.102
9161
Keystone
10.10.10.4
35357
192.168.1.200
35357
K8s-cni-to-agent
10.10.10.5
9091
127.0.0.1
9091
Install OpenShift using OpenShift Ansible deployer.
Perform the following steps to install the nested OpenShift 3.11 cluster along with Contrail Networking using OpenShift Ansible deployer.
Set up environment nodes for RHEL OpenShift enterprise installations:
Subscribe to RHEL.
(all-nodes)# subscription-manager register --username
    <> --password <> --force
From the list of available subscriptions, find and attach the pool ID for the OpenShift Container Platform subscription.
(all-nodes)# subscription-manager attach --pool=pool-IDDisable all yum repositories.
(all-nodes)# subscription-manager repos --disable="*"Enable only the required repositories.
 (all-nodes)# subscription-manager repos \
        --enable="rhel-7-server-rpms" \
        --enable="rhel-7-server-extras-rpms" \
        --enable="rhel-7-server-ose-3.11-rpms" \
        --enable=rhel-7-fast-datapath-rpms \
        --enable="rhel-7-server-ansible-2.6-rpms"
Install required packages, such as python-netaddr, iptables-services, and so on.
(all-nodes)# yum install -y tcpdump wget git net-tools
          bind-utils yum-utils iptables-services bridge-utils bash-completion
          kexec-tools sos psacct python-netaddr openshift-ansible
Note:CentOS OpenShift Origin installations are not supported.
-
Get the files from the latest tar ball. Download the OpenShift Container Platform install package from Juniper software download site and modify the contents of the
openshift-ansibleinventory file.-
Download Openshift Ansible (contrail-ansible-deployer-release-tag.tgz) installer from the Juniper software download site, https://www.juniper.net/support/downloads/?p=contrail#sw. See README Access to Contrail Networking Registry 20xx for appropriate release tags.
-
Copy the install package to the node from where Ansible is deployed. Ensure that the node has password-free access to the OpenShift primary and slave nodes.
scp contrail-ansible-deployer-release-tag.tgz openshift-ansible-node:/root/ -
Log in to the Ansible node and untar the
contrail-ansible-deployer-release-tag.tgzpackage.tar -xzvf contrail-ansible-deployer-release-tag.tgz -C /root/ -
Verify the contents of the openshift-ansible directory.
cd /root/openshift-ansible/ -
Modify the inventory/ose-install file to match your OpenShift environment.
Populate the inventory/ose-install file with Contrail configuration parameters specific to your system. The following mandatory parameters must be set.
contrail_version=1907 contrail_container_tag=<> contrail_registry="hub.juniper.net/contrail" contrail_registry_username=<> contrail_registry_password=<> openshift_use_openshift_sdn=false os_sdn_network_plugin_name='cni' openshift_use_contrail=trueNote:The
contrail_container_tagvalue for this release can be found in the README Access to Contrail Networking Registry 20xx file.
Note:Juniper Networks recommends that you obtain the Ansible source files from the latest release.
This procedure assumes that there is one primary node, one infrastructure node, and one compute node.
master : server1 (1x.xx.xx.11)
infrastructure : server2 (1x.xx.xx.22)
compute : server3 (1x.xx.xx.33)
-
Edit /etc/hosts to include all the nodes information.
[root@server1]# cat /etc/hosts
127.0.0.1   localhost localhost.localdomain localhost4 localhost4.localdomain4
::1         localhost localhost.localdomain localhost6 localhost6.localdomain6
1x.xx.xx.100 puppet
1x.xx.xx.11 server1.contrail.juniper.net server1
1x.xx.xx.22 server2.contrail.juniper.net server2
1x.xx.xx.33 server3.contrail.juniper.net server3
Set up password-free SSH access to the Ansible node and all the nodes.
ssh-keygen -t rsa
ssh-copy-id root@1x.xx.xx.11
ssh-copy-id root@1x.xx.xx.22
ssh-copy-id root@1x.xx.xx.33
Run Ansible playbook to install OpenShift Container Platform with Contrail. Before you run Ansible playbook, ensure that you have edited inventory/ose-install file.
(ansible-node)# cd /root/openshift-ansible
(ansible-node)# ansible-playbook -i inventory/ose-install playbooks/prerequisites.yml
(ansible-node)# ansible-playbook -i inventory/ose-install playbooks/deploy_cluster.yml
For a sample inventory/ose-install file, see #installing-a-nested-red-hat-openshift-container-platform---cluster-using-contrail-ansible-deployer__sample_ose_install.
Create a password for the admin user to log in to the UI from the primary node.
(master-node)# htpasswd /etc/origin/master/htpasswd admin
Note:If you are using a load balancer, you must manually copy the htpasswd file into all your primary nodes.
Assign cluster-admin role to admin user.
(master-node)# oc adm policy add-cluster-role-to-user cluster-admin admin
(master-node)# oc login -u admin
Open a Web browser and type the entire fqdn name of your primary node or load balancer node, followed by :8443/console.
https://<your host name from your ose-install inventory>:8443/console
Use the user name and password created in step 2.f to log in to the Web console.
Your DNS should resolve the host name for access. If the host name is not resolved, modify the /etc/hosts file to route to the above host.
Note:OpenShift 3.11 cluster upgrades are not supported.
Sample inventory/ose-install File
[OSEv3:vars]


###########################################################################
### OpenShift Nested mode vars
###########################################################################
nested_mode_contrail=true
rabbitmq_node_port=5673
contrail_nested_masters_ip="1.1.1.1 2.2.2.2 3.3.3.3"          <---  ips of contrail controllers
auth_mode=keystone
keystone_auth_host=<w.x.y.z>        <--- This should be the IP where Keystone service is running.
keystone_auth_admin_tenant=admin
keystone_auth_admin_user=admin
keystone_auth_admin_password=MAYffWrX7ZpPrV2AMAa9zAUvG     <-- Keystone admin password.
keystone_auth_admin_port=35357
keystone_auth_url_version=/v3
#k8s_nested_vrouter_vip is a service IP for the running node which we configured above
k8s_nested_vrouter_vip=10.10.10.5   <-- Service IP configured for CNI to Agent communication.(K8s-cni-to-agent in above examples)
#k8s_vip is kubernetes api server ip
k8s_vip=<W.X.Y.Z>                   <-- IP of the Openshift Master Node.
#cluster_network is the one which vm network belongs to
cluster_network="{'domain': 'default-domain', 'project': 'admin', 'name': 'net1'}" <-- FQName of the Virtual Network where Virtual Machines are running. The VMs in which Openshift cluster is being installed in nested mode.
#config_nodes="x.x.x.x,y.y.y.y.y"
#analytics_nodes="x.x.x.x,y.y.y.y.y"
#config_api_vip=x.x.x.x
#analytics_api_vip=x.x.x.x


###########################################################################
### OpenShift Basic Vars
###########################################################################
openshift_deployment_type=openshift-enterprise
deployment_type=openshift-enterprise
containerized=false
openshift_disable_check=docker_image_availability,memory_availability,package_availability,disk_availability,package_version,docker_storage

# Default node selectors
openshift_hosted_infra_selector="node-role.kubernetes.io/infra=true"

oreg_auth_user=<>
oreg_auth_password=<>

###########################################################################
### OpenShift Master Vars
###########################################################################

openshift_master_api_port=8443
openshift_master_console_port=8443
openshift_master_cluster_method=native

# Set this line to enable NFS
openshift_enable_unsupported_configurations=True


###########################################################################
### OpenShift Network Vars
###########################################################################

openshift_use_openshift_sdn=false
os_sdn_network_plugin_name='cni'
openshift_use_contrail=true

###########################################################################
### OpenShift Authentication Vars
###########################################################################

# htpasswd Authentication
openshift_master_identity_providers=[{'name': 'htpasswd_auth', 'login': 'true', 'challenge': 'true', 'kind': 'HTPasswdPasswordIdentityProvider'}]

###########################################################################
### OpenShift Router and Registry Vars
###########################################################################

openshift_hosted_router_replicas=1
openshift_hosted_registry_replicas=1

openshift_hosted_registry_storage_kind=nfs
openshift_hosted_registry_storage_access_modes=['ReadWriteMany']
openshift_hosted_registry_storage_nfs_directory=/export
openshift_hosted_registry_storage_nfs_options='*(rw,root_squash)'
openshift_hosted_registry_storage_volume_name=registry
openshift_hosted_registry_storage_volume_size=10Gi
openshift_hosted_registry_pullthrough=true
openshift_hosted_registry_acceptschema2=true
openshift_hosted_registry_enforcequota=true
openshift_hosted_router_selector="node-role.kubernetes.io/infra=true"
openshift_hosted_registry_selector="node-role.kubernetes.io/infra=true"

###########################################################################
### OpenShift Service Catalog Vars
###########################################################################

openshift_enable_service_catalog=True

template_service_broker_install=True
openshift_template_service_broker_namespaces=['openshift']

ansible_service_broker_install=True

openshift_hosted_etcd_storage_kind=nfs
openshift_hosted_etcd_storage_nfs_options="*(rw,root_squash,sync,no_wdelay)"
openshift_hosted_etcd_storage_nfs_directory=/export
openshift_hosted_etcd_storage_labels={'storage': 'etcd-asb'}
openshift_hosted_etcd_storage_volume_name=etcd-asb
openshift_hosted_etcd_storage_access_modes=['ReadWriteOnce']
openshift_hosted_etcd_storage_volume_size=2G


###########################################################################
### OpenShift Metrics and Logging Vars
###########################################################################
# Enable cluster metrics
openshift_metrics_install_metrics=True

openshift_metrics_storage_kind=nfs
openshift_metrics_storage_access_modes=['ReadWriteOnce']
openshift_metrics_storage_nfs_directory=/export
openshift_metrics_storage_nfs_options='*(rw,root_squash)'
openshift_metrics_storage_volume_name=metrics
openshift_metrics_storage_volume_size=2Gi
openshift_metrics_storage_labels={'storage': 'metrics'}

openshift_metrics_cassandra_nodeselector={"node-role.kubernetes.io/infra":"true"}
openshift_metrics_hawkular_nodeselector={"node-role.kubernetes.io/infra":"true"}
openshift_metrics_heapster_nodeselector={"node-role.kubernetes.io/infra":"true"}

# Enable cluster logging. ((
####openshift_logging_install_logging=True
openshift_logging_install_logging=False
#openshift_logging_storage_kind=nfs
#openshift_logging_storage_access_modes=['ReadWriteOnce']
#openshift_logging_storage_nfs_directory=/export
#openshift_logging_storage_nfs_options='*(rw,root_squash)'
#openshift_logging_storage_volume_name=logging
#openshift_logging_storage_volume_size=5Gi
#openshift_logging_storage_labels={'storage': 'logging'}
#openshift_logging_es_cluster_size=1
#openshift_logging_es_nodeselector={"node-role.kubernetes.io/infra":"true"}
#openshift_logging_kibana_nodeselector={"node-role.kubernetes.io/infra":"true"}
#openshift_logging_curator_nodeselector={"node-role.kubernetes.io/infra":"true"}

###########################################################################
### OpenShift Prometheus Vars
###########################################################################

## Add Prometheus Metrics:
openshift_hosted_prometheus_deploy=True
openshift_prometheus_node_selector={"node-role.kubernetes.io/infra":"true"}
openshift_prometheus_namespace=openshift-metrics

# Prometheus
openshift_prometheus_storage_kind=nfs
openshift_prometheus_storage_access_modes=['ReadWriteOnce']
openshift_prometheus_storage_nfs_directory=/export
openshift_prometheus_storage_nfs_options='*(rw,root_squash)'
openshift_prometheus_storage_volume_name=prometheus
openshift_prometheus_storage_volume_size=1Gi
openshift_prometheus_storage_labels={'storage': 'prometheus'}
openshift_prometheus_storage_type='pvc'

# For prometheus-alertmanager
openshift_prometheus_alertmanager_storage_kind=nfs
openshift_prometheus_alertmanager_storage_access_modes=['ReadWriteOnce']
openshift_prometheus_alertmanager_storage_nfs_directory=/export
openshift_prometheus_alertmanager_storage_nfs_options='*(rw,root_squash)'
openshift_prometheus_alertmanager_storage_volume_name=prometheus-alertmanager
openshift_prometheus_alertmanager_storage_volume_size=1Gi
openshift_prometheus_alertmanager_storage_labels={'storage': 'prometheus-alertmanager'}
openshift_prometheus_alertmanager_storage_type='pvc'

# For prometheus-alertbuffer
openshift_prometheus_alertbuffer_storage_kind=nfs
openshift_prometheus_alertbuffer_storage_access_modes=['ReadWriteOnce']
openshift_prometheus_alertbuffer_storage_nfs_directory=/export
openshift_prometheus_alertbuffer_storage_nfs_options='*(rw,root_squash)'
openshift_prometheus_alertbuffer_storage_volume_name=prometheus-alertbuffer
openshift_prometheus_alertbuffer_storage_volume_size=1Gi
openshift_prometheus_alertbuffer_storage_labels={'storage': 'prometheus-alertbuffer'}
openshift_prometheus_alertbuffer_storage_type='pvc'


#########################################################################
### Openshift HA
#########################################################################

# Openshift HA
openshift_master_cluster_hostname=load-balancer-0-3eba0c20dc494dfc93d5d50d06bbde89
openshift_master_cluster_public_hostname=load-balancer-0-3eba0c20dc494dfc93d5d50d06bbde89


#########################################################################
### Contrail Variables
########################################################################

service_subnets="172.30.0.0/16"
pod_subnets="10.128.0.0/14"

# Below are Contrail variables. Comment them out if you don't want to install Contrail through ansible-playbook
contrail_version=1907
contrail_container_tag=<>
contrail_registry=hub.juniper.net/contrail
contrail_registry_username=<>
contrail_registry_password=<>
openshift_docker_insecure_registries=hub.juniper.net/contrail
contrail_nodes=[10.0.0.5,10.0.0.3,10.0.0.4]
vrouter_physical_interface=eth0


###########################################################################
### OpenShift Hosts
###########################################################################
[OSEv3:children]
masters
etcd
nodes
lb
nfs
openshift_ca

[masters]
kube-master-2-3eba0c20dc494dfc93d5d50d06bbde89
kube-master-1-3eba0c20dc494dfc93d5d50d06bbde89
kube-master-0-3eba0c20dc494dfc93d5d50d06bbde89

[etcd]
kube-master-2-3eba0c20dc494dfc93d5d50d06bbde89
kube-master-1-3eba0c20dc494dfc93d5d50d06bbde89
kube-master-0-3eba0c20dc494dfc93d5d50d06bbde89

[lb]
load-balancer-0-3eba0c20dc494dfc93d5d50d06bbde89

[nodes]
kube-master-2-3eba0c20dc494dfc93d5d50d06bbde89 openshift_node_group_name='node-config-master'
controller-0-3eba0c20dc494dfc93d5d50d06bbde89 openshift_node_group_name='node-config-infra'
compute-1-3eba0c20dc494dfc93d5d50d06bbde89 openshift_node_group_name='node-config-compute'
controller-2-3eba0c20dc494dfc93d5d50d06bbde89 openshift_node_group_name='node-config-infra'
kube-master-1-3eba0c20dc494dfc93d5d50d06bbde89 openshift_node_group_name='node-config-master'
kube-master-0-3eba0c20dc494dfc93d5d50d06bbde89 openshift_node_group_name='node-config-master'
compute-0-3eba0c20dc494dfc93d5d50d06bbde89 openshift_node_group_name='node-config-compute'
controller-1-3eba0c20dc494dfc93d5d50d06bbde89 openshift_node_group_name='node-config-infra'

[nfs]
load-balancer-0-3eba0c20dc494dfc93d5d50d06bbde89

[openshift_ca]
kube-master-2-3eba0c20dc494dfc93d5d50d06bbde89
kube-master-1-3eba0c20dc494dfc93d5d50d06bbde89
kube-master-0-3eba0c20dc494dfc93d5d50d06bbde89
The /etc/resolv.conf must have write permissions.