Enroll an SRX Series Firewall in Juniper ATP Cloud Using J-Web
You can also enroll an SRX Series Firewall to Juniper ATP Cloud using J-Web. J-Web is the Web interface that comes preinstalled on the SRX Series Firewall. For more information, see J-Web User Guide for SRX Series Firewalls.
Before You Begin
-
Decide which region the realm you create will cover because you must select a region when you configure a realm.
-
Check whether the device is already enrolled in the Juniper ATP Cloud Web Portal.
-
In CLI mode, configure
set security forwarding-process
              enhanced-services-mode
on your SRX300, SRX320, SRX340, SRX345, and SRX550M devices to open ports and get the device ready to communicate with Juniper ATP Cloud
To enroll your SRX Series Firewall using J-Web portal:
-
(Optional) Configure a proxy profile.
In the J-Web UI, navigate to .
The ATP Enrollment page is displayed.

-
Use either of the following methods to configure the proxy profile:
-
Select an existing proxy profile from the Proxy Profile list.
Note:-
The list displays the existing proxy profiles created using the Proxy Profile page ().
-
The SRX Series Firewall and Juniper ATP Cloud communicate through the proxy server if a proxy profile is configured. Otherwise, they directly communicate with each other.
-
-
Click Create Proxy to create a proxy profile.
The Create Proxy Profile page appears.
Complete the configuration:
-
Profile Name—Enter a name for the proxy profile.
-
Connection Type—Select the connection type server (from the list) that the proxy profile uses:
-
Server IP—Enter the IP address of the proxy server.
-
Host Name—Enter the name of the proxy server.
-
-
Port Number—Select a port number for the proxy profile. Range is 0 through 65,535.
-
Click OK.
A new proxy profile is created.
-
-
Click Apply Proxy.
Applying proxy enables the SRX Series Firewall and Juniper ATP Cloud to communicate through the proxy server.
-
Enroll your device to Juniper ATP Cloud.
Click Enroll to open the ATP Enrollment page.
Note:If there are any existing configuration changes, a message appears for you to commit the changes and then to proceed with the enrollment process.
-
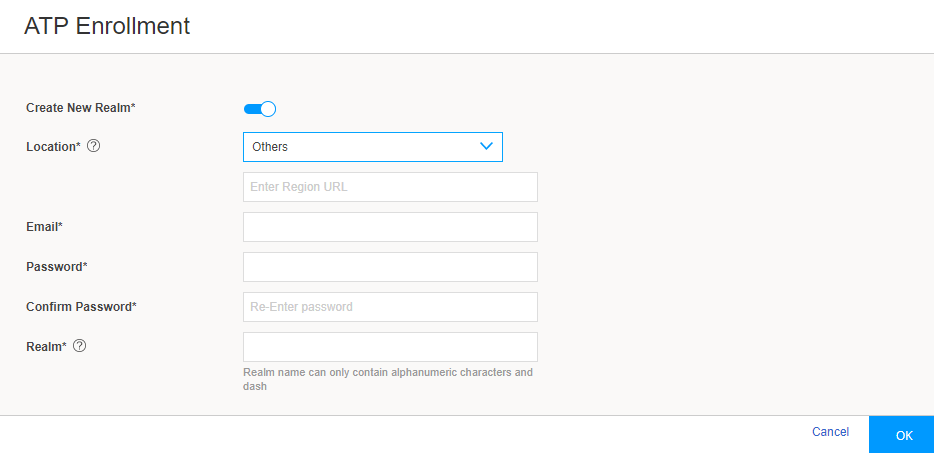
Complete the configuration:
-
Create New Realm—By default, this option is disabled if you have a Juniper ATP Cloud account with an associated license. Enable this option to add a new realm if you do not have a Juniper ATP Cloud account with an associated license.
-
Location—By default, the region is set as Others. Enter the region URL.
-
Email—Enter your e-mail address.
-
Password—Enter a unique string at least eight characters long. Include both uppercase and lowercase letters, at least one number, and at least one special character. Avoid using spaces, and you cannot use the same sequence of characters that are in your e-mail address.
-
Confirm Password—Reenter the password.
-
Realm—Enter a name for the security realm. This name should be meaningful to your organization. A realm name can contain only alphanumeric characters and the dash symbol. Once created, this name cannot be changed.
-
-
Click OK.
The status of the SRX Series Firewall enrollment process is displayed.
Note:Click Diagnostics to troubleshoot any enrollment errors.