Changing the Appliance Type
In release version 5.0.4, a single ISO is provided for all appliance types (All-In-One, Email Collector, Traffic Collector, Core/Central Manager). If you don’t change the form factor during the installation, all appliances initially boot-up as an All-In-One appliance. You can keep this type or change the type by selecting a different type in the wizard screen that appears following the EULA, after boot-up. See the hardware installation guide for details.
In addition to changing the appliance type after the initial installation, you can change the appliance type at any time using a new CLI command introduced in version 5.0.4 for both JATP700 and JATP400.
If you change the appliance type after the initial installation, all data files related to the current type are lost.
After you change the appliance type, you must configure the device for the new type as you would any new installation. Follow the installation procedure in the documentation that corresponds to the new appliance type, including setting the passphrase and following the configuration wizard prompts. There is no limit to how many times you can change the appliance type.
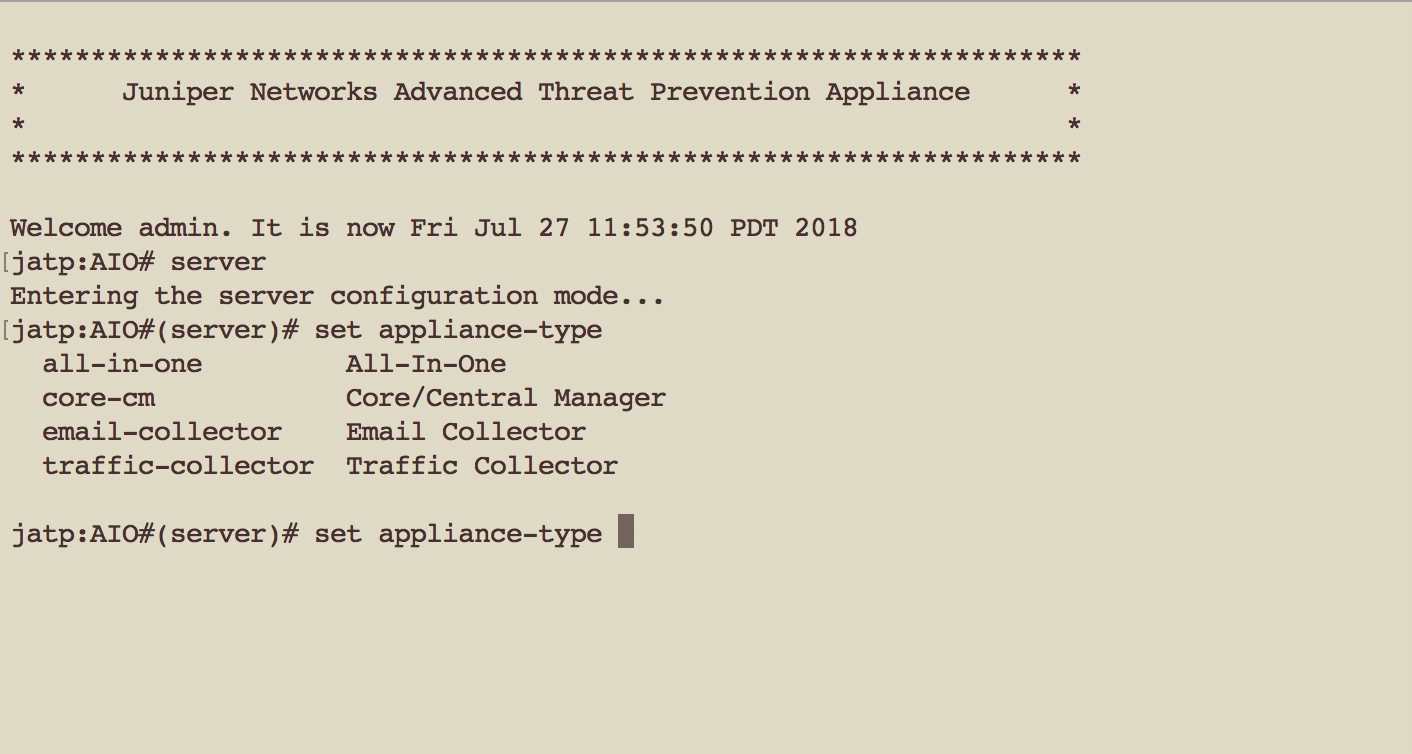
To change the appliance type using the CLI, enter the following command while in server mode. (Note that the current appliance type is displayed at the prompt. In this case, the type is “AIO,” which is All-In-One.):
jatp:AIO#(server)# set appliance-type core-cm
This will result in the deletion of all data and configurations not relevant to the new form factor.
Proceed? (Yes/No)?  Yes
The appliance types available from the set appliance-type command are listed below and displayed in the following CLI screen:
all-in-onecore-cmemail-collectortraffic-collector
When an Email Collector or Traffic Collector is converted to an All In One or Core/CM, you must obtain and apply a new license created for that device identified by its UUID. This is because, after the conversion, the device still uses the existing license, which it obtained and validated from the Core it was connected to previously. Refer to Setting the Juniper ATP Appliance License Key in the Operator’s Guide for instructions on applying a new license.

As mentioned previously, if you change the appliance type after the initial installation, all data files related to the current type are lost. Here are examples of the information that is lost when the appliance type is changed.
Core/CM—If Core/CM is removed from the current appliance type, that will result in the deletion of the following data: all user configurations such as notifications (alert and SIEM settings), system profiles (roles, zones, users, SAML, systems, GSS, collectors and other settings), environmental settings (email and firewall mitigation settings, asset value, identity, splunk configuration and other environmental settings), all file samples, analysis results, events and incidents.
Traffic Collector—If Traffic Collector is removed from the current appliance type, that will result in the deletion of the following data: the data path proxy, traffic rules and all other items configured through the collector CLI.
Email Collector—If Email Collector is removed from the current appliance type, that will result in the deletion of collector related information. Also note that the Email Collector will stop receiving emails.
All-In-One—If All-In-One is removed from the current appliance type, that will result in the following:
If you convert from All-In-One to Traffic Collector, then all items mentioned in the Core/CM section above will be removed.
If you convert from All-In-One to Core/CM, then all settings mentioned in the Traffic Collector section above will be removed.
If you convert from All-In-One to Email Collector, then all settings mentioned in both the Core/CM and Traffic Collector sections above will be removed.
If you are using MCM or Secondary Core and want to change the appliance type to one of the choices available from the “set appliance-type” CLI command, you must first do the following:
Convert the MCM system back to a Core/CM system by running the
set mcm removecommand from the cm menu.Convert from a Secondary Core system to a Core system by resetting the CM IP address to 127.0.0.1 and running the
set
cm 127.0.0.1
command from the server menu.
