Help us improve your experience.

Let us know what you think.

Do you have time for a two-minute survey?


Appendix A: Deploy ATP Appliance Email Threat Mitigation for Office 365 (A Start to Finish Example)

This section provides a start to finish configuration of ATP Appliance email threat mitigation for Microsoft Office 365 using Azure.

Overview

The administrator must configure supported servers to direct the email stream to the ATP Appliance MTA Receiver using the email address setup on the MTA Receiver (for example: CustomerX@MTA-IP or CustomerX@DomainName. When using a domain name, the MX records should be resolvable by the servers). The ATP Appliance Appliance’s On-Premise MTA Receiver extracts objects/URL links and submits them to the ATP Appliance Appliance Core for analysis.

Prerequisites:

  • ATP Appliance SmartCore running CyOS version 5.0.4.27

  • ATP Appliance SmartCore licensed for Enterprise Feature Set

  • ATP Appliance SmartCore administrator account privileges

Register a New Application in the Azure Portal

  1. Sign in to the Azure portal.
  2. Choose your Azure AD tenant by selecting your account in the top right corner of the page.
  3. In the left-hand navigation pane, choose Azure Active Directory and click New application registration.
  4. A Create template opens. In that template, you will enter the name of the new application and select the Application type and Sign-on URL fields.
  5. Enter a Name (such as ATP Appliance Email Mitigation). Select Web App/ API for Application Type and enter a Sign-On URL in the format http://localhost:<portnumber>.

    Enter any port number, preferably in the range 20000 – 60000. For example https://x.x.x.x:56565.

Obtain the Application ID and Object ID

Once you've completed the registration process, Azure AD assigns your application a unique client identifier—the Application ID. Go to the App registrations page, select the application you just created, and save the Application ID and Object ID as shown below.

Figure 1: Application ID and Object IDApplication ID and Object ID

Obtain the Directory ID

In Azure, navigate to DashboardActive Directory>Properties. Copy the Directory ID and save it for later use.
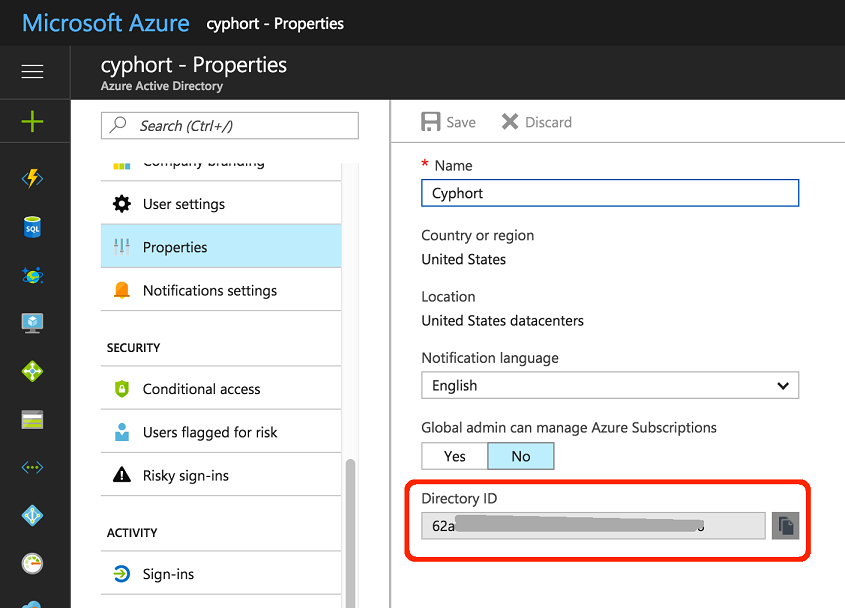
Figure 2: Directory IDDirectory ID

Provide API Access Permissions

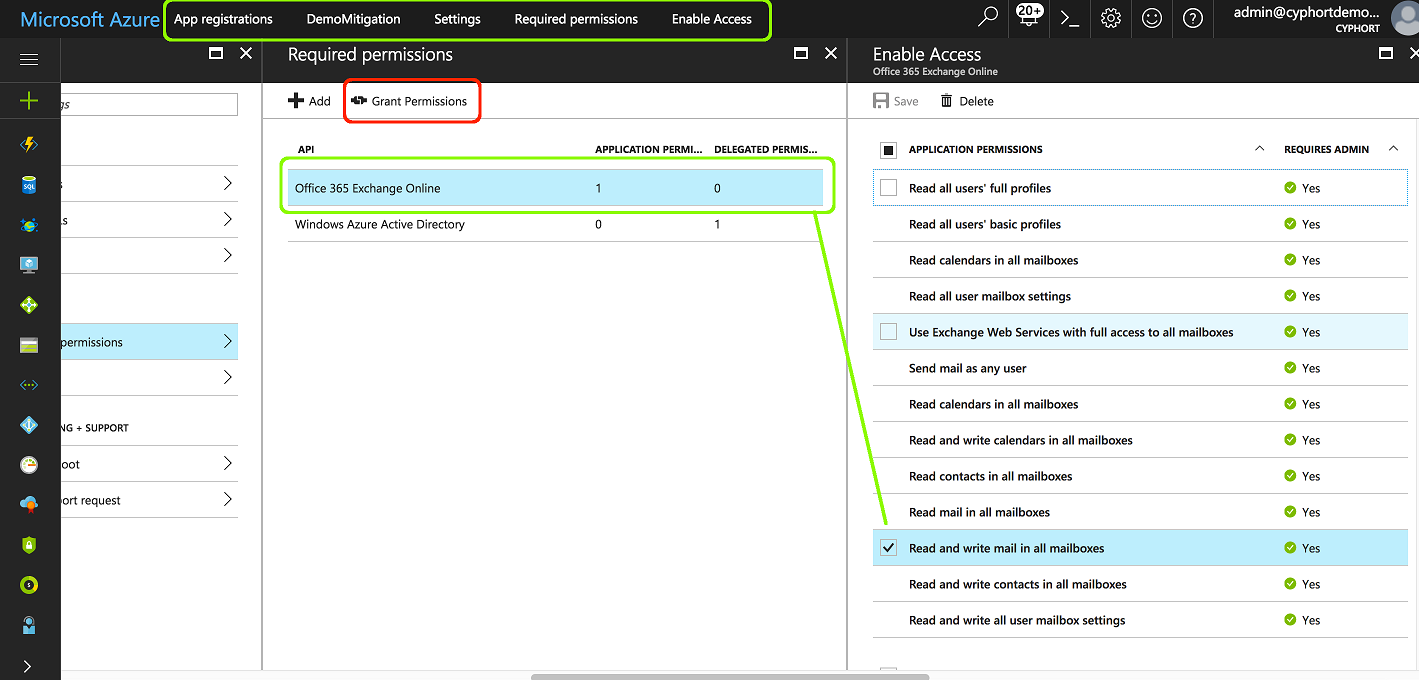
  1. Navigate to the API Access Permissions page by going to App Registrations>(App you just created)>Settings>Required Permissions (Located in the API Access section).
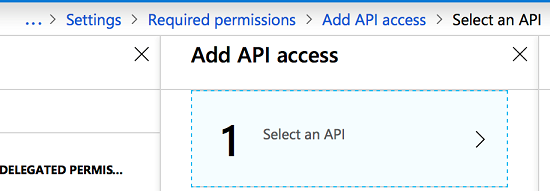
  2. Click the Add button at the top of the page and then click Select an API.

    Next, select Office 365 Exchange Online.

  3. Provide the following permissions:
    • "APPLICATION PERMISSIONS"

      • Read and write mail in all mailboxes

  4. Click the Grant Permissions button located under the Required Permissions section.
    Figure 3: Grant PermissionsGrant Permissions

Download the Manifest File

  1. Go to your App registrations in the Azure Portal
  2. From your new app registration, click the Manifest button located in between the “Settings” and “Delete” buttons.
  3. Click Download to download the manifest json file.
    Figure 4: Download Manifest FileDownload Manifest File

Configure Email Mitigation Settings in ATP Appliance

  1. Login to the ATP Appliance Web UI.
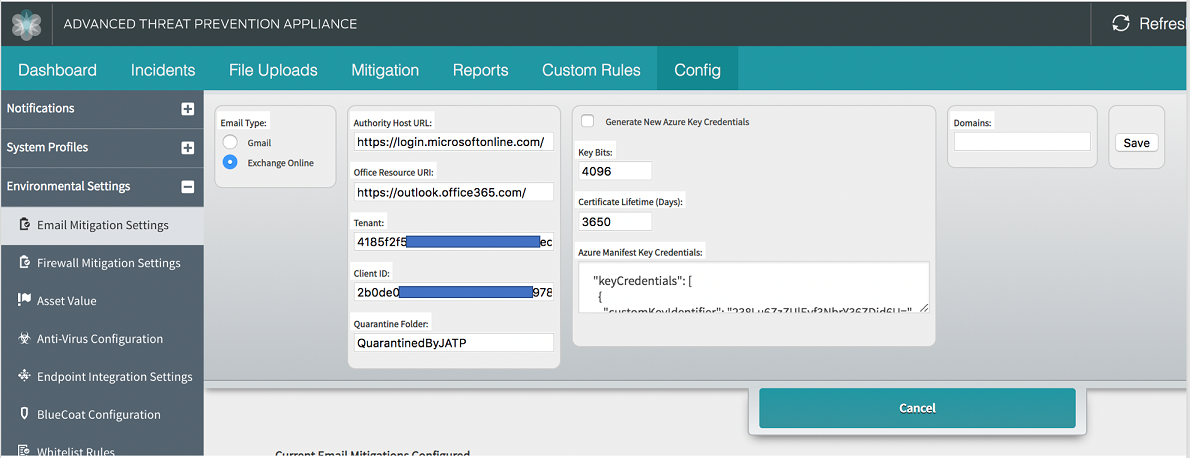
  2. Navigate to Config>Environmental Settings>Email Mitigation Settings.
  3. Select Add New Mitigation.
  4. For email type, select Exchange Online.
  5. In the Tenant field, enter the Directory ID you obtained in the previous section entitled “Obtain the Directory ID.”
  6. In the Client ID field, enter the Application ID you obtained in the previous section entitled “Obtain the Application ID and Object ID.”
  7. Quarantined emails are moved to the “QuarantinedByJATP” folder under Quarantine. If you want to move emails to a different folder, enter the folder name under Quarantine Folder.
  8. Select the Generate New Azure Key Credentials check box and then click the Add button.
  9. View the configuration by clicking Edit. You should see the ‘Azure Manifest Key Credentials’ populated.
  10. Copy the entire contents of the Azure Manifest Key Credentials and paste it under the ‘keyCredentials’ section of the manifest file you downloaded previously from Azure -App registrations.
    Figure 5: ATP Appliance Email Mitigation SettingsATP Appliance Email Mitigation Settings

Upload the Manifest File

  1. Go to your App registrations in the Azure Portal.
  2. From your app, click the Manifest button located between the “Settings” and “Delete” buttons.
  3. Upload the manifest json file you updated with ‘keyCredentials’ from the ATP Appliance section.

Configure Office 365 Journaling for ATP Appliance Mitigation

Create an administrator user in Office 365 who is configured as the journal email sender:

  1. In the Admin center, go to the Active users page or select Users>Active Users.
  2. Choose Add a user.
  3. Fill in the information for the user and select Add when you are done. This account name will be used in the ATP Appliance email collector configuration.
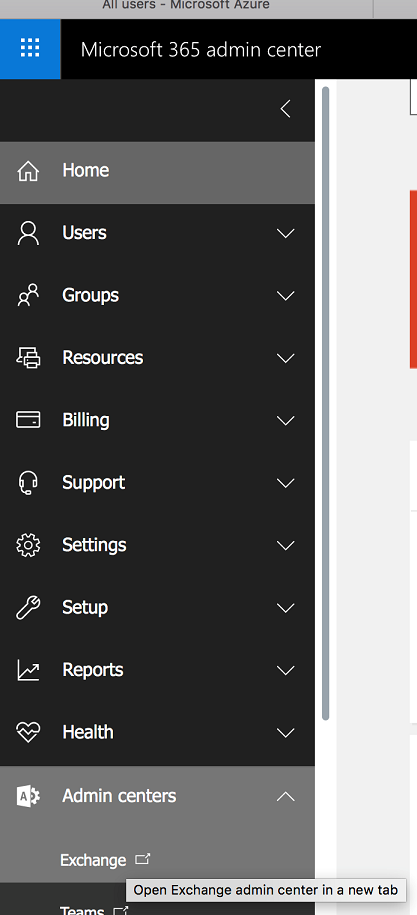
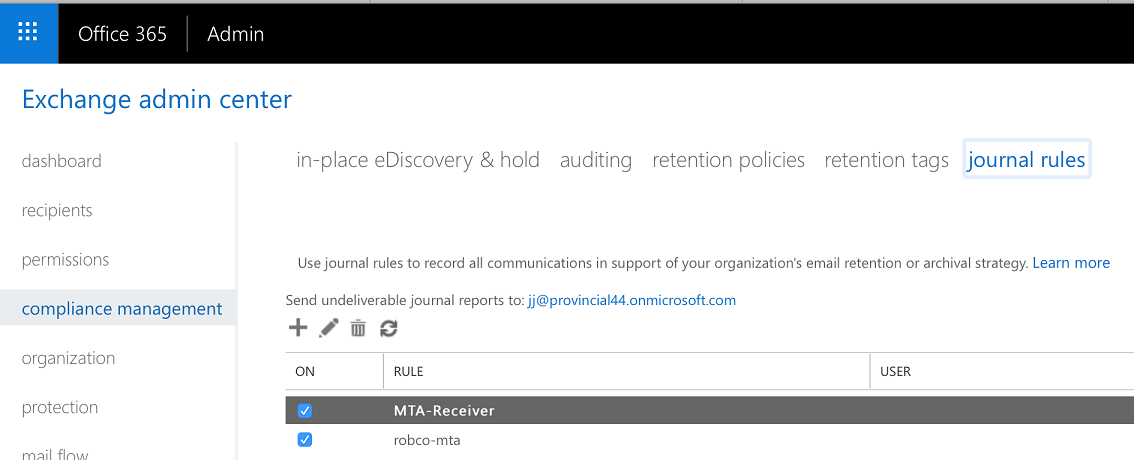
  4. After you create the journal email sender, navigate to Admin centers>Exchange.
  5. Select Compliance Management>Journal Rules.
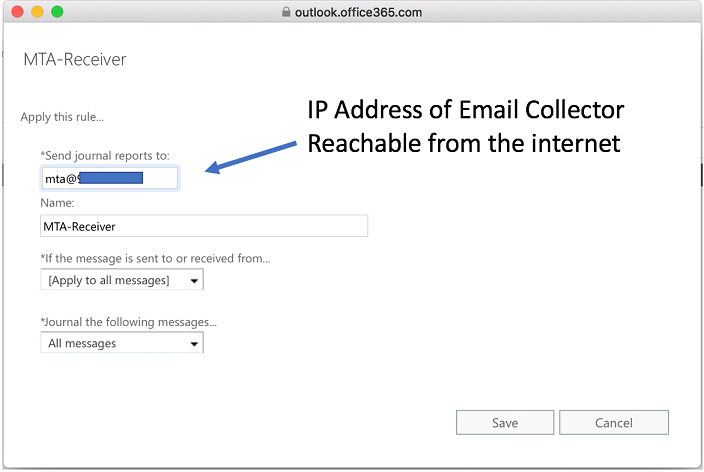
  6. Click the + sign to add a new Journal Rule.
  7. Complete the new Journal Rule form fields and click Save.

Configure the Email Collector on ATP Appliance

  1. Login to the ATP Appliance Web UI.
  2. Navigate to Config>System Profiles> Email Collectors.
  3. Under Capture Method, select JATP MTA Receiver.
  4. Under MTA Receiver IP, enter the publicly accessible IP address for the ATP Appliance MTA appliance.

    This is the same address entered at the “Registered app>Home page” step. Note that this deployment uses DMZ Mode to expose ATP Appliance MTA to the service provider allocated public IP address. Port forwarding would be another option.

  5. Domains should be left blank.
  6. Receive from my email server should be set to No.
  7. The Enabled option should be selected.
  8. Click Save.

Test the Configuration

  1. Login to the ATP Appliance Web UI.
  2. Navigate to Config>Environmental Settings>Email Mitigation Settings.
  3. Click the Test link.
  4. Verify that the test is successful.
  5. If you see Unable to obtain access token, the manifest file’s key credentials are not correct. This may be caused by a lack of API access permissions, an incorrect Client ID, or an incorrect Tenant Id. Please refer to the above sections again to verify that all configurations are correct and that they match on both Azure and ATP Appliance.