MCM Configuration
Use the CLI command line in “cm” mode, available for MCM device types, to configure a manager of distributed central managers (MCM). It is recommended that an admin begin by converting a CM to an MCM via the CLI, and then set up each individual, distributed CMs to register to the configured MCM in order to sync incidents.
Communication between the MCM and the secondary CMs takes place on port 443 which must be set bidirectionally if the CMs and MCM communicate across a firewall boundary.
From the CLI “cm” mode, configure an MCM IP address and a shared secret/passphrase. When the MCM CLI is used, a Web UI MCM account is created via this passphrase which is used as the API key, which means that client CMs connected to the MCM can use this passphrase to perform a “login” API call to the management CM (MCM).
The secret passphrase must be configured on all distributed CM and MCM devices to allow communications.
In MCM configurations, all systems must be either be in FIPS mode or not in FIPS mode. This is due to differences in how the device keys are calculated between modes.
To convert a CM to an MCM
Use the following procedure to convert a CM to an MCM. A sample CLI sequence follows.
Sample MCM CLI Configuration Sequence
MCM-VM# cm
Entering the Central Manager configuration mode...
MCM-VM(cm)# set mcm
ip Set the IP address of the Manager of Central Managers
resync Resync with MCM
remove Remove entire MCM config
MCM-VM(cm)# set mcm ip 127.0.0.1
passphrase Set the device key passphrase for MCM
MCM-VM(cm)# set mcm ip 127.0.0.1 passphrase password123
To Register and Sync Incidents from Distributed CMs to an MCM
Use this procedure to register and syn incidents on distributed CMs to a configured MCM. A sample CLI sequence follows.
- Set the MCM IP on a distributed CM.
- Set the passphrase; this must be same passphrase configured on the MCM.
- Set the username with the API key already configured to be used for communication between each CM and the MCM.
The “remove” command deletes the MCM configuration entirely. However, this command when executed on a CM does not remove any incidents unlike when executed on an MCM.
Use the “resync” command on a CM to force a resync of all incidents from this CM to the MCM.
After configuring the parameters described above, incidents are immediately synced to the configured MCM.
Sample CLI Sequence for CM Registering and Syncing to an MCM
CM-VM6-LosAngeles(cm)# set mcm ip 1.2.3.4
passphrase Set the device key passphrase for MCM
CM-VM6-LosAngeles(cm)# set mcm ip 1.2.3.4 passphrase password123
username Enter a username to use for communication with MCM
<cr>
CM-VM6-LosAngeles(cm)# set mcm ip 1.2.3.4 passphrase password123
username Enter a username to use for communication with MCM
<cr>
CM-VM6-LosAngeles(cm)# set mcm ip 1.2.3.4 passphrase password123
username admin
CM-VM6-LosAngeles(cm)# show mcm
MCM IP Address: 1.2.3.4, username: admin
CM-VM6-LosAngeles(cm)#
Using the MCM Web UI
As mentioned in the introduction, the MCM Web UI management view displays two tabs: the Incidents and Config Tabs.
Use the Incidents tab to view all incidents reported from distributed CMs.
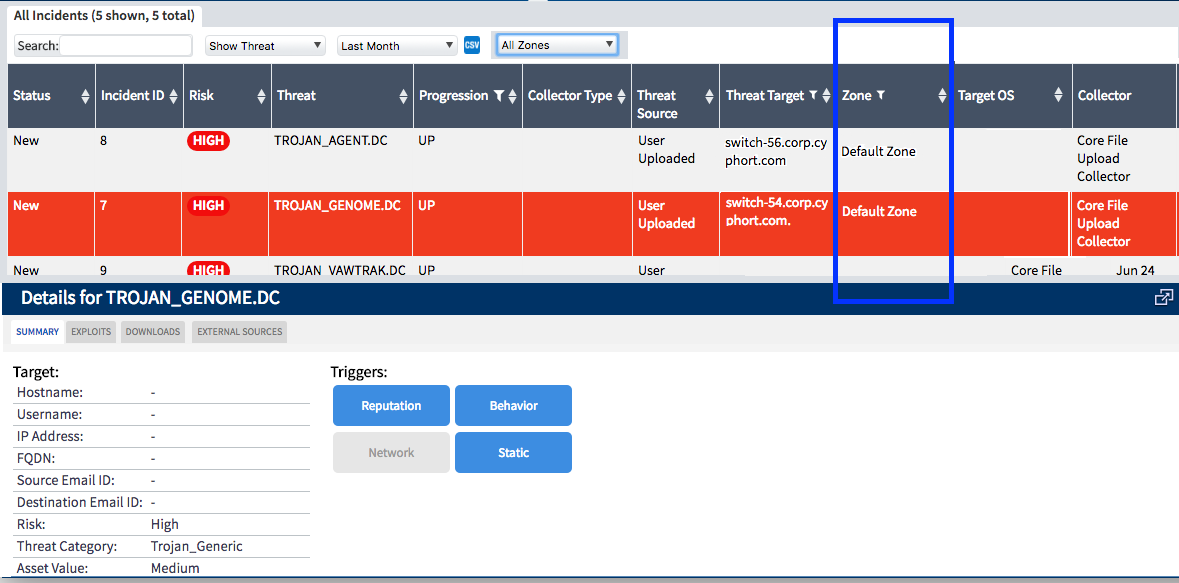
The Uploads button is not available from the MCM Web UI. Be aware also that there is a new column in MCM for the originating CM per incident, and that the Core/CM IP and hostname are displayed in the Summary section. Also: no benign incidents are communicate to the MCM. Lastly, CMs cannot be deleted from the MCM.
Refer to the Juniper ATP Appliance Operator’s Guide for more information about use of the Incidents tab.
On an MCM, the Details section for a selected incident displays the mitigation options as in a CM, and all options are available from the MCM.
Use the Config tab to add or modify MCM settings.
The Config Tab options on an MCM are reduced to System Profiles settings only, as follows:
Password Reset
Roles
Users
SAML Settings
RADIUS Settings
System Settings
Certificate Management
GSS Settings
Secondary CMs
Licensing
Backup/Restore
Refer to the Juniper ATP Appliance Operator’s Guide for more information about use of the Config tab System Profiles configuration options.