Help us improve your experience.

Let us know what you think.

Do you have time for a two-minute survey?


Commit / Revert Changes to Blueprint

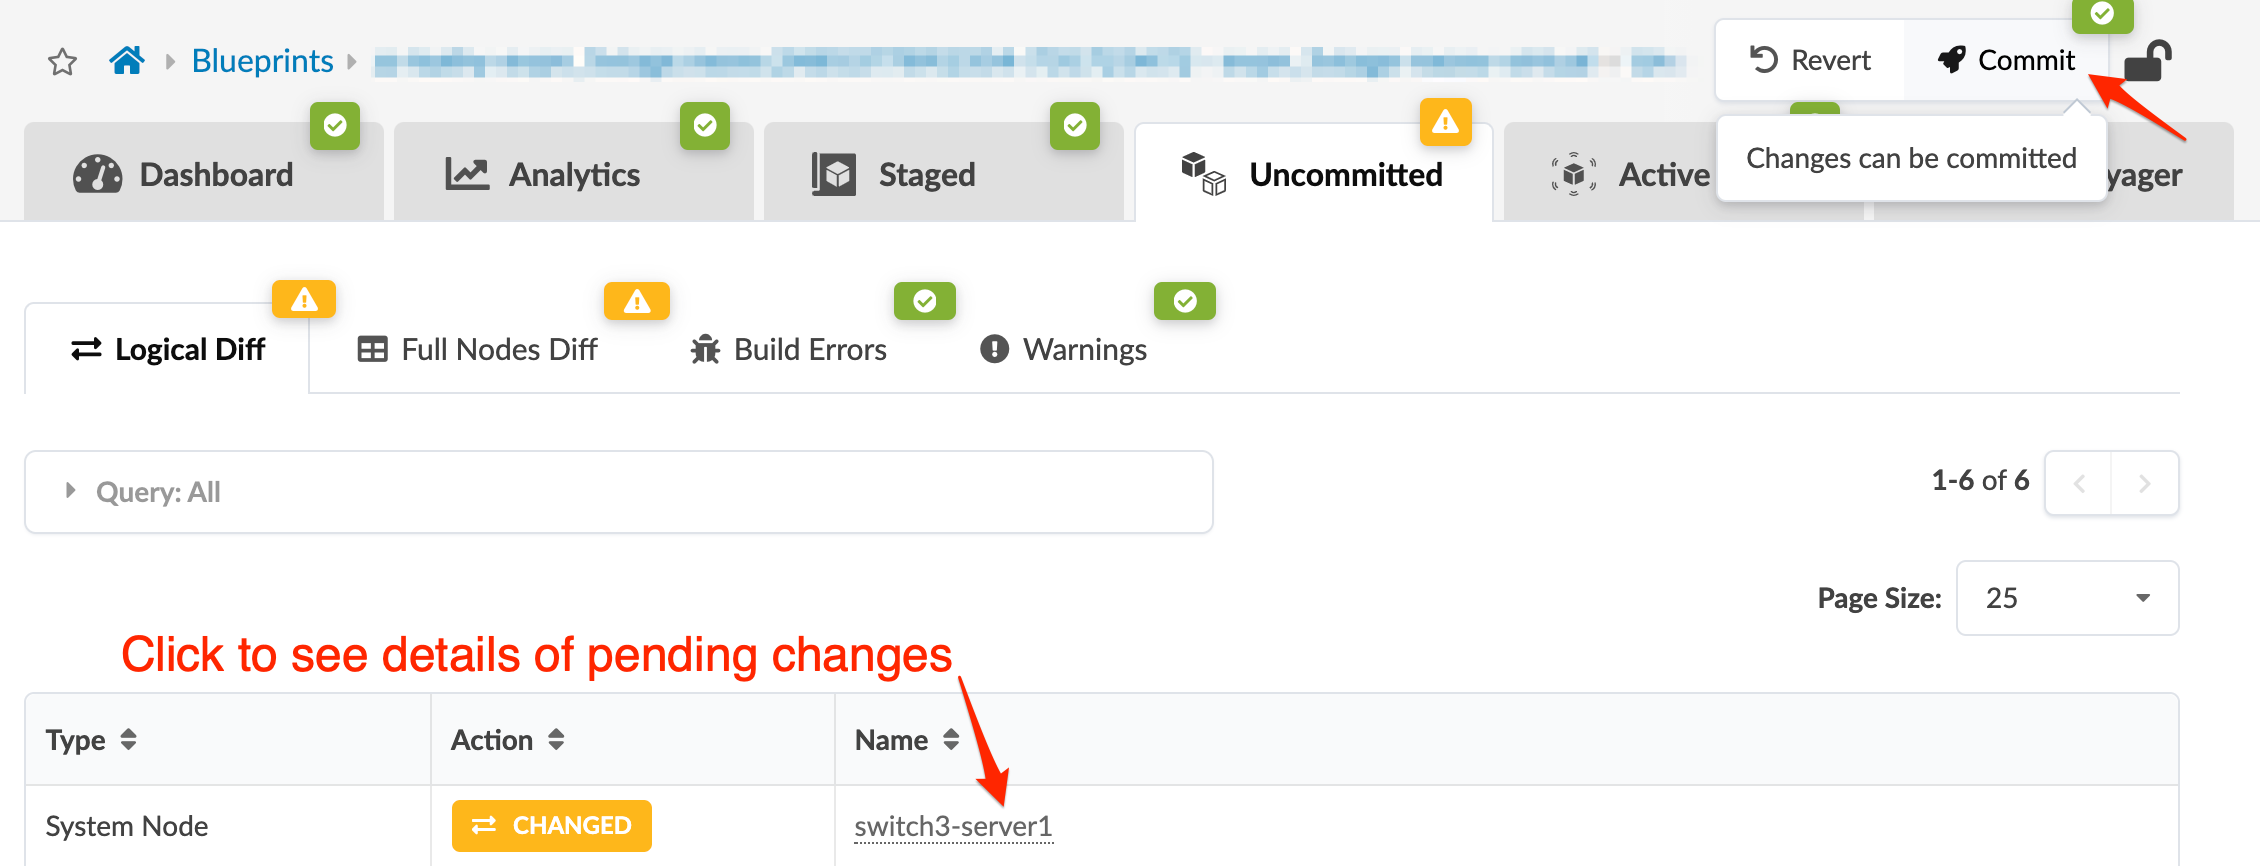
When the Commit button on the Uncommitted tab becomes clickable, you can activate your blueprint changes.

When blueprint requirements have been validated, the Uncommitted button becomes available, and you can activate the changes.

To commit (or revert) staged blueprint changes using the GUI:

  1. From the blueprint top menu, click Uncommitted.
  2. Review changes, as needed. Click a name to see details.
  3. Starting in Apstra 6.1, you can use the commit-check feature. This feature works the same way as it does in Junos OS and Junos OS Evolved. Commit-check checks each managed device running either Junos OS or Junos OS Evolved in a blueprint against a future configuration. Commit-check then shows you the difference between the committed configuration and the latest rendered candidate configuration, and stores this information in a database.

    If the blueprint version that you used to render the device configuration is the same as the current present blueprint version, the configuration is considered "fresh." If the blueprint changes to a later version than the one used in the last commit-check operation, the configuration is considered "stale."

    In the Incremental Config column, you can see which devices are affected by any configuration change you've made to a blueprint. Essentially, this feature shows you which systems will undergo a configuration change.
  4. To see if there are any uncommitted changes, click Uncommitted, and then click Commit Check.

    As you can see there are no uncommitted changes. Once you've made a change, the Commit Check tab displays an orange alert.

  5. Click the Commit Check tab, and then click Check all devices to initiate a commit-check against all assigned devices in the blueprint.

    Now you can see which systems have any incremental configuration changes.

    You can sort the changes by clicking either Incremental Config , Yes, or No.

    Additionally, you can click the magnifying glass to query changes based on the following items:
    • System name

    • Hostname

    • Serial number

    • Last commit check result

    • Incremental Config

    • Role

    • Device Profile

    • Status

    • Result Validity

    and then click Apply. If you don't want to search through results of your query, click Clear.

  6. In the Actions column, you can initiate a brand new commit-check against a specific device and look at the configuration that was rendered when the last commit-check against the device was calculated.
  7. To check the configuration, click Check. The check function renders the configuration and runs that by the device itself. The device can detect and flag potential syntactical or semantic errors in that configuration.
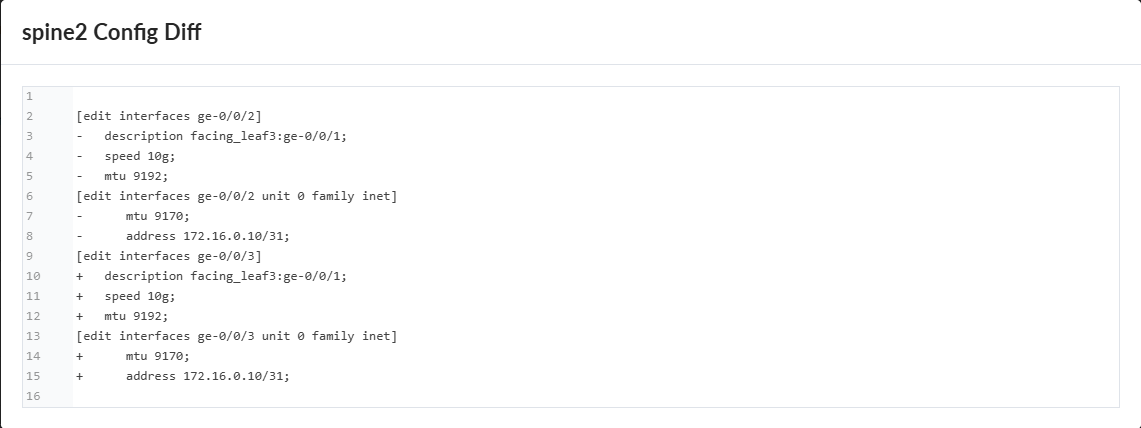
  8. To see the differences between the current device configuration and the changes you've just made, click Config Diff.
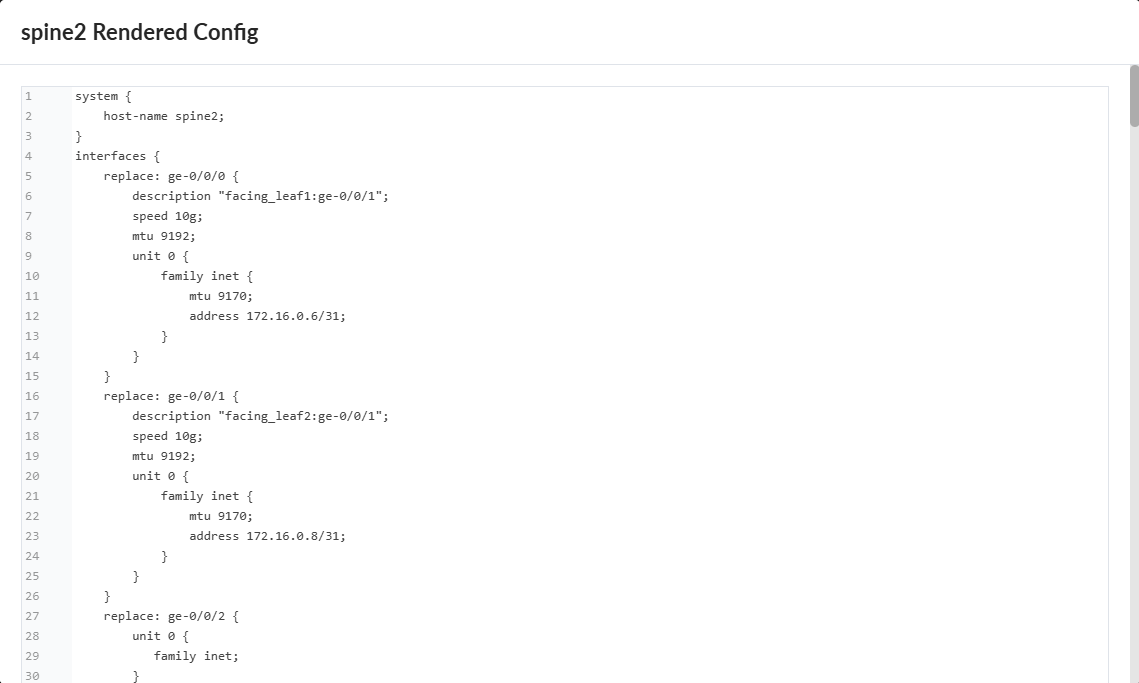
  9. To see the rendered configuration, click Render. When you click Commit in the blueprint, the rendered configuration, if any, is pushed onto the device.
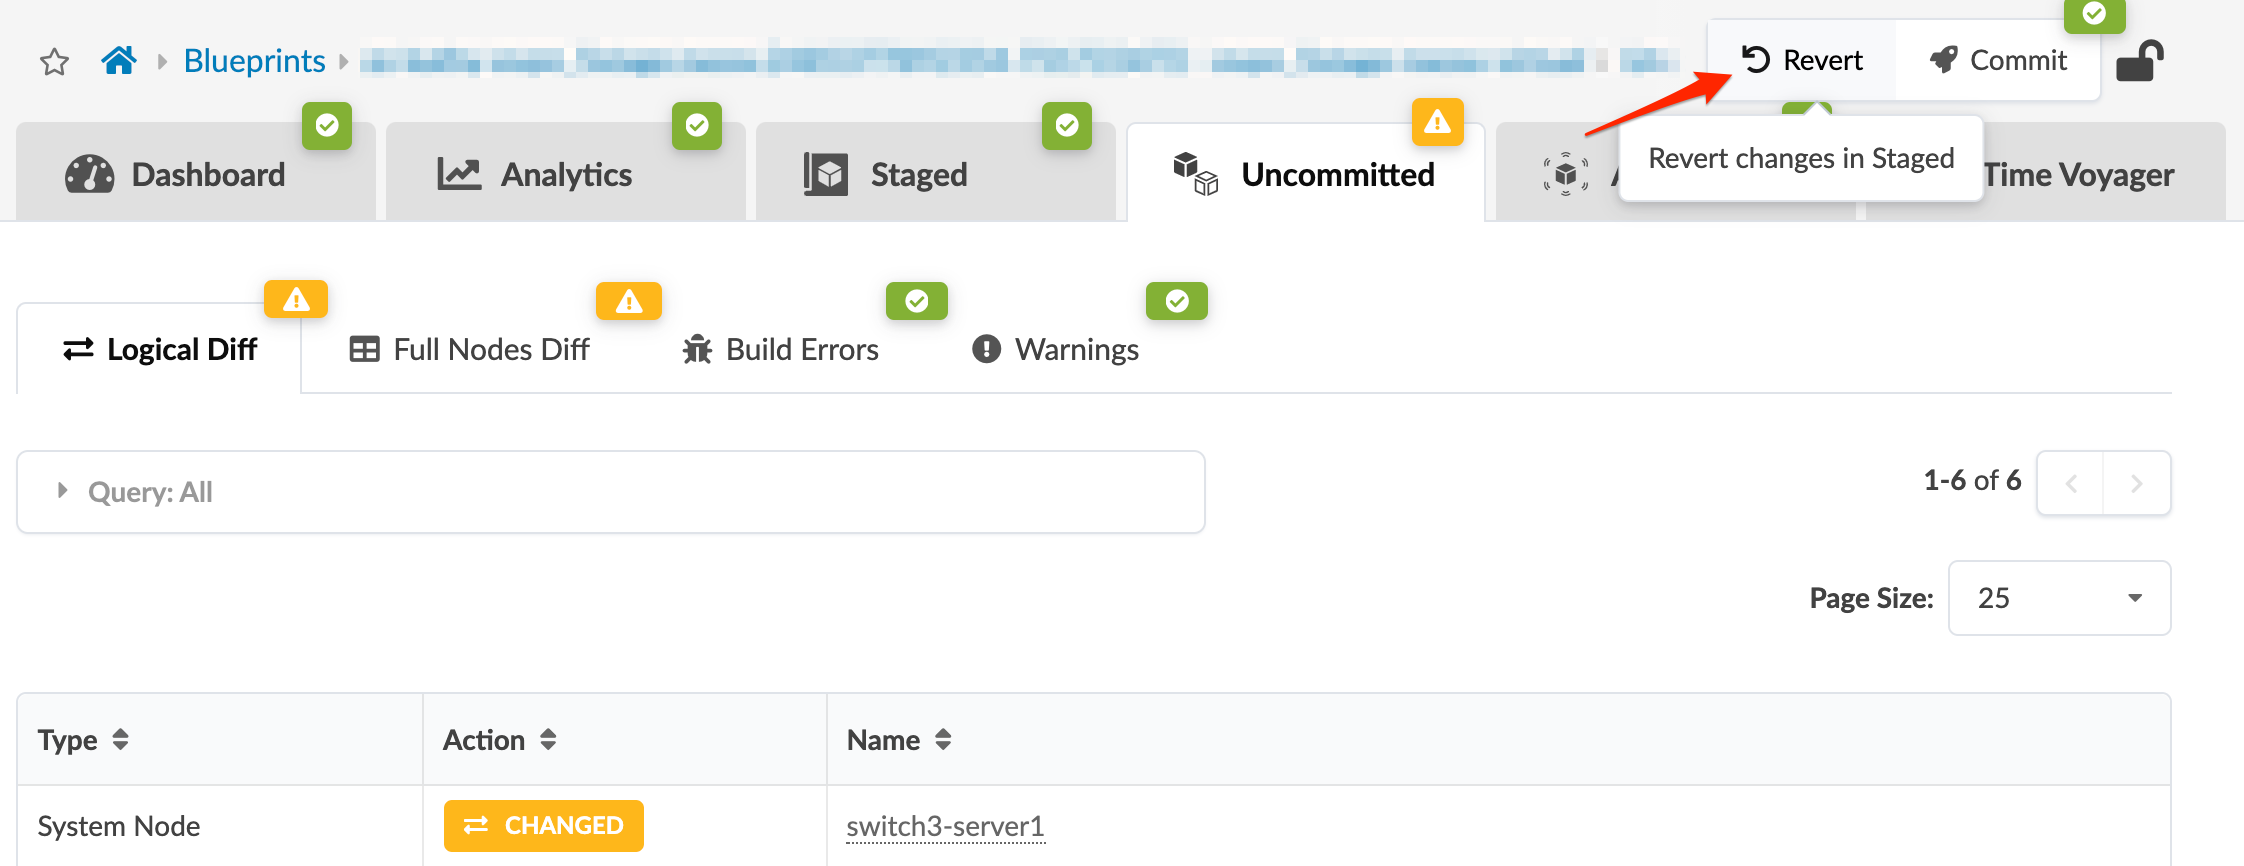
  10. If you decide to discard the blueprint changes, click Revert. In some cases, you might also need to reset resource group overrides. See the note in Assign ASNs and IP Addresses.
  11. If you decide to activate the blueprint changes, click Commit and add a description. We recommend that you enter the optional revision description to identify changes. These descriptions are displayed in the Revisions section of Time Voyager where you can roll back to a previous network state. If you don't add a description now you can always add one later. If you need to roll back to a previous revision, this description helps to determine the appropriate revision. Specific diffs between revisions are not displayed, so the description is the only change information available for that revision.
  12. Click Commit to push staged changes to the active blueprint and create a revision. All commits are validated before configuration is pushed. Cabling anomalies may appear until validation is complete.
  13. While the task is active, you can click Active Tasks at the bottom of the screen for information about task progress. (Additional task history is available in the blueprint at Staged > Tasks.)

When a blueprint has been committed and devices have been deployed, the network is up and running. However, networks are not static and can require modifications as they evolve. Due to our approach of the network as a single entity this is extremely easy; all required device configurations are generated and pushed to the devices when you commit the change.