Update Cabling Map (Datacenter)
Situations when you might want to update the cabling map include:
- to use existing network cabling instead of recabling to the prescribed cabling
- to change interface names or IP addresses in the existing network cabling map
- to specify a different port from the one that the cabling algorithm selected
- to avoid the use of a defective interface
Device profiles must be assigned to blueprint nodes.
Overriding generated cabling can be disruptive to the network. Use with extreme caution. For assistance with production networks, please contact Juniper Support.
Update Cabling Map (GUI)
To update the cabling map using the GUI:
-
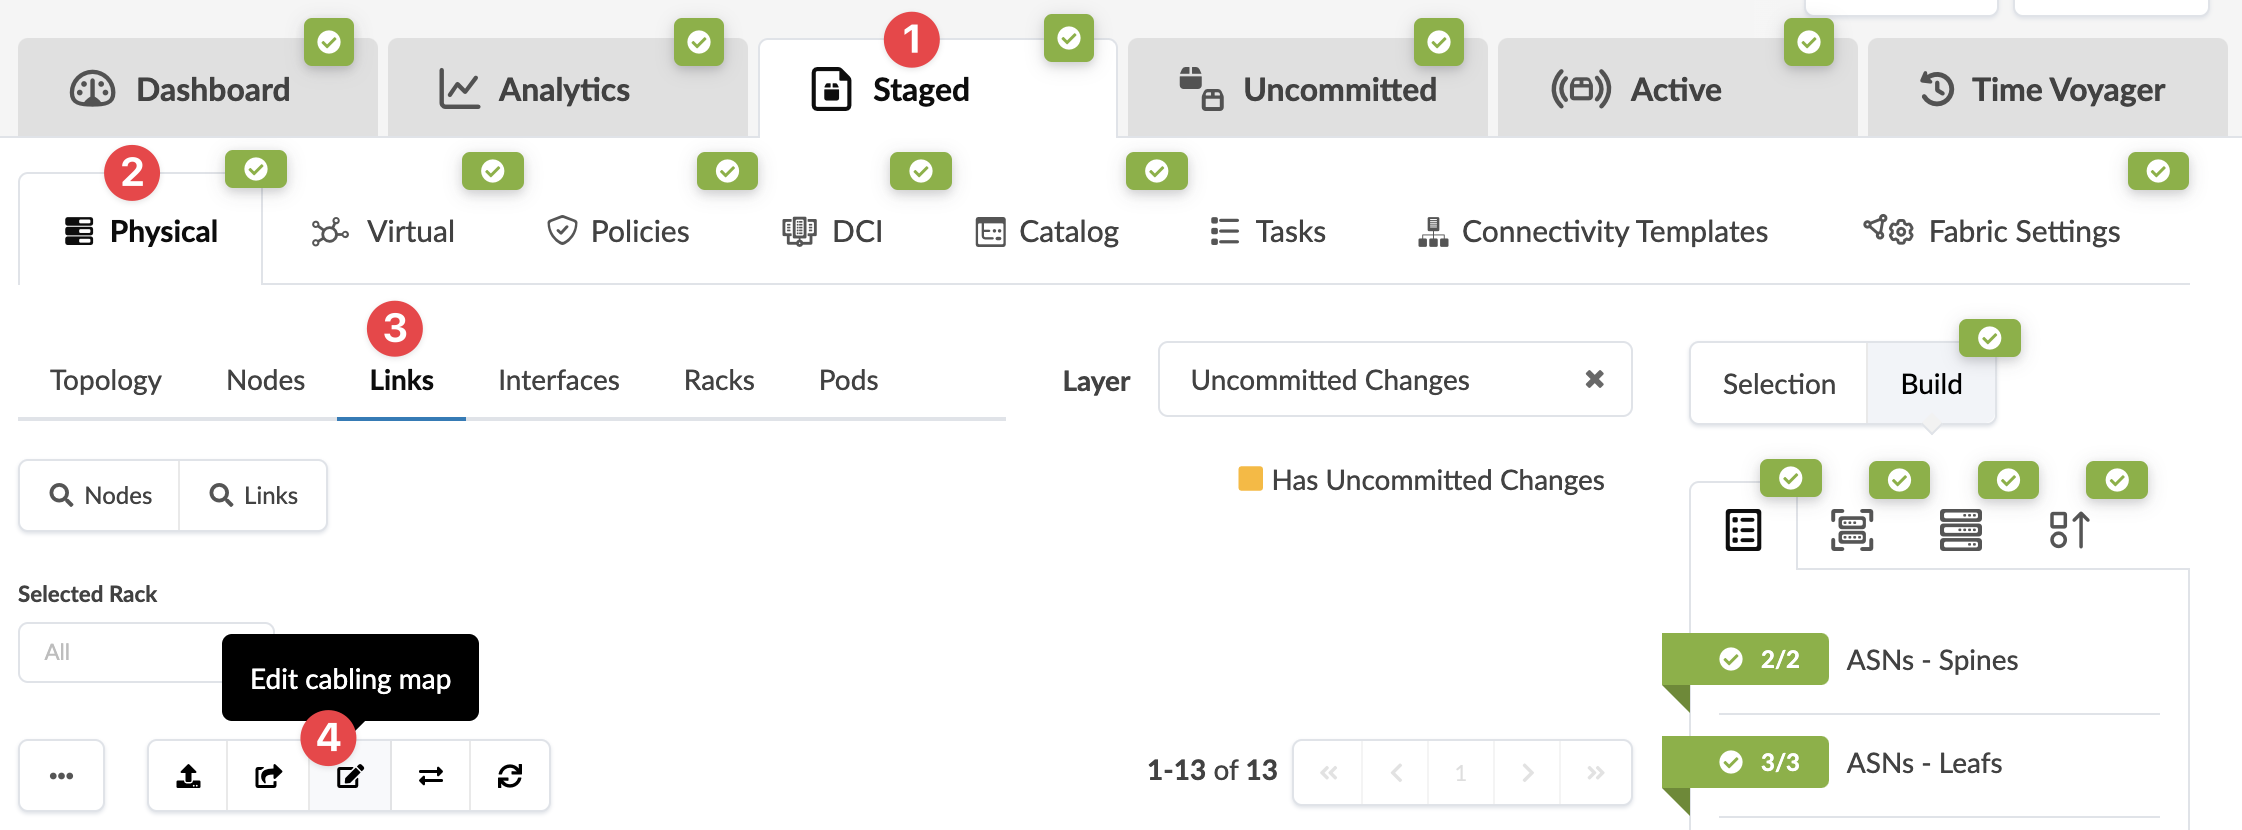
From the blueprint, navigate to Staged > Physical >
Links and click the Edit cabling map
button (third of five buttons above the links list).
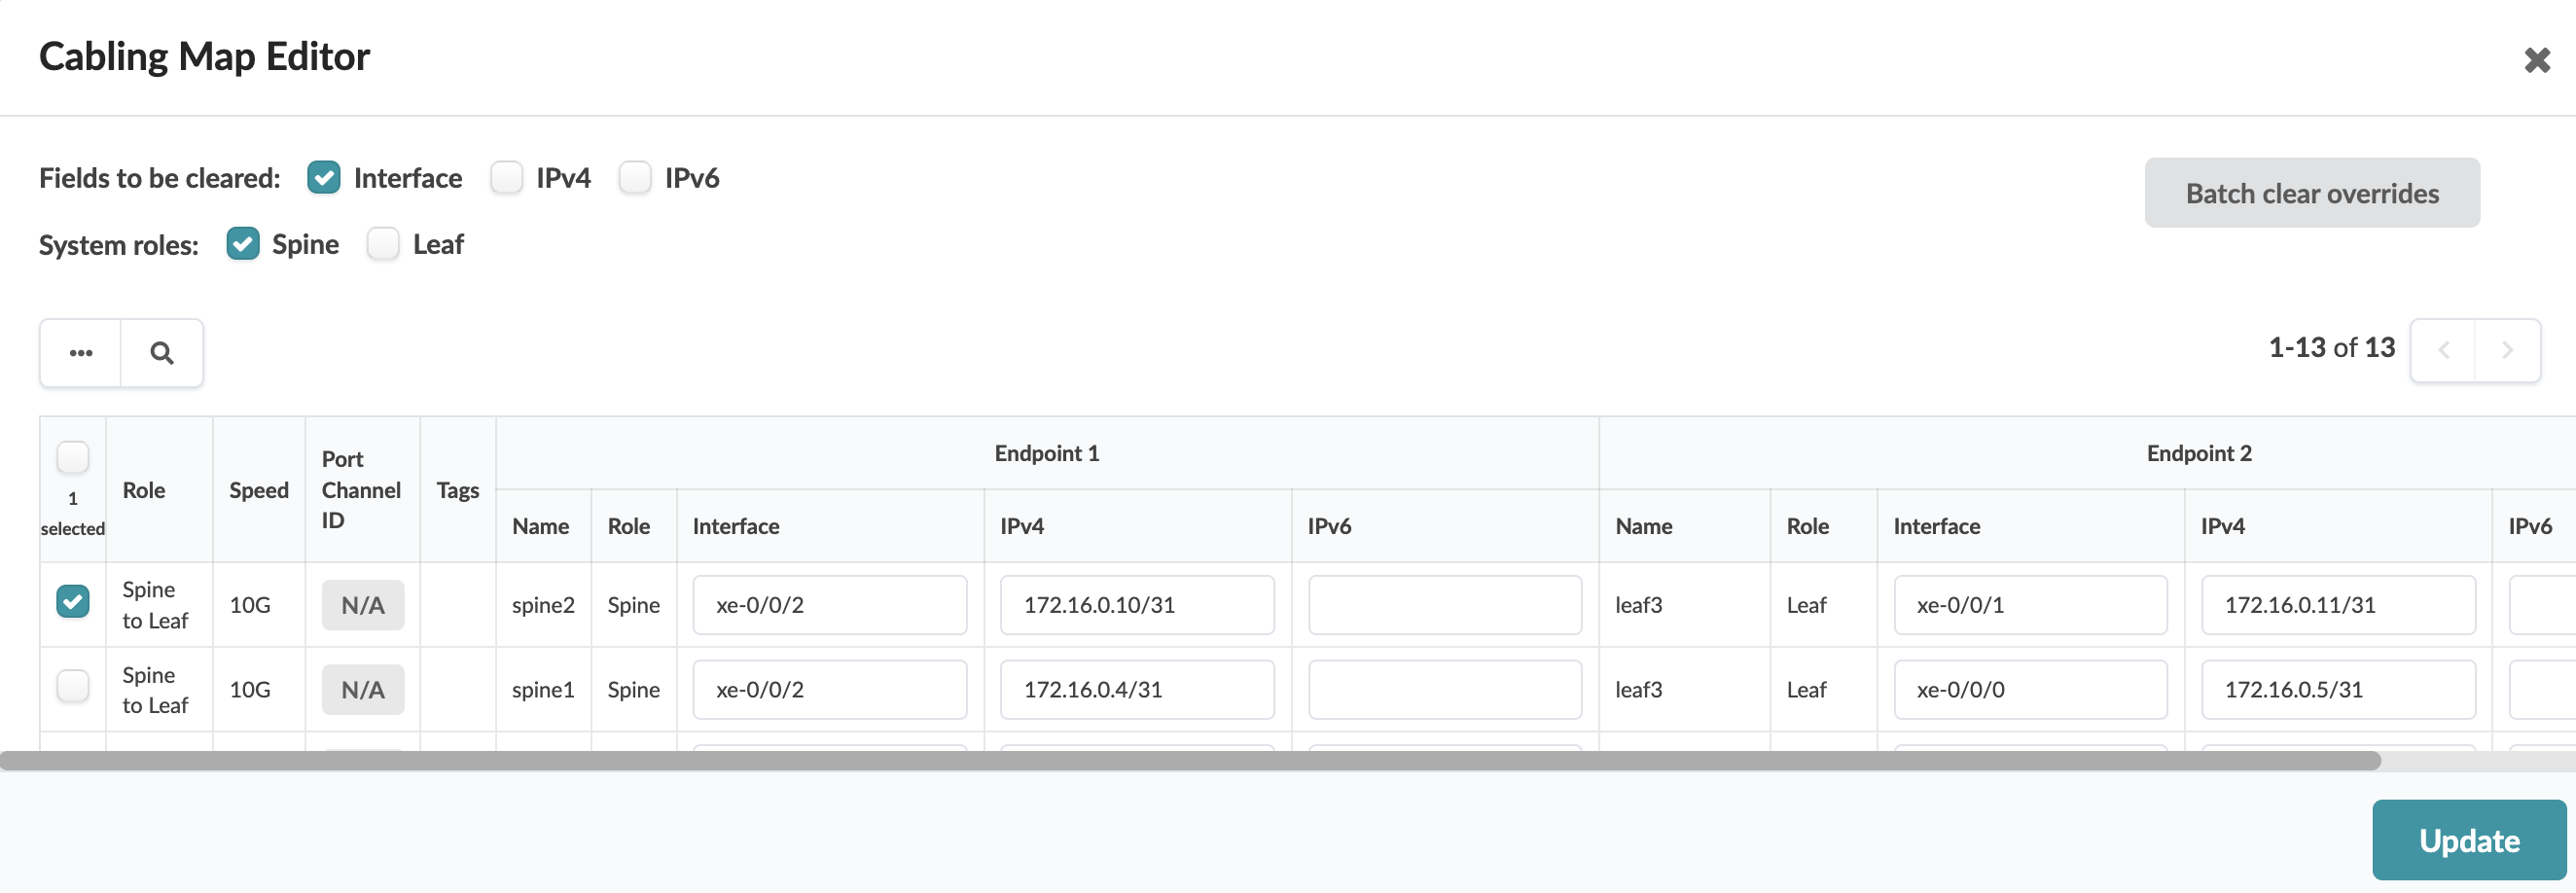
 The Cabling Map Editor dialog opens.
 -
Change interface names and/or IP addresses, as applicable.
-
You can use Batch clear override to clear all Interface and IPv4/IPv6 values for a specific device type.
-
To drop the override for either an interface name or IPv4/IPv6 address, submit an empty value in the corresponding field.
-
The changes are staged and you're returned to the Links view.
When you're ready to activate your changes, go to the Uncommitted tab to review and commit (or discard) your changes.
Update Cabling Map (GUI and JSON)
If you have a large cabling map to update, it may be more efficient to export the file, update it, then re-import it.
To update the cabling map using the GUI and JSON:
When you're ready to activate your changes, go to the Uncommitted tab to review and commit (or discard) your changes.