Help us improve your experience.

Let us know what you think.

Do you have time for a two-minute survey?


Deploying the Apstra Virtual Appliance on Nutanix

This guide explains how to deploy the Apstra VM Image for Linux KVM image and install it on Nutanix.

Download the Image

  1. Download the 6.0 Apstra VM Image for Linux KVM (QCOW2) from the Software Downloads page.

  2. Select the 6.0 version from the VERSION drop-down window.

    An example filename for the 6.0 version is aos_server_6.0.0-189.qcow2.gz.

  3. Extract the disk image and then move it to the location where you want to install it.

Upload the Image

  1. Log into the Nutanix Prism Central console.

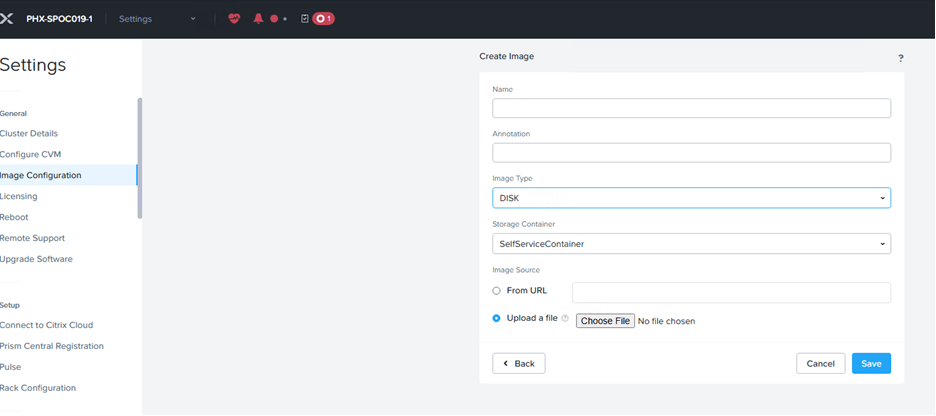
  2. Navigate to the Image Configuration screen, or similar screen, depending on your version of Nutanix.

  3. Specify the name of the image.

  4. Select the image type as DISK.

  5. Select SelfServiceContainer from the Storage Container drop-down window.

  6. Select Upload a file and then click Choose File to upload the qcow2 file that you extracted from the .gz file.

    User interface for creating an image in a system configuration panel with fields for name, annotation, image type set to DISK, storage container set to SelfServiceContainer, and image source set to upload a file. Navigation menu on the left with Image Configuration selected and buttons for Cancel, Back, and Save at the bottom.

Deploy the VM

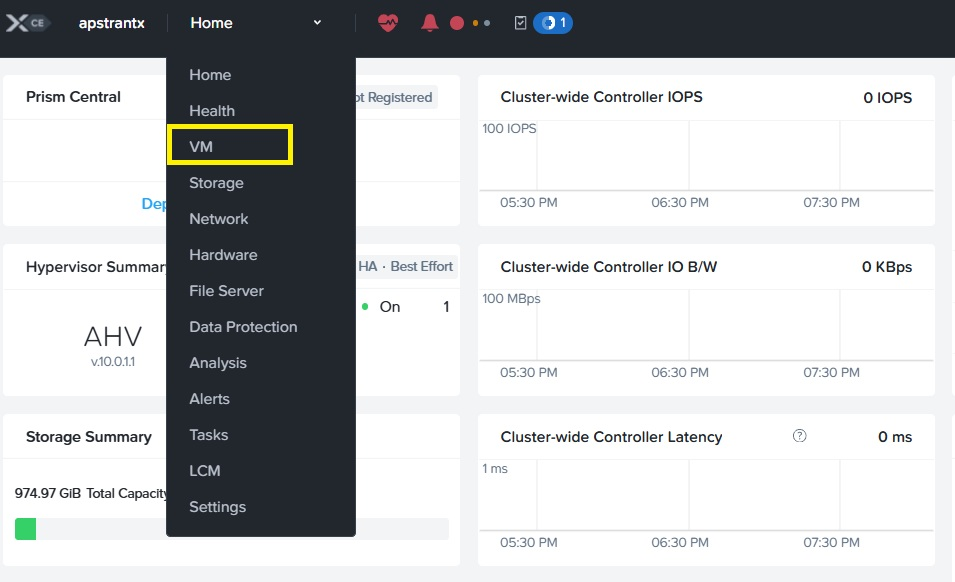
  1. In the Prism Central console, navigate to the VM section.

    Nutanix Prism interface showing VM option selected in dropdown menu, with metrics for IOPS, IO Bandwidth, Latency, storage, and hypervisor summaries.
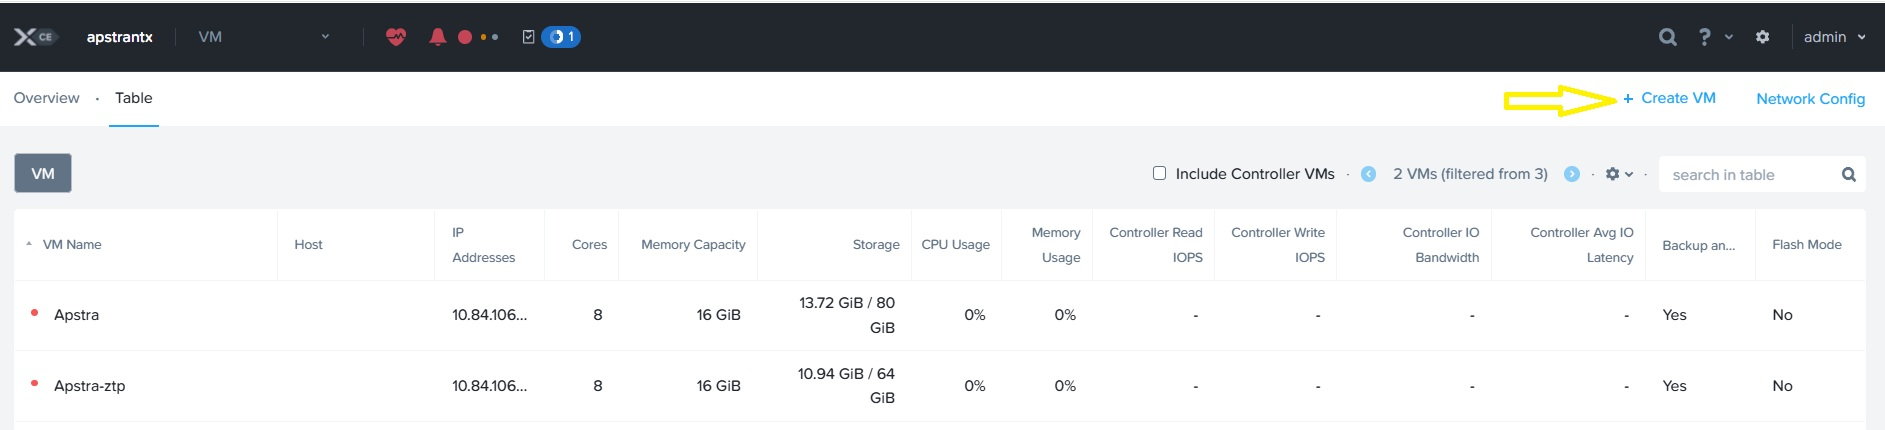
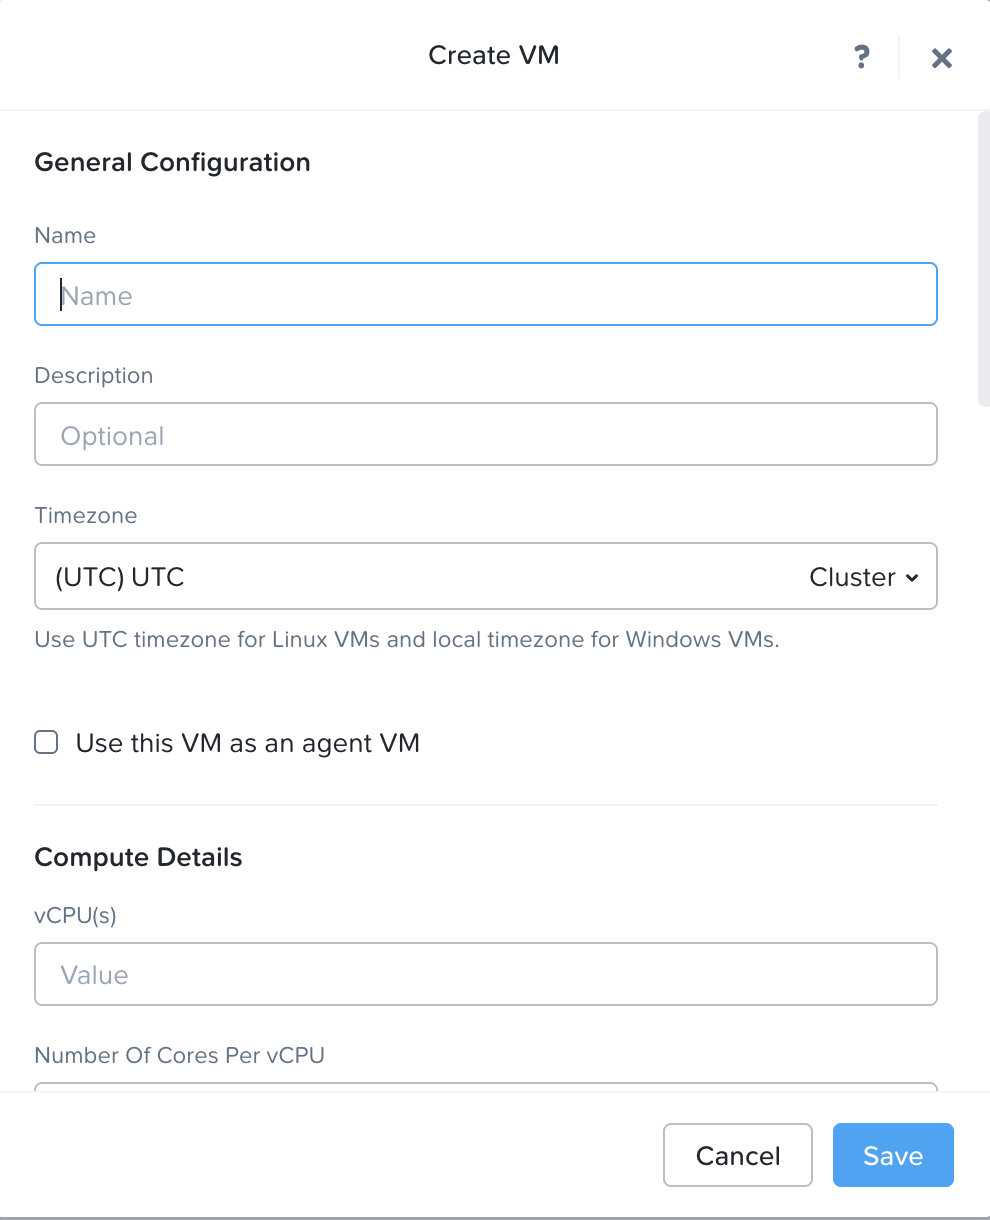
  2. Click Table and then select Create VM to start the wizard.

    Virtual machine management interface showing a table with details like VM names Apstra and Apstra-ztp, IP addresses, performance metrics, and a Create VM button highlighted with a yellow arrow.
  3. Enter the name of the VM in the Name edit box.

    User interface for creating a virtual machine with fields for name, description, timezone, agent VM checkbox, vCPUs, cores per vCPU, and Cancel and Save buttons.
  4. Select Legacy BIOS in the Boot Configuration section.

    Create VM configuration window with 16 GiB memory, Legacy BIOS boot selected, empty CD-ROM on IDE bus, and options to add disk, save, or cancel.
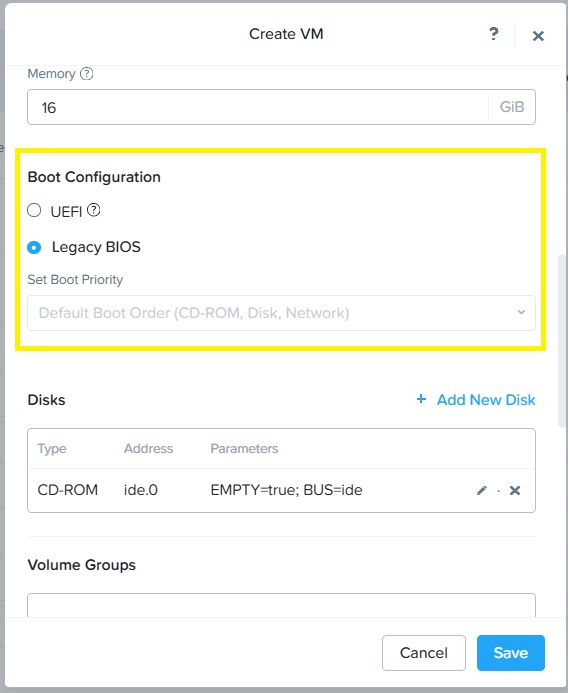
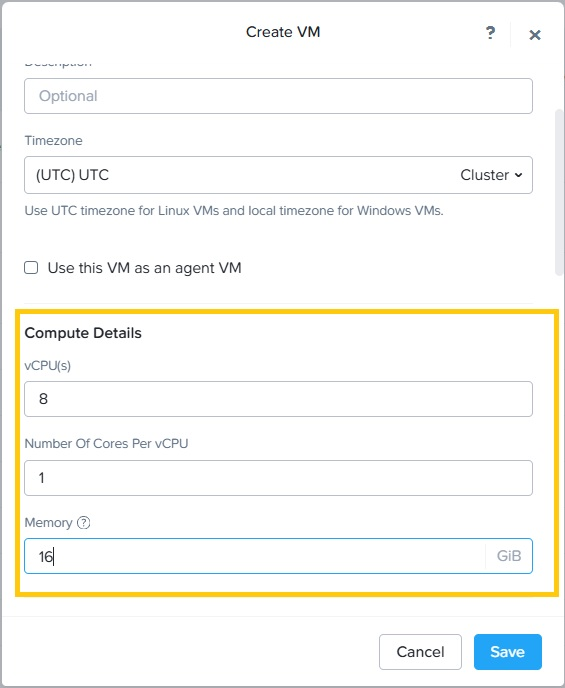
  5. Specify the number of vCPU(s) and cores per vCPU, and memory details.
    User interface for creating a virtual machine with fields for description, timezone selection, agent VM checkbox, compute details for vCPUs set to 8, cores per vCPU set to 1, memory set to 16 GiB, and buttons for cancel or save configuration.
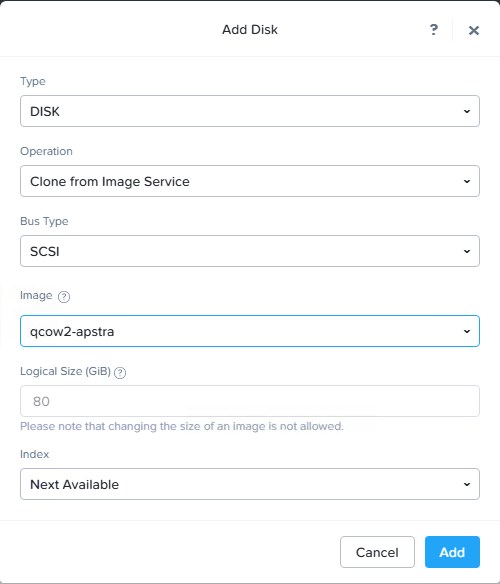
  6. Add a disk to the VM:

    1. Select DISK from the Type drop-down window.

    2. Select Clone from Image Service from the Operation drop-down window.

    3. Select SCSI from the Bus Type drop-down window.

    4. Select qcow2-apstra from the Add Diskdrop-down window.

    5. Select Next Available from the Index drop-down window, and then click Add.

      User interface form for adding a virtual disk with fields set to Disk type, Clone from Image Service operation, SCSI bus type, qcow2-apstra image, 80 GiB logical size, and Next Available index. Cancel and Add buttons included.
  7. Click Add New NIC in the Network Adapters (NIC) section to add a NIC.
    Configure Network Adapters with Add New NIC button and VM Host Affinity rules options for virtual machine setup.
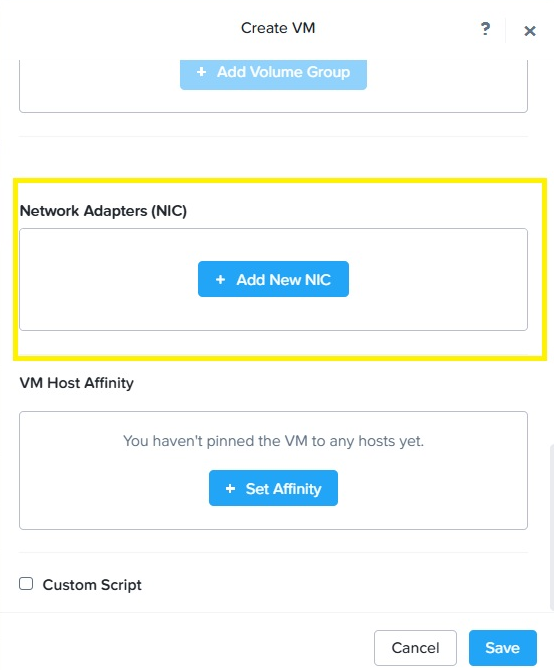
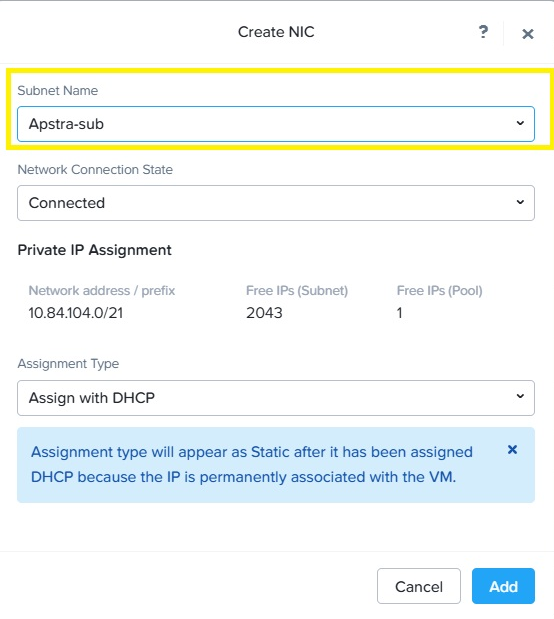
  8. Select the available subnet name from the drop-down window.

    Create NIC configuration window showing subnet name Apstra-sub highlighted in yellow, connected state, subnet 10.84.104.0/21 with 2043 free IPs, pool with 1 free IP, DHCP assignment type, and Add and Cancel buttons.
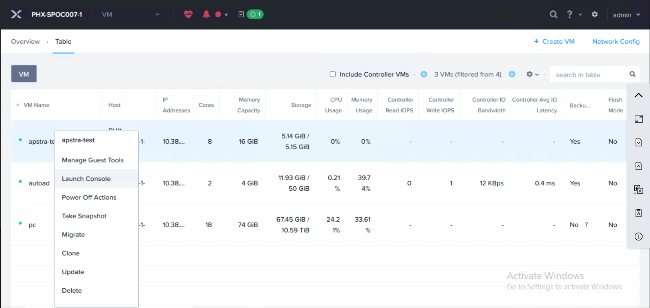
  9. Save the VM settings, and then right-click on the VM to power it on.

    VM management interface showing a context menu for the Apstra VM with options including Manage Guest Tools, Power on highlighted in yellow, Take Snapshot, Migrate, Clone, Update, and Delete. The VM is currently powered off.
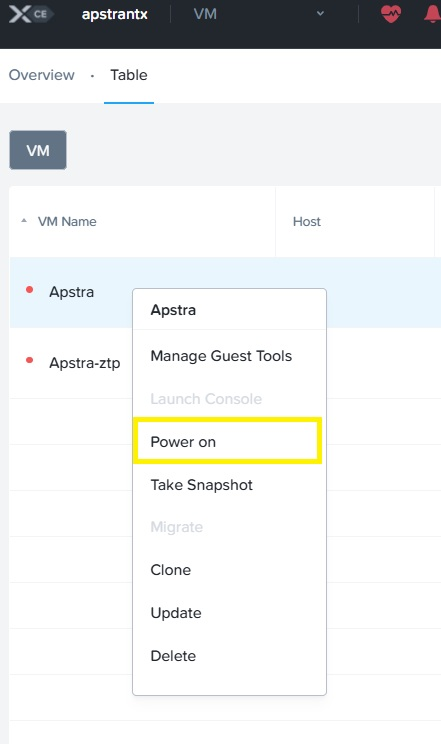
  10. Right-click on the VM, and then select Launch Console for access.

    User interface for managing virtual machines, displaying VM details like name, host, IP addresses, CPU cores, memory, storage, usage metrics, and management options such as manage tools, launch console, power off, snapshot, migrate, clone, update, and delete.