Create Access Switch
-
From the blueprint, navigate to Staged > Physical >
Topology and select the leaf that you want to connect to the new access
switch.
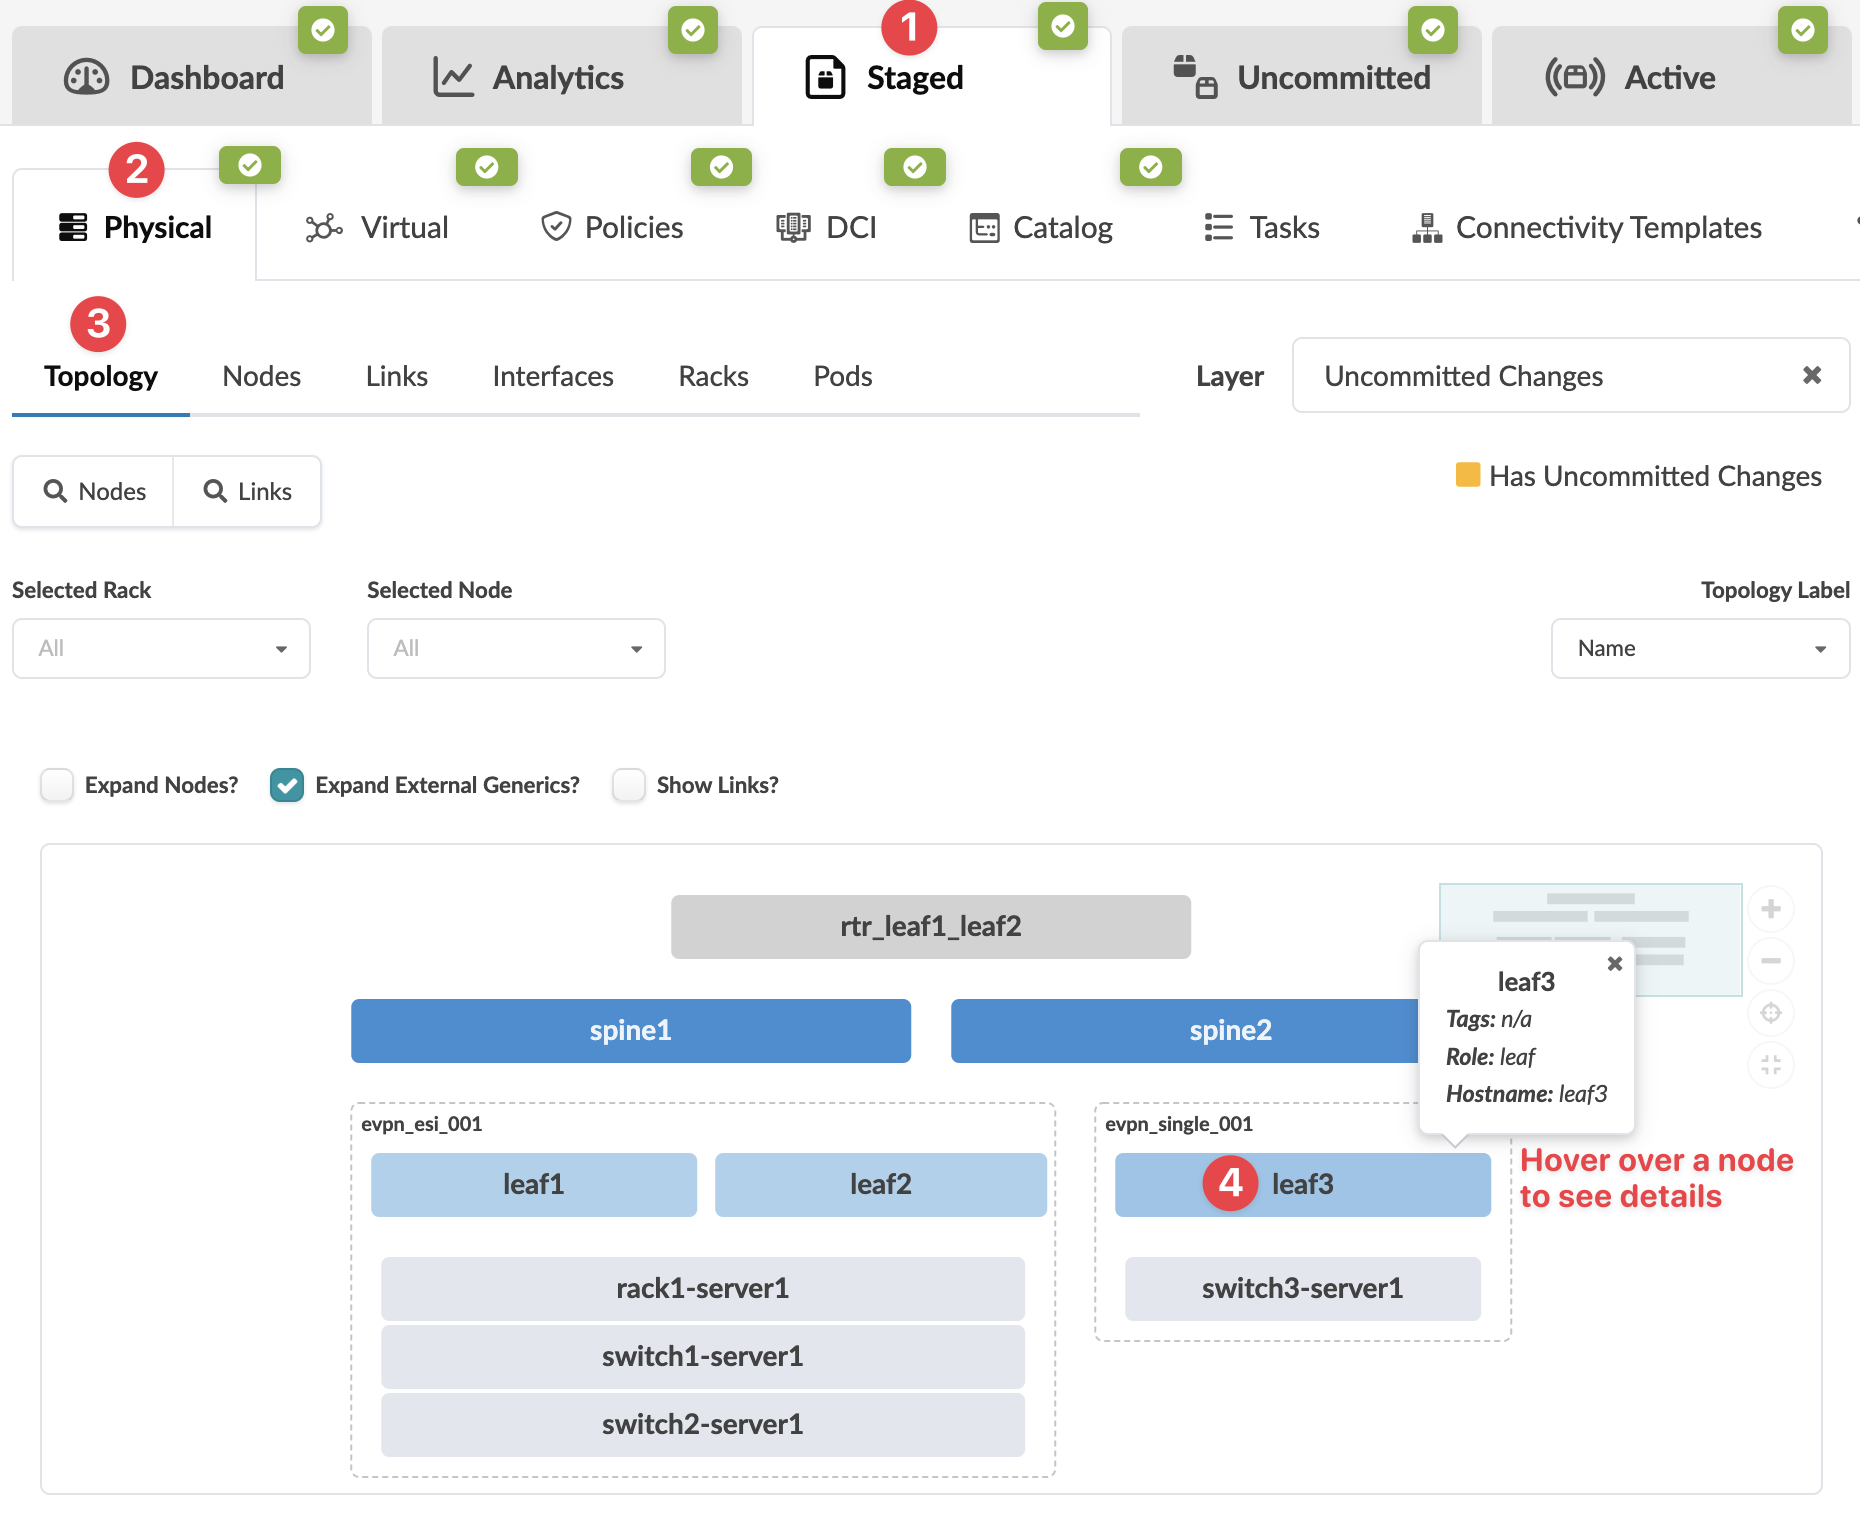
-
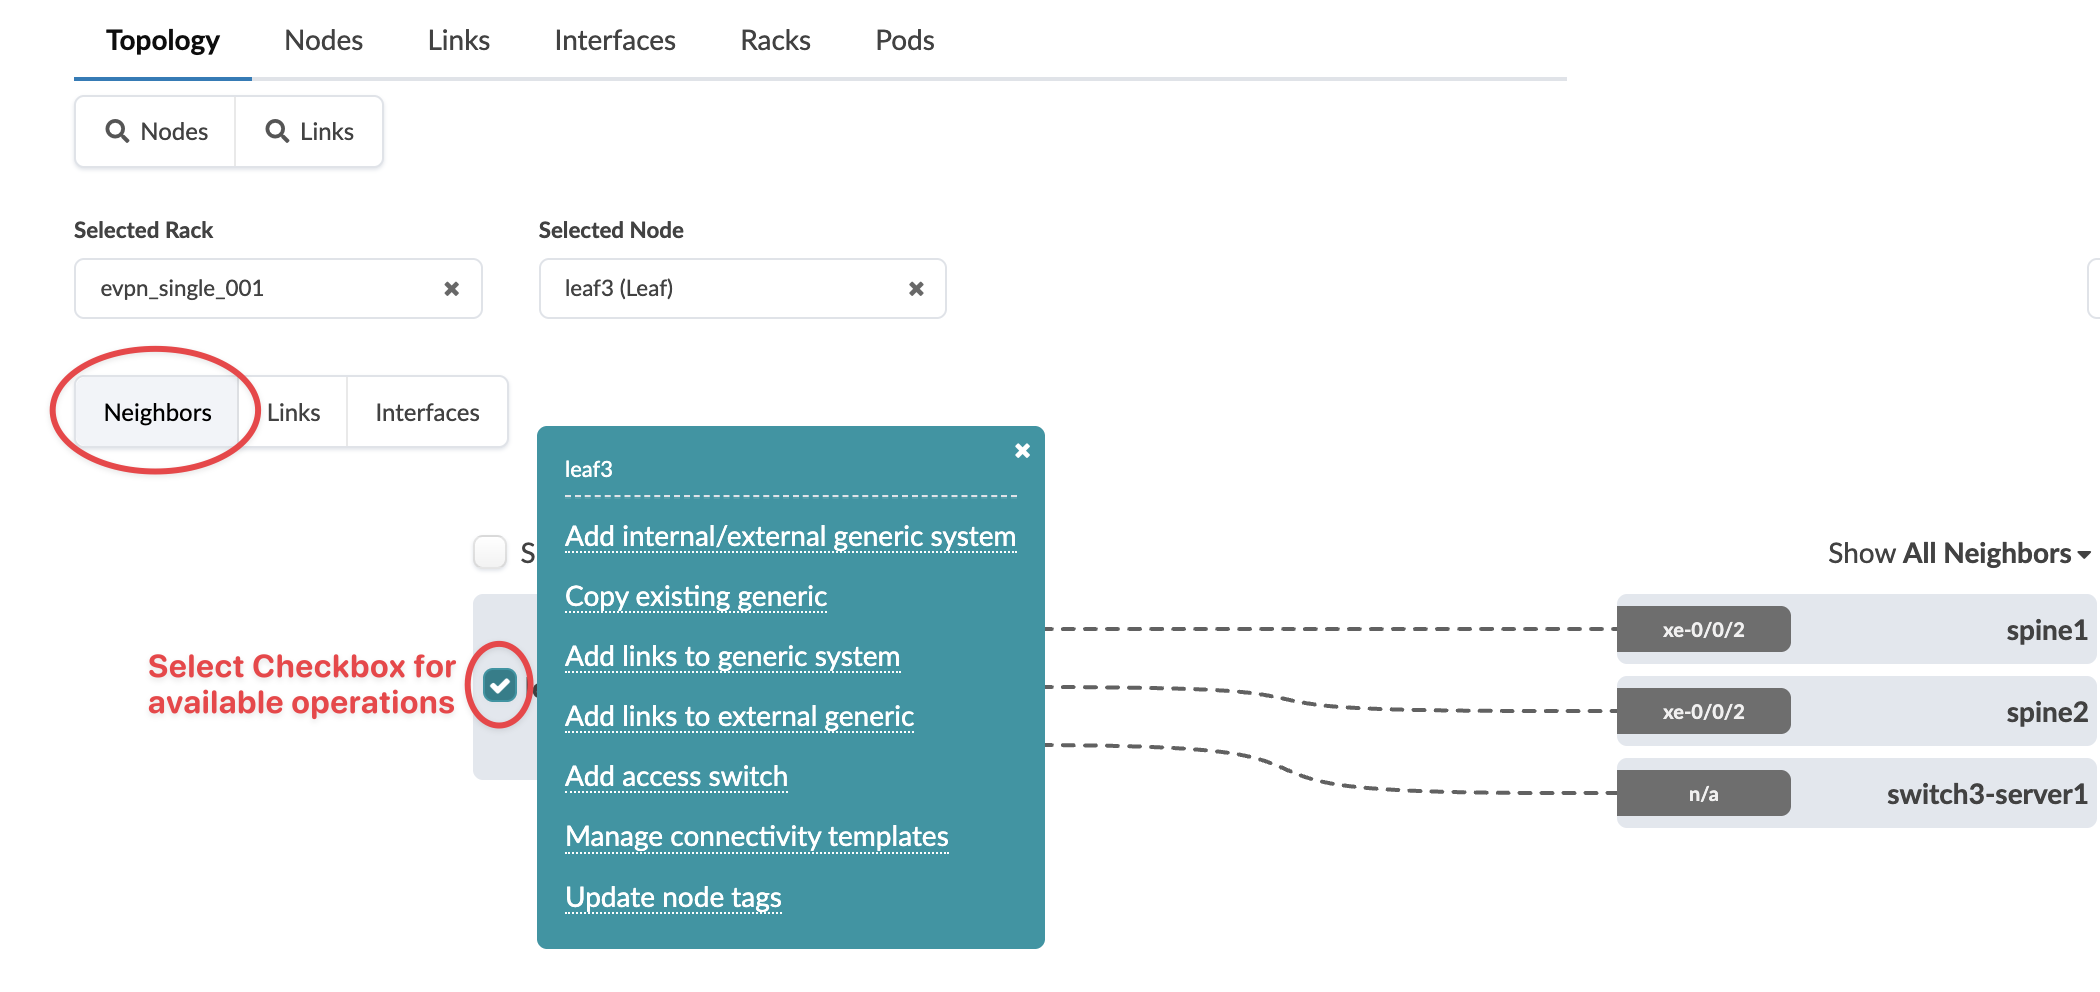
Select the node check box to see the operations available for that node (and that you
have permissions for).
 Note:
Note:You can also get to the selection page from the Nodes view. From the blueprint, navigate to Staged > Physical > Nodes, click the leaf name in the table, then click the leaf name that appears at the top of the Selection panel (on the right side of the page).
-
Click Add access switch and enter a unique label and
hostname.
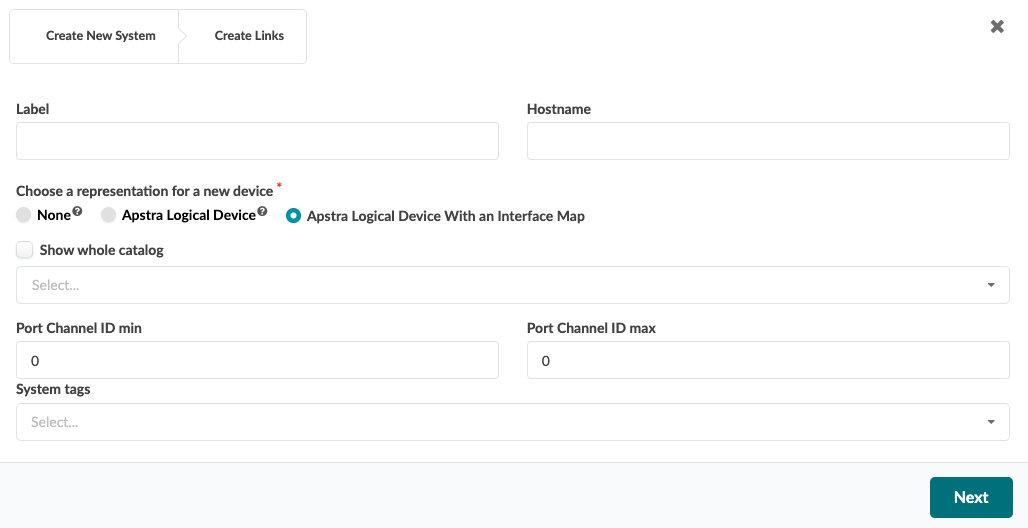
-
Enter tags (optional) to identify the role(s) of the new access switch, then click
Next.
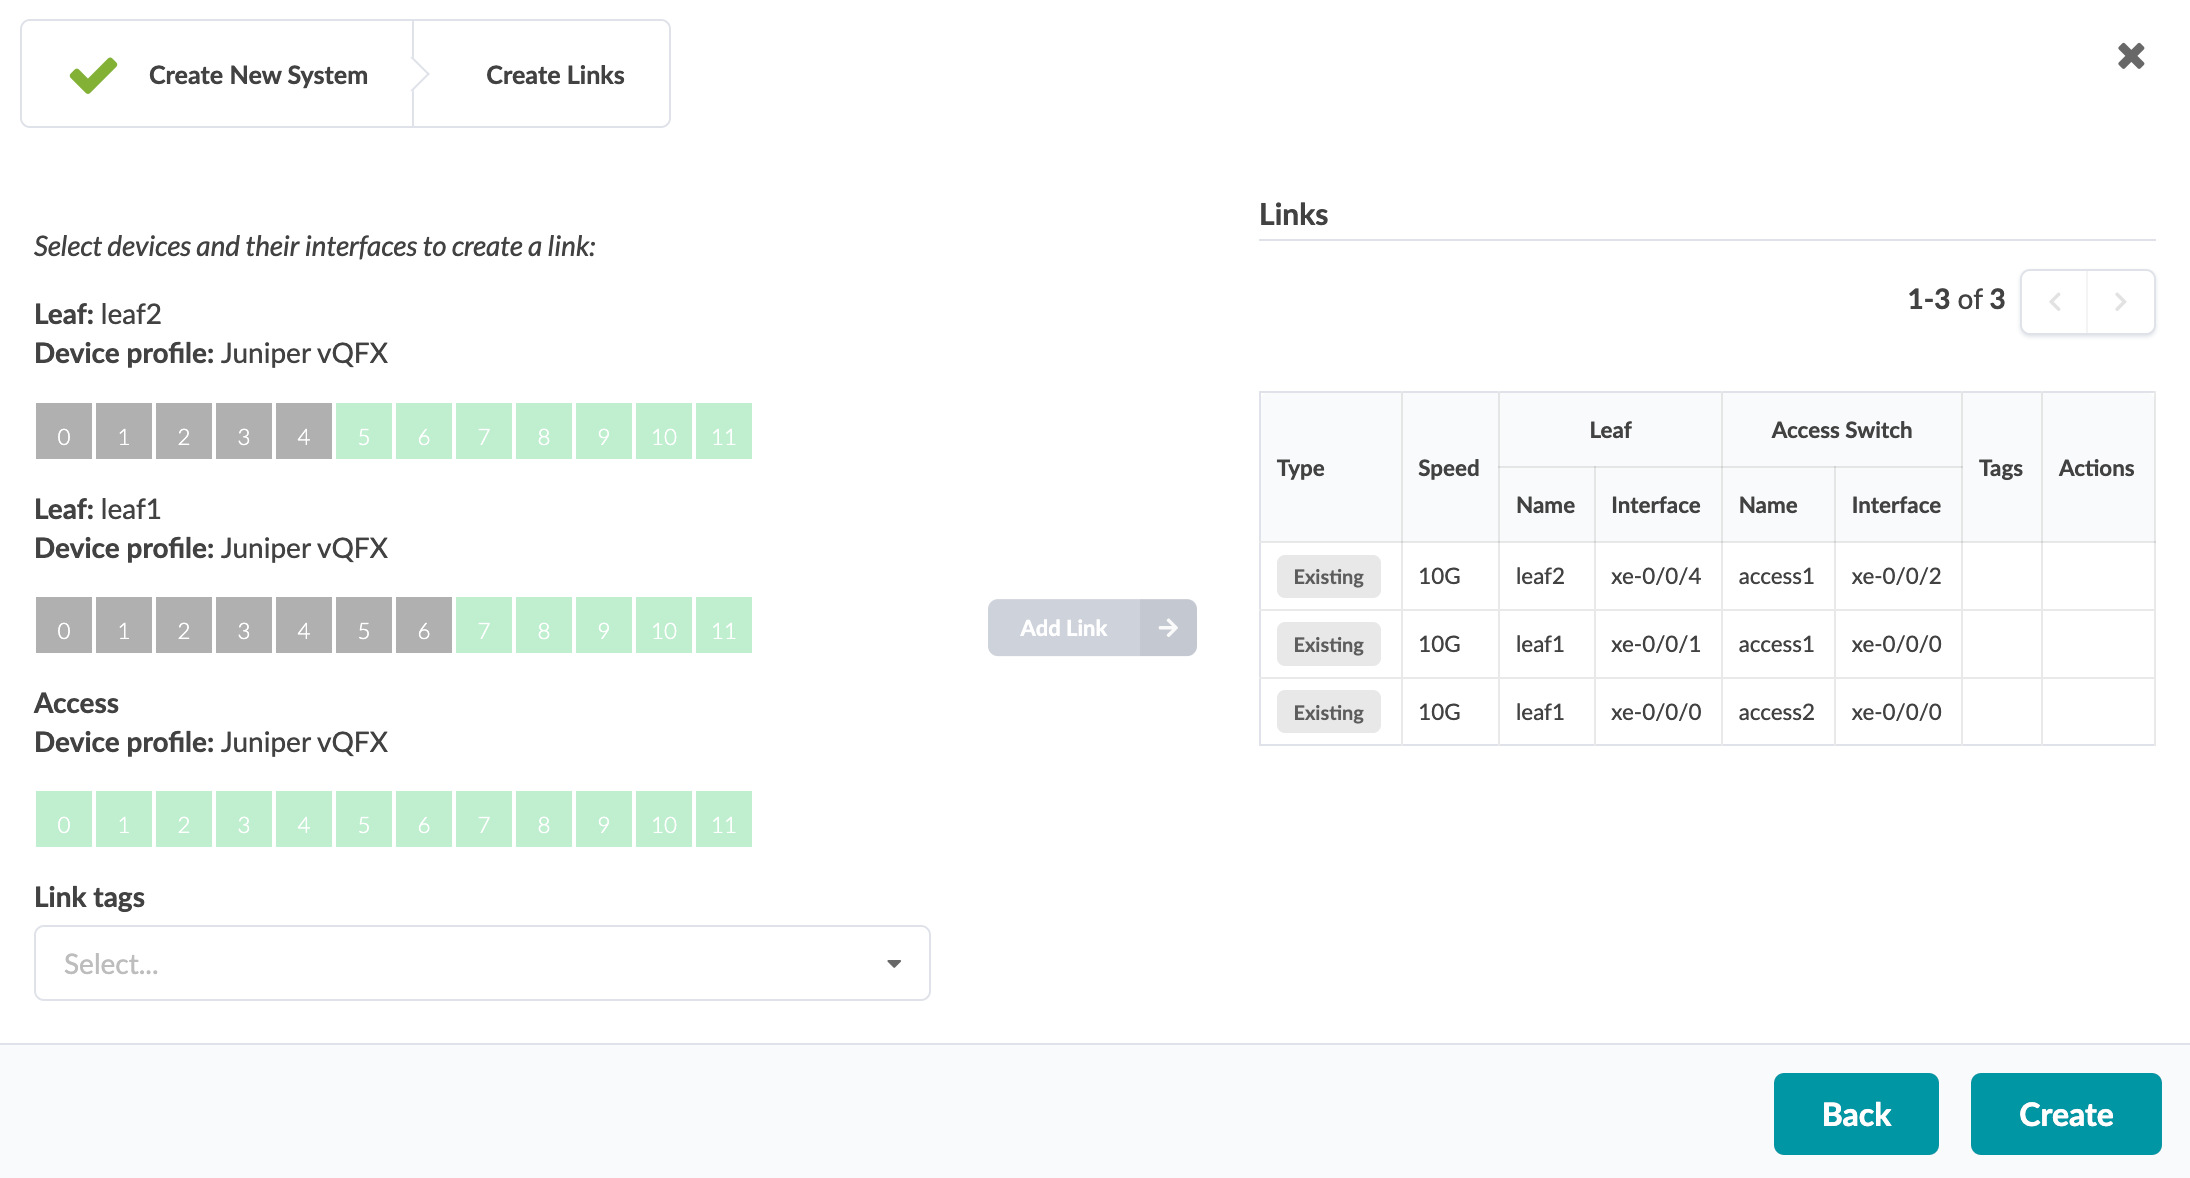
-
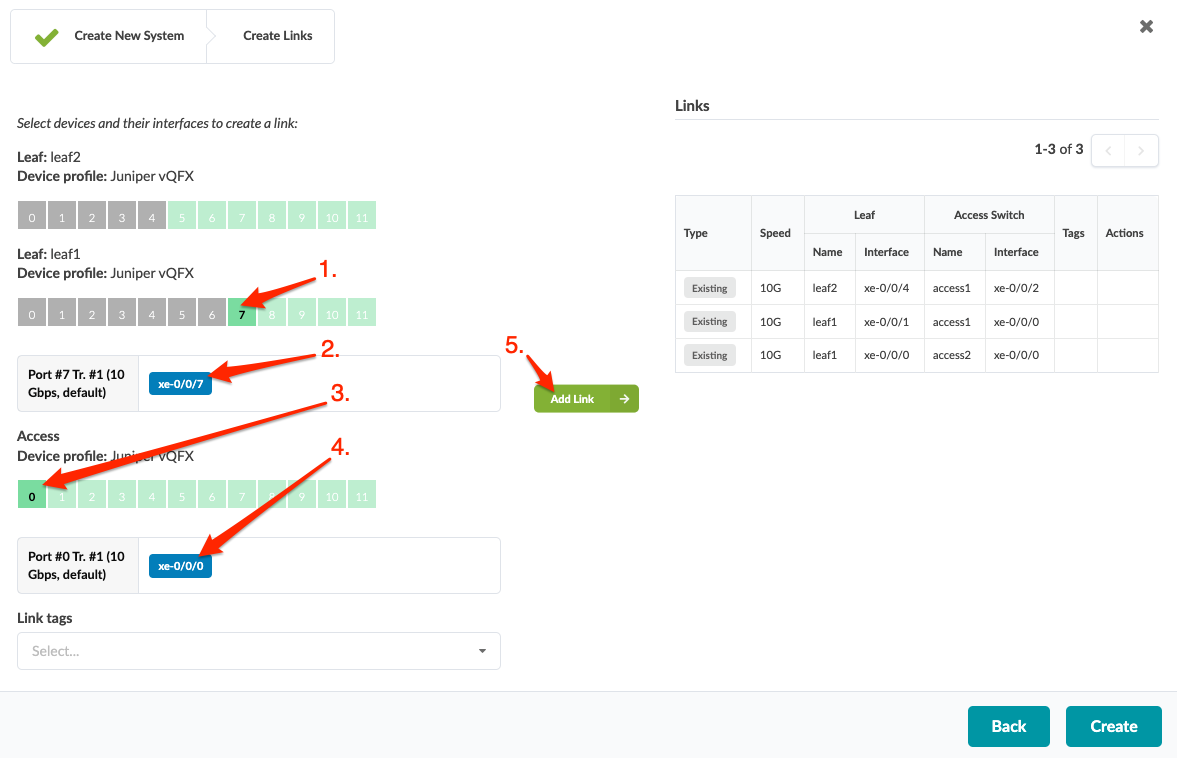
Select available ports and transformations, as applicable. The gray Add
Link button turns green.
-
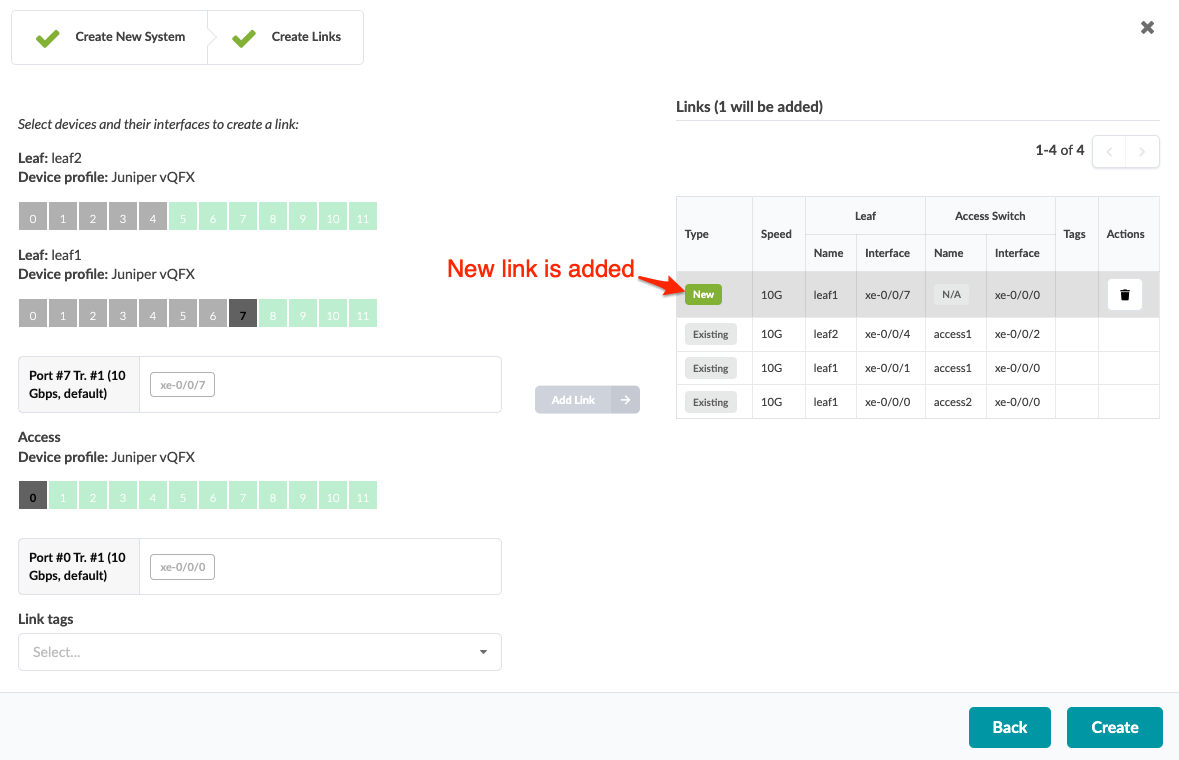
Click Add Link. The link is added to the link table.
When you're ready to activate your changes, commit them from the Uncommitted tab.