Help us improve your experience.

Let us know what you think.

Do you have time for a two-minute survey?


Install Apstra on KVM

You can install KVM with Virtual Machine Manager or with the CLI.

These instructions are for installing Apstra software on a KVM hypervisor. For information about using KVM in general, refer to Linux KVM documentation.

Install on KVM with Virtual Machine Manager

  1. Confirm that you're running one of the Supported Hypervisors and Versions.
  2. Make sure that you allocate enough resources for your network. For example, if you're using more than 25 offbox agents, you'll need to add another VM. See Required Server Resources for more details.
    CAUTION:

    If you allocate insufficient CPU and RAM allocations for your network you'll probably experience issues such as slow response times, system errors and a critical "segmentation fault" (core dump). If this happens, you'll need to delete the VM and redeploy it with additional resources.

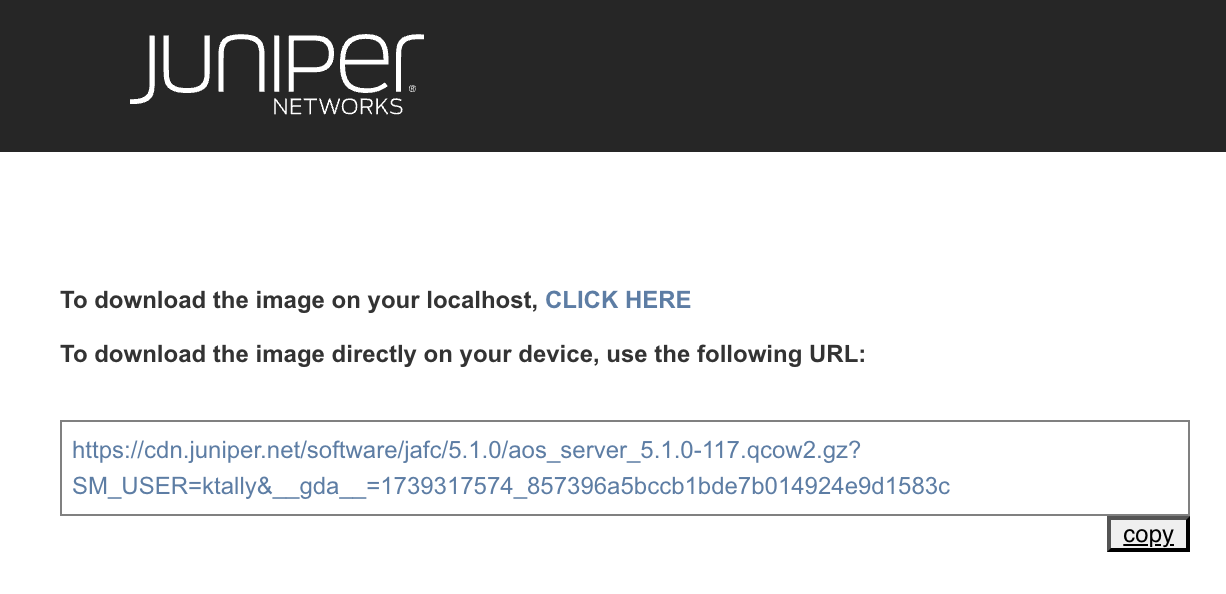
  3. Apstra software is delivered pre-installed on a single VM. The same Apstra VM image is used for installing both the Apstra controller and Apstra workers. As a registered support user, download the Apstra VM Image for Linux KVM (QCOW2) from Juniper Support Downloads.
    Juniper Networks portal showing instructions to download aos_server_5.1.0-117.qcow2.gz for virtual machines, with download link and copy button.
  4. Uncompress the disk image, then move it to where it will run.
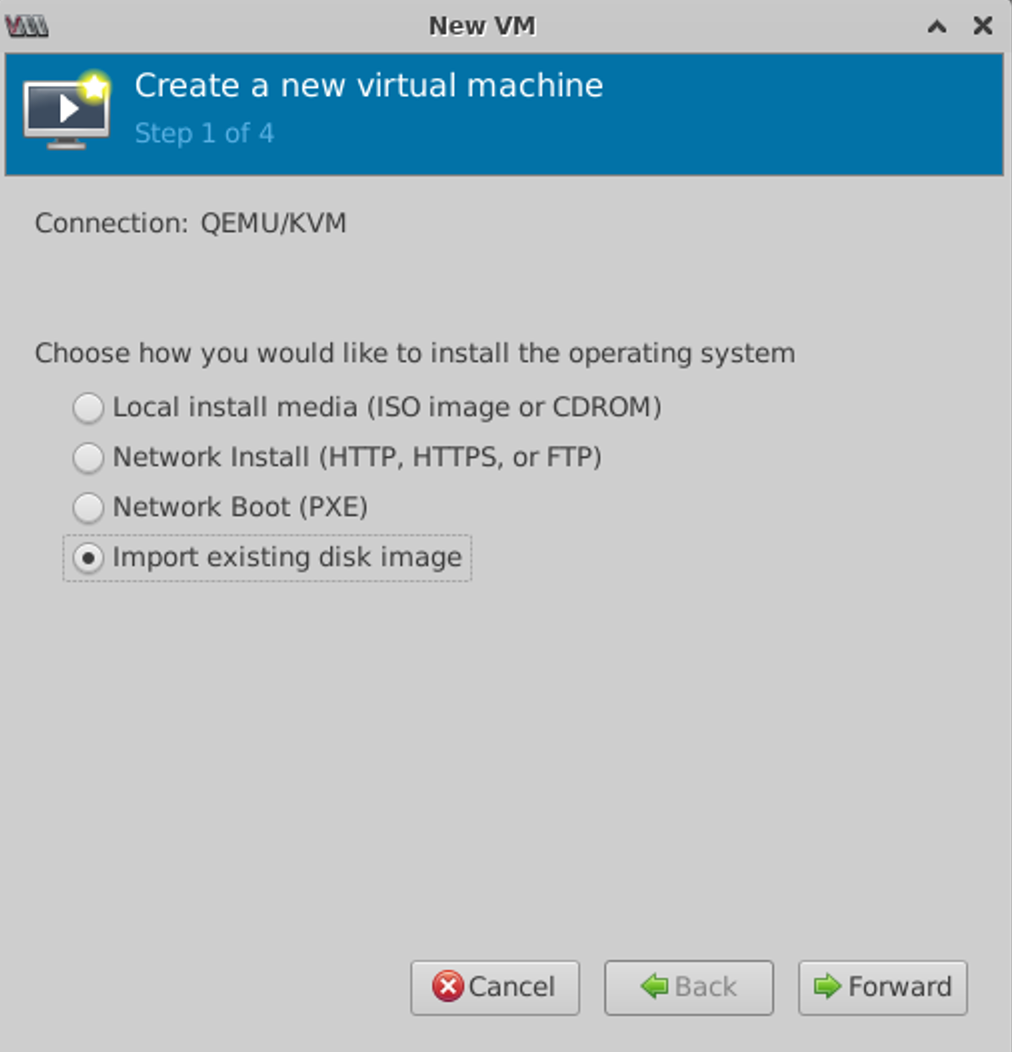
  5. Start Virtual Machine Manager, then click the Create a new virtual machine button.
    Virtual Machine Manager with menu bar options, icons for creating, opening, controlling VMs, and a list showing QEMU/KVM with Name and CPU usage columns.
  6. Select Import existing disk image, then click Forward.
    Create a new virtual machine wizard step 1 of 4. Import existing disk image is selected. Options: Local install media, Network Install, Network Boot. Buttons: Cancel, Back, Forward.
  7. Browse to where you moved the QCOW2 image, then click Choose Volume.
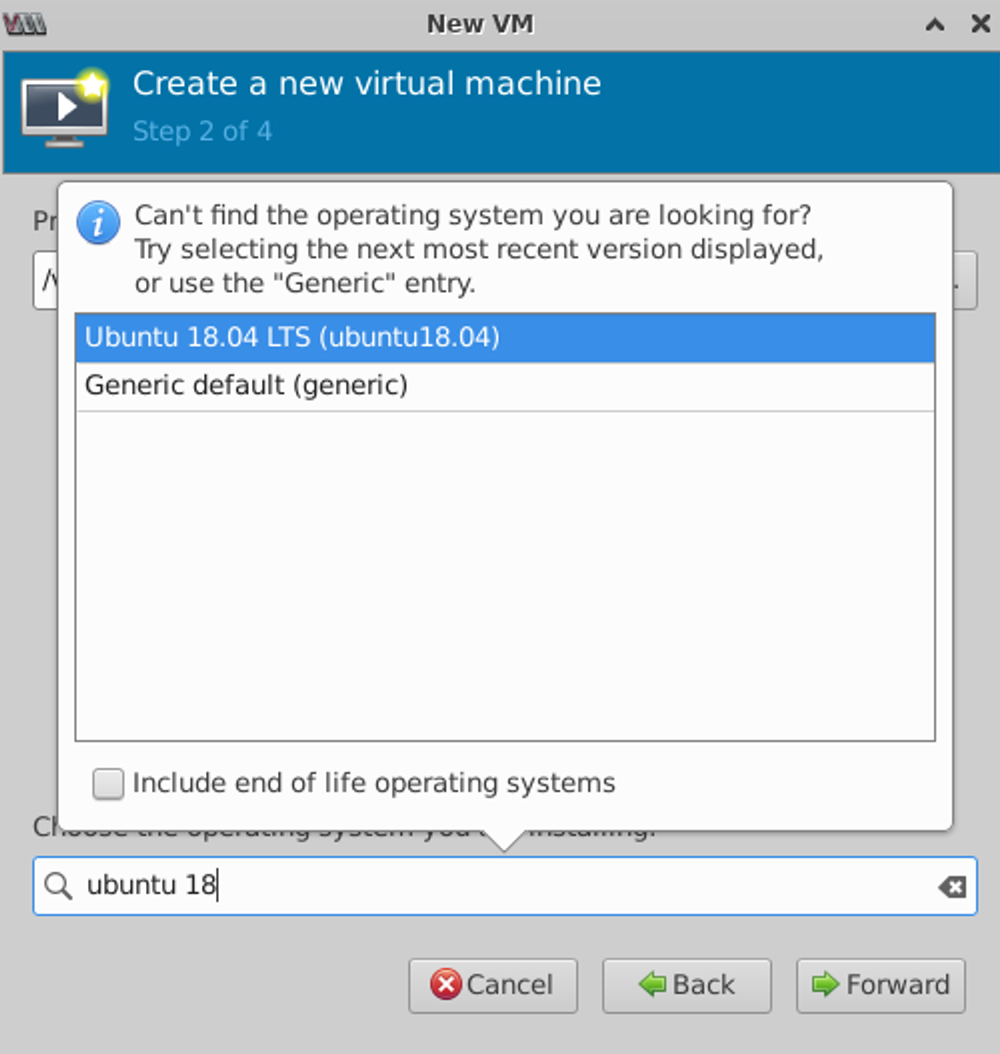
  8. Select Ubuntu 22.04 LTS operating system, then click Forward. (Screenshot below is from older Ubuntu version.)
    Create a new virtual machine dialog at Step 2 of 4. Selecting operating system Ubuntu 18.04 LTS or Generic default. Include end of life OS checkbox unchecked. Search bar with ubuntu 18 typed. Navigation options: Cancel, Back, Forward.
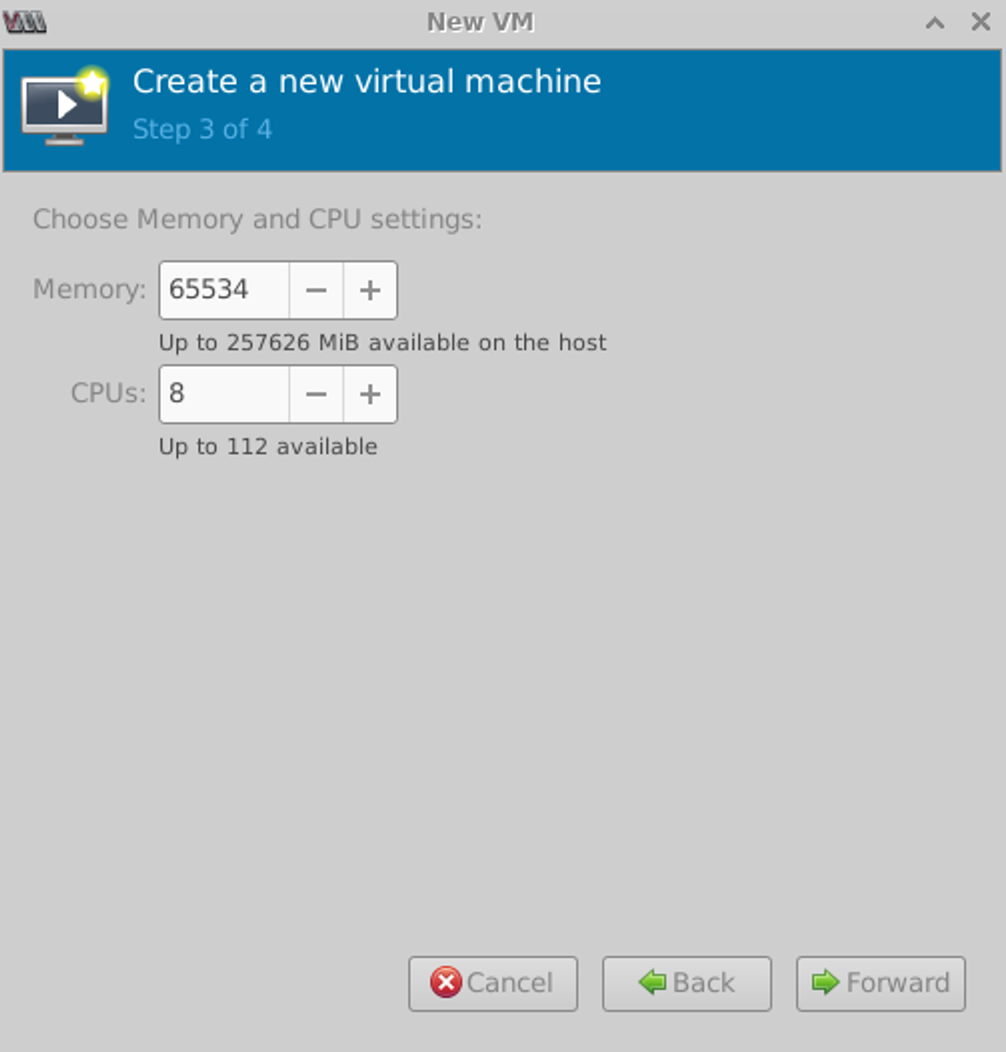
  9. Specify memory and CPU requirements based on your environment.
    Step 3 of 4 in VM setup: Allocate 65534 MiB memory and 8 CPU cores. Maximum on host: 257626 MiB memory, 112 CPU cores.
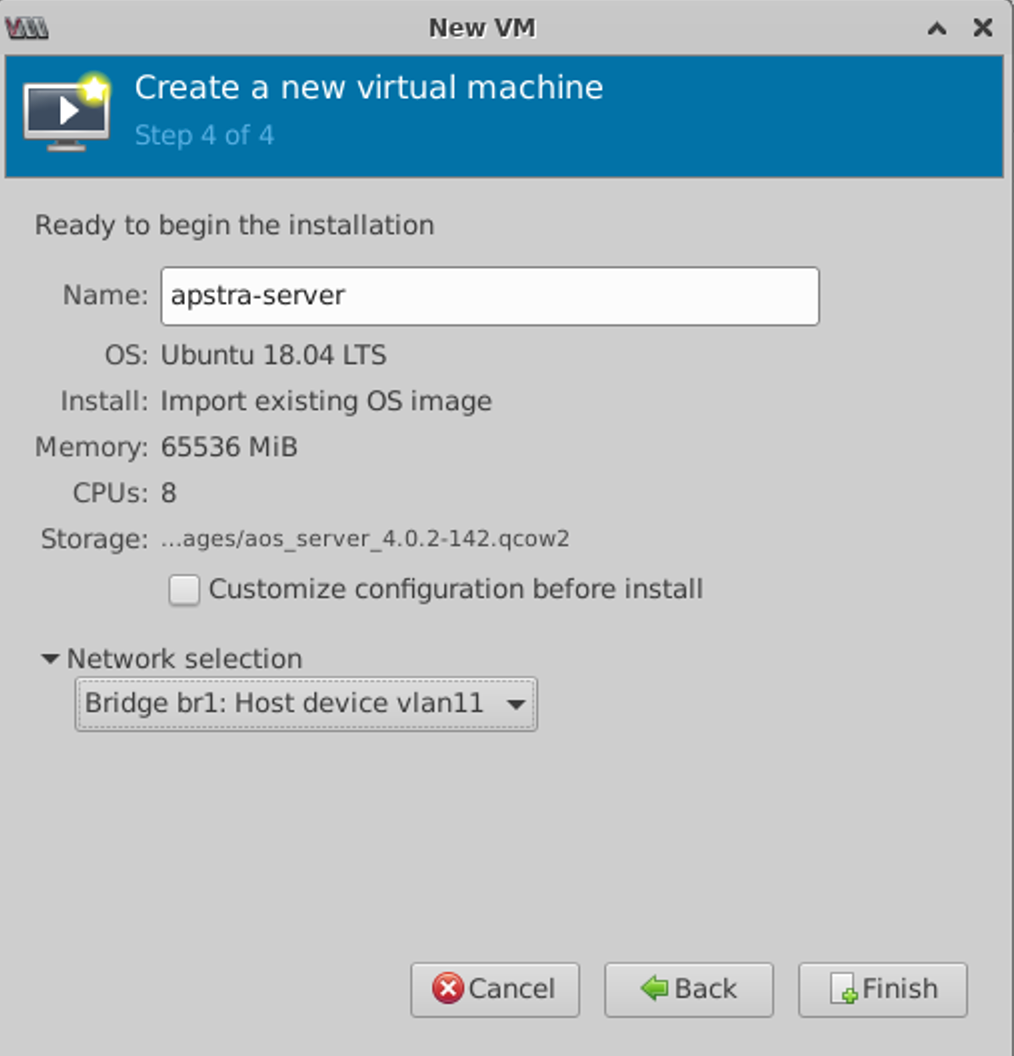
  10. Change the default name (optional), select the VM network that you want the VM to connect to, then click Finish. It may take a few minutes to create the VM. (Screenshot below is from older Ubuntu version.)
    Final step in creating a new VM named apstra-server with Ubuntu 18.04 LTS; 64 GB RAM, 8 CPUs, network bridge br1, and disk image aos_server_4.0.2-142.qcow2. Finish button to complete.

You're ready to configure the Apstra server.

Install on KVM with CLI

  1. Confirm that you're running one of the Supported Hypervisors and Versions.
  2. Make sure that you allocate enough resources for your network. For example, if you're using more than 25 offbox agents, you'll need to add another VM. See Required Server Resources for more details.
    CAUTION:

    If you allocate insufficient CPU and RAM allocations for your network you'll probably experience issues such as slow response times, system errors and a critical "segmentation fault" (core dump). If this happens, you'll need to delete the VM and redeploy it with additional resources.

  3. Ensure that the QEMU environment and bridge networking are installed and configured. For examples of installing and configuring QEMU, refer to the following documents:
  4. You must use e1000 or virtio Linux KVM network drivers. Run the command ethtool -i eth0 from the Apstra server to confirm which network drivers you're using.
    CAUTION:

    Using other drivers such as rtl8139 may result in high CPU utilization for the ksoftirqd process.

  5. As a registered support user, download the Apstra VM Image for Linux KVM (QCOW2) from Juniper Support Downloads.
  6. Uncompress the disk image (with gunzip) and move it to where it will run.
  7. Create a VM with the virt-install command line tool. For example, to install the aos_server_5.1.1-117.qcow2.gz image using the existing bridge network (named br0), use the following command:
  8. Connect to the VM console.

You're ready to configure the Apstra server.