Install Apstra on ESXi
These instructions are for installing Apstra software on an ESXi hypervisor. For information about using ESXi in general, refer to VMware's ESXi documentation.
-
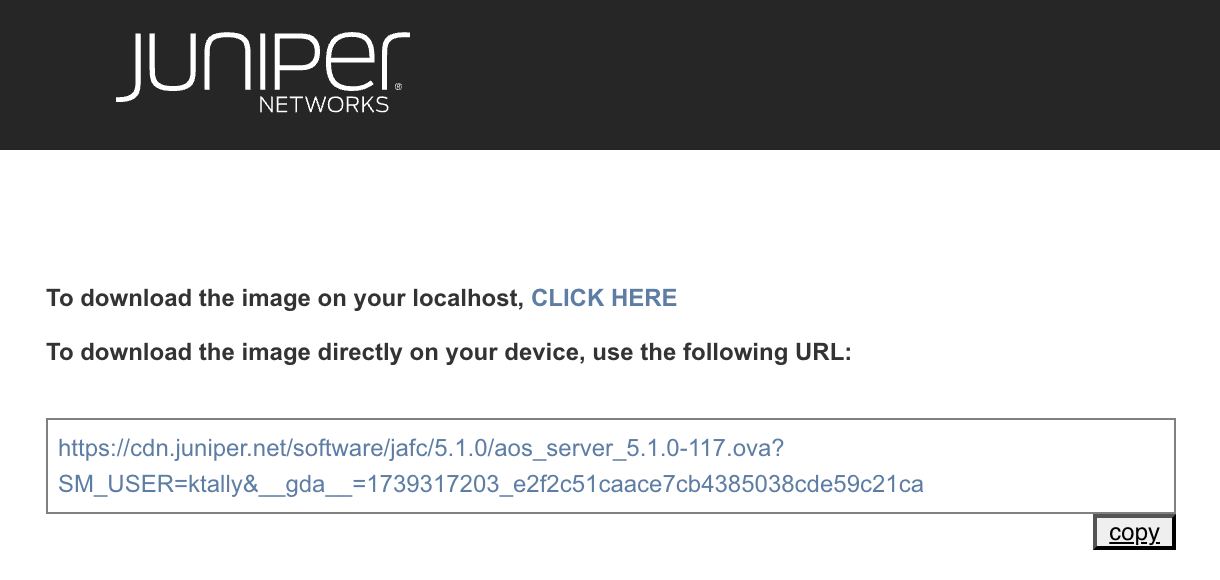
Apstra software is delivered pre-installed on a single VM. The same Apstra VM
image is used for installing both the Apstra controller and Apstra workers. As a
registered support user, download the Apstra VM Image for VMware ESXi
(OVA) from Juniper Support Downloads.
-
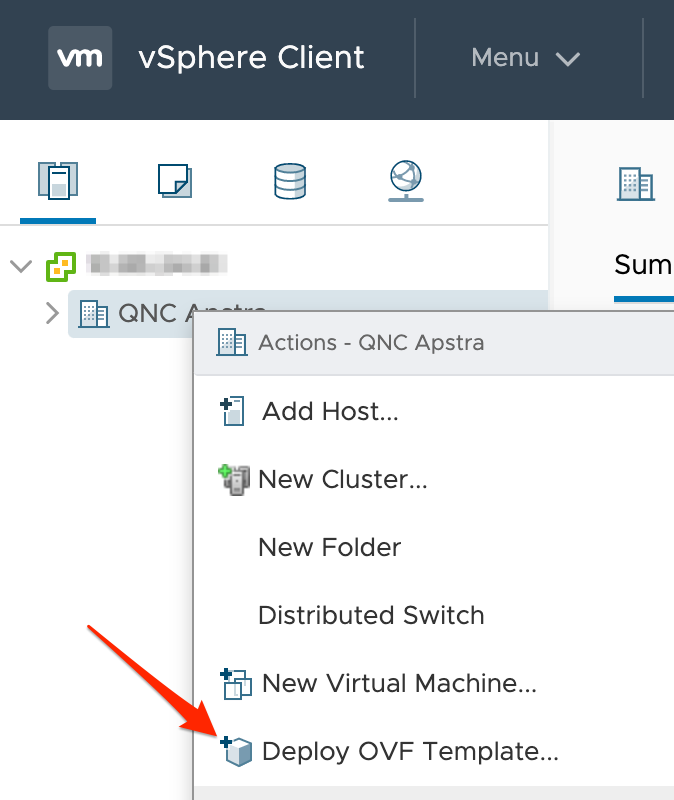
Log in to vCenter, right-click your target deployment environment, then click
Deploy OVF Template.
-
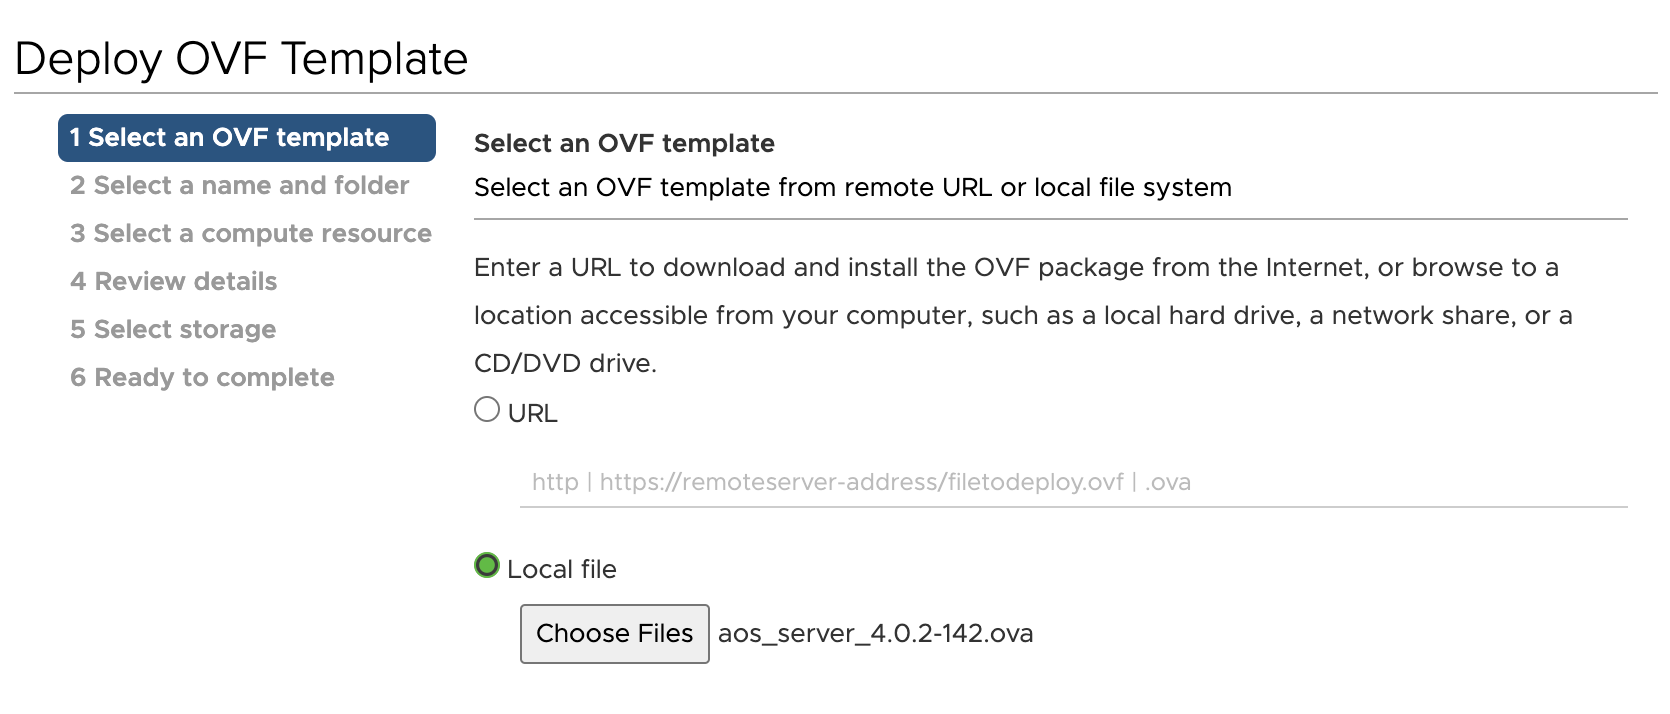
Specify the URL or local file location for the OVA file you downloaded, then
click Next. (Screenshot below is from an older Apstra
version.)
-
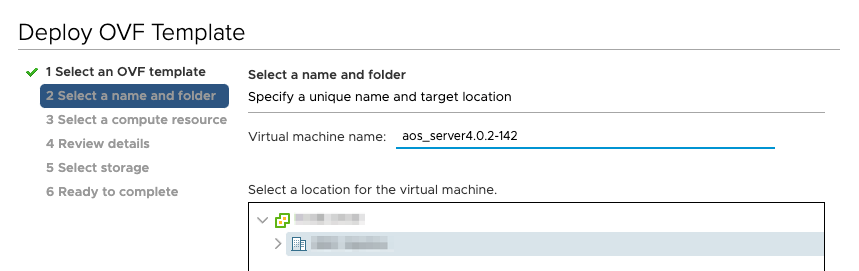
Specify a unique name and target location for the VM, then click
Next. (Screenshot below is from an older Apstra
version.)
-
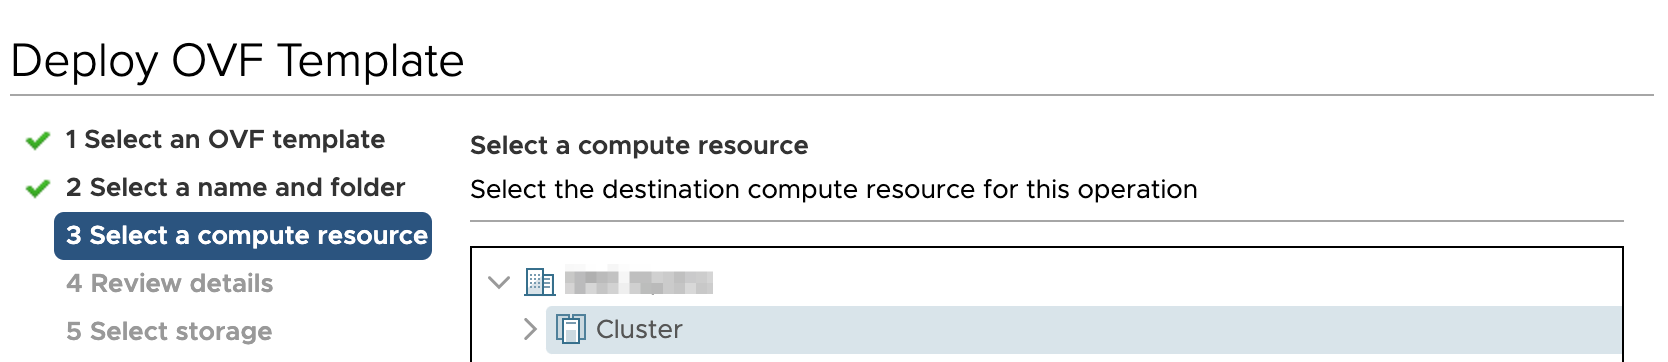
Select your destination compute resource, then click
Next.
-
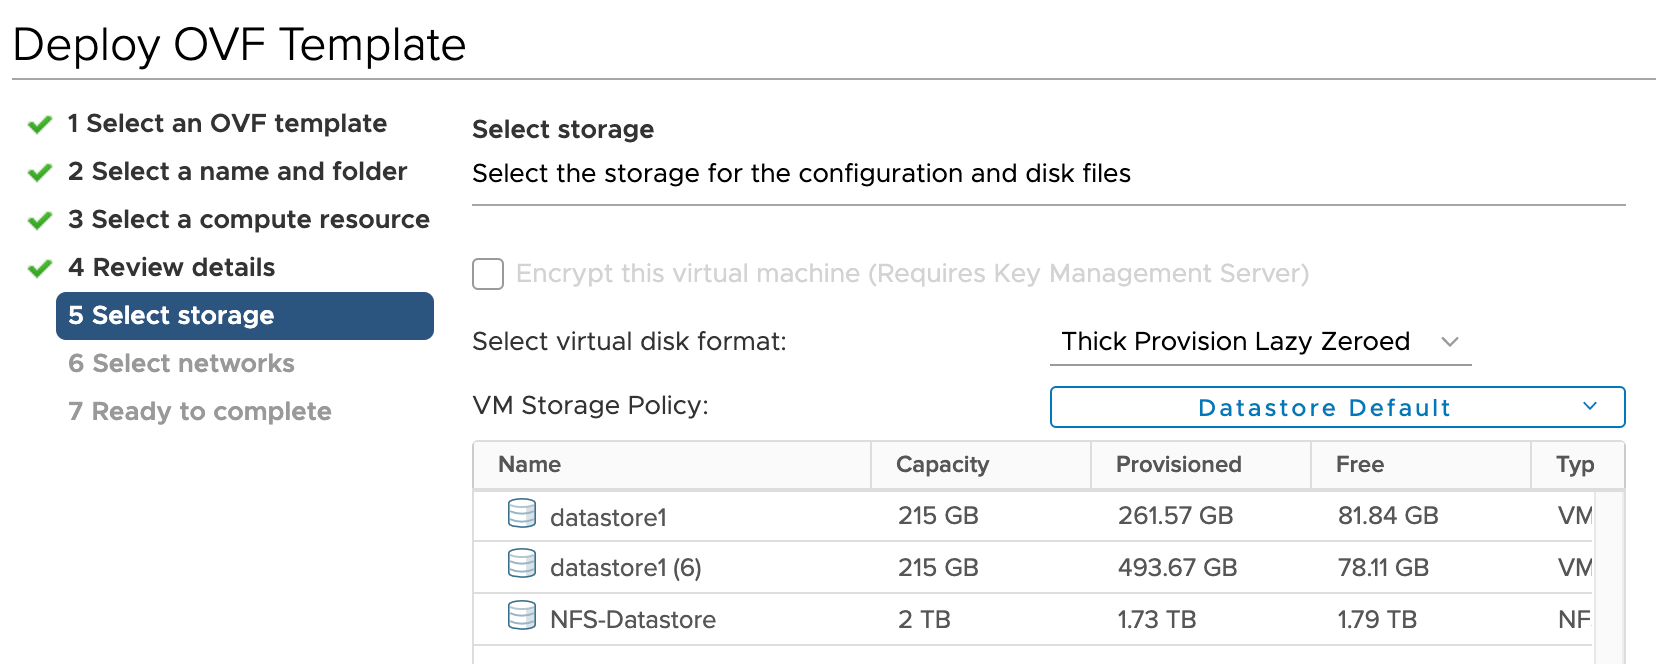
Select storage for the files, then click Next. We
recommend thick provisioning for the Apstra server.
-
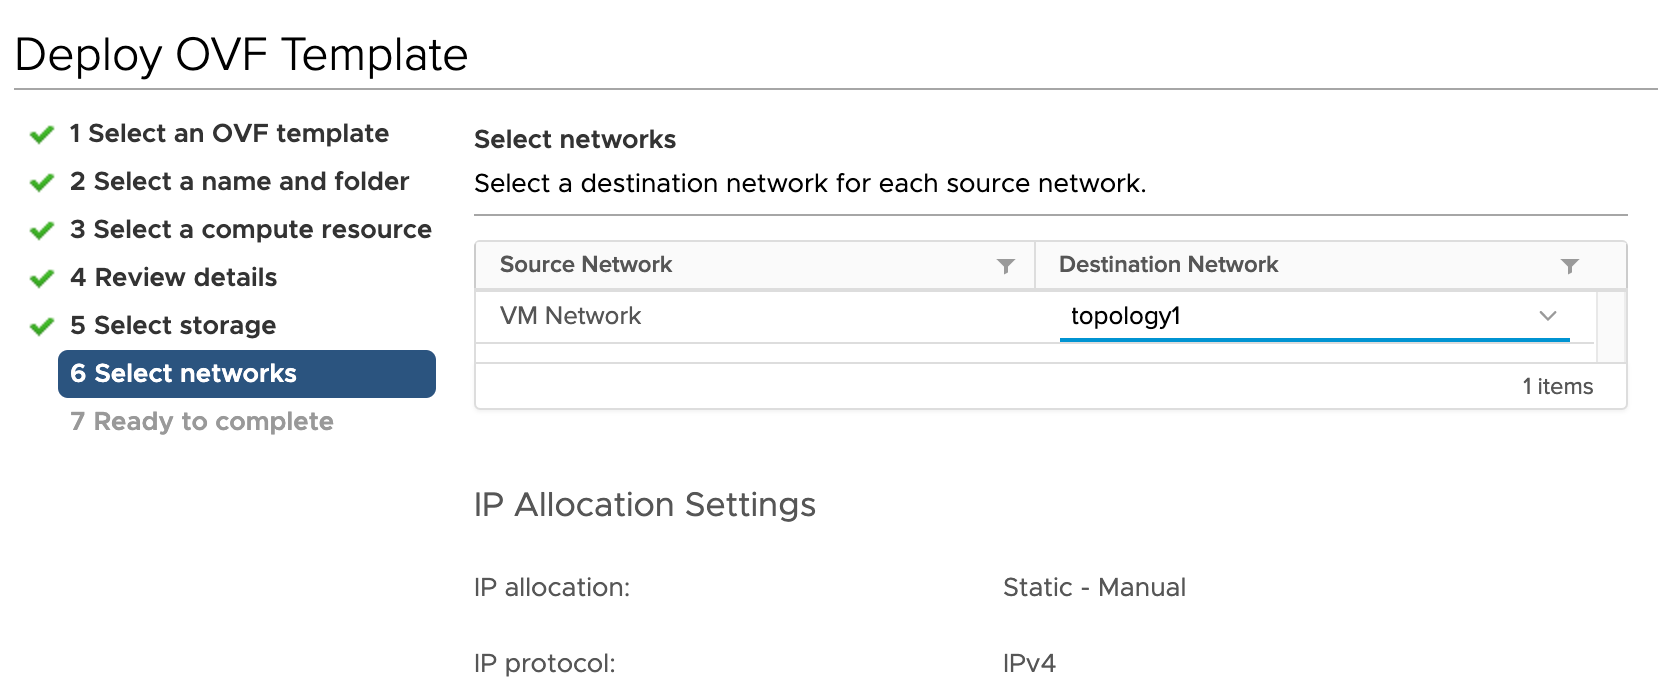
Map the Apstra Management network to enable it to reach the virtual networks
that the Apstra server will manage on ESXi, then click
Next.
You're ready to configure the Apstra server.