Edit Virtual Network
Edit One Virtual Network
-
From the blueprint, navigate to Staged > Virtual > Virtual
Networks and click the Edit button in
the Actions panel for the virtual network to
edit.
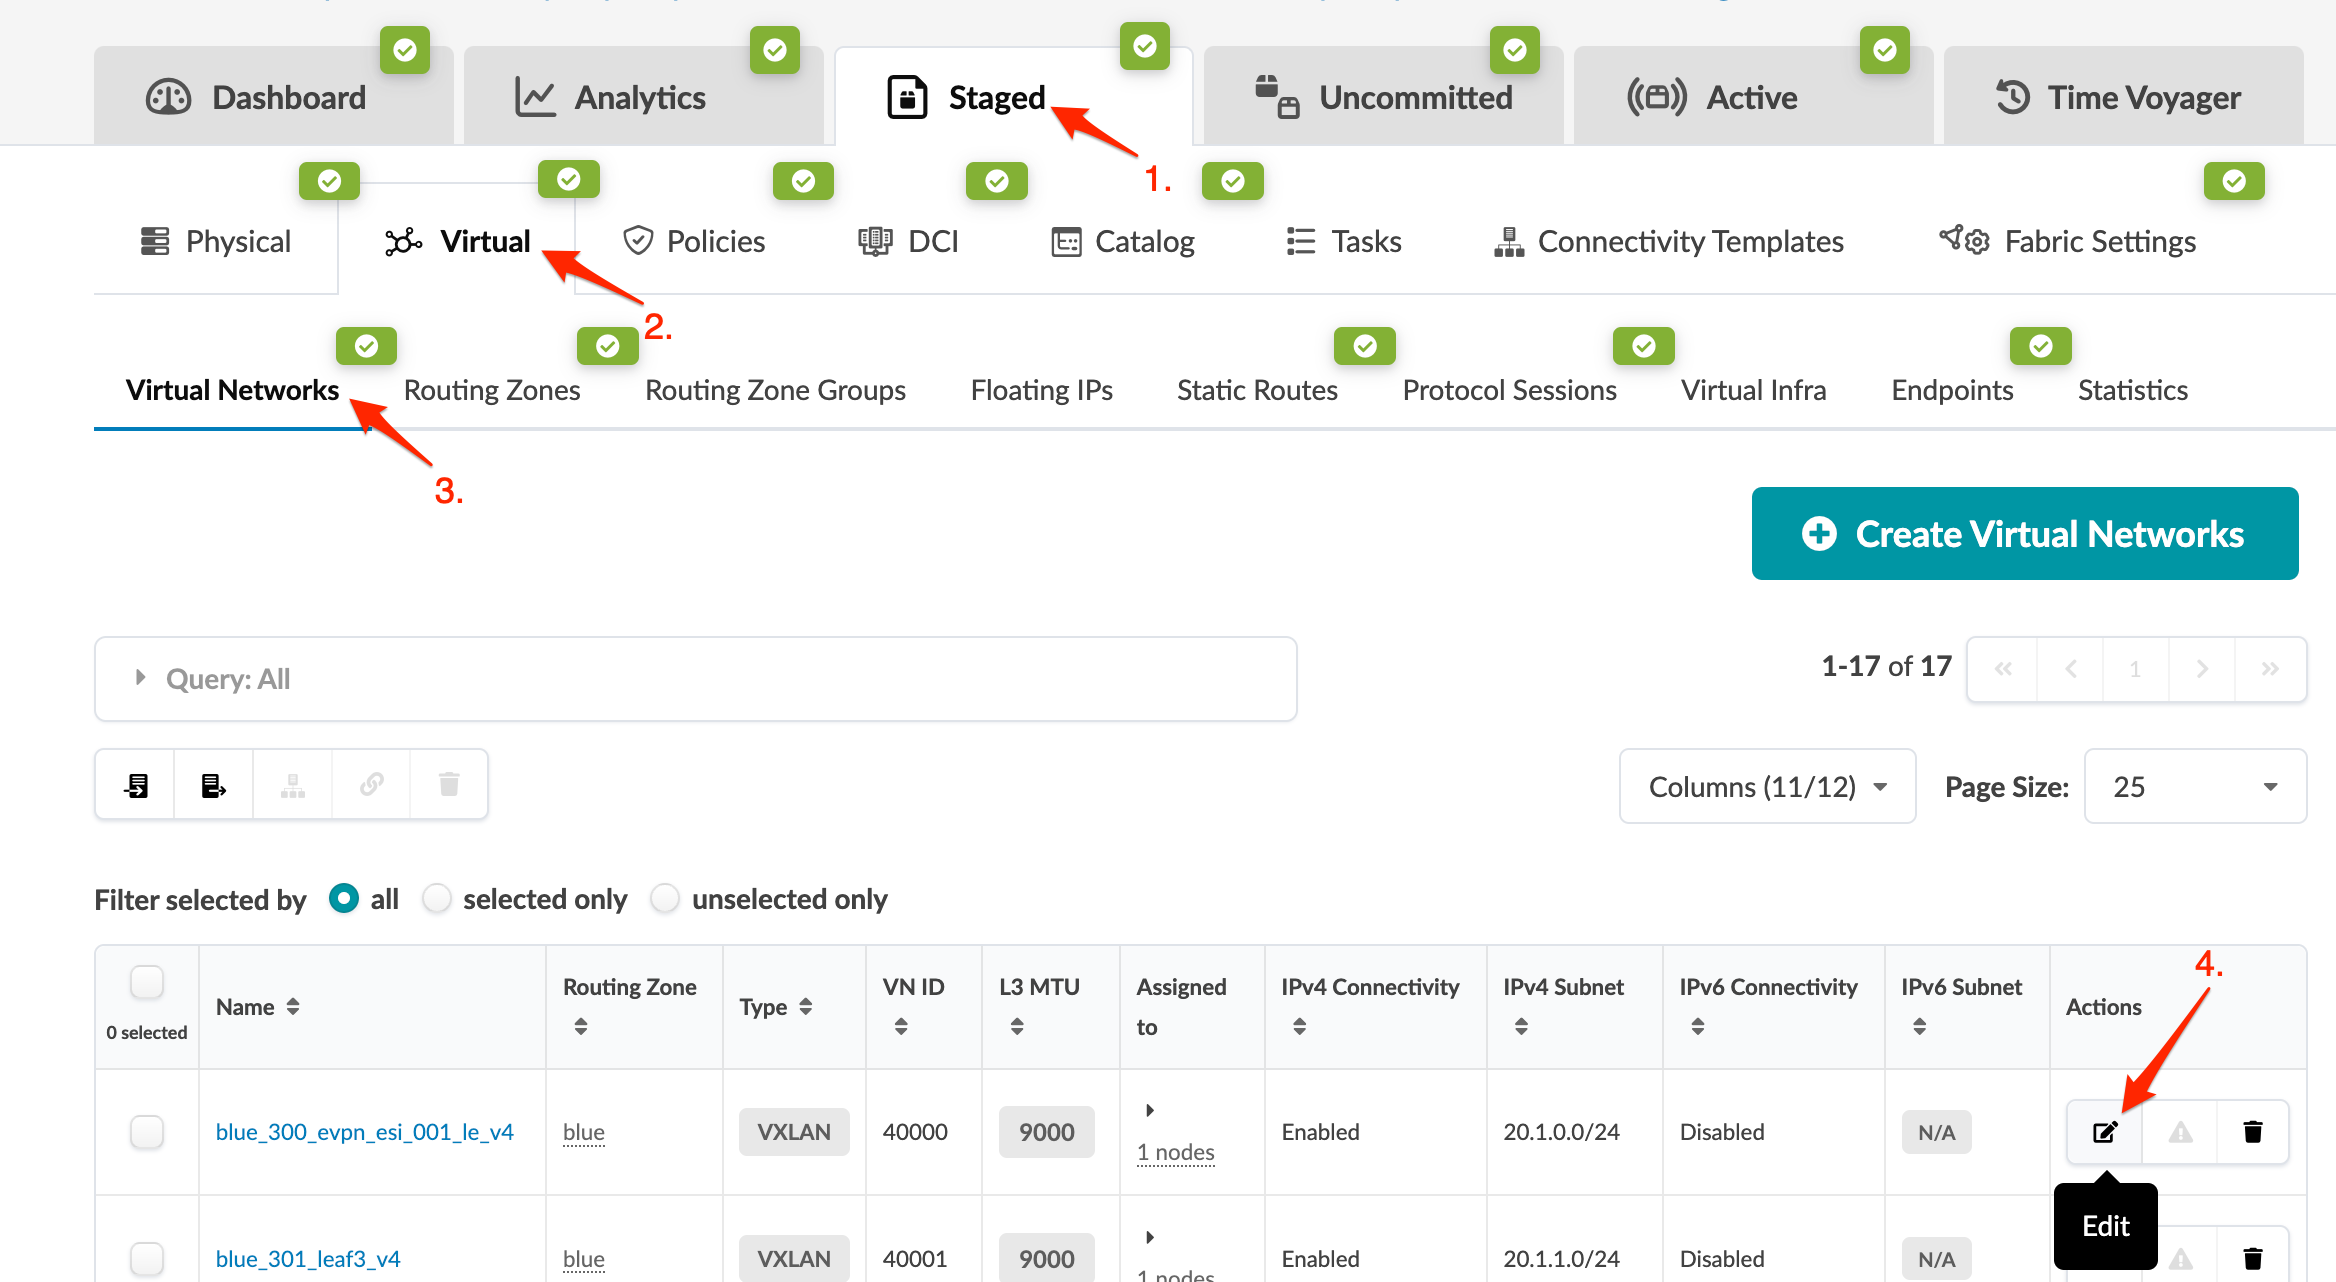
When you're ready to activate your changes, commit them from the Uncommitted tab.
Edit Multiple Virtual Networks
You can update many virtual networks quickly by
exporting them in a CSV file, updating the file, then importing the file back into
your blueprint.
-
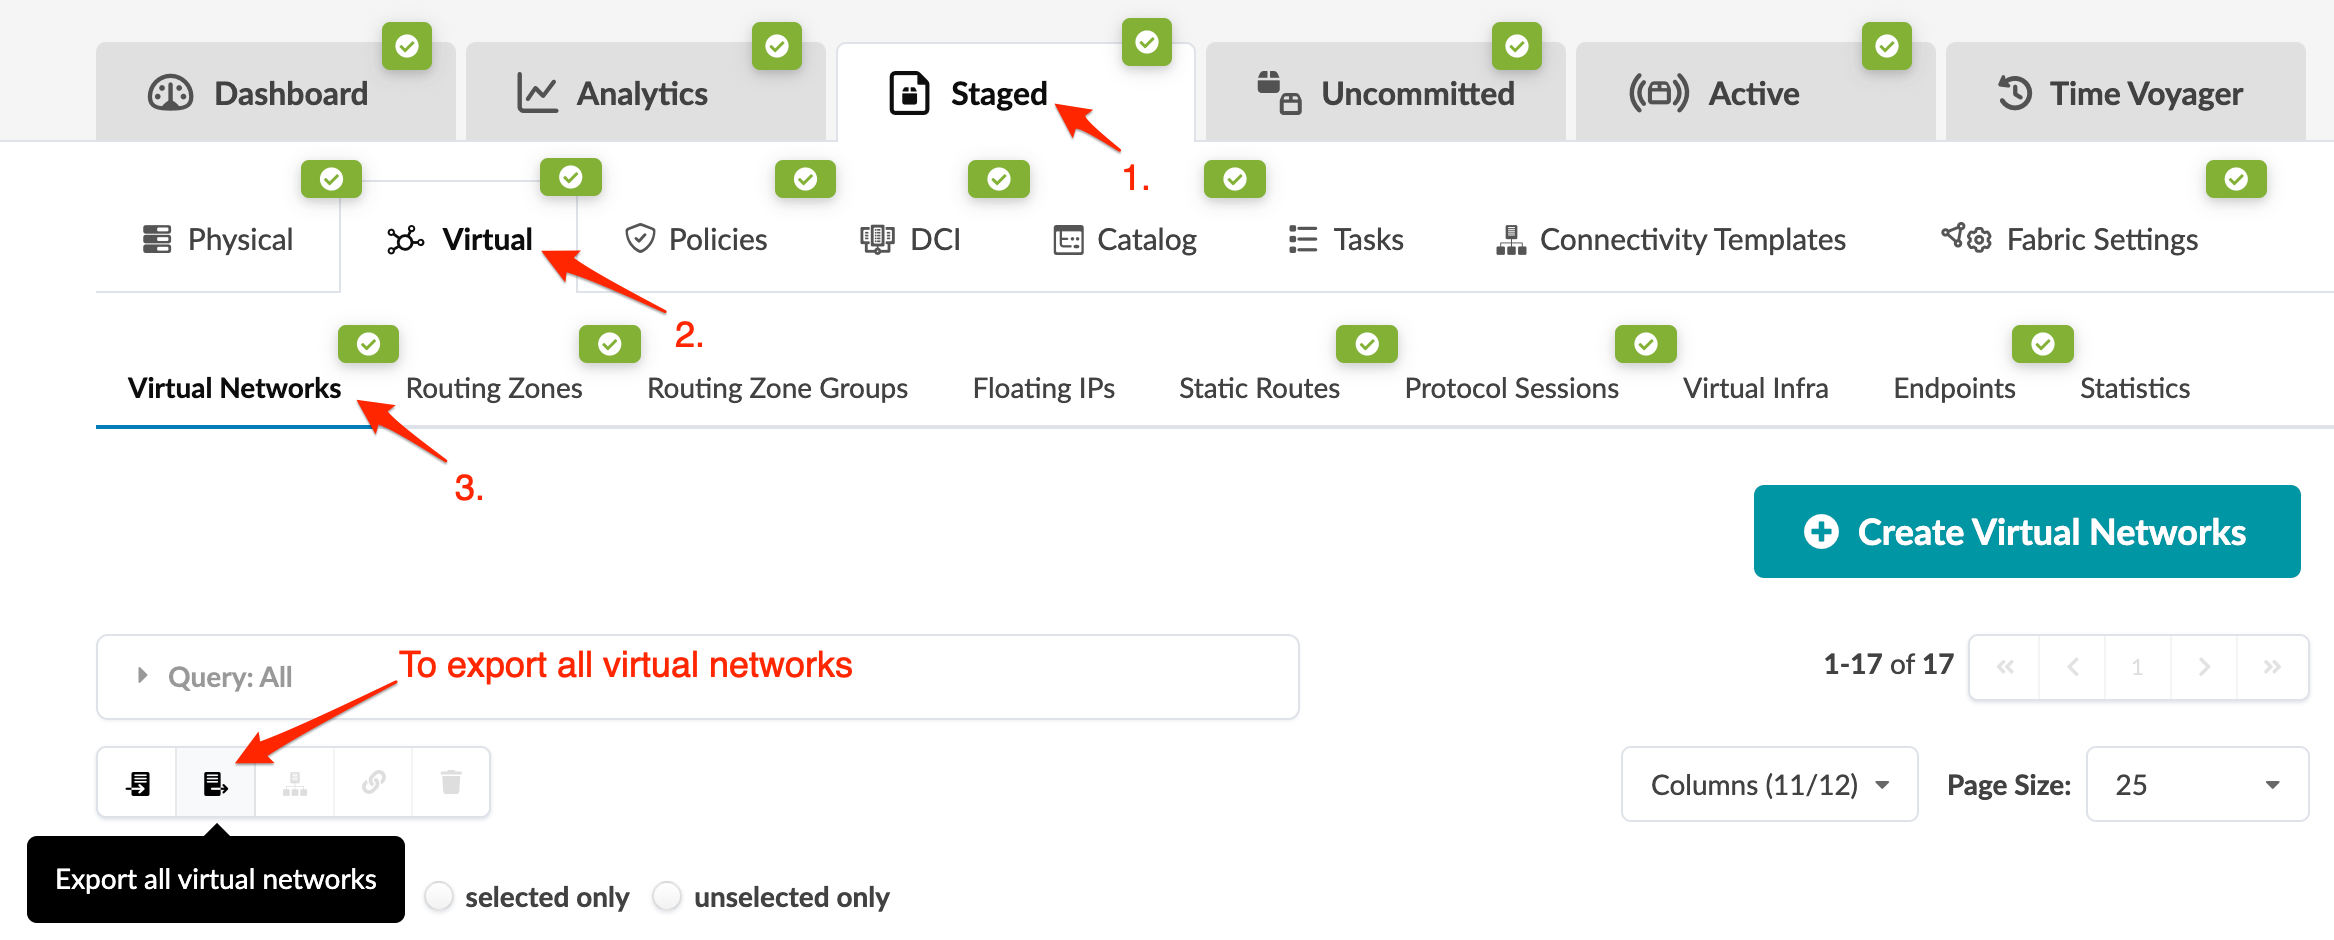
To export all virtual networks, click the Export all virtual
networks button.
-
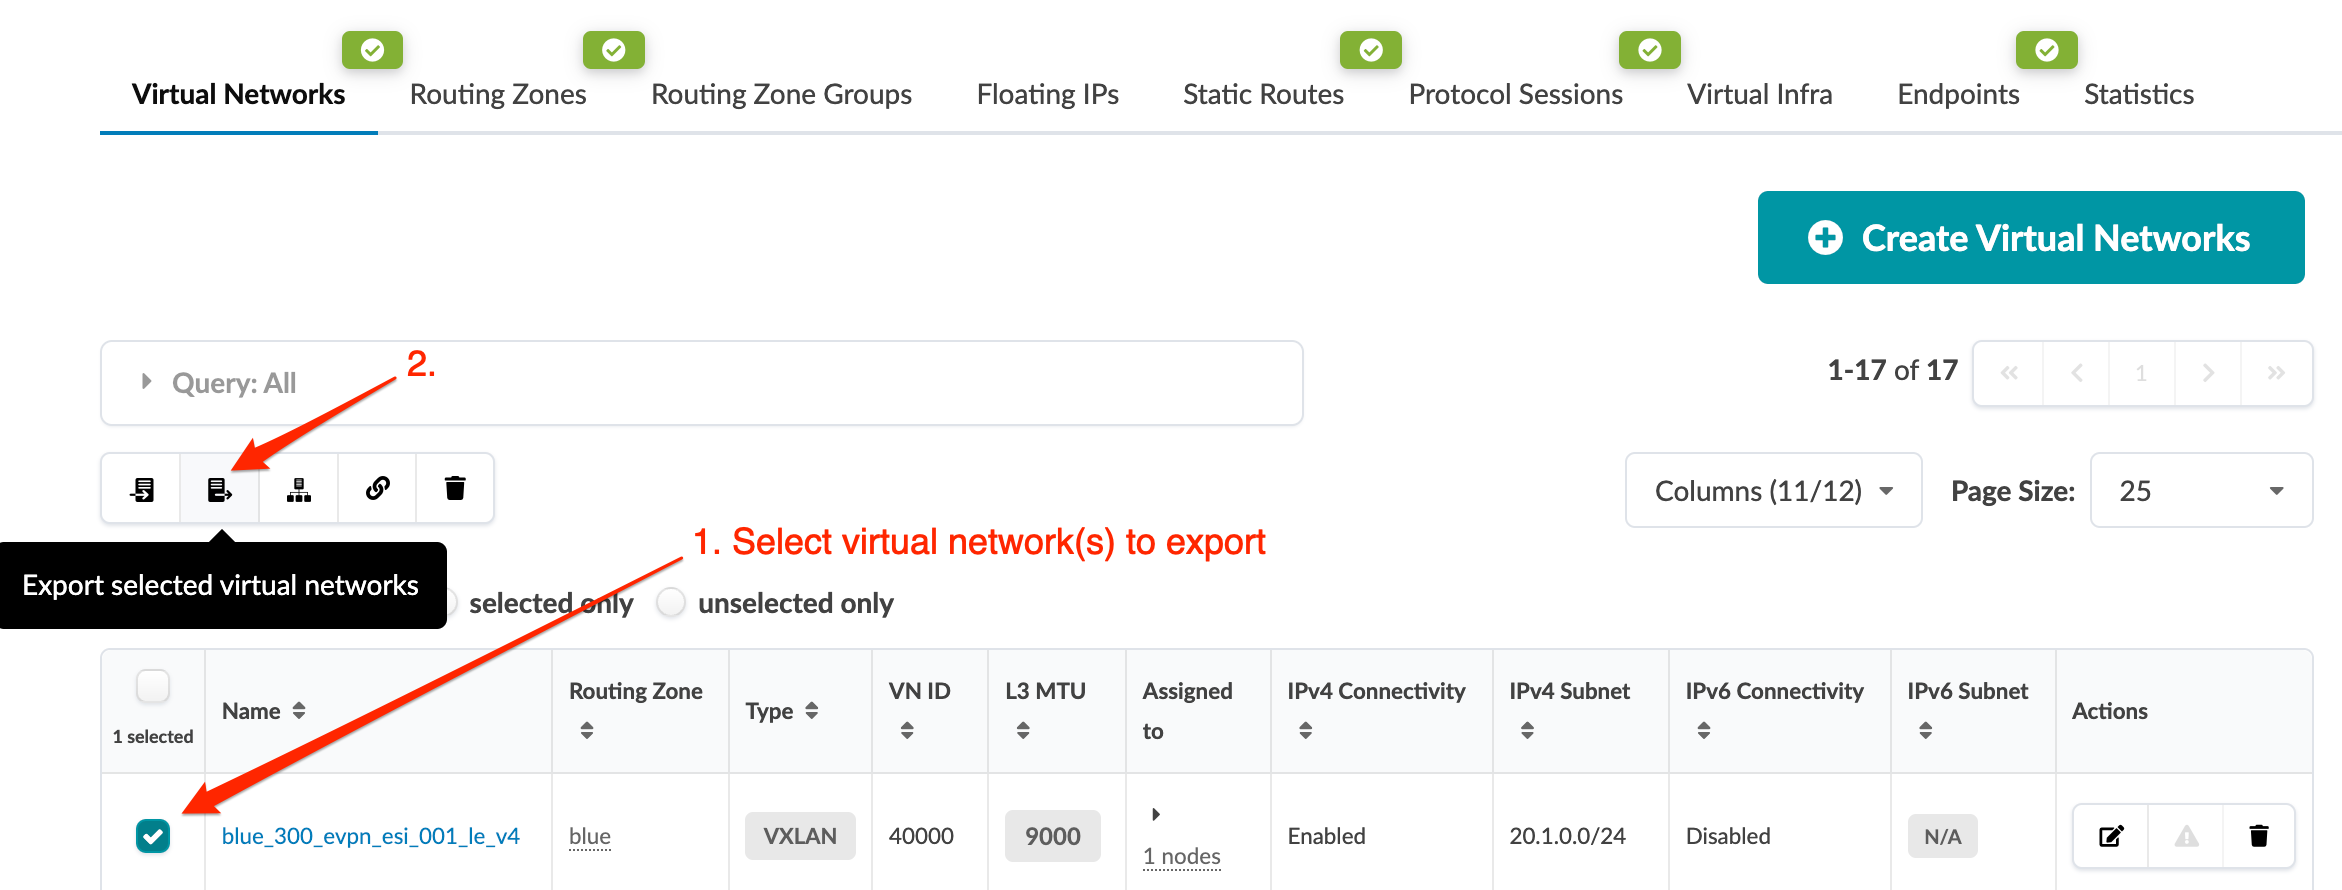
Or to export specific virtual networks instead of all of them, check their
check boxes, then click the same button as in the previous step (now called
Export selected virtual networks) (new in Apstra
version 4.2.0).
-
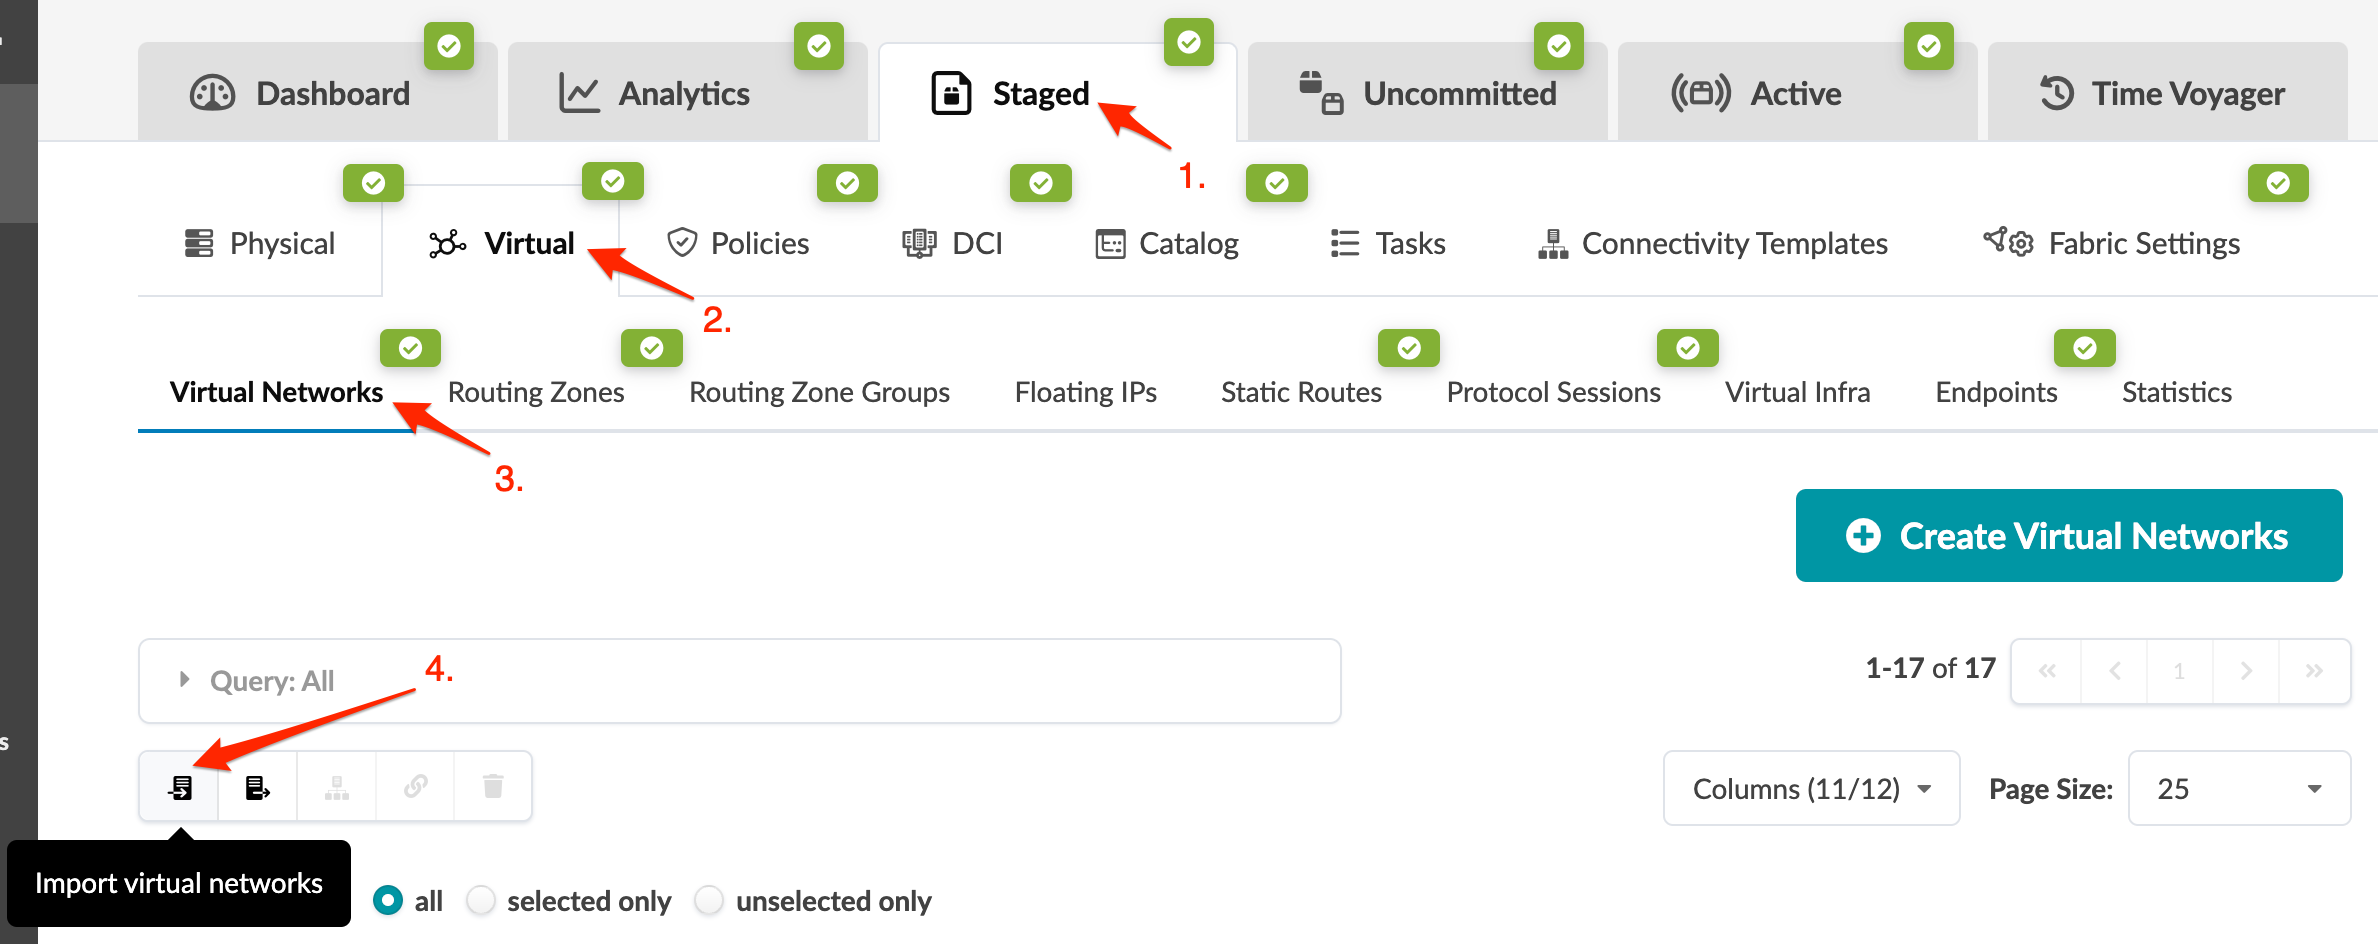
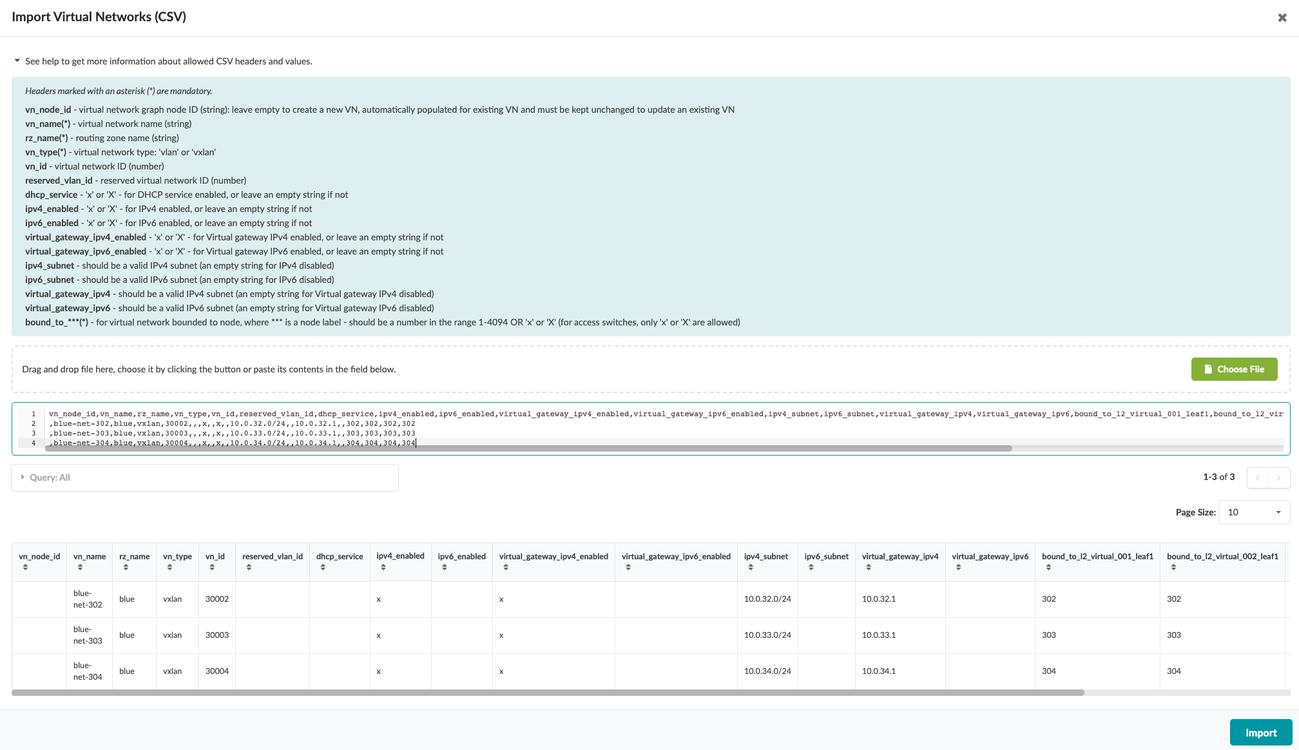
In the Apstra GUI, navigate to Staged > Virtual > Virtual
Networks and click the Import virtual
networks button.
-
Either click Choose File and navigate to the file on
your computer, or drag and drop the file onto the dialog window, or as shown
in the screenshot below, directly paste CSV file contents. Virtual network
details are displayed for your review.
When you're ready to activate your changes, commit them from the Uncommitted tab.