ON THIS PAGE
Edit Routing Zone
Edit One Routing Zone
-
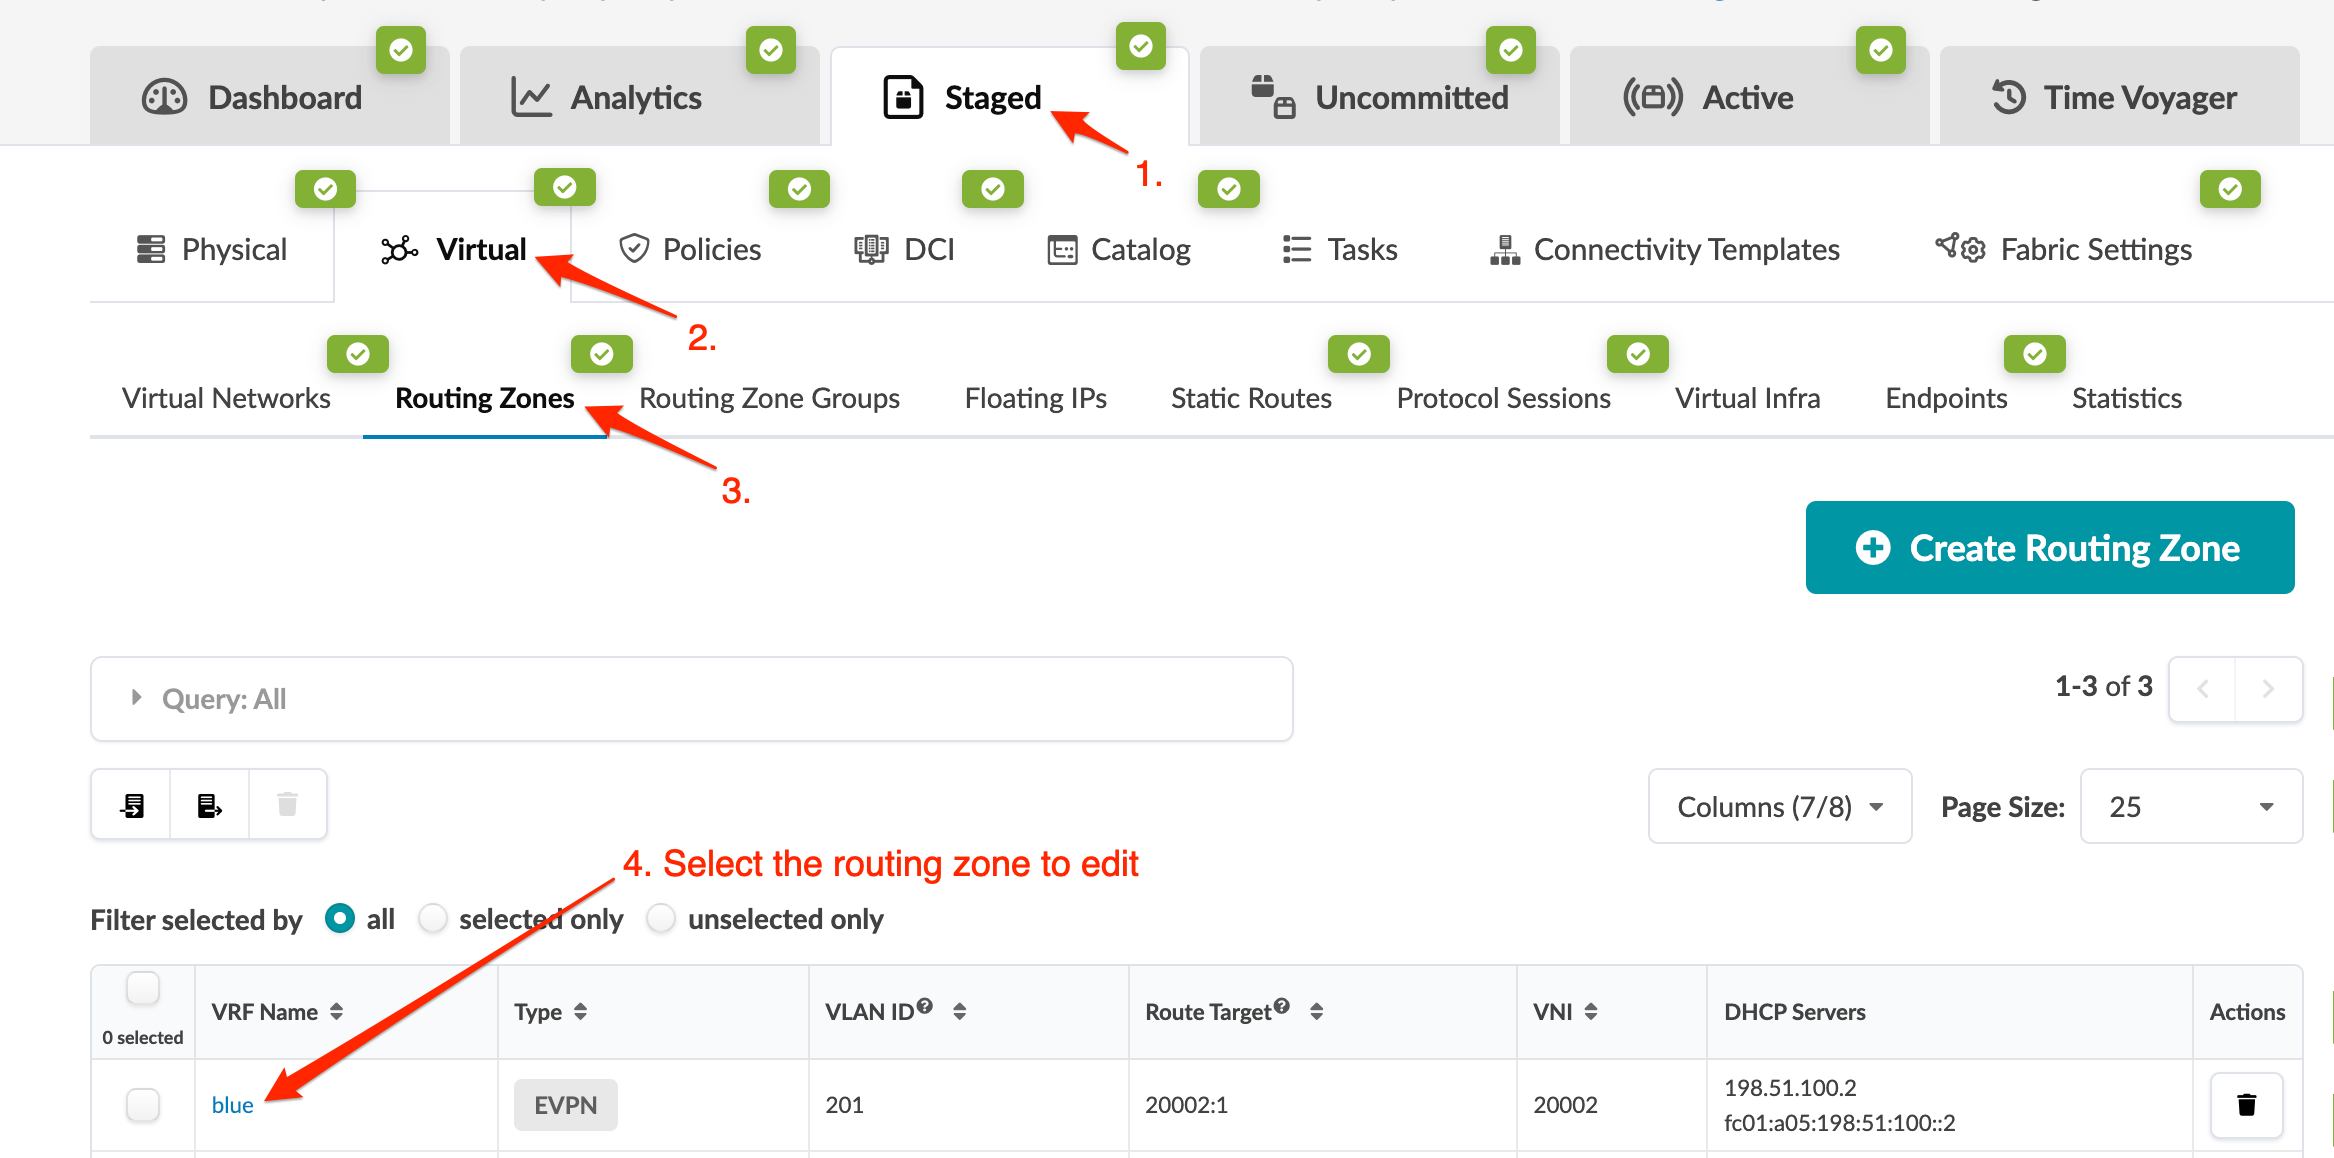
From the blueprint, navigate to Staged > Virtual > Routing
Zones and click the name of the routing zone to edit. (The
screenshot below is for Apstra version 4.2.0. Version 4.2.1 includes a
column in the table for Routing Policy Name that you can link to directly;
and you can select which columns to show in the table. In Apstra version
4.2.1, some menu tabs have been renamed, moved, and/or added.)
-
Click the Edit button (upper-right) for the selected
routing zone.

When you're ready to activate your changes, commit them from the Uncommitted tab.
Edit Multiple Routing Zones
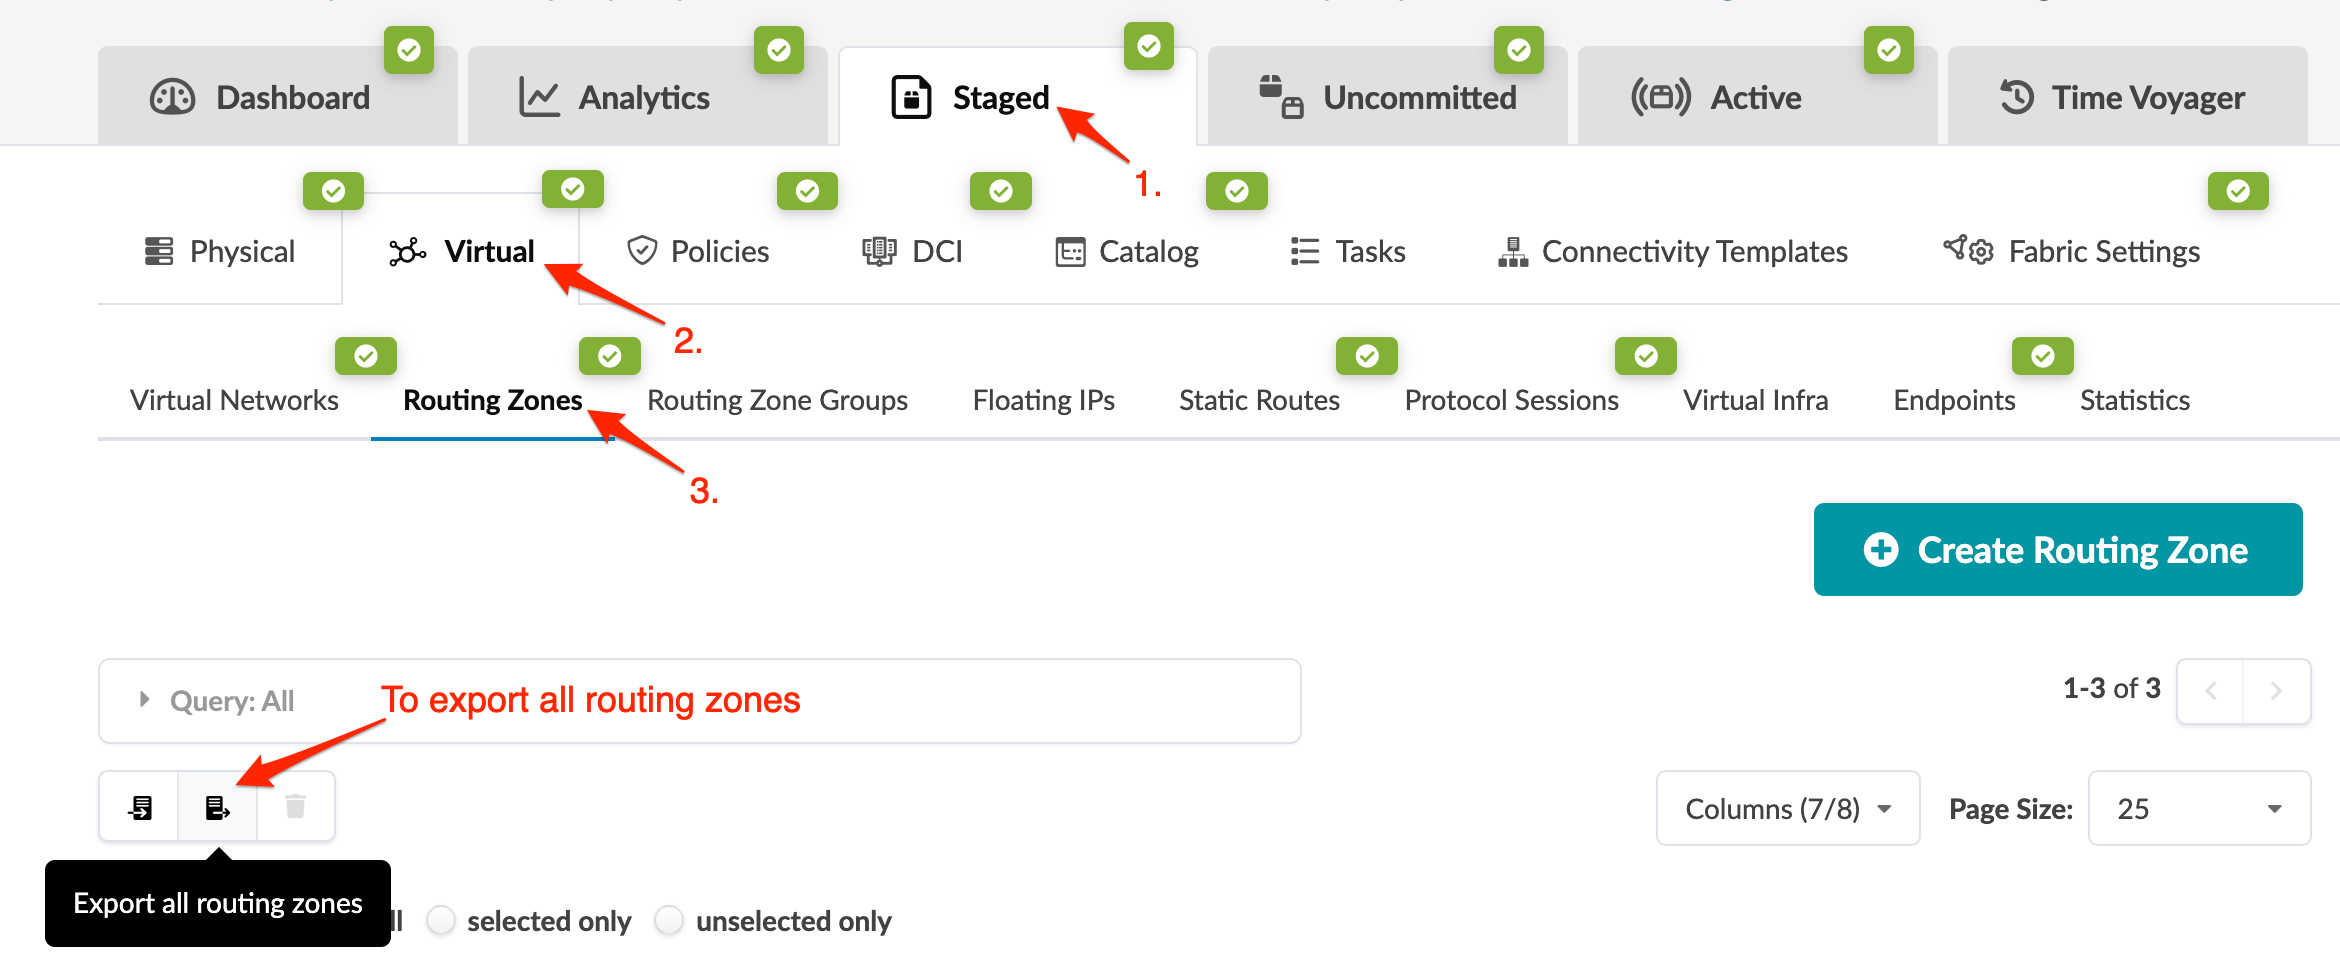
You can update many routing zones quickly by exporting
them in a CSV file, updating the file, then importing the file back into your
blueprint.
-
To export all routing zones, click the Export all routing
zones button. (The screenshot below is for Apstra version
4.2.0. In Apstra version 4.2.1, some menu tabs have been renamed, moved,
and/or added.)
-
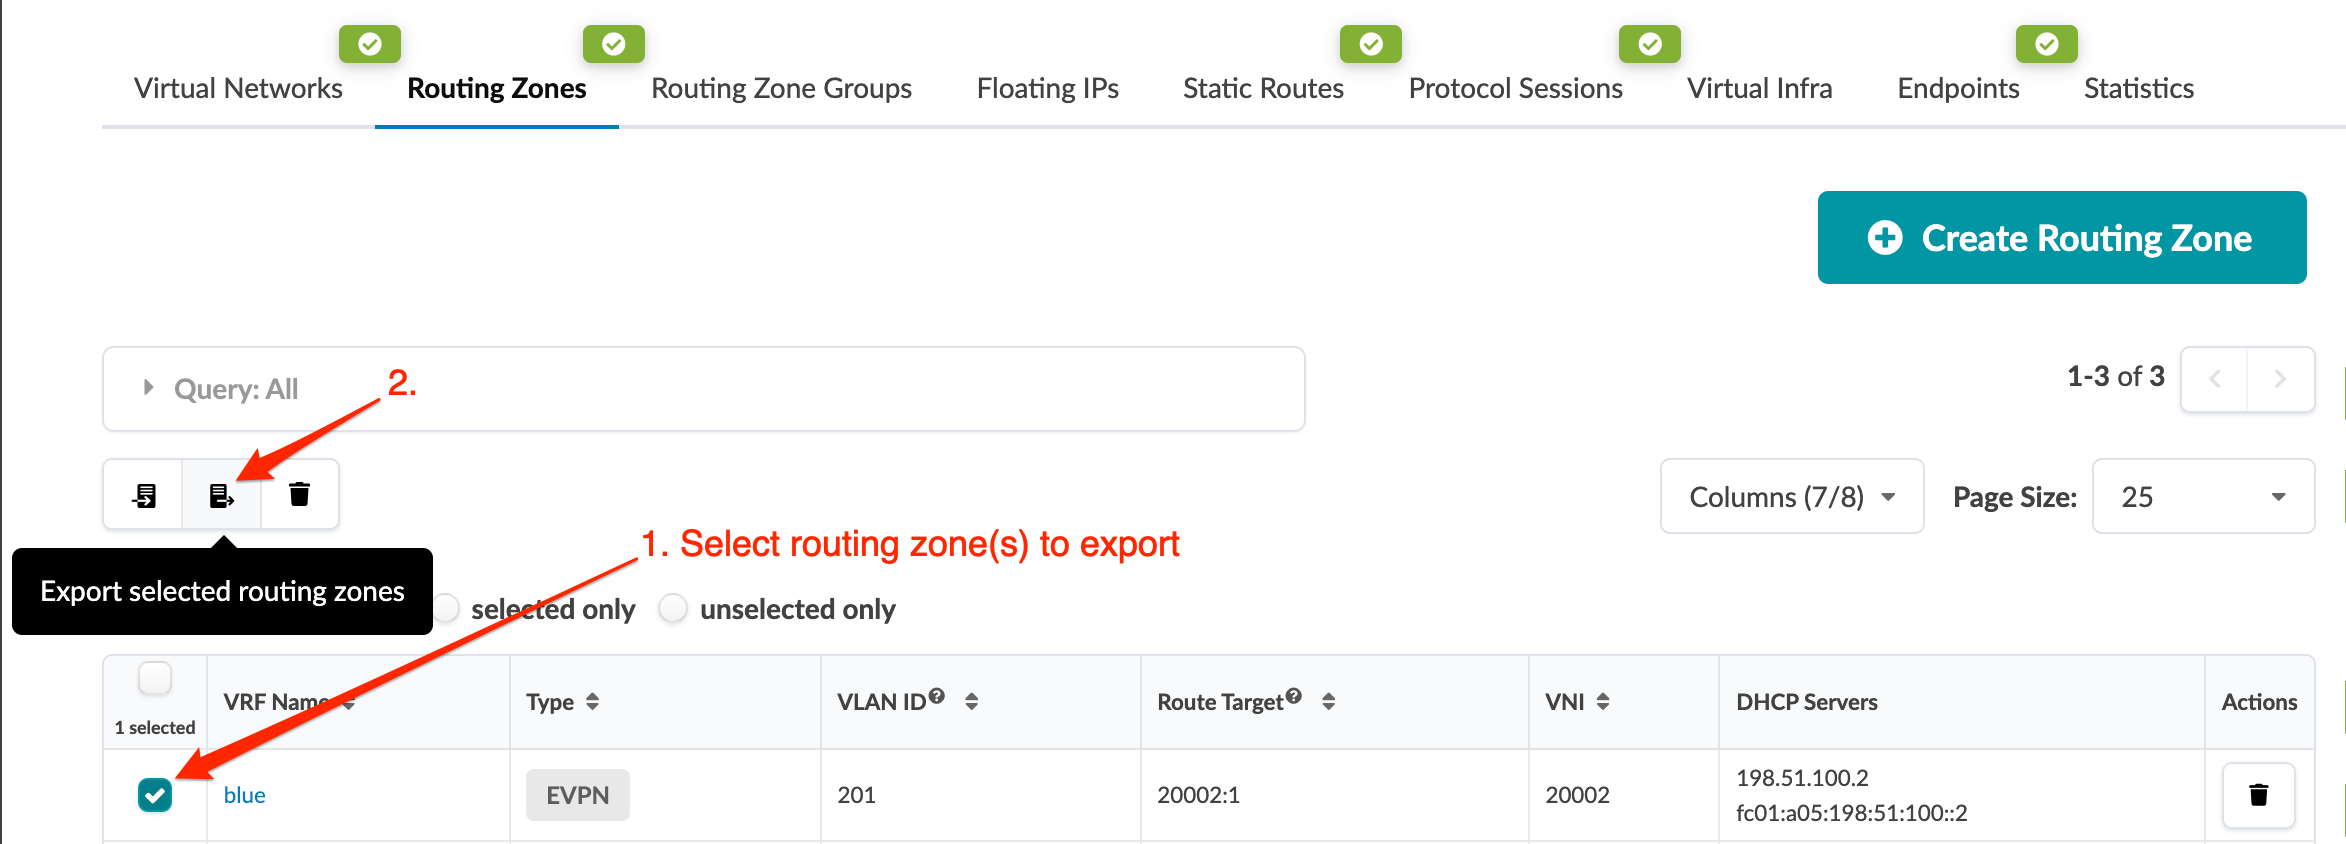
Or to export specific routing zones instead of all of them, select their
check boxes, then click the same button as in the previous step (now called
Export selected routing zones) (new in Apstra
version 4.2.0). (The screenshot below is for Apstra version 4.2.0. Version
4.2.1 includes a column for Routing Policy Name that you can link to
directly; and you can select which columns to show in the table.)
-
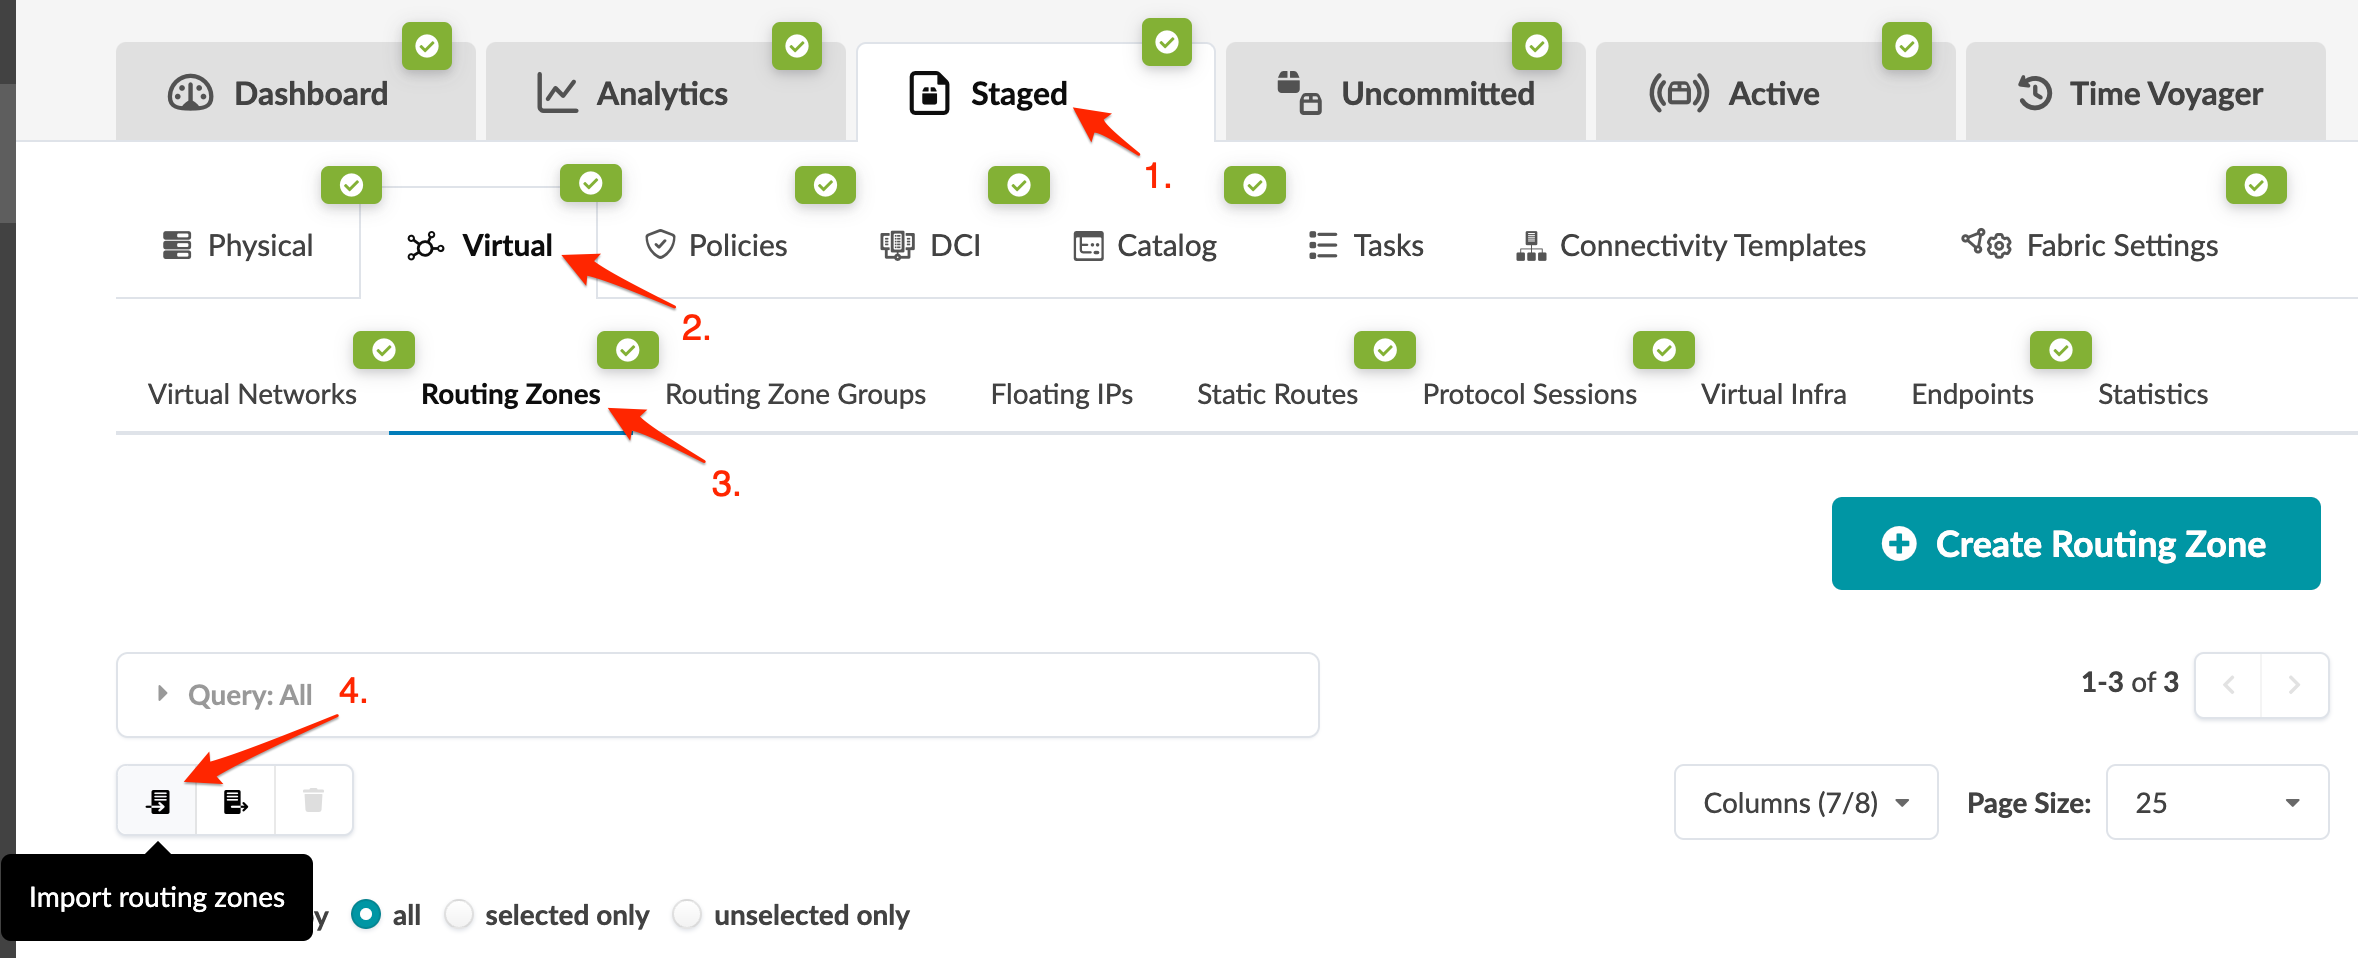
In the Apstra GUI, navigate to Staged > Virtual >Routing
Zones and click the Import routing
zones button.
When you're ready to activate your changes, commit them from the Uncommitted tab.