Configure DHCP Server for Apstra ZTP
SUMMARY Define the network parameters that the DHCP service will use
Apstra ZTP software comes with an ISC DHCP server for the device management network. This page describes several methods for editing the supplied DHCP server. If you're using a different DHCP for the device management network, you're responsible for configuring the same options.
All configuration files are owned by root. You must use sudo to run
commands as root using the sudo command or after
becoming root with the sudo -s command.
dhcpd.conf Parameters
Optional DHCP Parameters
You can set up optional parameters that the DHCP services will send to every device it asks for DHCP services. You can configure these parameters at a later time via configlets. (If you define these parameters in the DHCP service, don't try to set them up again via Apstra; the device OS may return an error.)
If in doubt, don't enter random parameters; it may result in timeouts as a service tries to resolve IP addresses.
-
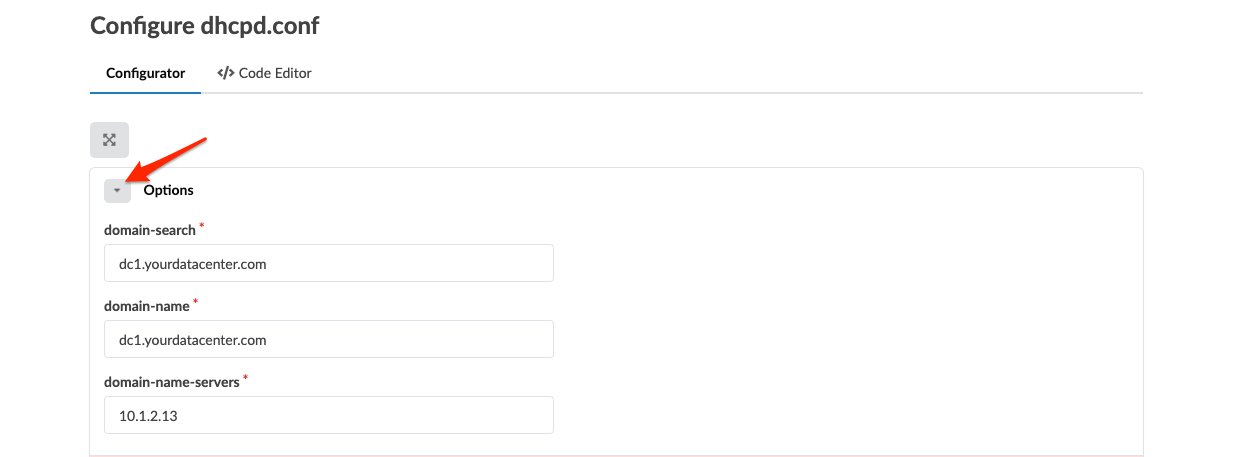
option domain-search "dc1.yourdatacenter.com"- set up a domain name. To specify more than one value, separate them with a comma (,). For the parsing of the file to succeed, each line must end with a semicolon (;) -
option domain-name "dc1.yourdatacenter.com"- set up a list of DNS -
option domain-name-servers 10.1.2.13, 10.1.2.14- set up domain-search
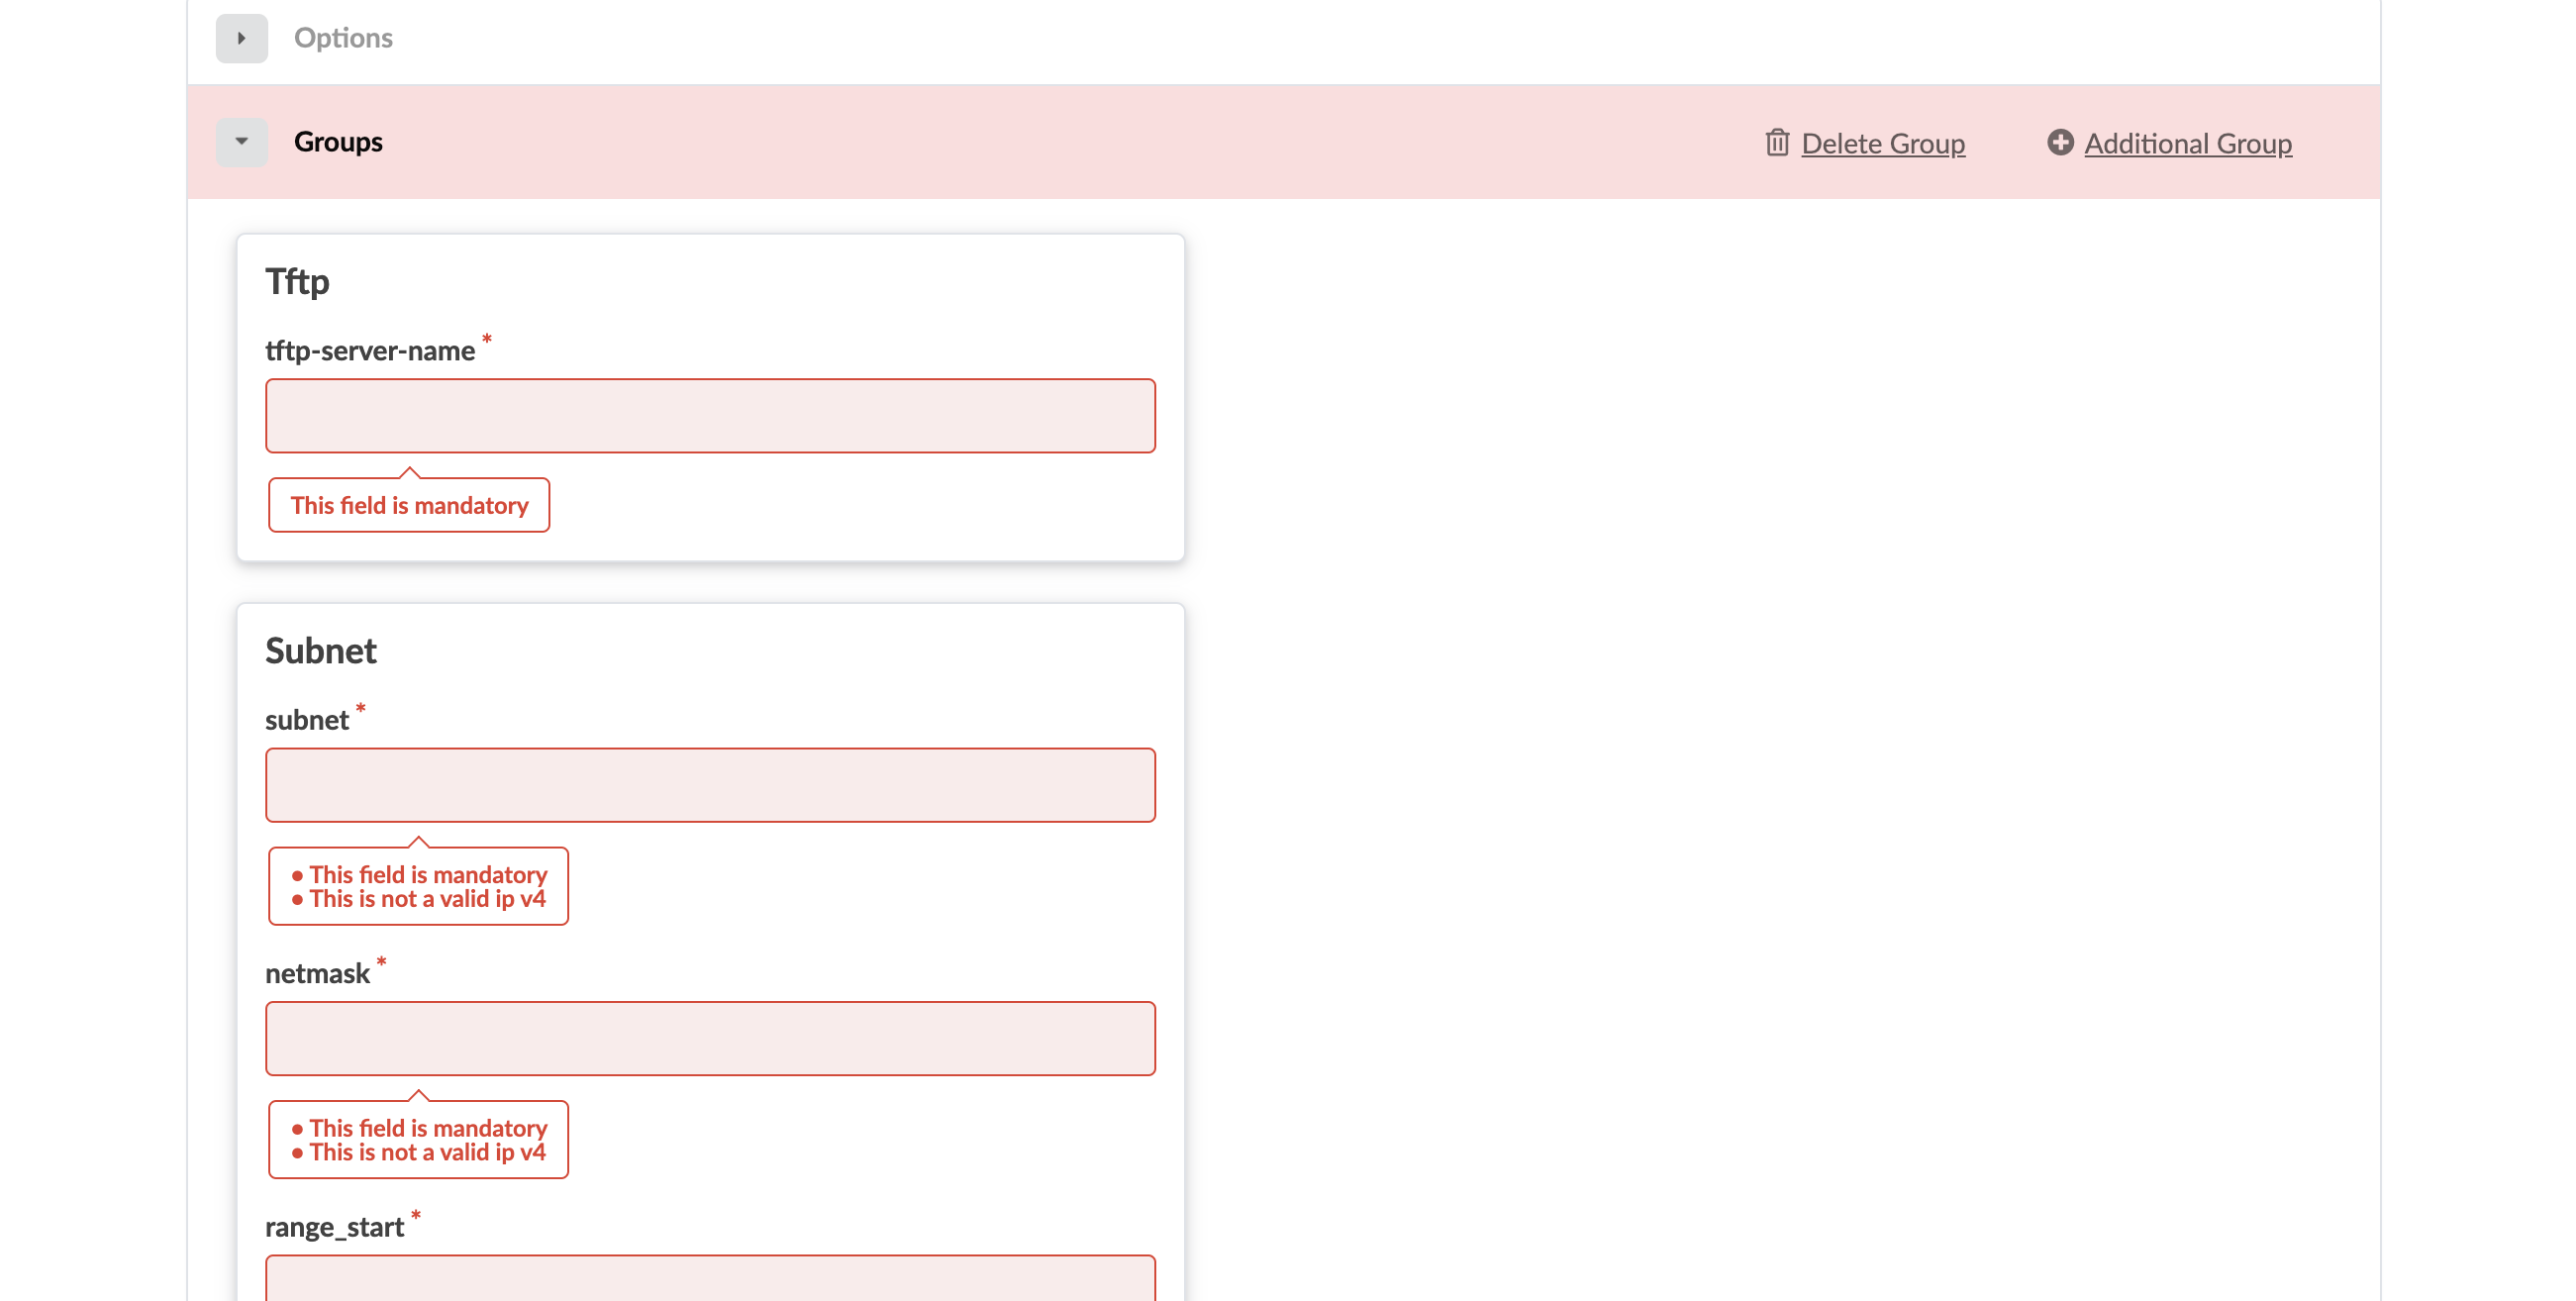
Group Parameters
The Group section includes the following parameters:
-
Tftp-
tftp-server-name- IP address of the ZTP server (not a URL)
-
-
Subnet-
subnet(IP v4) - IP management network -
netmask(IP v4) - IP management netmask -
range_start- Beginning of range of dynamic DHCP IP addresses. Ensure the full range is available and no statically configured IP addresses from that range are used. -
range_end- End of range of dynamic DHCP IP addresses. Ensure the full range is available and no statically configured IP addresses from that range are used. -
routers- default gateway router for management network
-
-
host-
name- Hostname of static DHCP management IP address -
hardware ethernet- Switch MAC address of the management interface, used for DHCP negotiations -
fixed-address- Static DHCP IP address, for device with hardware Ethernet MAC. Use the switch MAC address.
-
Use GUI Configurator to Configure dhcpd.conf
-
If you're using the wizard, step 2 is to configure the
dhcpd.conffile. (You can skip this step for now and come back later to complete this configuration.) If you're not using the wizard, then from the left navigation menu of the Apstra ZTP GUI, click dhcpd.conf.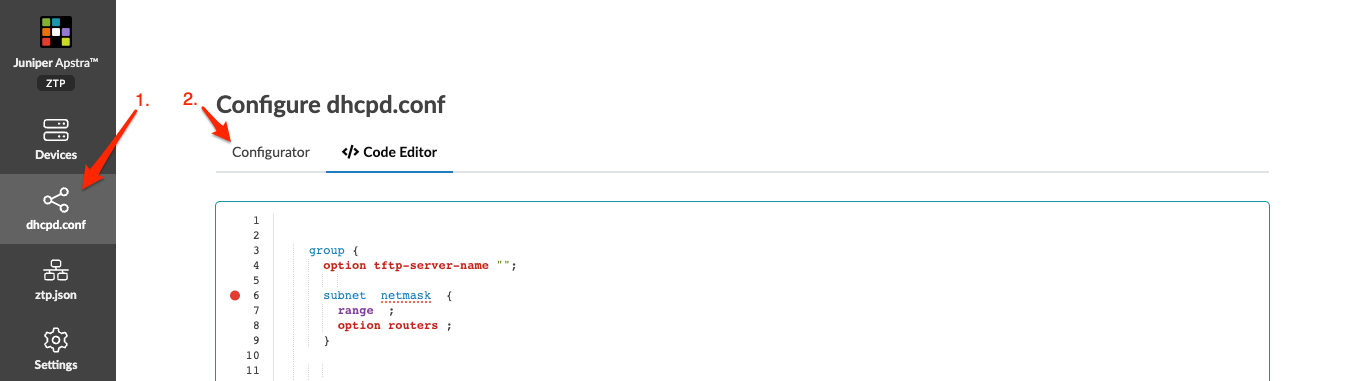 The code editor for the
dhcpd.conffile opens. -
Click Confirm to switch to the configurator.
-
Click Groups to see its parameters
.