Configure ztp.json with Configurator
SUMMARY The Apstra ZTP Configurator is a GUI for configuring the ztp.json file.
The preferred method for configuring ztp.json is with the Apstra ZTP Configurator (new in Apstra version 4.2.0). Using the Configurator reduces the chances of human error. The steps below show you how to access the Configurator. Check out the platform-based examples, then refer to the ztp.json Keys page for details about all the keys.
Access the ztp.json Configurator
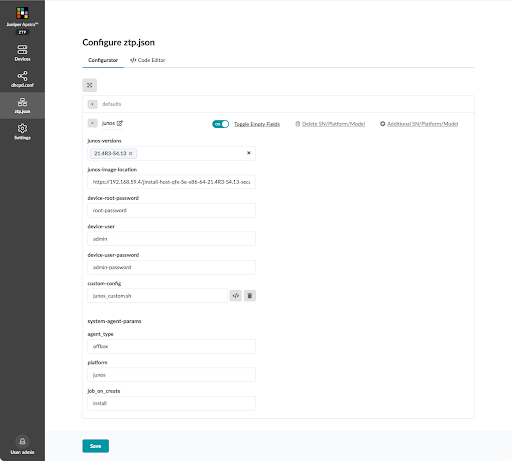
Juniper Junos Example
Offbox Agent / Apstra ZTP 4.2.0
Juniper Junos Evolved Example
Onbox Agent / Apstra ZTP 4.2.0

Enterprise SONiC Example
Onbox Agent / Apstra ZTP 4.2.0

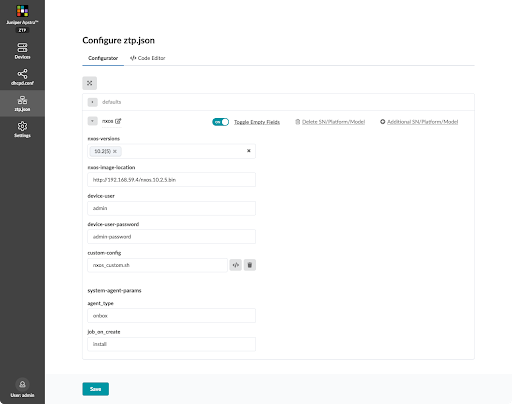
Cisco NX-OS Example
Onbox Agent / Apstra ZTP 4.2.0
Arista EOS Example
Onbox Agent / Apstra ZTP 4.2.0
