Create Onbox Agent
To create onbox agents, you need full admin / root privileges. We recommend that you create a dedicated user on the device using Apstra ZTP or other means. Before installing agents, make sure to do the following:
- Add login credentials for the devices.
- Configure management IP connectivity between devices and the Apstra server. You must do this before installing agents so it’s out-of-band (OOB). Configuring management connectivity in-band (through the fabric) is not supported and could cause connectivity issues when changes are made to the blueprint.
- Upload required packages.
-
Configure the minimum configuration on your devices as shown below:
Note:
The minimum release version for Junos OS Evolved switches for onbox agents is Junos OS Evolved Release 22.4R3.
Juniper Junos Onbox Agent Minimum Configuration
system { login { user aosadmin { uid 2000; class super-user; authentication { encrypted-password "xxxxx"; } } } services { ssh; netconf { ssh; } } management-instance; } interfaces { em0 { unit 0 { family inet { address <address>/<cidr>; } } } } routing-instances { mgmt_junos { routing-options { static { route 0.0.0.0/0 next-hop <management-default-gateway>; } } } }- Juniper Junos OS Evolved Onbox Agent Minimum Configuration
- Cisco NX-OS Onbox Agent Minimum Configuration
- Arista EOS Onbox Agent Minimum Configuration
- SONiC
Juniper Junos OS Evolved Onbox Agent Minimum Configuration
system {
    login {
        user aosadmin {
            uid 2000;
            class super-user;
            authentication {
                encrypted-password "xxxxx";
            }
        }
    }
    services {
        ssh;
        netconf {
            ssh;
        }
    }
    management-instance;
}
interfaces {
    em0 {
        unit 0 {
            family inet {
                address <address>/<cidr>;
            }
        }
    }
}
routing-instances {
    mgmt_junos {
        routing-options {
            static {
                route 0.0.0.0/0 next-hop <management-default-gateway>;
            }
        }
    }
}
The minimum release version for Junos OS Evolved switches on onbox agents is 22.4R3.
Cisco NX-OS Onbox Agent Minimum Configuration
!
copp profile strict
!
username admin password <admin-password> role network-admin
!
vrf context management
  ip route 0.0.0.0/0 <management-default-gateway>
!
interface mgmt0
  ip address <address>/<cidr>
!
Arista EOS Onbox Agent Minimum Configuration
!
service routing protocols model multi-agent
!
aaa authorization exec default local
!
username admin privilege 15 role network-admin secret <admin-password>
!
interface Management1
   ip address <address>/<cidr>
!
ip route vrf management 0.0.0.0/0 <management-default-gateway>
!
SONiC
SONiC has no specific configuration requirements other than Management Network and privileged user access.
-
Some configuration could raise validation errors. Make sure the following
configuration is not on the devices:
- VLANs other than VLAN 1
- VRFs other than "management"
- Interface IP addresses other than "management"
- Loopback interfaces
- VLAN interfaces
- VXLAN interfaces
- AS-Path access-lists
- IP prefix-lists
- Route maps or policies
- BGP configuration
-
From the left navigation menu, navigate to Devices > Managed
Devices and click Create Onbox
Agent(s).

-
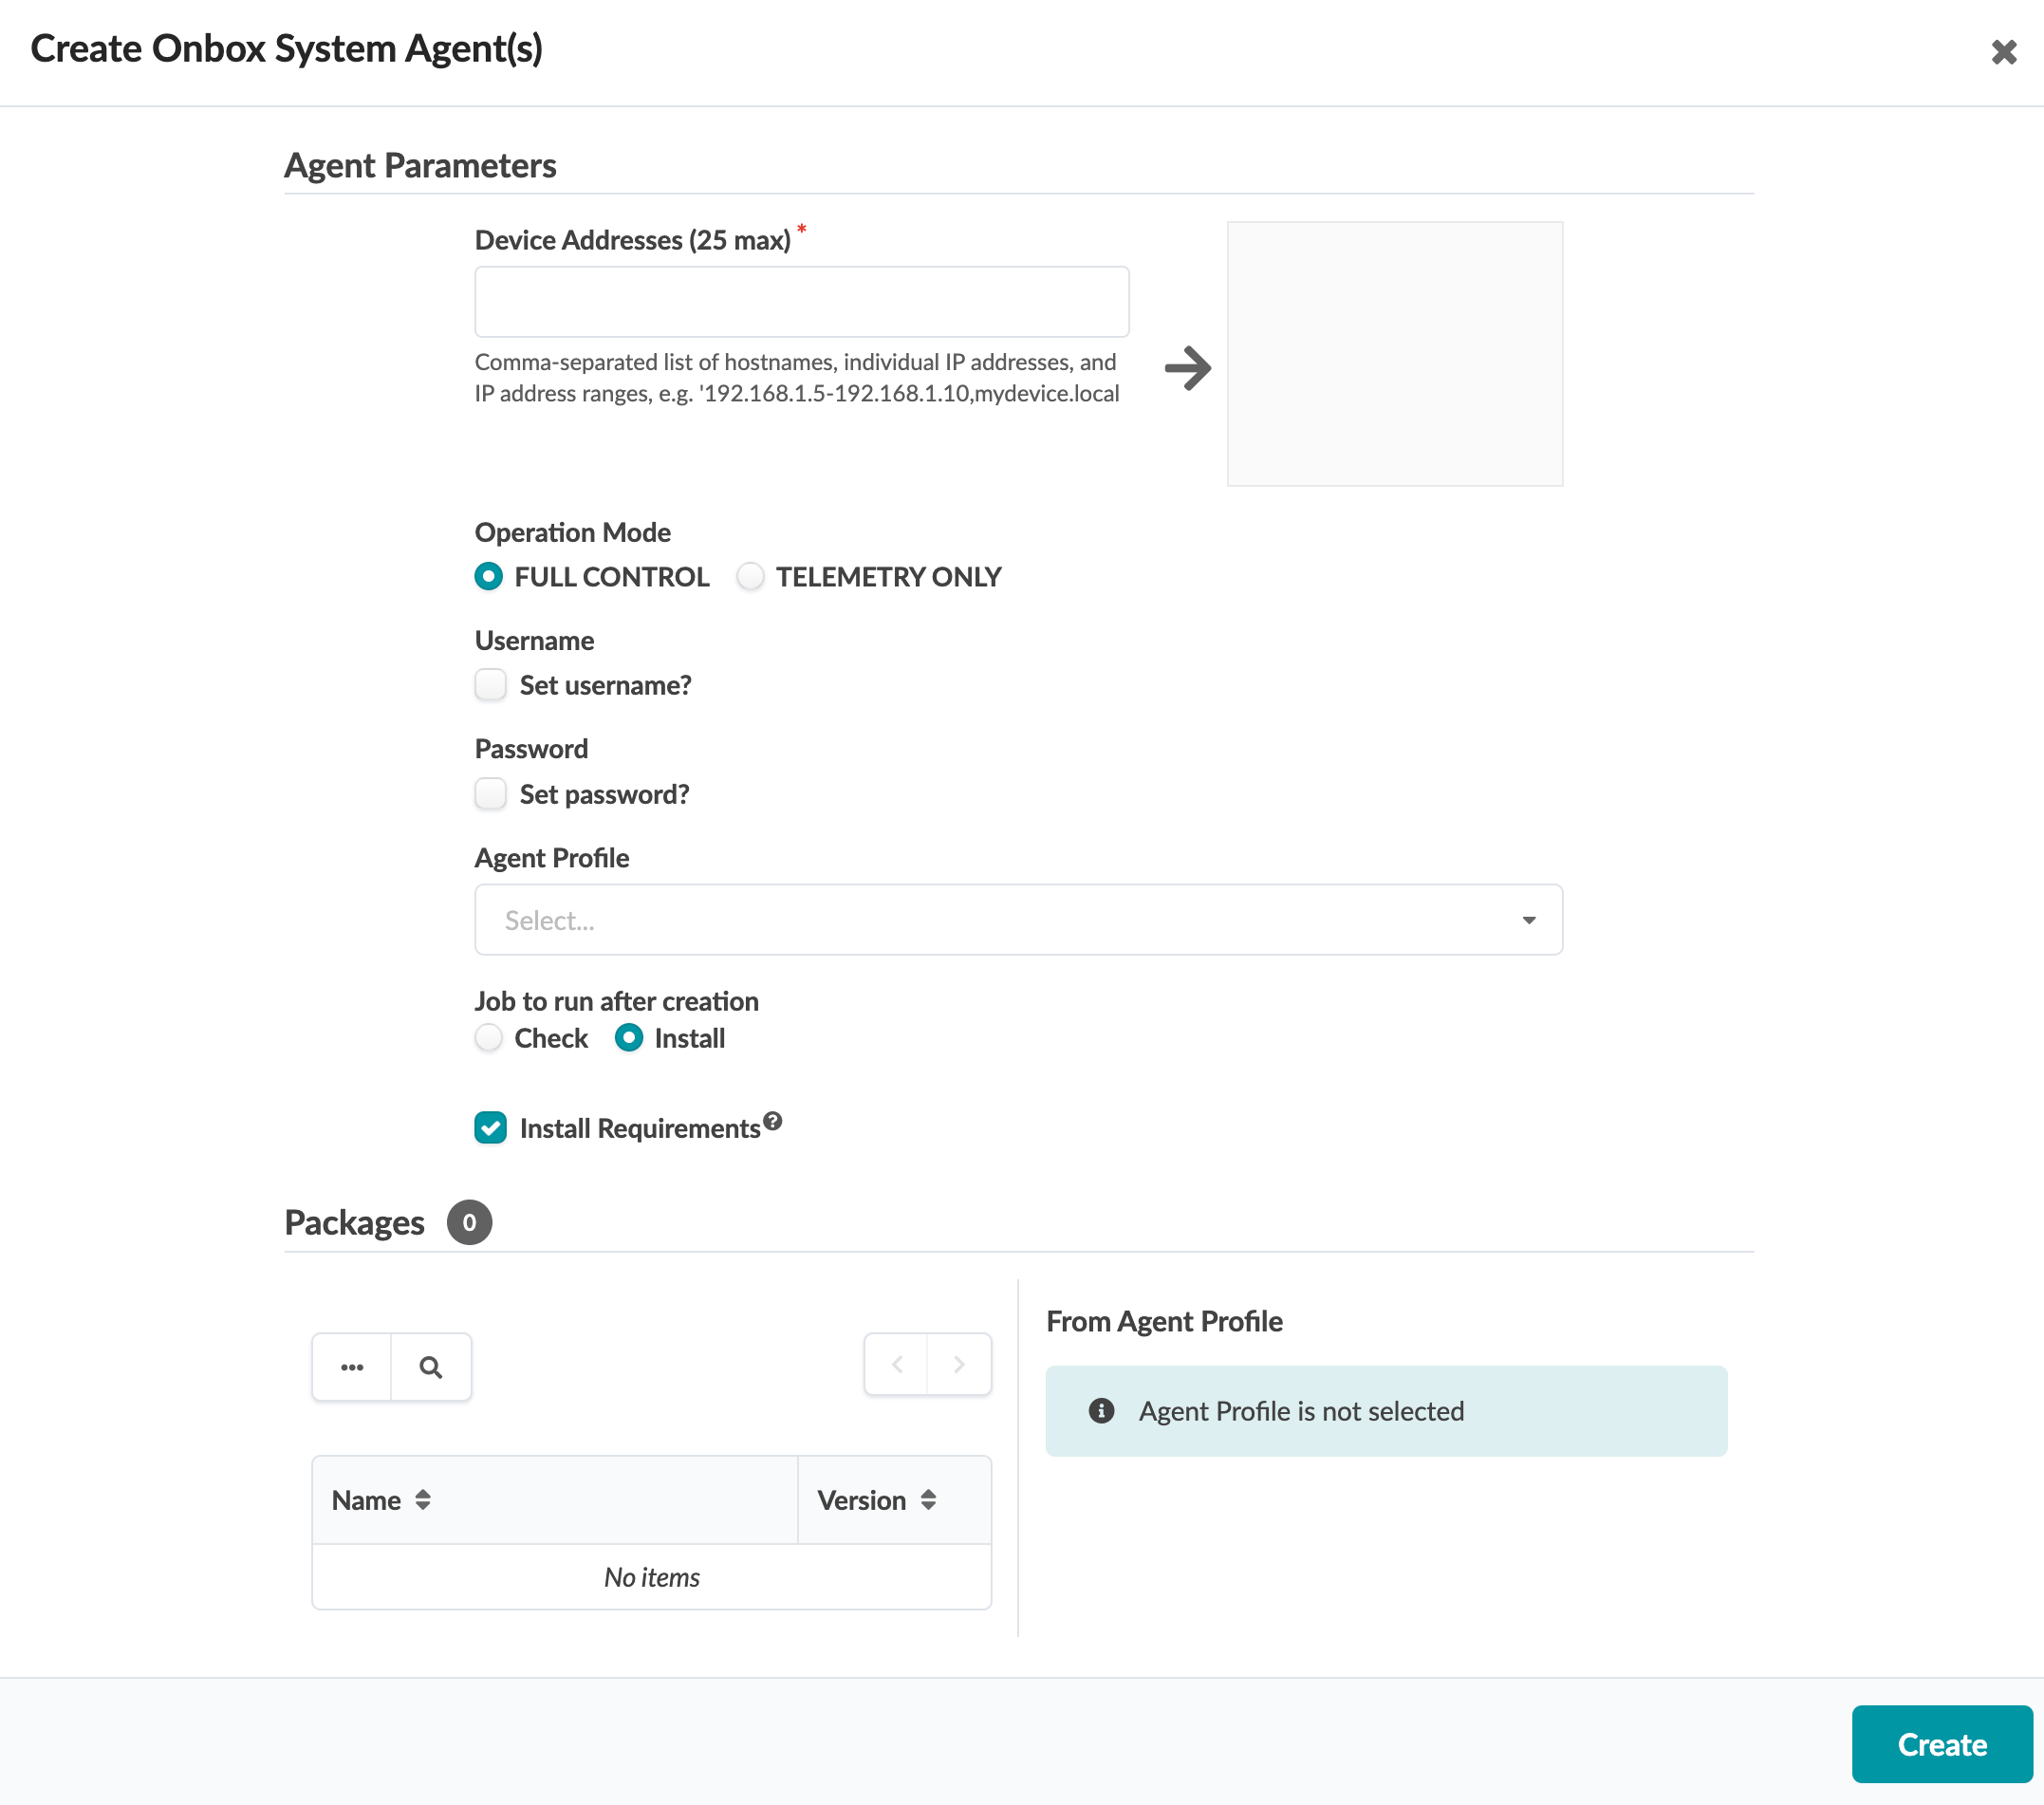
In the dialog that opens, enter up to 25 device IP addresses in the
Device Addresses field. Leave Operation
Mode at FULL CONTROL. (FULL CONTROL deploys configuration and
collects telemetry. TELEMETRY ONLY does not deploy configuration.)

- If you're not using an agent profile with credentials, select the check boxes for username and password and add credentials.
- If you are using agent profiles (that you previously defined), select the agent profile from the Agent Profile drop-down list, so you don't have to manually enter credentials and packages.
-
Select the job to run after creation:
- Install (default) - installs the agent on the device
- Check - creates the agent, but does not install it. It appears in the table view where you can install it later.
- Install Requirements is for servers. If servers don't have Internet connectivity, deselect the box.
- Packages that you've previously installed appear in the Packages section. Packages associated with selected agent profiles are listed here as well. Select packages, as required.
-
Click Create. During the agent install process, device
configuration is validated; if the device contains configuration that could
prevent the deployment of service configuration, the agent install process
raises an error.

In this case, manually remove conflicting configuration and start the agent installation process again.
If you must complete the agent installation with configuration validation errors, you can disable pristine configuration validation. To do this, from Devices > Managed Devices, click Advanced Settings (top-right), select Skip Pristine Configuration Validation, then click Update.

For information about retaining pre-existing configuration when bringing devices under Apstra management, see Device Configuration Lifecycle.
Note:On some platforms (Junos for example) you can configure rate-limiting for management traffic (SSH for example). When the Apstra server interacts directly with devices it can be more bursty than when it interacts with a user. Rate-limiting configurations that are used for hardening security can impact device management, and lead to deployment failures and other agent-related issues.
- While the task is active you can view its progress at the bottom of the screen in the Active Jobs section. The job status changes from Initialized to In Progress to Succeeded.
