Help us improve your experience.

Let us know what you think.

Do you have time for a two-minute survey?


Install Apstra on KVM

You can install KVM with Virtual Machine Manager or with the CLI.

These instructions are for installing Apstra software on a KVM hypervisor. For information about using KVM in general, refer to Linux KVM documentation.

Install on KVM with Virtual Machine Manager

  1. Confirm that you're running one of the Supported Hypervisors and Versions and that the VM has the Required Server Resources.
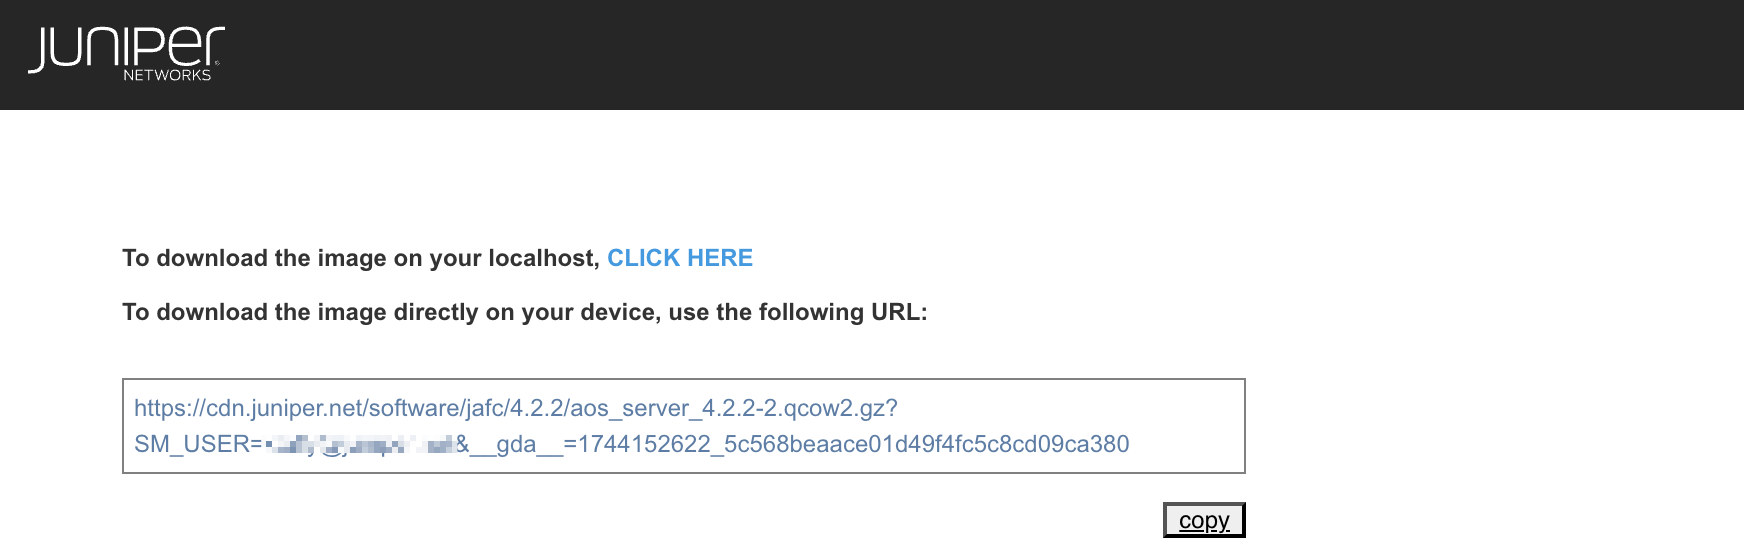
  2. Apstra software is delivered pre-installed on a single VM. The same Apstra VM image is used for installing both the Apstra controller and Apstra workers. As a registered support user, download the Apstra VM Image for Linux KVM (QCOW2) from Juniper Support Downloads.
    Instructions for downloading Juniper software image with download and copy URL option.
  3. Uncompress the disk image, then move it to where it will run.
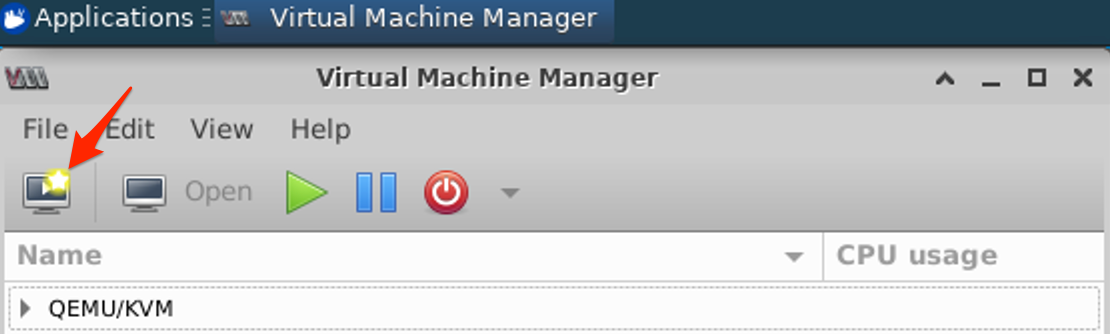
  4. Start Virtual Machine Manager, then click the Create a new virtual machine button.
    Virtual Machine Manager interface with Create a new virtual machine button highlighted with yellow star. Menu bar and buttons for managing VMs visible.
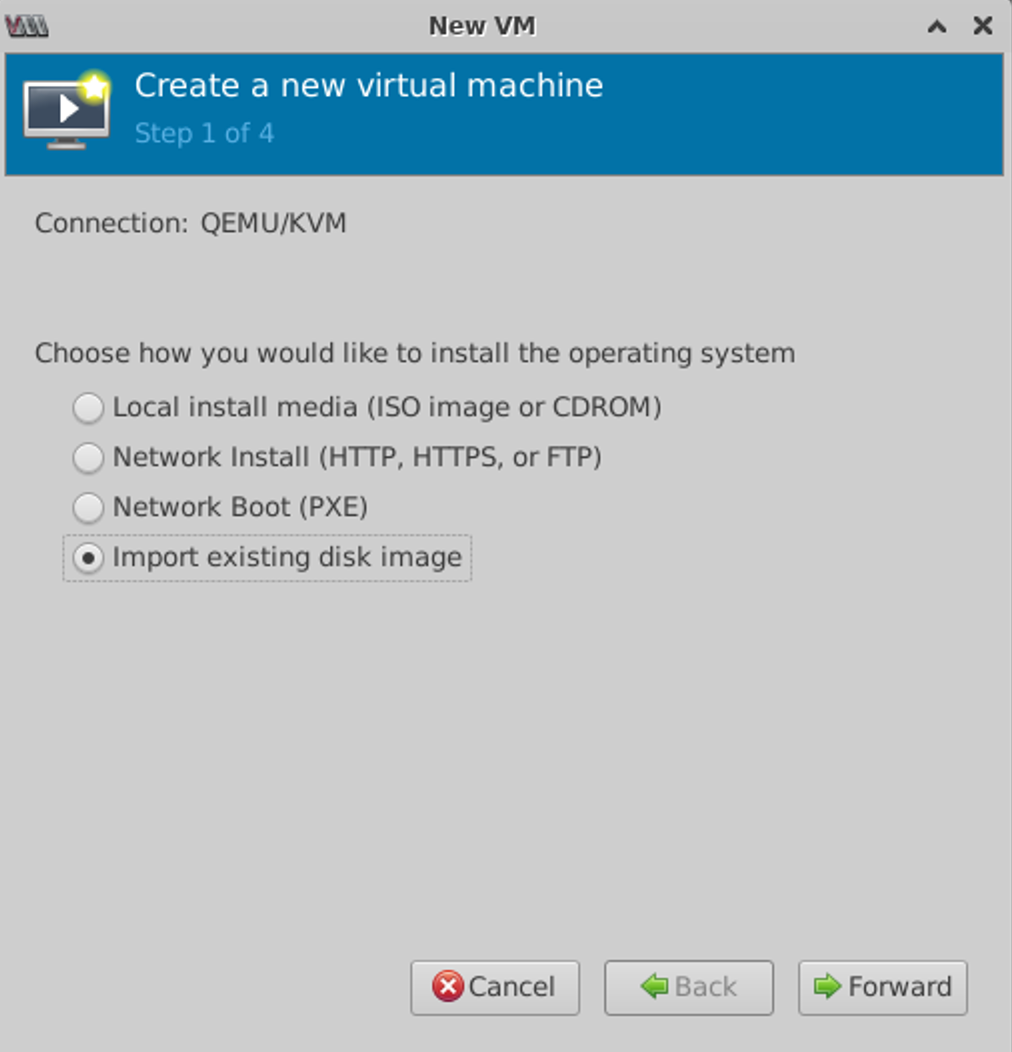
  5. Select Import existing disk image, then click Forward.
    Create new virtual machine dialog box, Step 1 of 4. Import existing disk image selected. Options include Local install media, Network Install, Network Boot. Buttons: Cancel, Back, Forward.
  6. Browse to where you moved the QCOW2 image, then click Choose Volume.
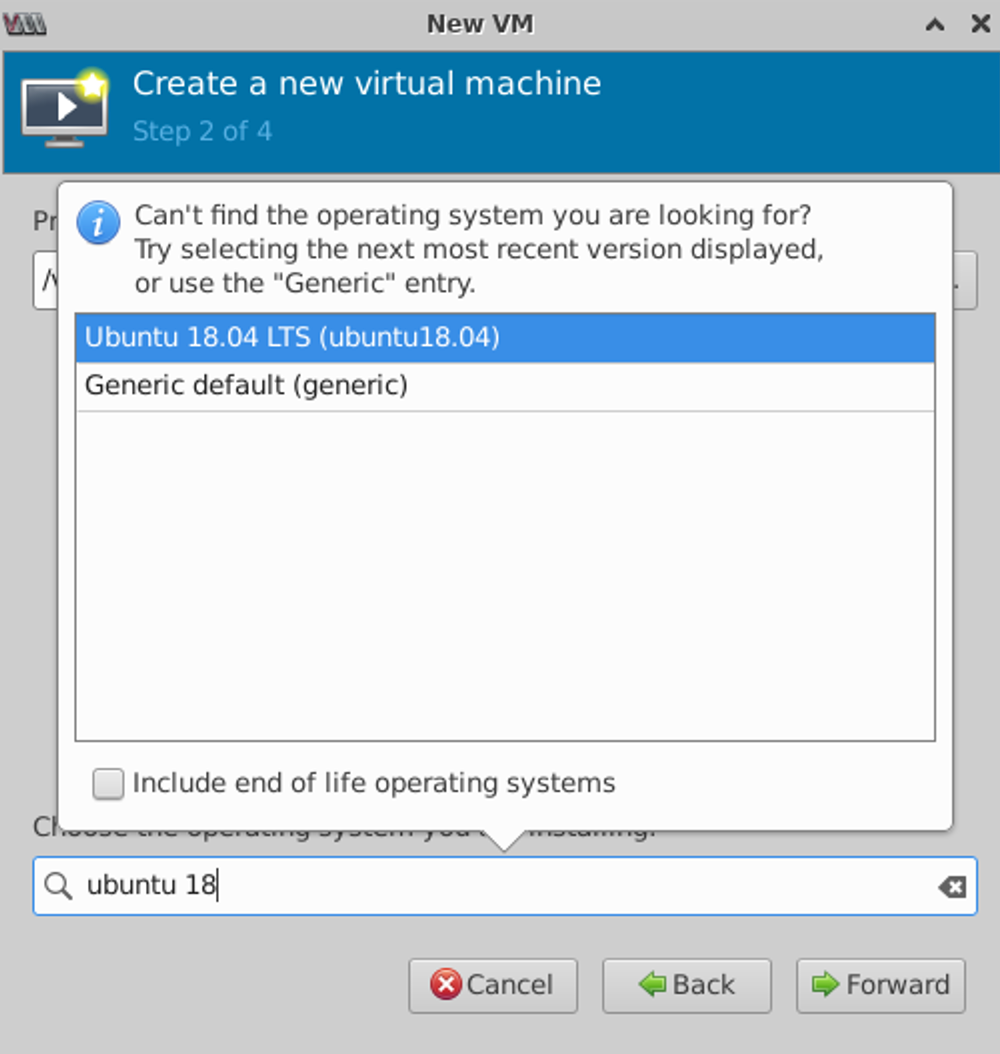
  7. Select Ubuntu 18.04 LTS operating system, then click Forward.
    Step 2: Select OS for virtual machine. Options: Ubuntu 18.04 LTS, Generic default. Checkbox: Include end of life OS. Search: ubuntu 18.
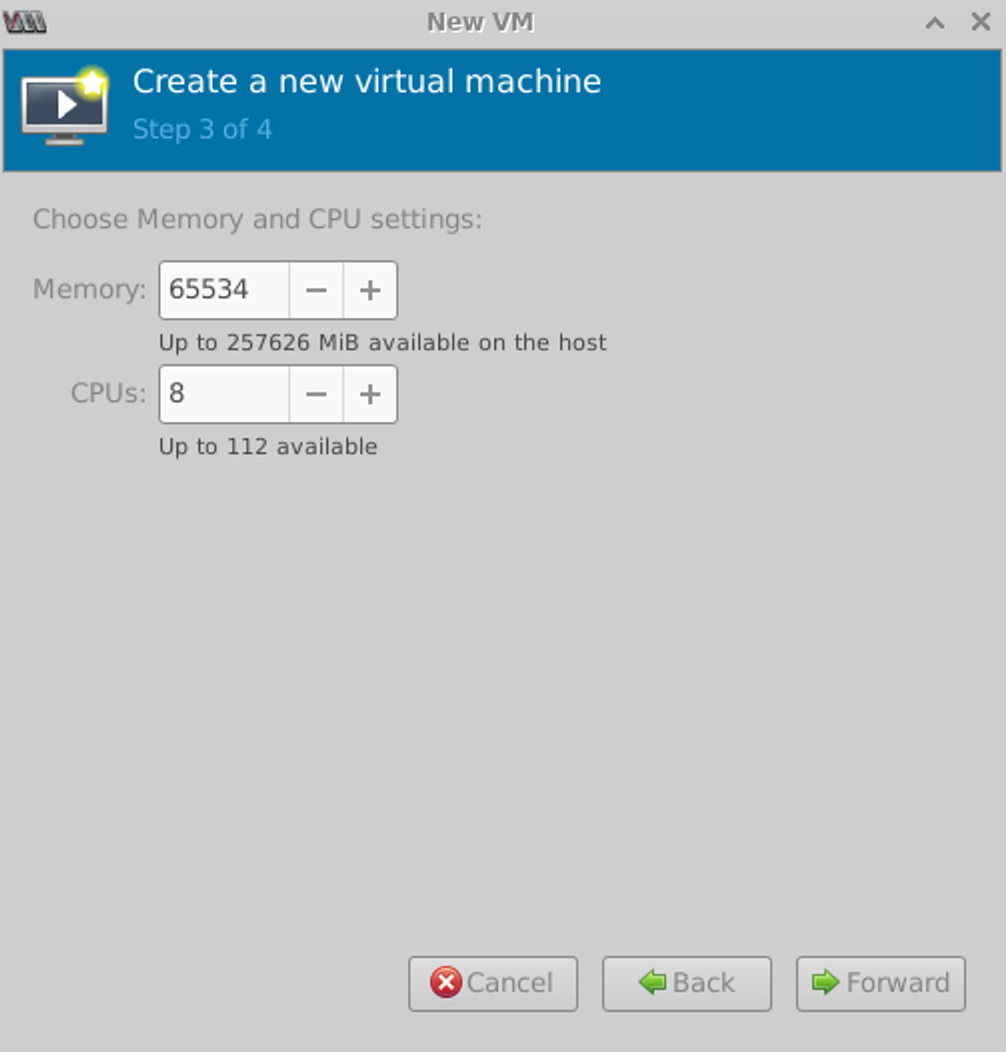
  8. Specify memory and CPU requirements based on your environment.
    Step 3 of 4 in virtual machine wizard: Select 65534 MiB memory, 8 CPUs. Max available: 257626 MiB memory, 112 CPUs. Options to cancel, go back, proceed.
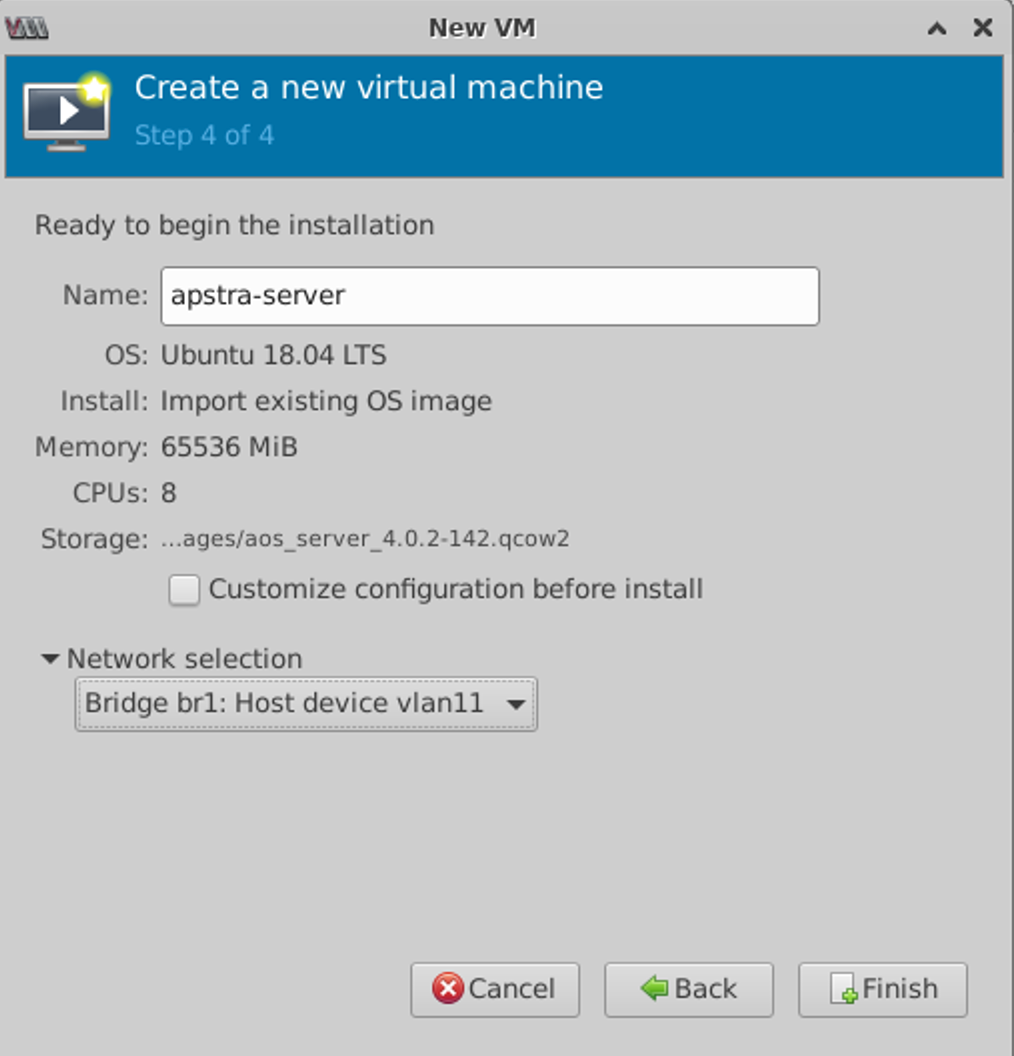
  9. Change the default name (optional), select the VM network that you want the VM to connect to, then click Finish. It may take a few minutes to create the VM.
    Final step in creating a virtual machine: Name apstra-server, OS Ubuntu 18.04 LTS, 64 GB memory, 8 CPU cores, storage file aos_server_4.0.2-142.qcow2, network Bridge br1 Host device vlan11, buttons Cancel Back Finish.

You're ready to Configure the Apstra server.

Install on KVM with CLI

  1. Confirm that you're running one of the Supported Hypervisors and Versions and that the VM has the Required Server Resources.
  2. Ensure that the QEMU environment and bridge networking are installed and configured. For examples of installing and configuring QEMU, refer to the following documents:
  3. You must use e1000 or virtio Linux KVM network drivers. Run the command ethtool -i eth0 from the Apstra server to confirm which network drivers you're using.
    CAUTION:

    Using other drivers such as rtl8139 may result in high CPU utilization for the ksoftirqd process.

  4. As a registered support user, download the Apstra VM Image for Linux KVM (QCOW2) from Juniper Support Downloads.
  5. Uncompress the disk image (with gunzip) and move it to where it will run.
  6. Create a VM with the virt-install command line tool. For example, to install the aos_server_4.2.2-2.qcow2.gz image using the existing bridge network (named br0), use the following command:
  7. Connect to the VM console.

You're ready to Configure the Apstra server.