Enable Resource Allocation
This topic outlines the steps required to enable resource allocation. Follow these
steps to allocate resources and their associated objects. Then, configure these resources in
Jinja.
-
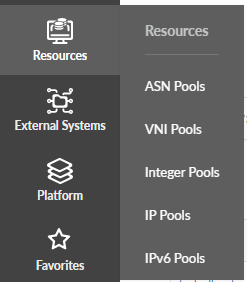
Create a resource pool object. To create a resource pool, select the Resources
icon on the left side of the page.
You must create a resource pool which acts as a countainer for other resources. The available options are:
-
ASN Pools
-
VNI Pools
-
Integer Pools
-
IP Pools
-
IPv6 Pools
-
-
Create an Allocation Group. Allocation Groups are located within the Blueprint
interface under Staged > Resource Management > Allocation
Groups
An Allocation Group lets you allocate resources to be used in a resource generator. With Allocation Groups, you can group multiple resource pools together in a single entity.
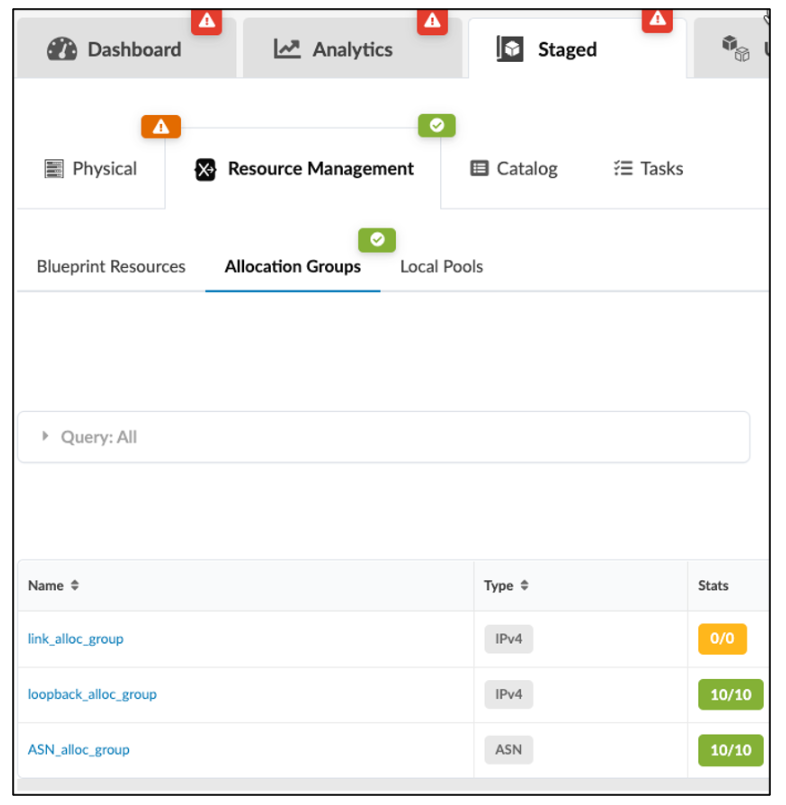 Select one or multiple allocation groups for detailed information like Parameters, and associated Resources and Resource Generators.
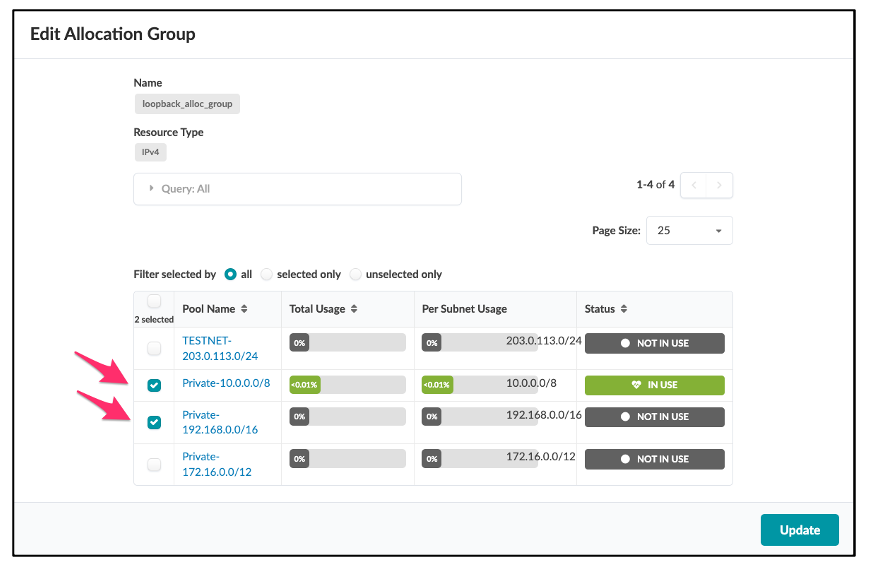
-
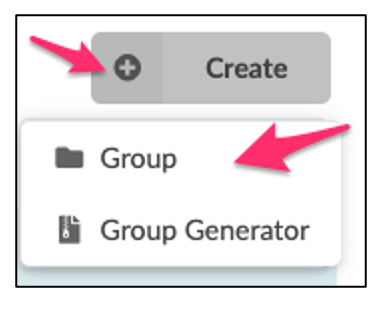
Create a Group.
After you group resource pools into an allocation group, you can create a resource Group. Resource Groups contain resources and resource generators. Note the default "root" group. This group only contains other groups, not pure resources.
-
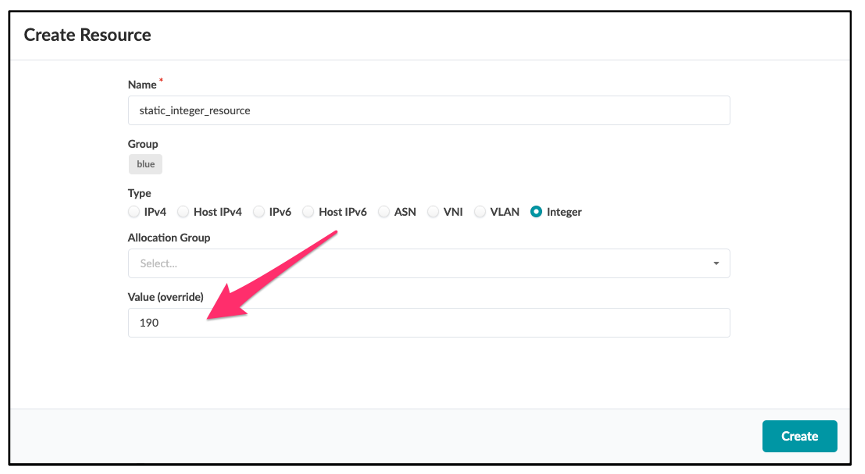
Create a Static Resource.
Create a Static Resource if you want to assign the resource value statically. Static Resource values do not change. Static Resources enable you to set resources that won't change over time. The following example shows the creation of a Static Resource of type integer, with a value of 190.
-
Create a Resource Generator.
Resource Generators are automation objects that generate resources like IP addresses and ASN pools for your network design. Resource Generators reside within Resource Groups. Resource Generators require a graph query scope that defines how many resources the generator automatically creates.The following example shows the creation of a Resource Generator with name
asn_generator, of type ASN within theASN_alloc_group.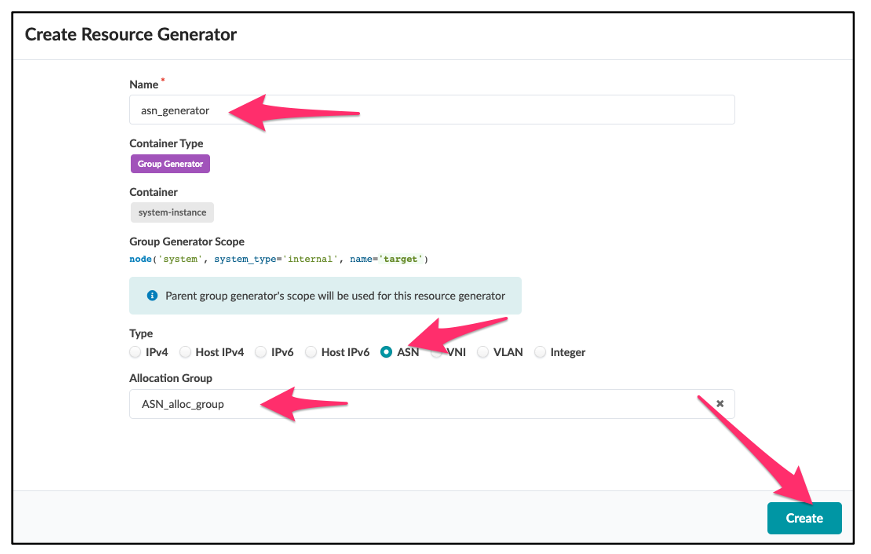
-
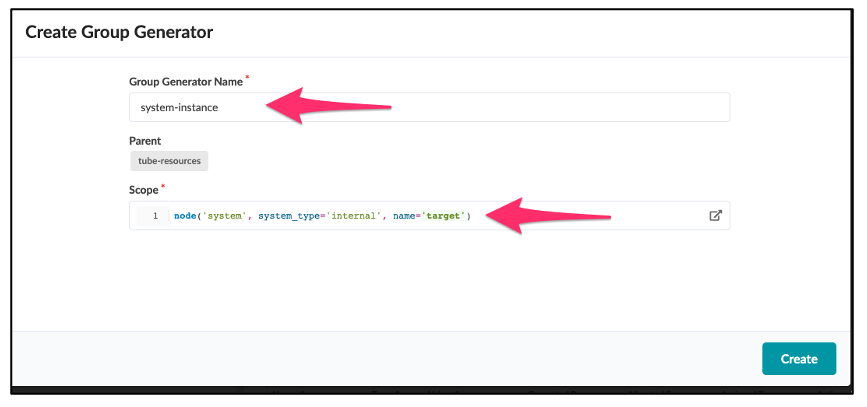
Create a Group Generator.
Group Generators are objects that create Groups based on a defined scope. Groups created by a Group Generator inherit the scope of the Group Generator. This enables you to create specific Resource Generators within a Group Generator, which lets you automatically allocate resources and properly group those resources into Groups.For example, you can create a Group Generator for each internal system in your network. These internal systems might need a respective loopback address and an ASN Number. If you create a Group Generator that includes those Resource Generators, the Group Generator automatically creates the Group for each internal system. The ASN and loopback addresses are created and organized within those internal Groups.
 The following example shows a Group Generator with name
system-instance, and a defined scope.