Step 2: Up and Running
Set Up User Profiles
For On-Premises Users
-
Select and click the plus (+) sign. Select the service locations, enter the site details, traffic forwarding information (customer premises equipment (CPE) and interfaces), configure CPE routing configuration (optional), and click Finish.

-
Expand the site details, go to . The configuration is auto-generated for SRX Series firewall. Click Copy to Clipboard. Paste the configuration in the CLI of your CPE device and commit the changes.

For non-SRX Series Firewalls, a generic configuration summary is provided
-
Select , click the plus (+) sign, enter the required information, and click OK.
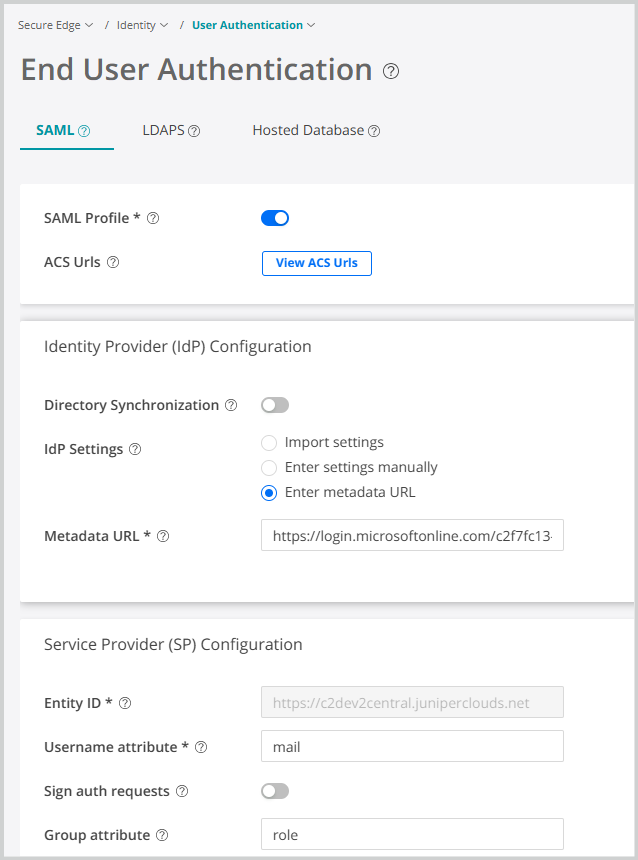
For Roaming Users
- Go to , select an authentication method—Security Assertion
Markup Language (SAML), Lightweight Directory Access Protocol (LDAP), or
Hosted Database, enter the required configuration, and click
Save.
- Select . Enter the port number of the proxy server and select the decrypt profile from the list. If you do not have a decrypt profile, click Create Decrypt Profile, enter the required information, and click Save.
- Select . Recommended proxy auto-configuration (PAC) file is auto-generated. Select the PAC file and click Copy URL.
- Go to the browser proxy settings on your device, paste the URL of the PAC file, and click Save.
Deploy Your Secure Edge Policy
- Select and click plus (+) sign to create new
rule.
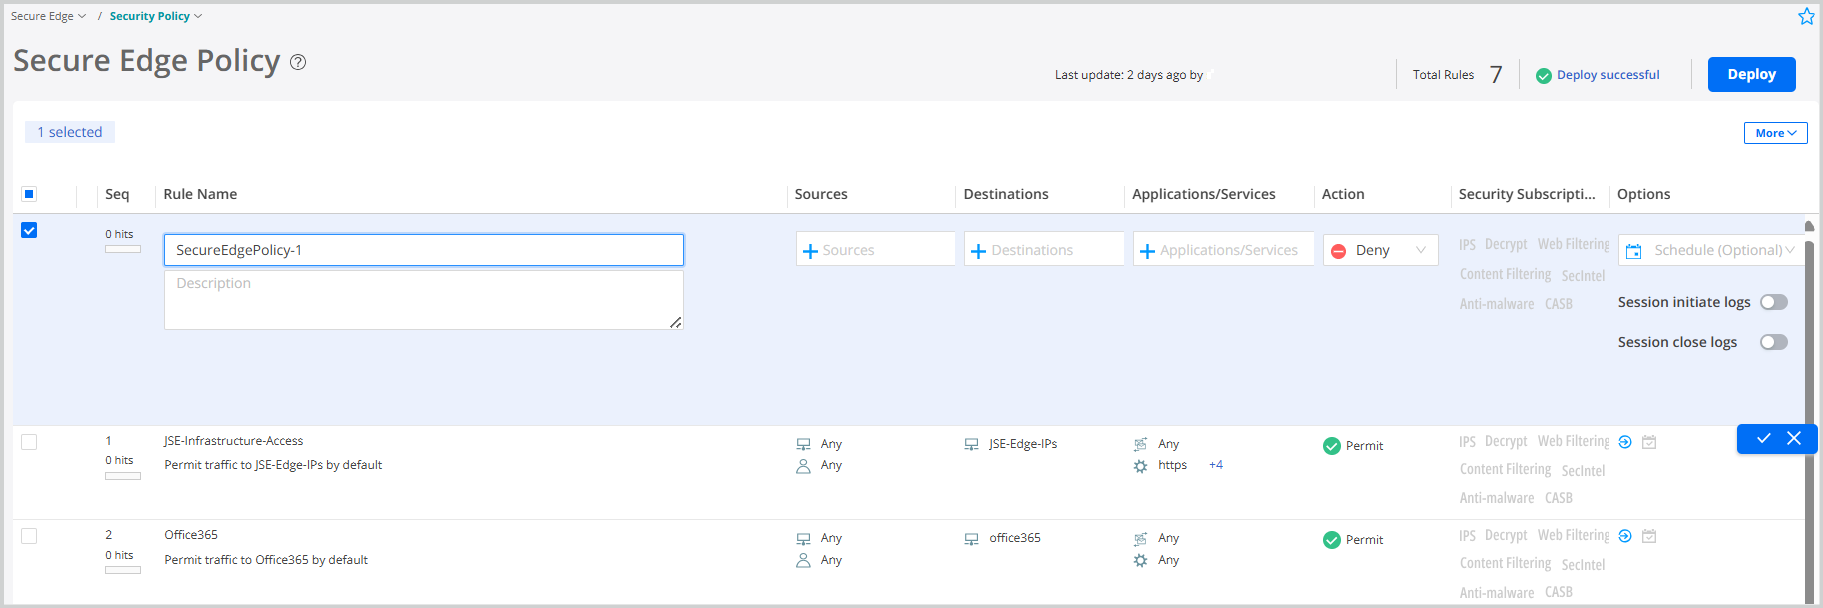
-
Enter the required information, click ✓ to save the policy, and click Deploy.
For on-premise users, the site tunnel status displays as ![]() in the
portal. For roaming users, after authentication in to the portal, the end user
authentication status displays as Success.
in the
portal. For roaming users, after authentication in to the portal, the end user
authentication status displays as Success.
Congratulations! You have successfully onboarded Juniper Secure Edge for on-premises and roaming users!