Step 2: Up and Running
Activating Your License
This section describes license activation for SaaS customers. For on-premise installations of Routing Active Testing, licenses are created and activated differently; see the Installation Guide, chapter Getting Started with Routing Active Testing.
- Log in to the Juniper EMS Portal at license.juniper.net/licensemanage/ with your Juniper account credentials. If you do not have such an account, you are invited to create one.
- You will also have received from Juniper a "Software Entitlement Certificate" which contains a
17-character activation code in the format
abCdeF-GhiJk-lmNOPq. If that code is listed in the My Product Licenses dialog, click the Activate button next to it. If the code is not listed, paste it into the box at the top and click the Activate button there.
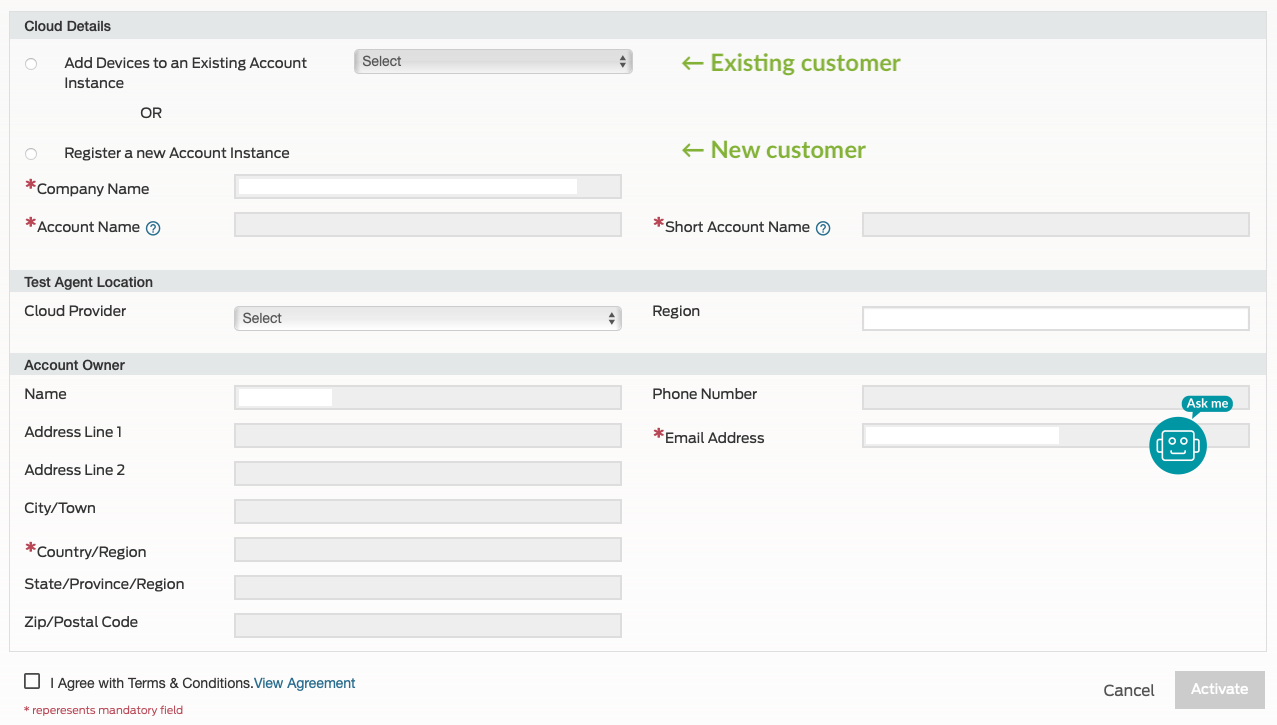
The procedure that follows is different for existing customers and new customers.
-
Existing customer:
-
Under Cloud Details, select Add Devices to an Existing Account Instance, then select the short name of your Routing Active Testing account from the drop-down box.
- Your account has both a full name and a short name, and the latter is what is found in the drop-down.
-
The short name appears in the Control Center URL, for example, "juniper" in app.netrounds.com/juniper.
Note:If you do not find your short account name in the drop-down, please contact customer care before proceeding.
- The Test Agent Location section is relevant only if you are a Premium SaaS customer, that is, if you have a separate Control Center instance which is nonetheless managed by Juniper. If you are such a customer and have also purchased Juniper-managed Test Agents, you need to specify here the cloud where you want the Test Agents deployed and the region in which that cloud is located.
- The Account Owner section of the dialog is populated with your account details.
- Finish by clicking Activate.
-
-
New customer:
-
Under Cloud Details, select Register a New Account Instance and enter your account details. Note that you need to enter both a full and a short account name.
- Account Name: The account name that will be displayed in the Control Center GUI once you have logged in to the account, for example, "Juniper Inc.".
- Short Account Name: The short account name is used to access the account and to register Test Agents. Example: "juniper". In the short name, only the following characters are allowed: a-z, 0-9, "-", and "_".
- Regarding the Test Agent Location section, see Existing customer above.
- Finish by clicking Activate.
-
Please note that the activation is not instantaneous but will take about 48 hours. You will receive a confirmation email acknowledging your request. A work order is sent to the license team, which will activate the capabilities granted to the account.
If you encounter a problem in the activation process or if you have questions, please contact customer care.
Logging In to the Routing Active Testing SaaS
To log in to Routing Active Testing SaaS,
Go to https://app.netrounds.com.
Routing Active Testing GUI is displayed.
Enter the email and password for your Routing Active Testing user.
Click the Log in button.
You are now logged into Routing Active Testing SaaS.