Step 1: Begin
This guide walks you through the simple steps to get a new cloud-ready SSR130 up and running in the Juniper Mist AI cloud portal. You can onboard a single device using your mobile phone, or one or more devices using your computer. Once onboarded, we'll walk you through the steps to create a basic configuration.
You'll need a Juniper Mist WAN Assurance subscription and your login credentials for the Juniper Mist portal.
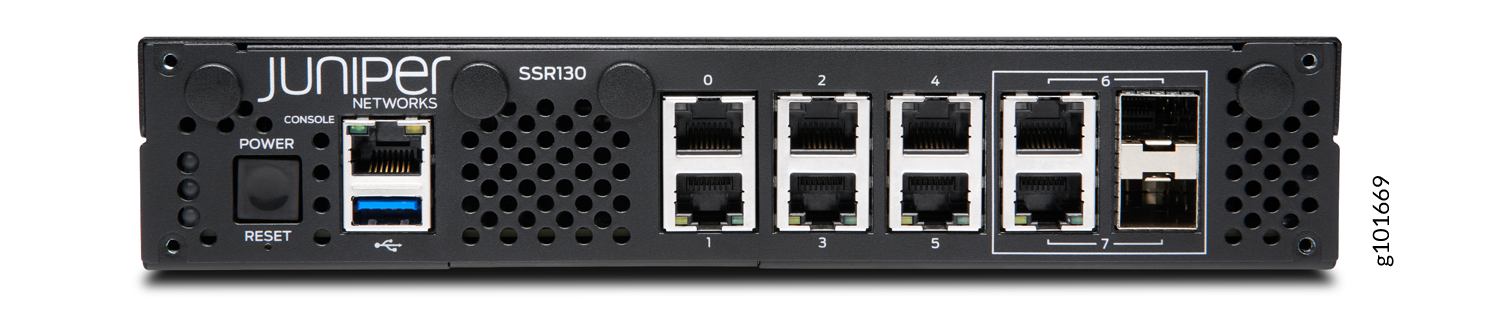
Meet the SSR130
The Juniper Networks SSR130 network appliance is part of the SSR portfolio. The SSR130 features four 1 GbE ports, two 1 GbE RJ-45/SFP combo ports, 8 GB of memory, and a 120 GB enterprise-grade solid-state drive (SSD) for storage.
The SSR130 runs the FIPS 140-2 Level 1 compliant Session Smart Router (SSR) software, which provides secure and resilient WAN connectivity.
The SSR130 is available in models with or without LTE support.
Claim Your Device
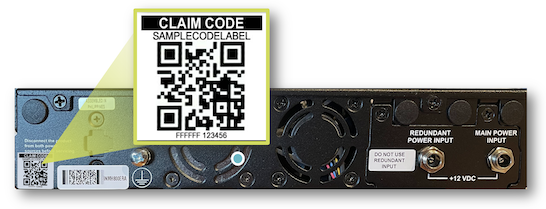
To add the SSR130 to your organization's WAN Edge inventory, you'll need to enter the SSR130 claim information into Mist. Locate the claim label on the rear panel.
There are two ways to enter the device claim information into Mist. Choose the method that is best for you.
-
Scan the QR code with the MistAI app
-
Manually enter the claim code in Mist
You can download the Mist Application from the following mobile app stores:
Scan the QR Code
-
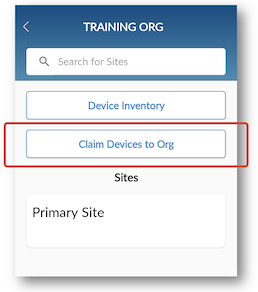
Open your MistAI App.
-
Select Claim Devices to Org.
-
Scan the QR code.
Enter the Mist Claim Code
-
Log in to your Mist organization's dashboard.
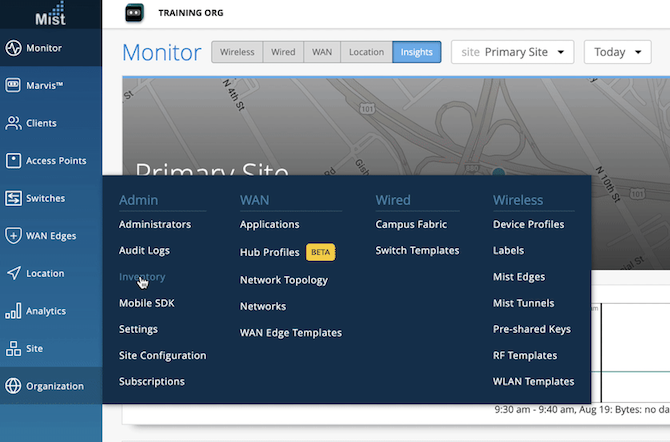
- Navigate to your organization's inventory, and select the WAN tab at the top.
-
Select the Claim WAN Edges button in the upper right of the inventory screen.
-
Add the claim code into the list of devices to claim.
-
Clear the Assign claimed WAN edges to site check box. This places the SSR into inventory, to be assigned to a site later.
-
Click the Claim button to claim the SSR into your inventory.
Onboarding Complete!
Fantastic, the SSR130 is in your inventory! To provision the SSR130 with ZTP, log in to Mist and continue with WAN configuration.
Add the Network
To begin your WAN design, identify the network the SSR will use to access applications over a LAN network segment.
-
From the Mist dashboard, navigate to the WAN section of the organization
sidebar menu, and select Networks.
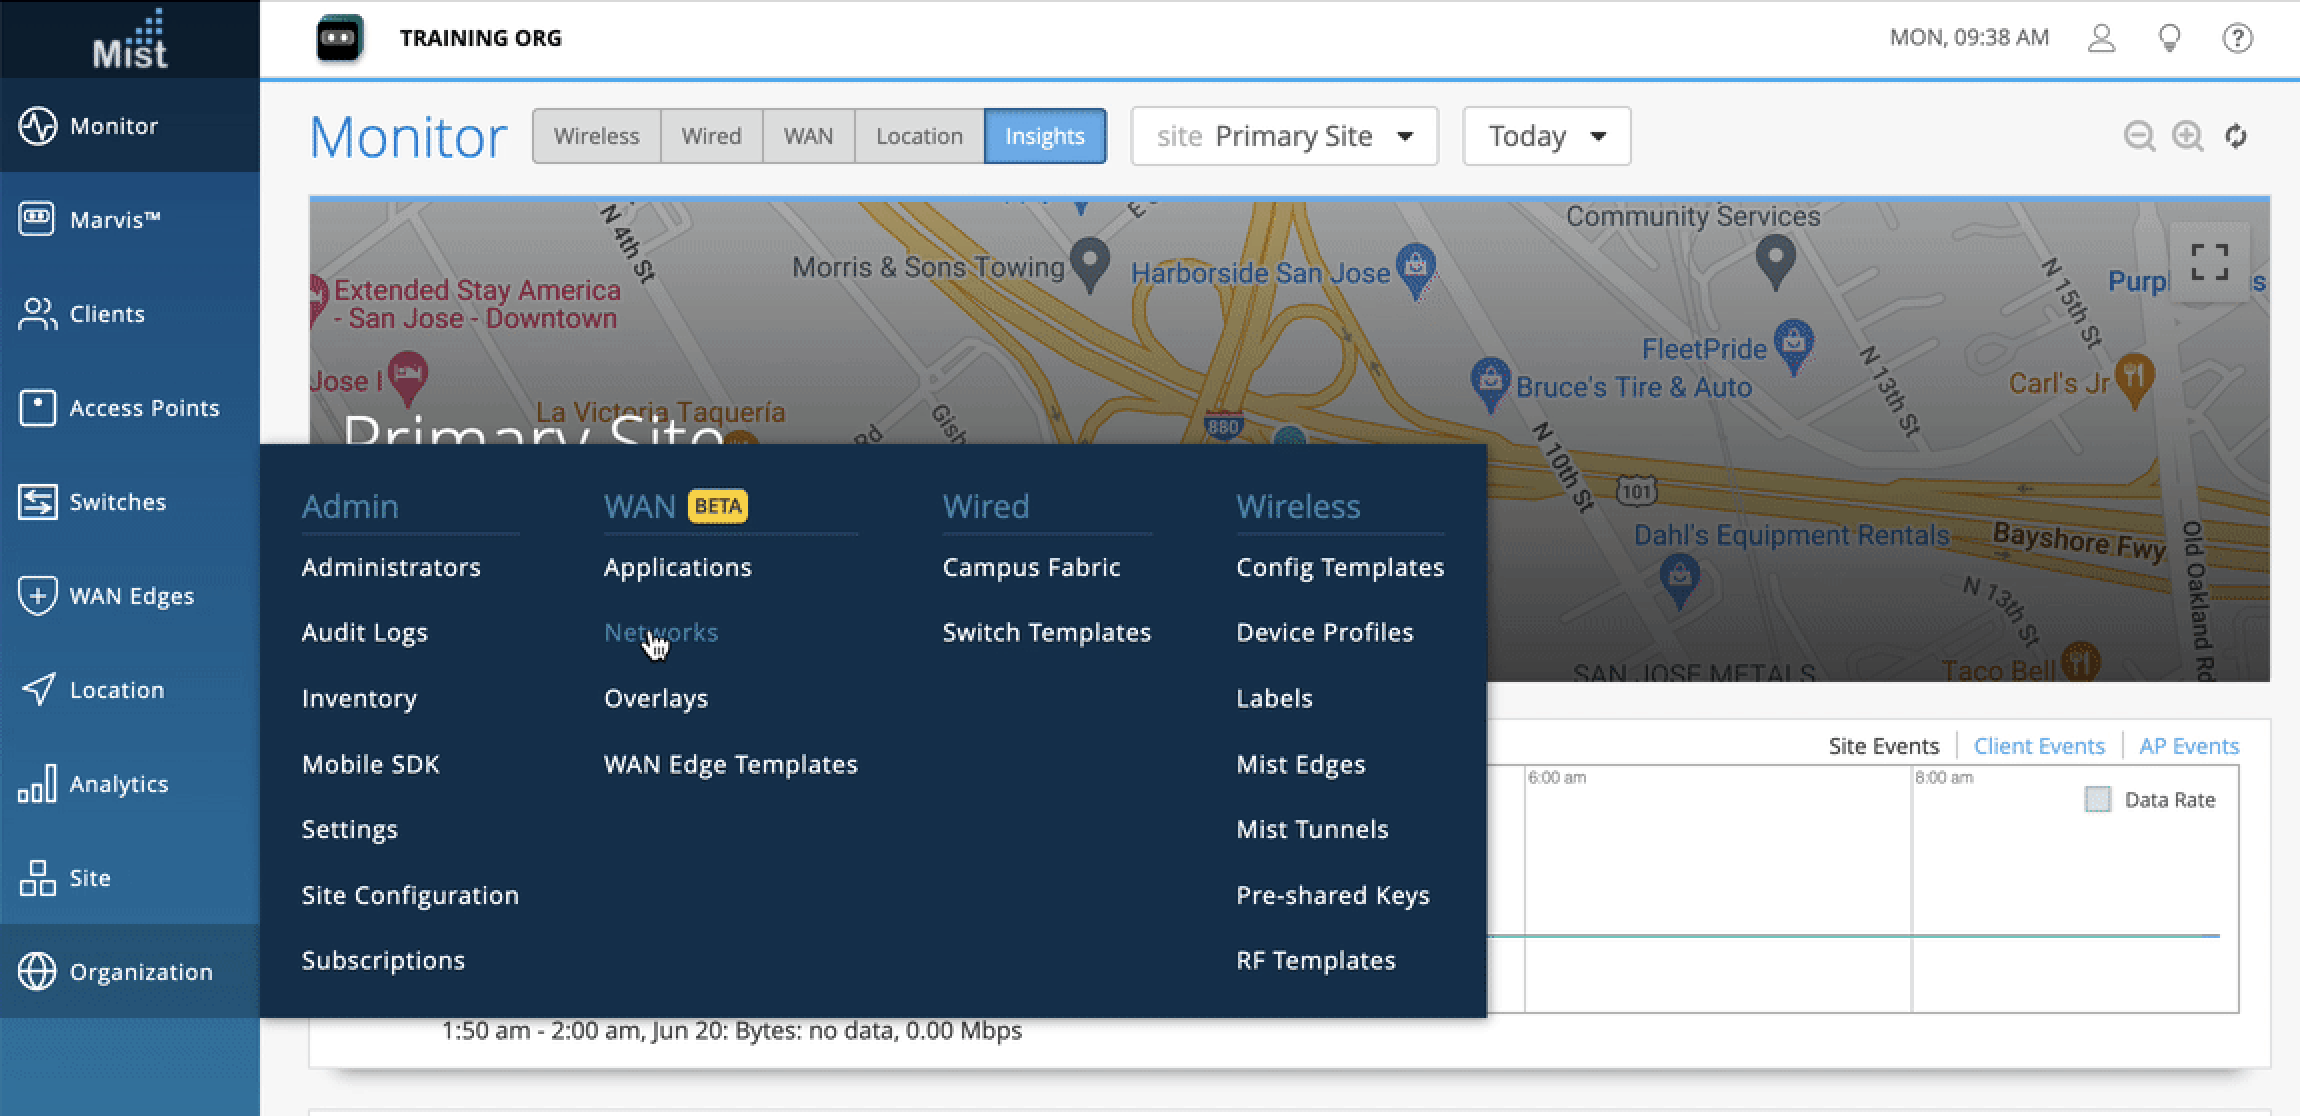
-
Select Add Networks in the upper right.

- Give the network a name.
-
Configure the network subnet as
192.168.1.0/24.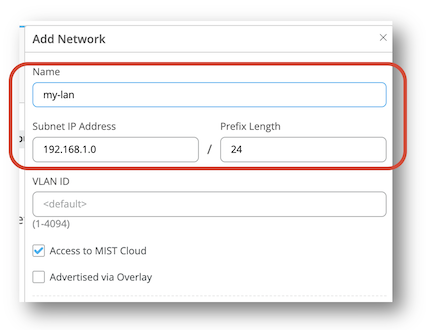
- Click Save at the bottom of the Edit Network side panel.
Add an Application
Next, define the applications for the WAN to deliver, starting with the Internet.
- Navigate back to the WAN section of the organization sidebar menu, and select Applications.
-
Select Add Applications in the upper right.
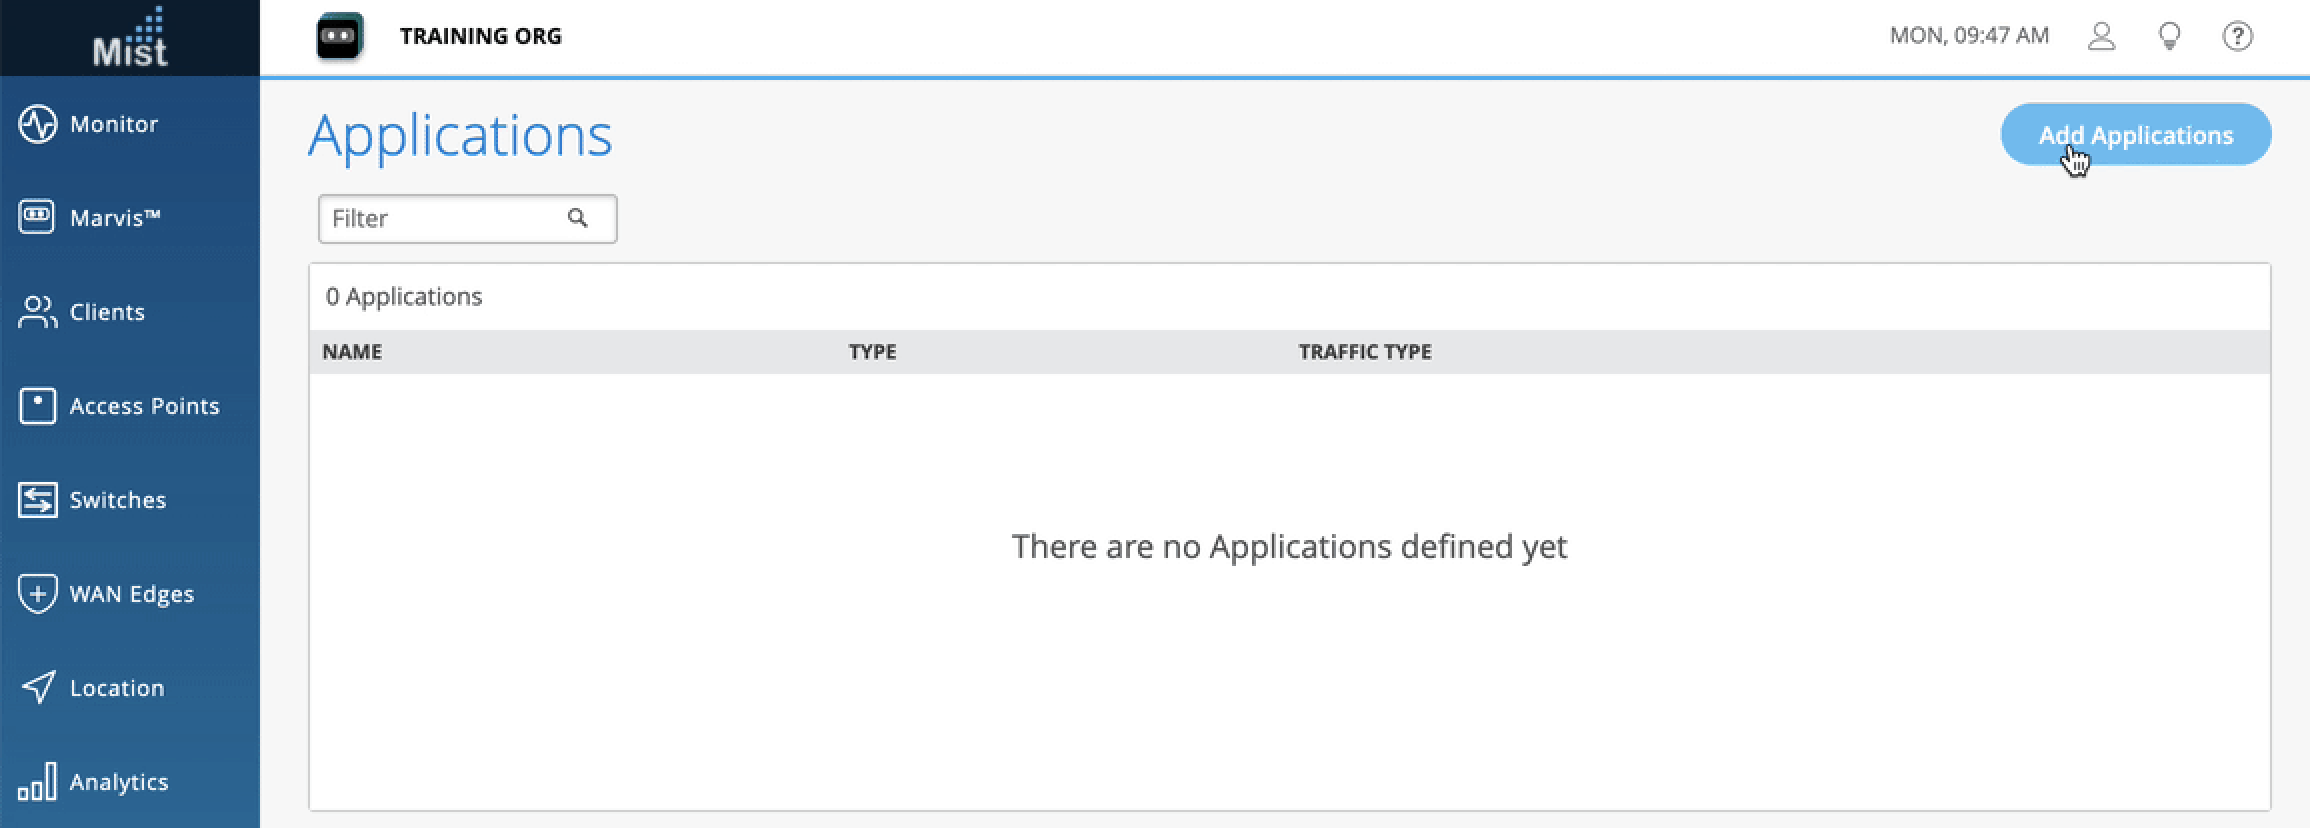
-
Name the application
Internet. -
Enter
0.0.0.0/0, or an IPv4 address space in the IP Addresses configuration.
- Click Save at the bottom of the Add Application side panel.
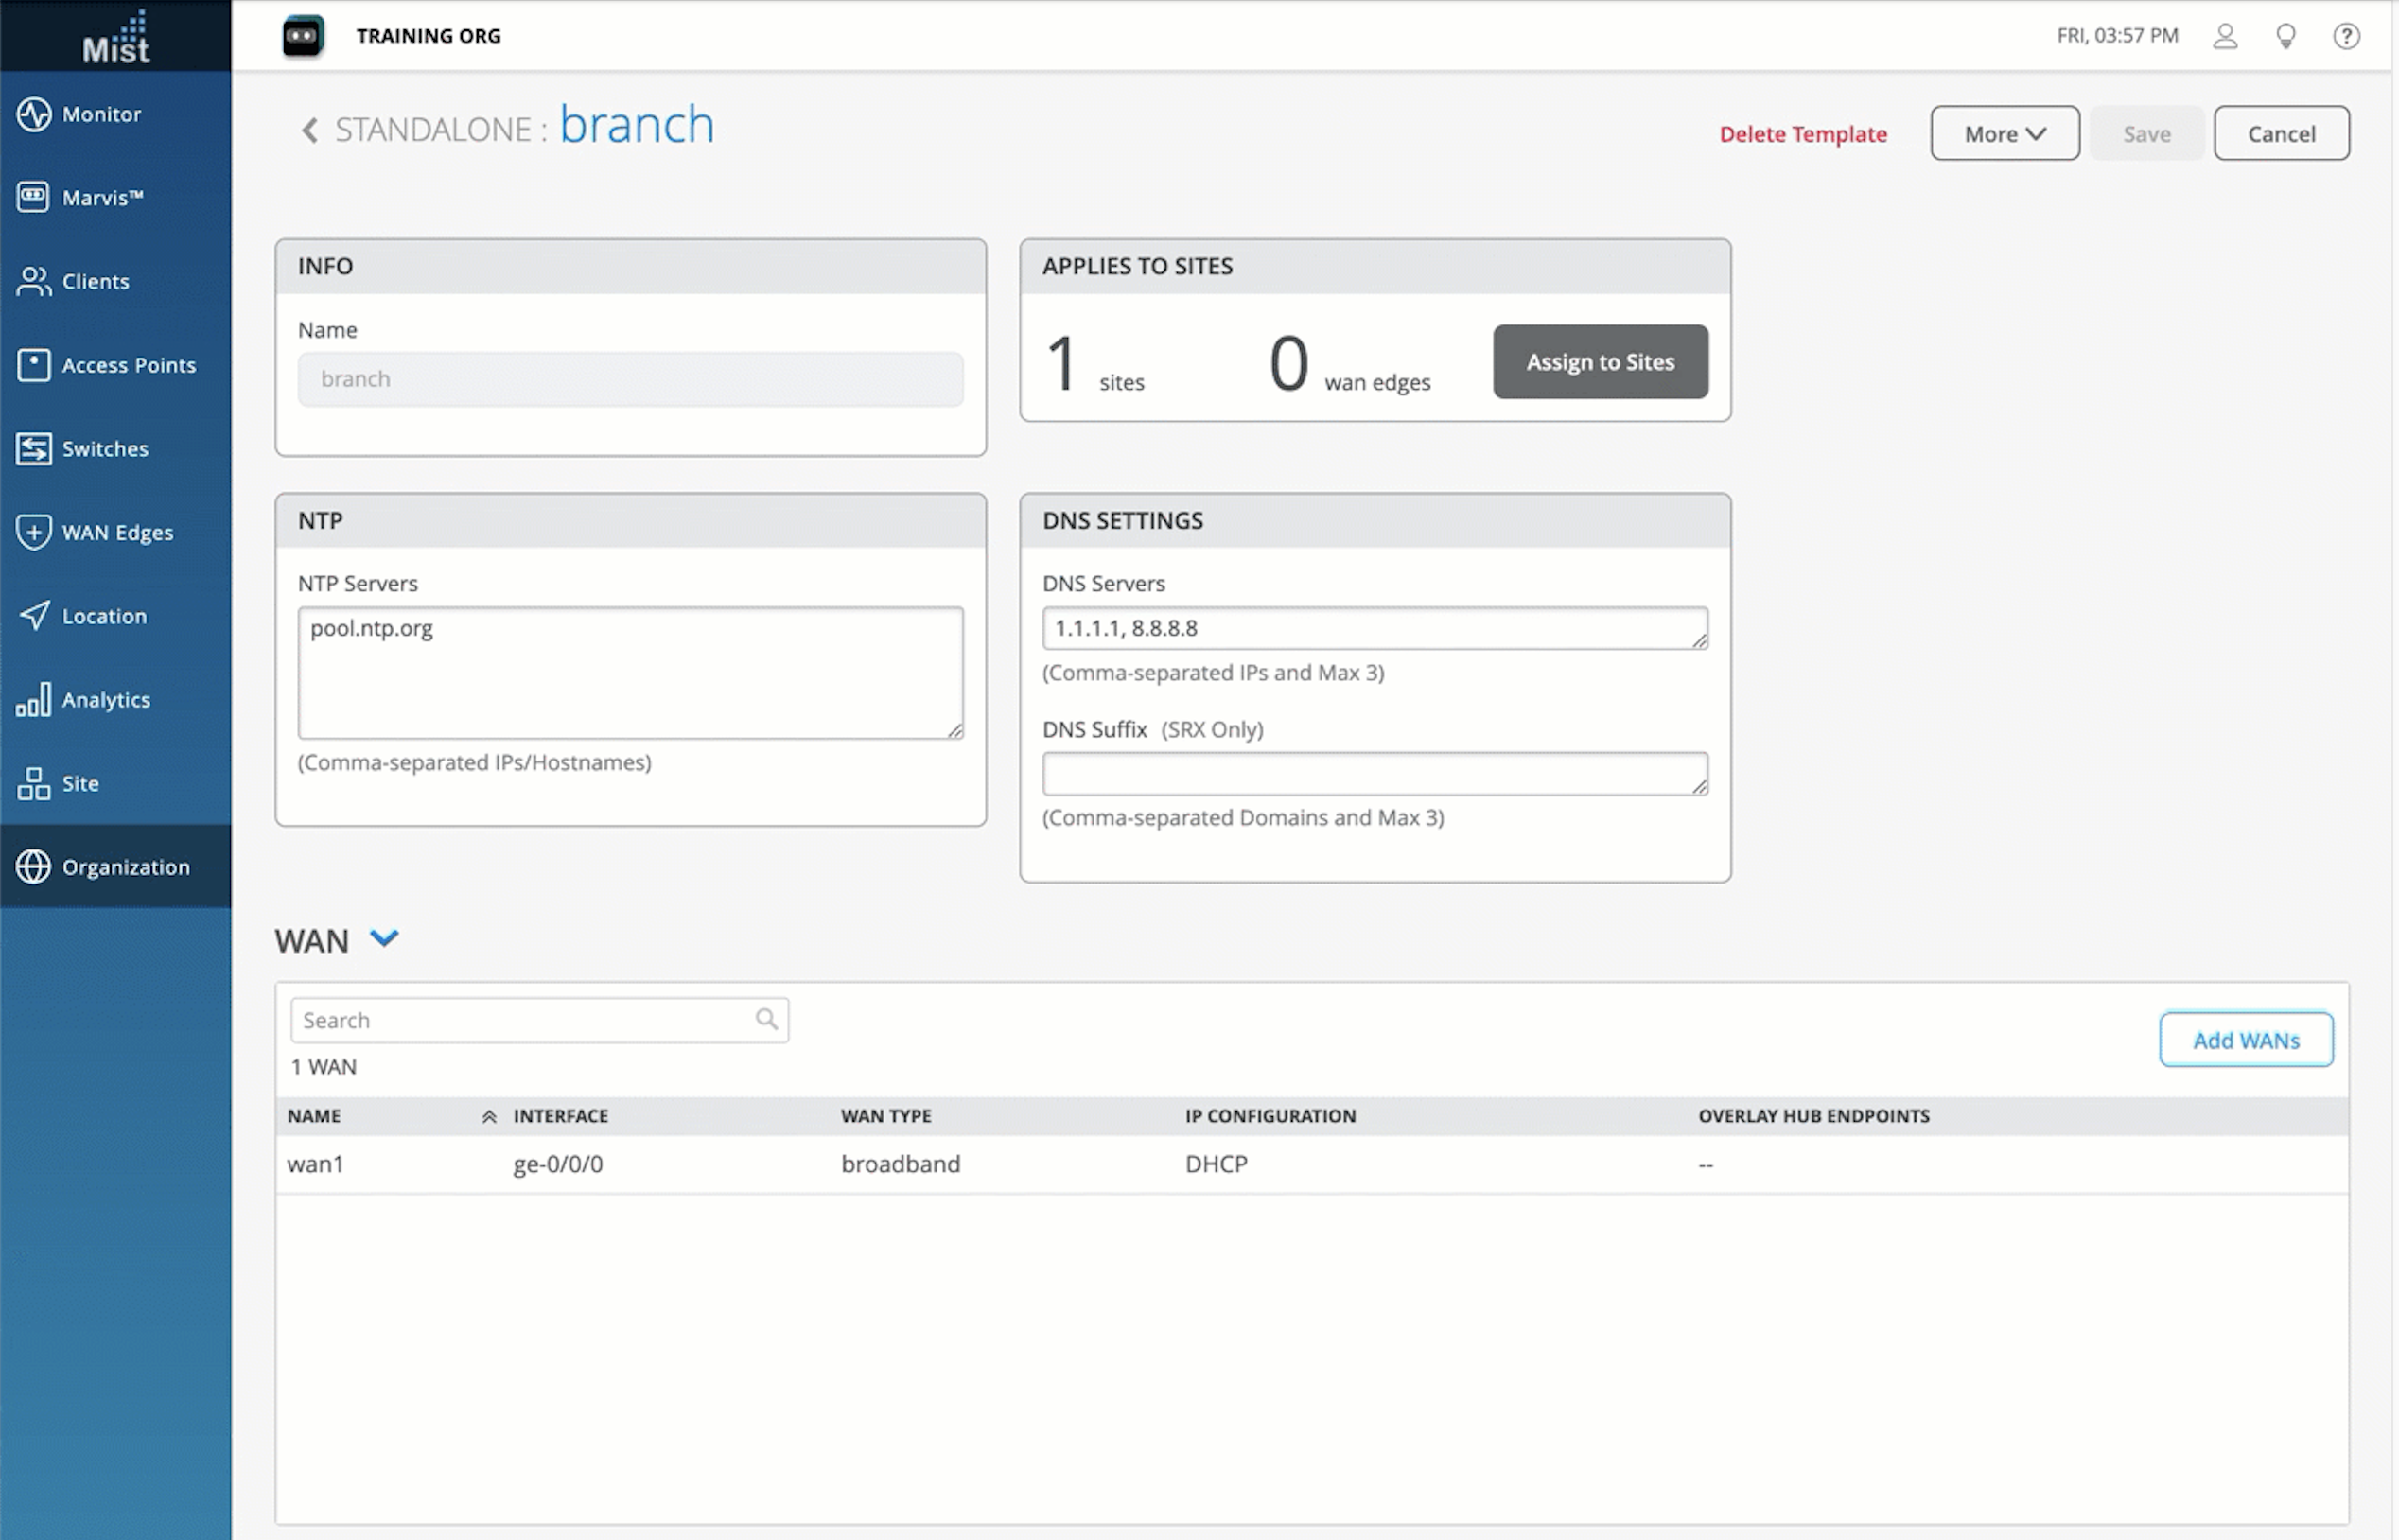
Create a Template
So far you have an SSR device waiting to be claimed, a network for your LAN, and an Internet application for your WAN to deliver. Next, you need to create a WAN Edge template that ties them all together. Templates provide a re-usable and consistent configuration for every SSR you deploy.
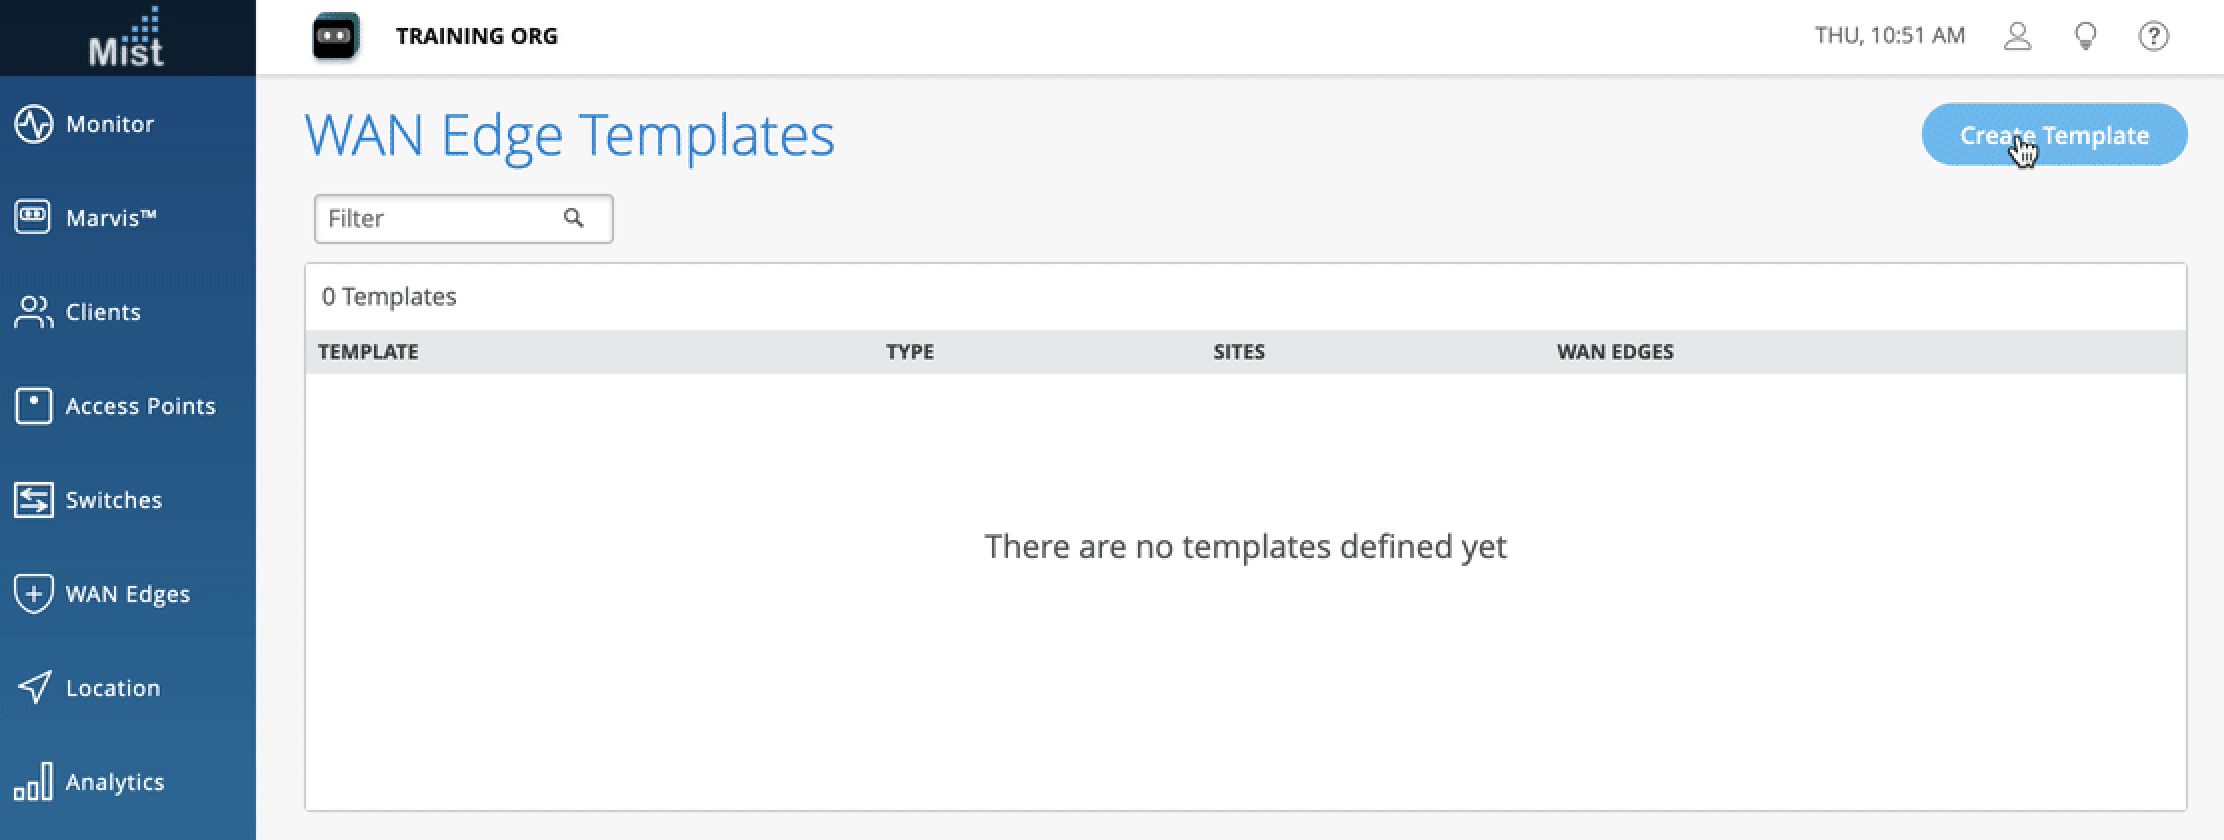
-
Navigate back to the WAN section of the organization sidebar menu, and select WAN Edge Templates.
-
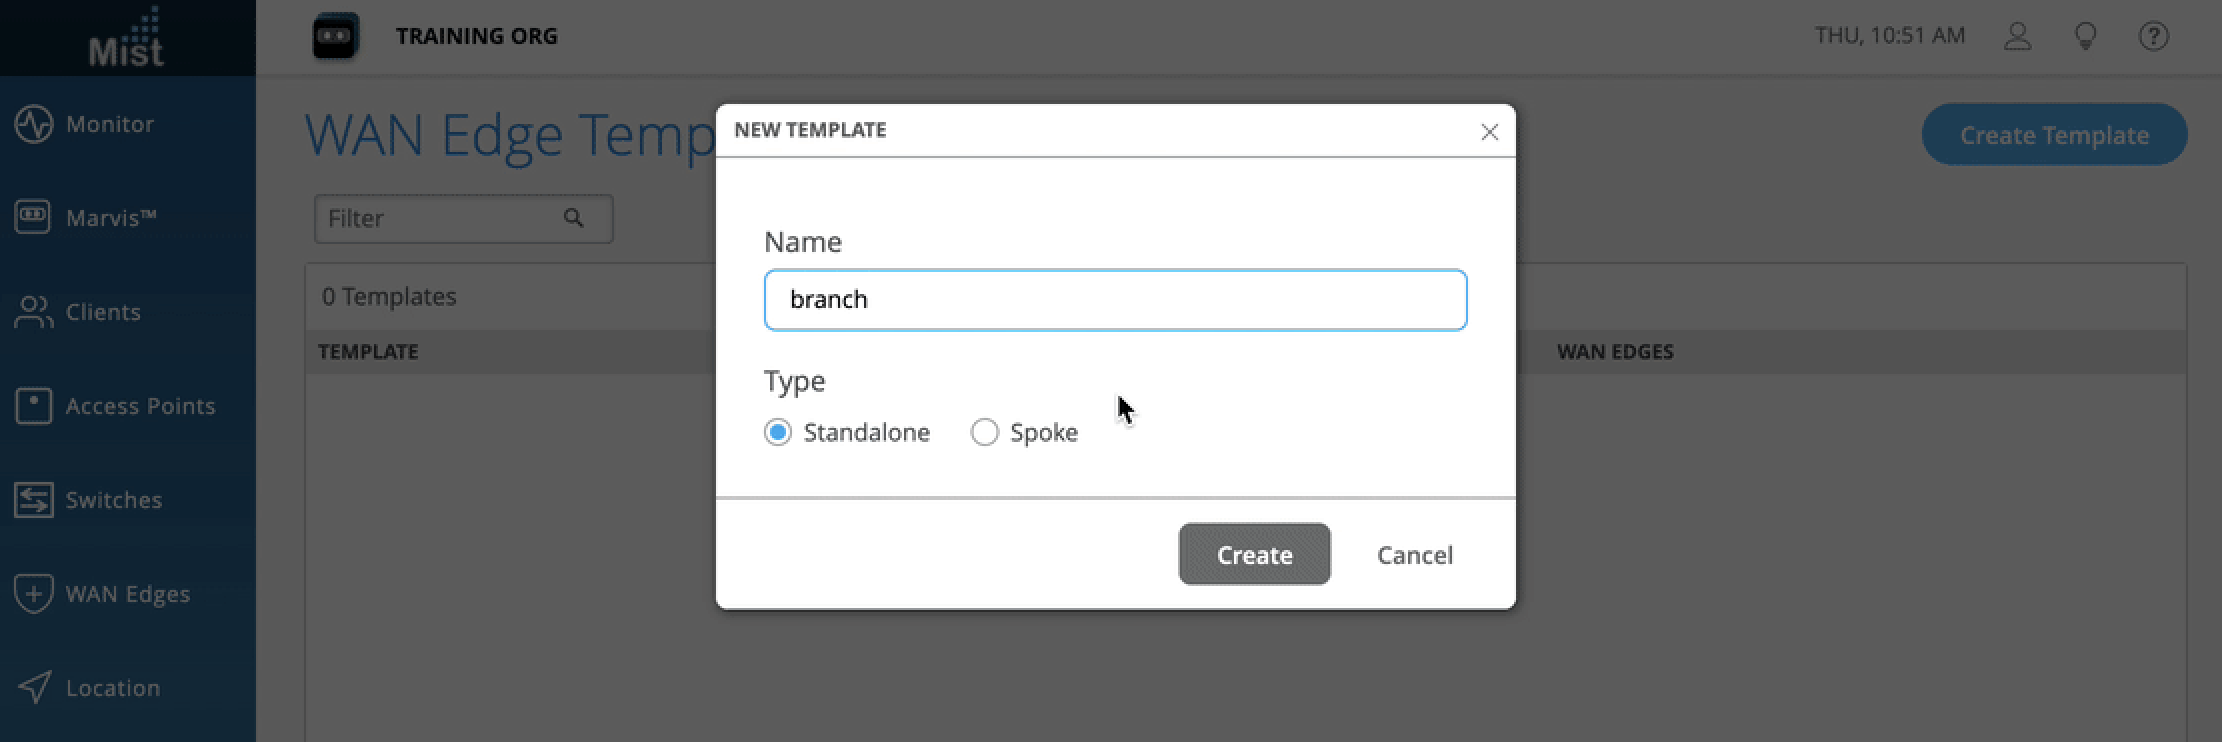
Select Create Template in the upper right.
-
Name the template.
-
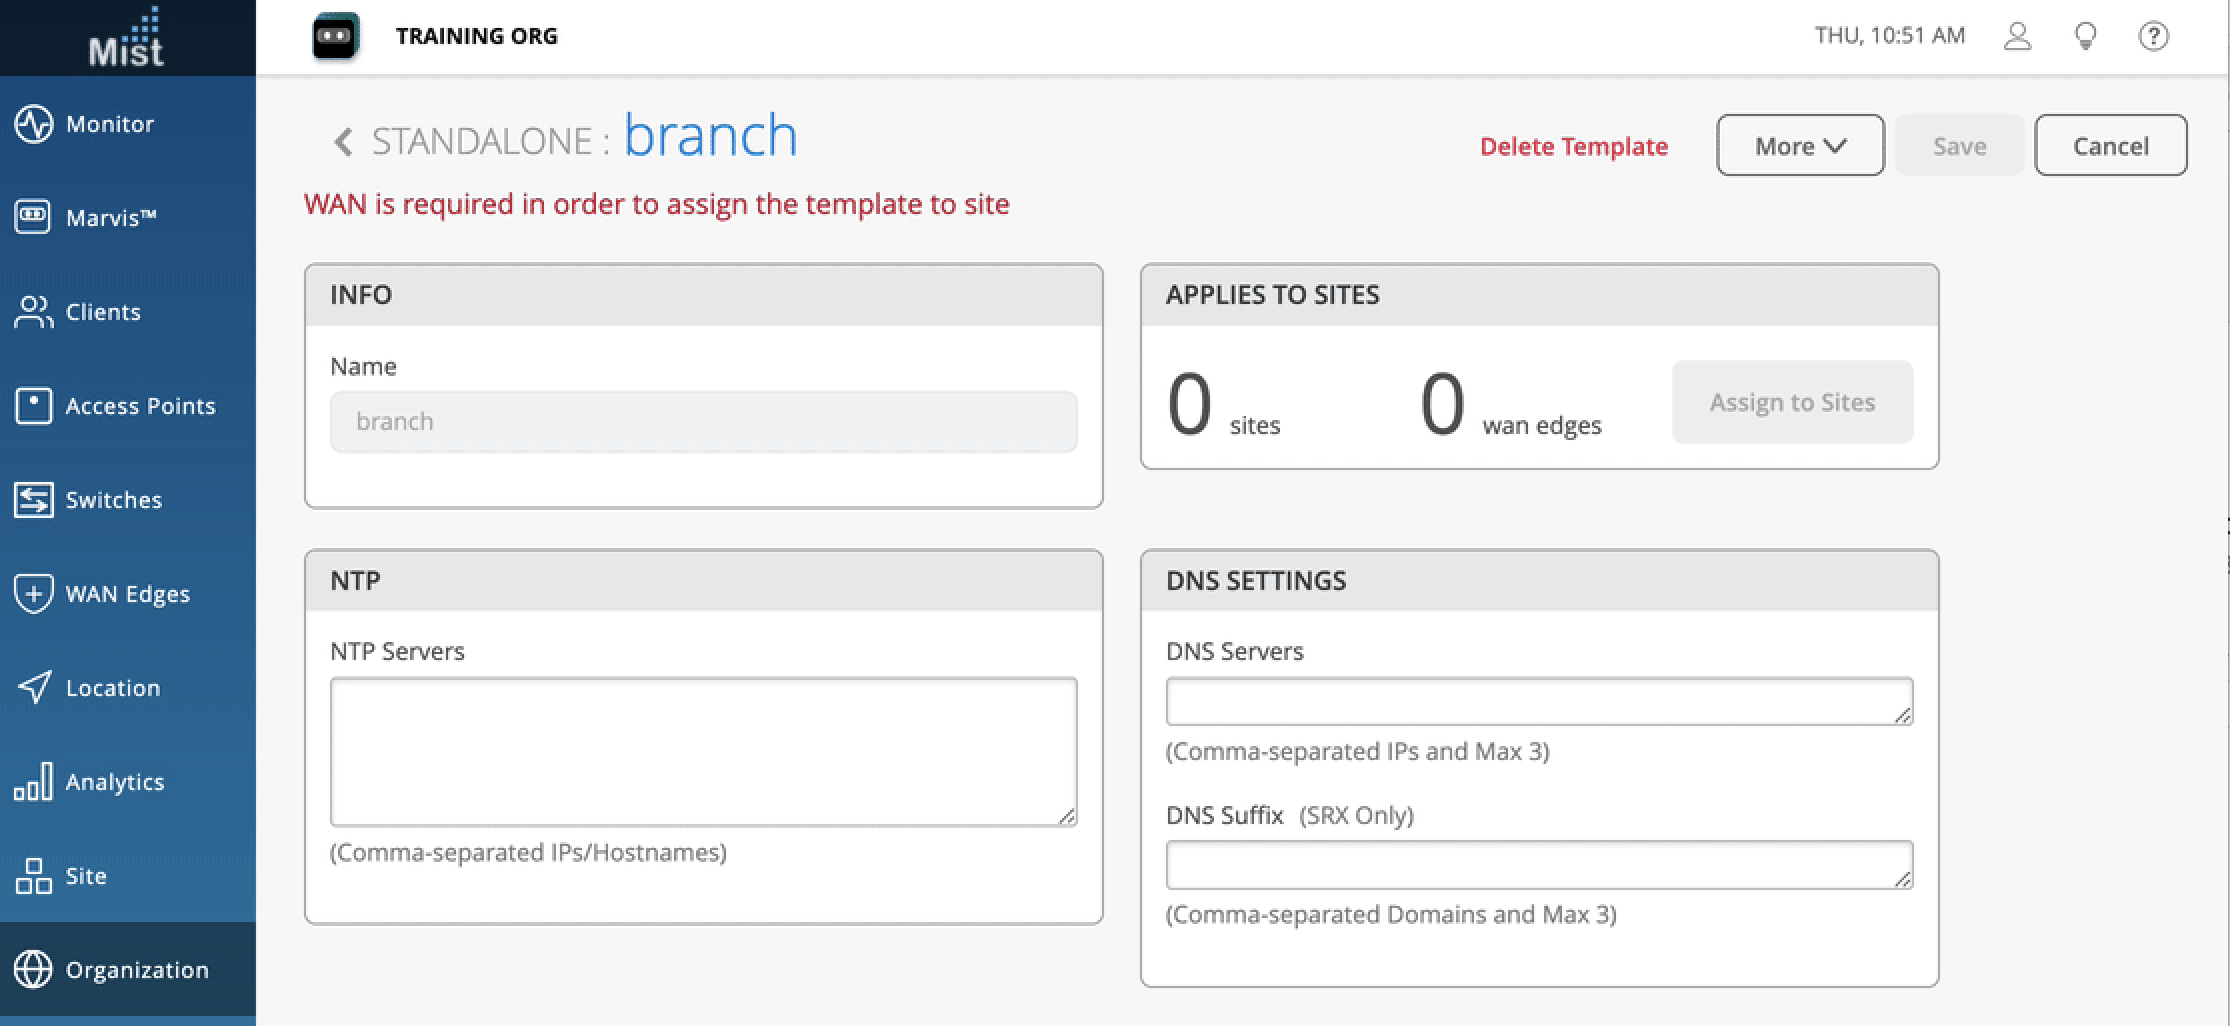
Click Create.
-
Enter NTP and DNS information to be used by the WAN edge device.
Define the WAN Port
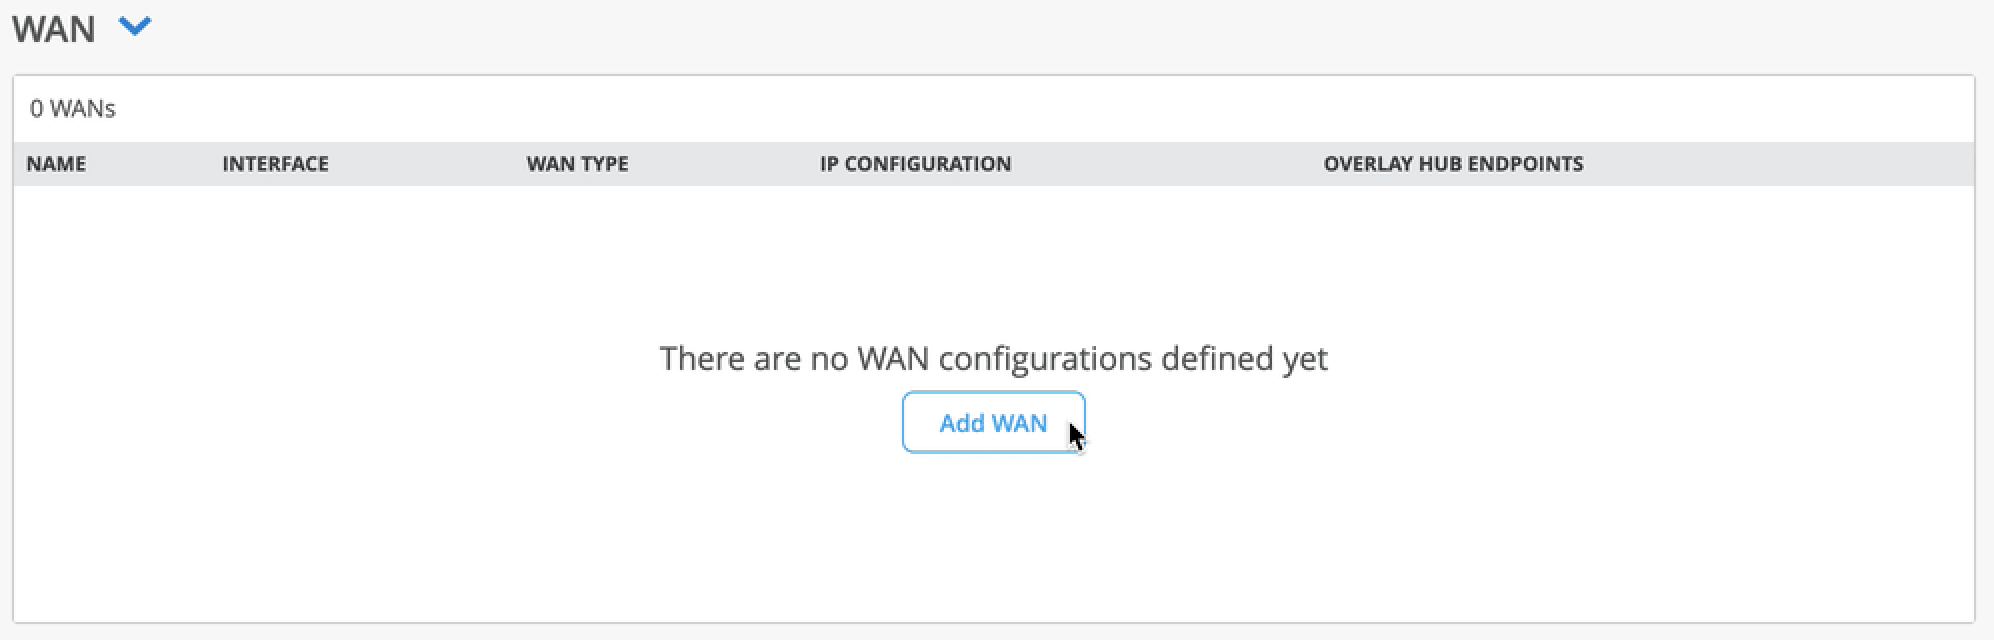
The first thing to do in your template is to define which port to use for the WAN.
-
Scroll to the WAN section of the template, and select Add WAN.
-
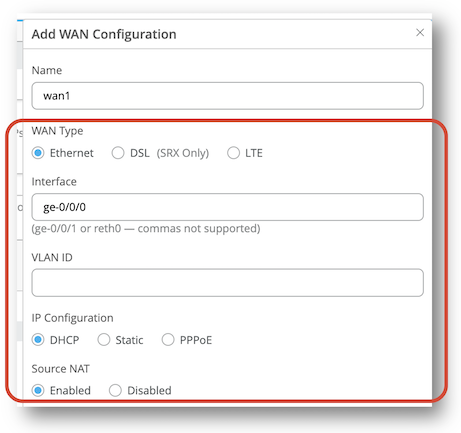
Name the WAN port
wan1. -
Since you already plugged port 0 on the SSR130 into the Internet, enter
ge-0/0/0to designate it as a WAN port. -
Make sure IP Configuration is set to DHCP, and that Source NAT is enabled.
-
Click Add at the bottom of the Edit WAN Configuration side panel.
Define the LAN Port
Next, associate your LAN with the appropriate port on the SSR, and give the LAN additional network services such as DHCP.
-
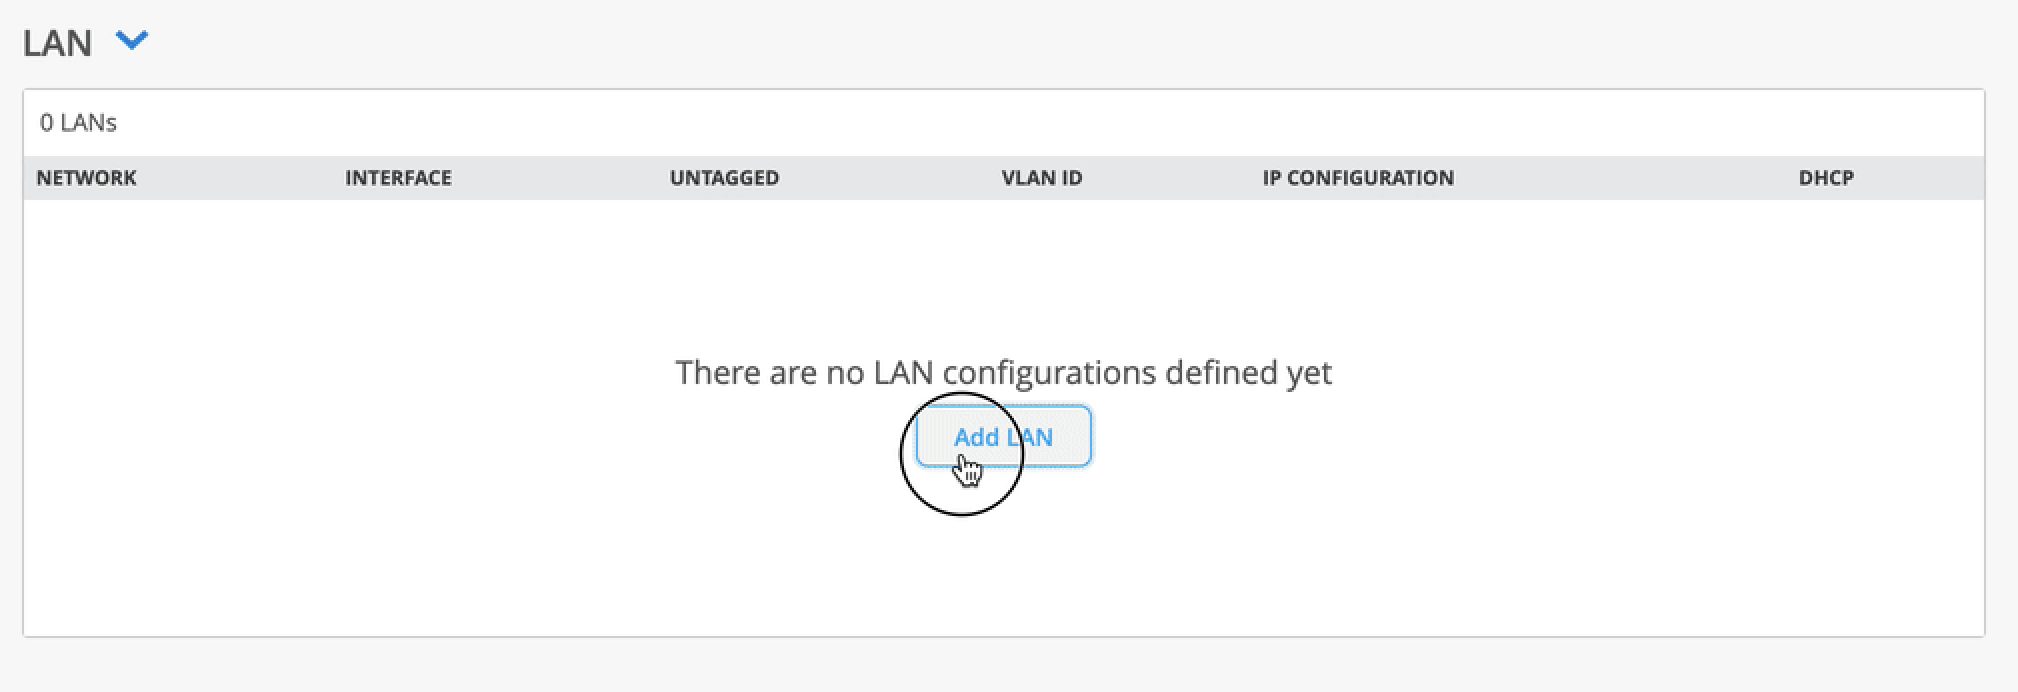
Scroll to the LAN section of the template, and select Add LAN.
-
From the Network drop-down menu, select your network segment to associate it with the LAN.
-
Enter the port used for the LAN port, for example
ge-0/0/3. -
Enter
192.168.1.1as the IP Address to assign the WAN edge device.1as a gateway in the network. -
Enter
/24for the Prefix Length.
-
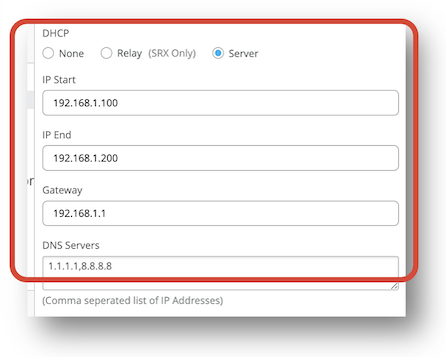
Enable the DHCP Server button to provide DHCP services to endpoints on this network.
-
Give your DHCP server an address pool starting with
192.168.1.100and ending with192.168.1.200. -
Enter
192.168.1.1as the Gateway to be assigned to DHCP clients. -
Finally, enter
1.1.1.1,8.8.8.8as DNS Servers to be assigned to clients on the network. -
Click Add at the bottom of the Edit LAN Configuration side panel.
Create Policies
Define the Traffic Steering Policy
-
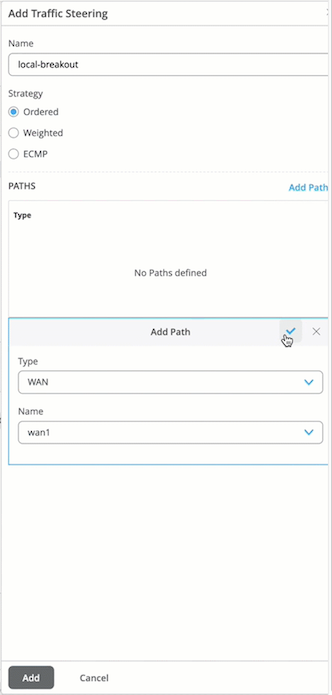
Scroll to the Traffic Steering section of the template, and select Add Traffic Steering.
-
Name your steering policy, for example,
local-breakout. -
Select Add Paths to give your steering policy a path to send traffic.
-
Select WAN as the path type, and select your WAN interface. For apps that use the policy, this indicates you want them sent directly out of the local WAN interface.
-
Click the check in the upper right of the Add Path box, and then click Add at the bottom of the Add Traffic Steering side panel.
Next, define the Application Policy.
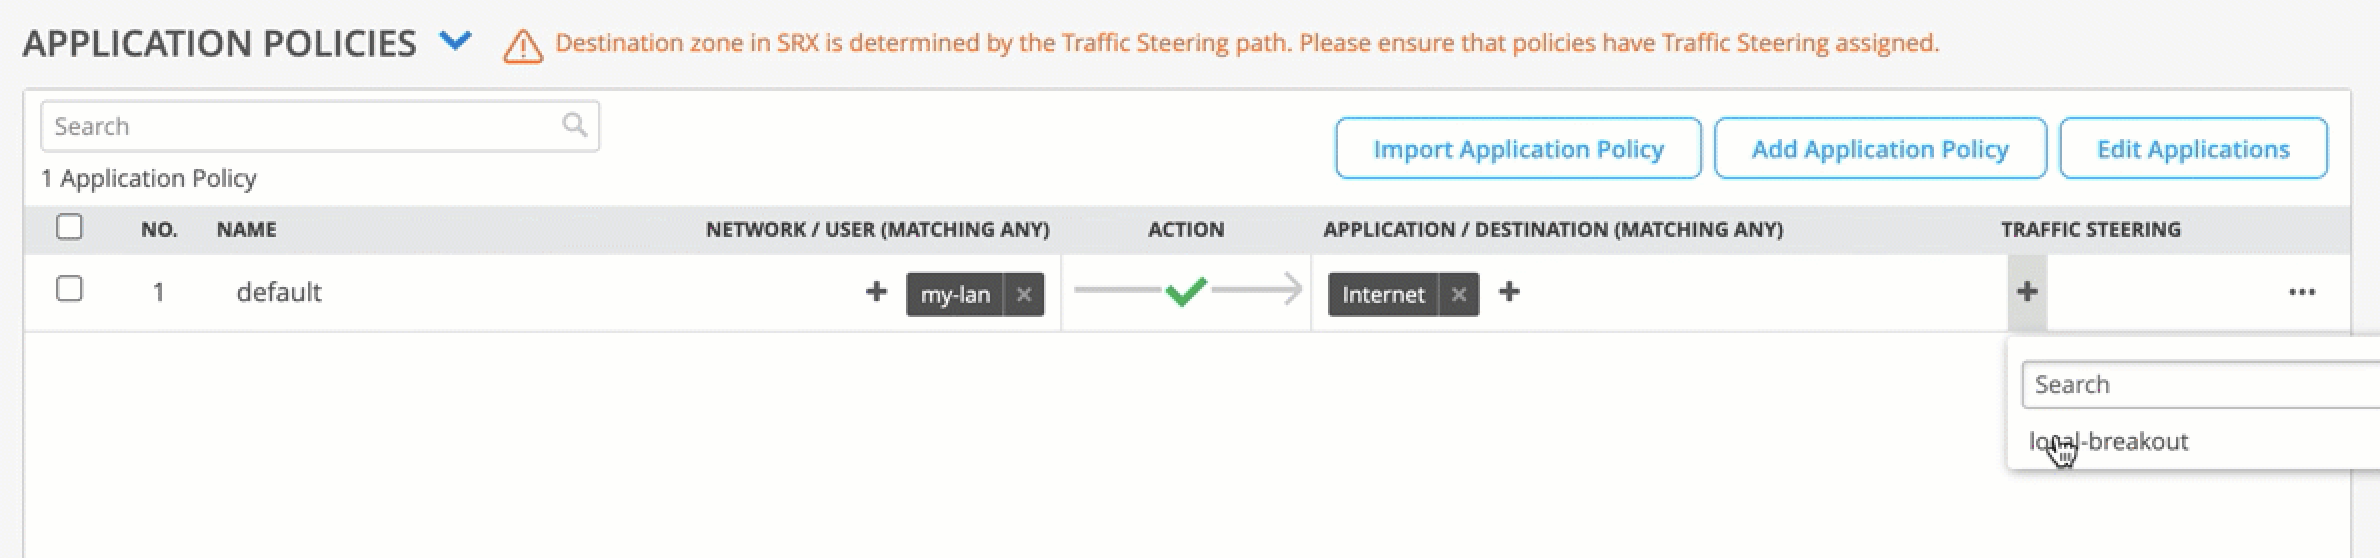
Define the Application Policy
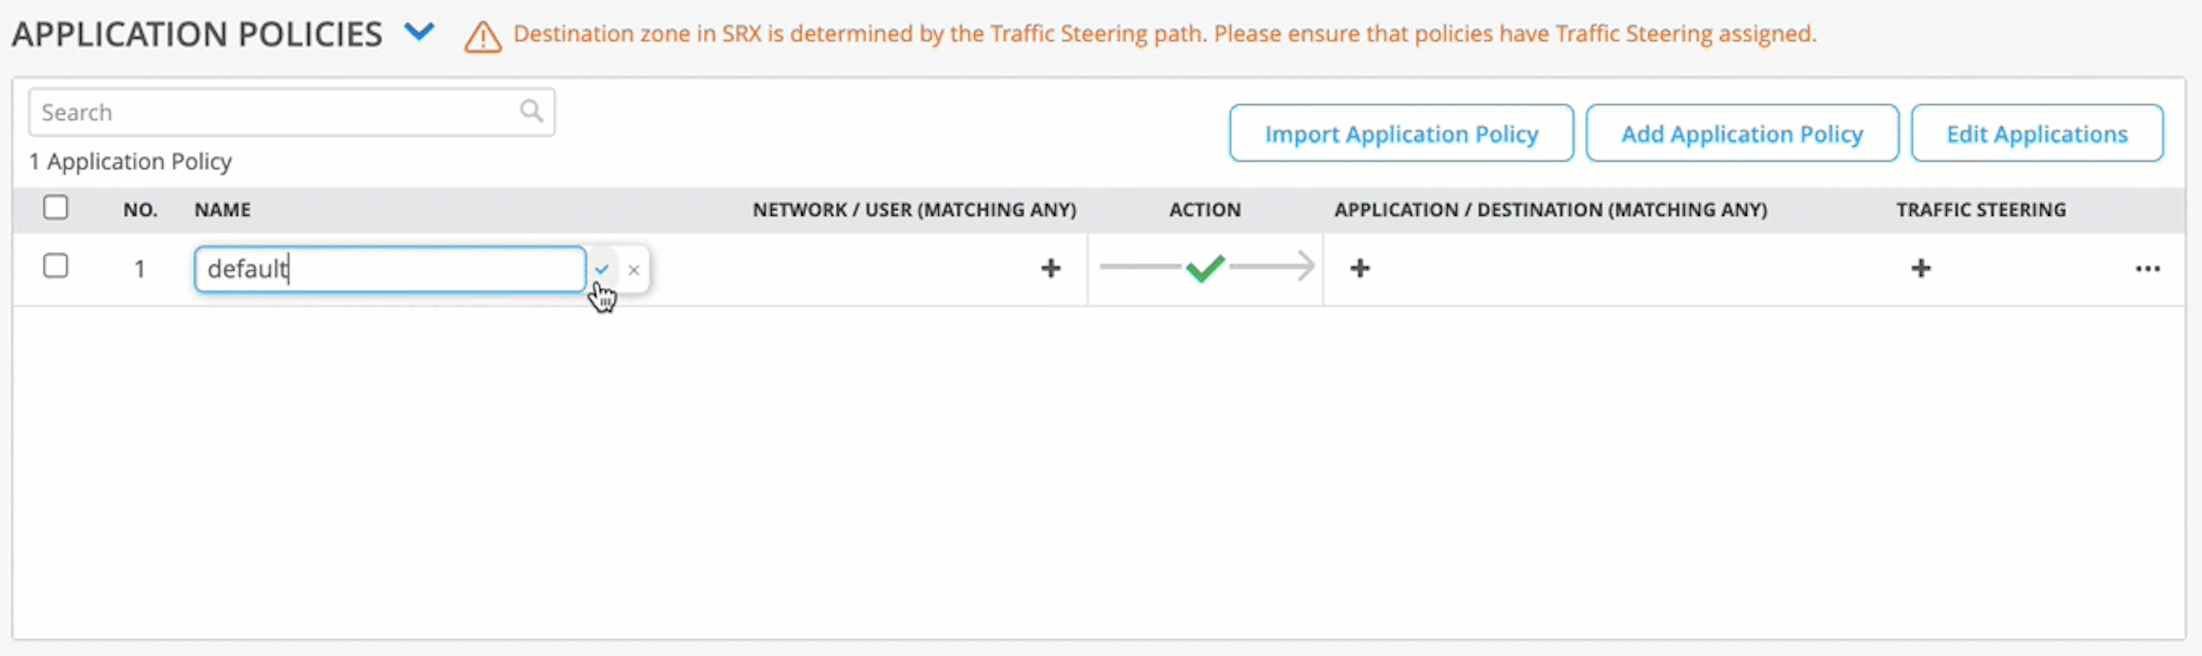
The Application Policy ties the networks and applications together.
-
Scroll to the Application Policy section of the template, and select Add Policy.
-
Enter a string in the name column, and click the check box to the right of your entry.
-
From the Network column drop-down, select your LAN network.
-
From the Applications column drop-down, select your Internet app.
-
From the Traffic Steering column drop-down, select your local breakout steering policy.
Assign the Template to a Site
- Scroll to the top and click Save.
-
Click the Assign to Site button, and select the site
where you want the template config applied.
Assign the SSR130 to a Site
- Go to your organization's WAN Edges Inventory.
- Select your SSR130.
- Assign the SSR to your site.
- If you are configuring a Mist-managed router (SSR Software version 6.x and greater), check the Manage configuration with Mist check box. For version 5.4.x and greater conductor-managed routers, make sure there is no check mark in the Manage Configuration from Mist under Manage Configuration.
- Select Assign to Site.
Congratulations you now have a Mist-claimed SSR130 with a basic configuration ready to send to your device! Step 2 will get your SSR130 rack or wall mounted, powered up, and connected to your network.