Step 1: Begin
In this guide, we provide a simple, three-step path, to quickly get you up and running with your new EX2300. We’ve simplified and shortened the installation and configuration steps, and included how-to videos. You’ll learn how to install an AC-powered EX2300 in a rack, power it up, and configure basic settings.
Are you interested in getting hands-on experience with the topics and operations covered in this guide? Visit Juniper Networks Virtual Labs and reserve your free sandbox today! You’ll find the Junos Day One Experience sandbox in the stand alone category. EX switches are not virtualized. In the demonstration, focus on the virtual QFX device. Both the EX and QFX switches are configured with the same Junos commands.
Meet the EX2300 Line of Ethernet Switches
The Juniper Networks® EX2300 line of Ethernet switches provide a flexible, high-performance solution for supporting today’s converged network access deployments.
You can interconnect up to four EX2300 switches to form a Virtual Chassis, enabling these switches to be managed as a single device.
The EX2300 switches are available in 12-port, 24-port and 48-port models with AC power supplies.
The EX2300-24T-DC switch is DC-powered.
Each EX2300 switch model has front-panel 10/100/1000BASE-T access ports and 10GbE uplink ports for connecting to higher-level devices. The uplink ports support small form-factor pluggable plus (SFP+) transceivers. All switches except the EX2300-C-12T, EX2300-24T, and EX2300-48T support Power over Ethernet (PoE) and Power over Ethernet Plus (PoE+) for powering attached network devices.
There’s a separate Day One+ guide for the 12-port EX2300-C switch models. See EX2300-C on the Day One+ webpage.
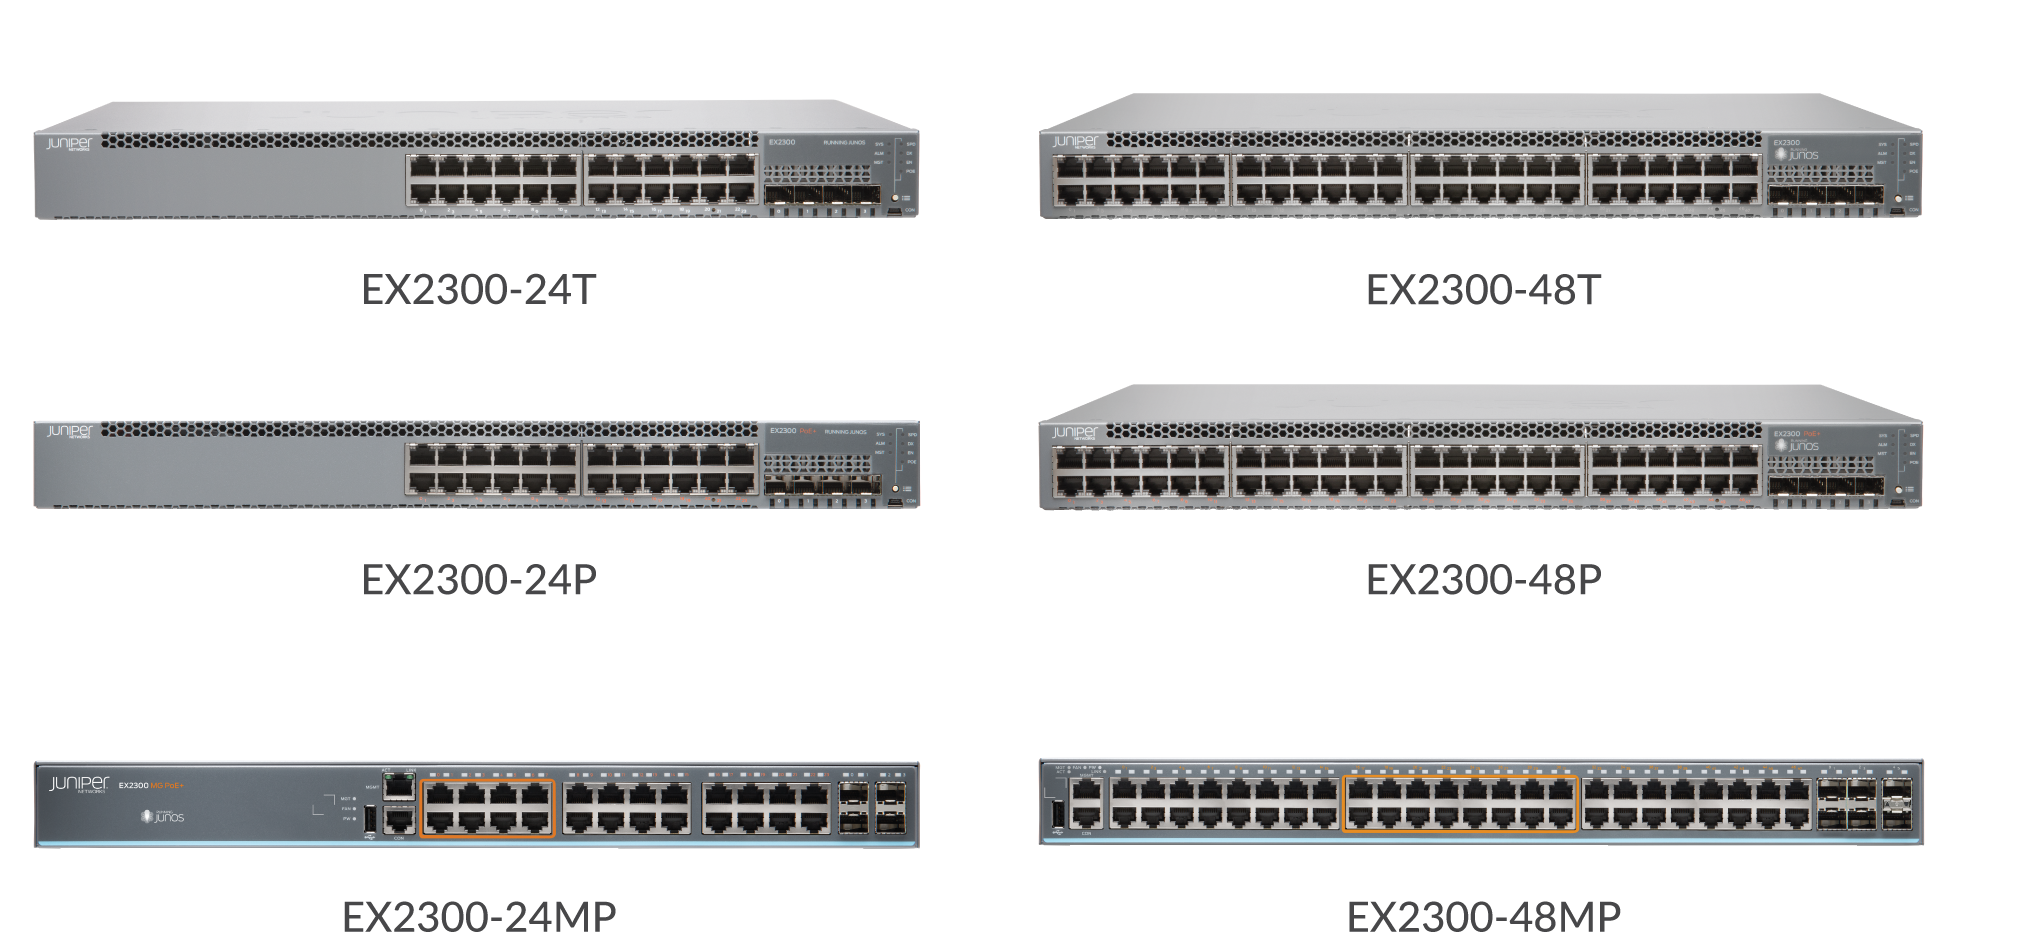
This guide covers the following AC-powered switch models:
-
EX2300-24T: 24 10/100/1000BASE-T ports
-
EX2300-24P: 24 10/100/1000BASE-T PoE/PoE+ ports
-
EX2300-24MP: 16 10/100/1000BASE-T PoE+ ports, 8 10/100/1000/2500BASE-T PoE+ ports
-
EX2300-48T: 48 10/100/1000BASE-T ports
-
EX2300-48P: 48 10/100/1000BASE-T PoE/PoE+ ports
-
EX2300-48MP: 32 10/100/1000BASE-T PoE/PoE+ ports, 16 100/1000/2500/5000/10000BASE-T PoE/PoE+ ports
Install the EX2300 in a Rack
You can install the EX2300 switch on a desk or table, on a wall, or in a two-post or four-post rack. The accessory kit that ships in the box has the brackets you need to install the EX2300 switch in a two-post rack. We’ll walk you through how to do that.
If you want to mount the switch on the wall or in a four-post rack, you’ll need to order a wall mount or rack mount kit. The four-post rack mount kit also has brackets for mounting the EX2300 switch in a recessed position in the rack.
What’s in the Box?
-
An AC power cord appropriate for your geographical location
-
Two mounting brackets and eight mounting screws
-
Power cord retainer clip
What Else Do I Need?
-
An electrostatic discharge (ESD) grounding strap
-
Someone to help you secure the router to the rack
-
Mounting screws to secure the EX2300 to the rack
-
Number two Phillips (+) screwdriver
-
Serial-to-USB adapter (if your laptop doesn’t have a serial port)
-
An Ethernet cable with RJ-45 connectors attached and an RJ-45 to DB-9 serial port adapter
Note:We no longer include the RJ-45 console cable with the DB-9 adapter as part of the device package. If the console cable and adapter are not included in your device package, or if you need a different type of adapter, you can order the following separately:
-
RJ-45 to DB-9 adapter (JNP-CBL-RJ45-DB9)
-
RJ-45 to USB-A adapter (JNP-CBL-RJ45-USBA)
-
RJ-45 to USB-C adapter (JNP-CBL-RJ45-USBC)
If you want to use RJ-45 to USB-A or RJ-45 to USB-C adapter you must have X64 (64-Bit) Virtual COM port (VCP) driver installed on your PC. See, https://ftdichip.com/drivers/vcp-drivers/ to download the driver.
-
Rack It!
Here’s how to install the EX2300 switch in a two-post rack:
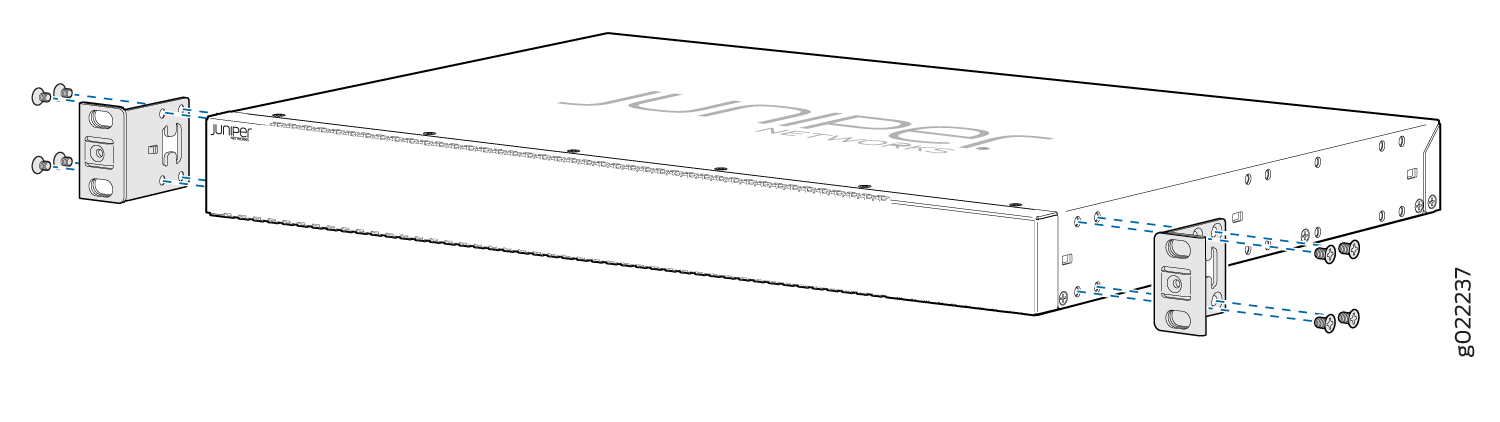
-
Attach the mounting brackets to the sides of the EX2300 switch using the
eight mounting screws and a screwdriver.
You’ll notice there are three locations on the side panel where you can attach the mounting brackets: front, center, and rear. Attach the mounting brackets to the location that best suits where you want the EX2300 switch to sit in the rack.
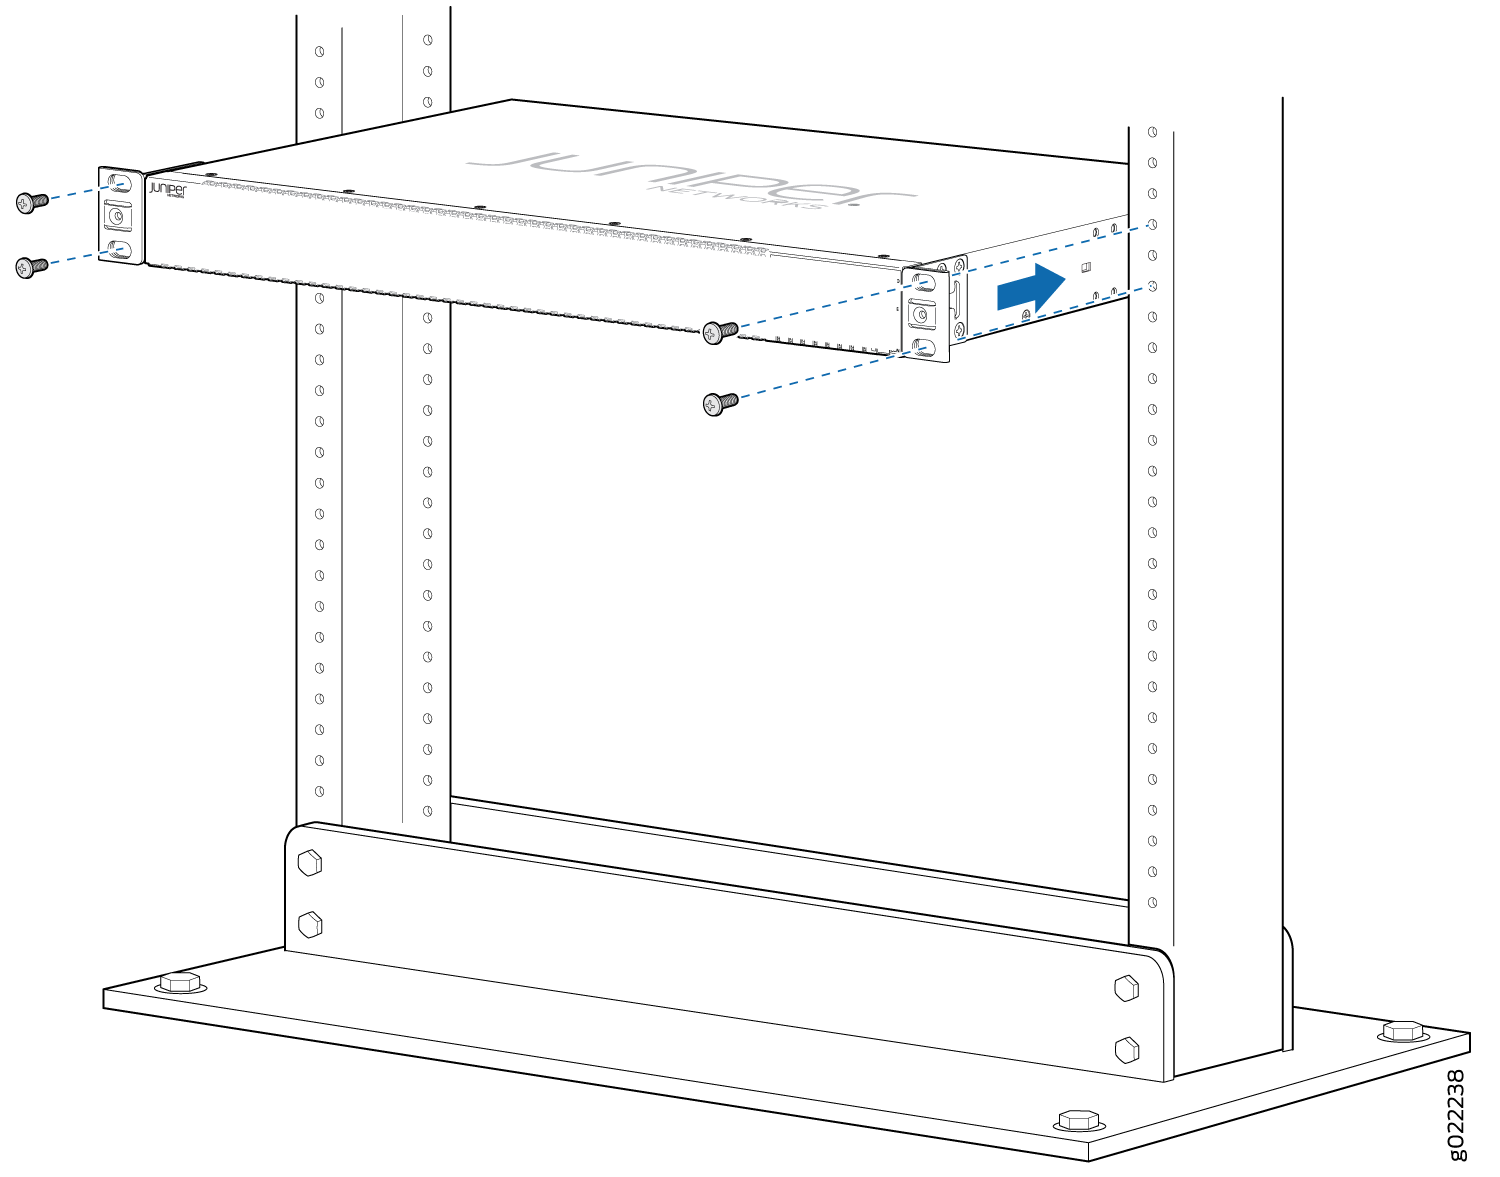
-
Lift the EX2300 switch and position it in the rack. Line up the bottom hole
in each mounting bracket with a hole in each rack rail, making sure the
EX2300 switch is level.
Connect to Power
Now you’re ready to connect the EX2300 switch to a dedicated AC power source. The switch comes with the AC power cord for your geographic location.
To connect the EX2300 swtich to AC power, you must do the following:
Ground the EX2300 Switch
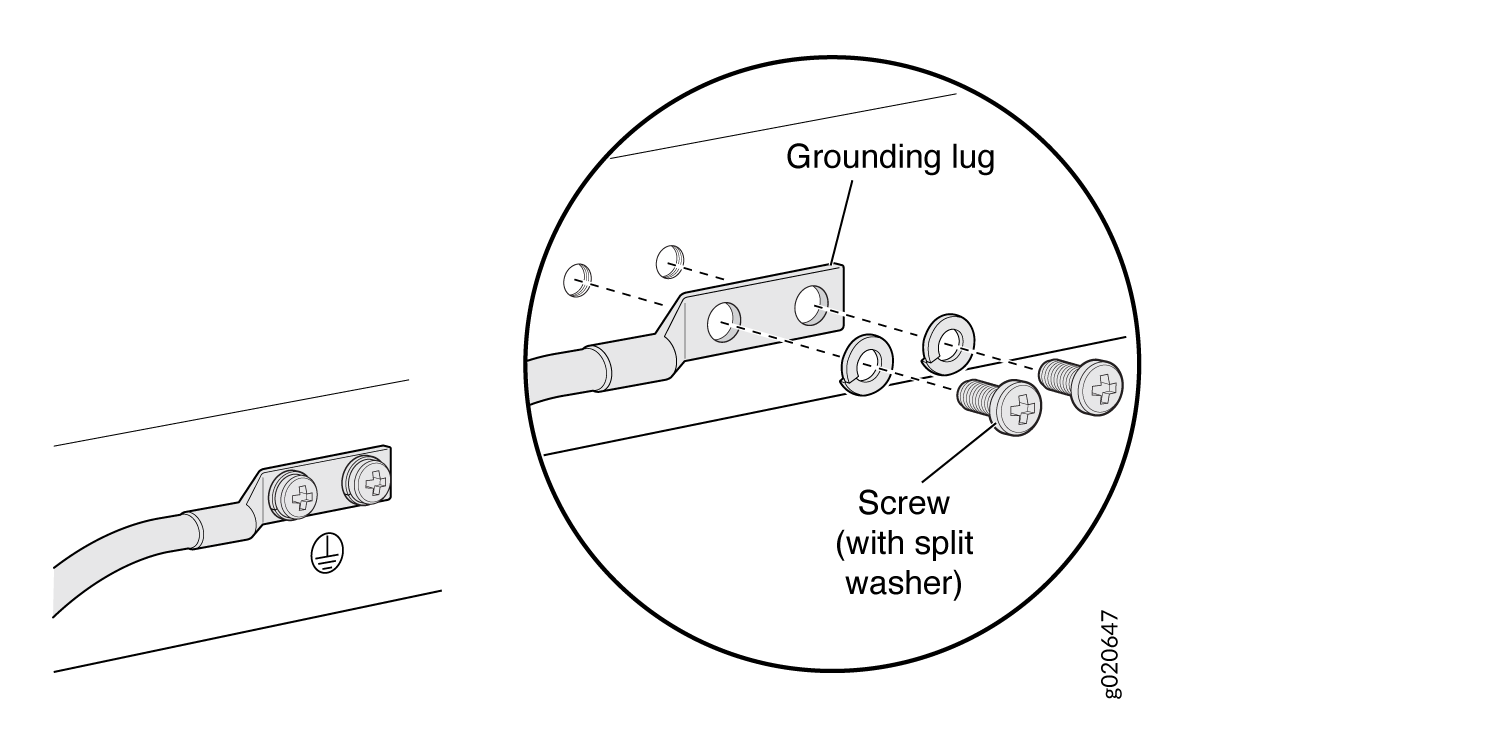
To ground the EX2300 switch, do the following:
-
Place the grounding lug attached to the grounding cable over the
protective earthing terminal. See Figure 1.
Figure 1: Connecting a Grounding Cable to an EX Series Switch
Connect the Power Cord to EX2300 Switch and Power On
-
On the rear panel, connect the power cord retainer clip to the AC power
supply:
 Note:
Note:The EX2300-24-MP and the EX2300-48-MP switches don’t need a power cord retainer clip. You can simply plug in the power cord to the AC power socket on the switch and then skip to step 5.
-
Turn the nut clockwise until it’s snug against the base of the coupler. The
slot in the coupler should be 90 degrees from the power supply socket.
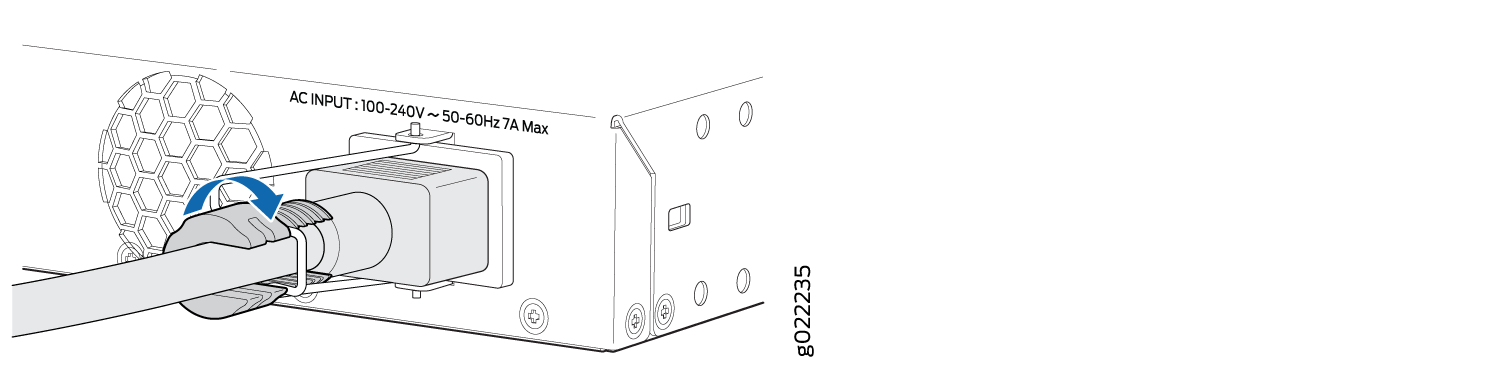
The EX2300 switch powers up as soon you connect it to the AC power source. When the SYS LED on the front panel is steadily green, the switch is ready to use.