Step 1: Begin
In this guide, we provide a simple, three-step path, to quickly get you up and running with Juniper Apstra. We'll show you how to install and configure Apstra software release 4.1.1 onto a VMware ESXi hypervisor. From the Apstra GUI, we'll walk through the elements used to build a network in the Apstra environment. Then we'll show you how to build (stage) a network and deploy it. Depending on the complexity of your design, other tasks may be required in addition to the ones included in this workflow.
Meet Juniper Apstra
Juniper Apstra automates and validates the design, deployment, and operations of your data center network. Once you specify the outcomes you want Apstra will set up the network, assure that it’s secure and runs as intended, alert you to anomalies, and manage changes and maintenance. Juniper Apstra intent-based software automates and validates your data center network design, deployment, and operations across a wide range of vendors. With support for nearly any network topology and domain, Apstra delivers built-in design templates for creating repeatable, continuously validated blueprints. It leverages advanced intent-based analytics to continually validate the network, thereby eliminating complexity, vulnerabilities, and outages resulting in a secure and resilient network.
Get Ready
Apstra software comes pre-installed on a single virtual machine (VM). You'll need a server that meets the following specifications:
| Resource | Recommendation |
|---|---|
| Memory | 64 GB RAM + 300 MB per installed device off-box agent |
| CPU | 8 vCPU |
| Disk Space | 80 GB |
| Network | 1 network adapter, initially configured with DHCP |
| VMware ESXi installed | Version 7.0, 6.7, 6.5, 6.0 or 5.5 |
Install Apstra Server
-
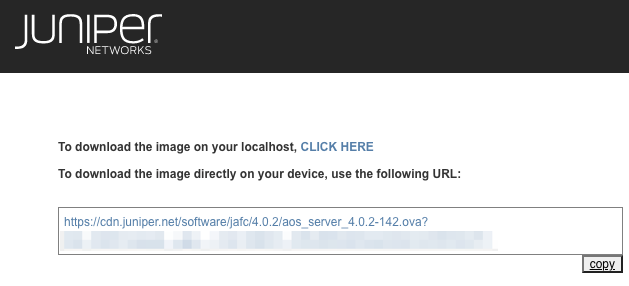
As a registered support user, download the latest OVA Apstra VM image
from Juniper Support Downloads.
-
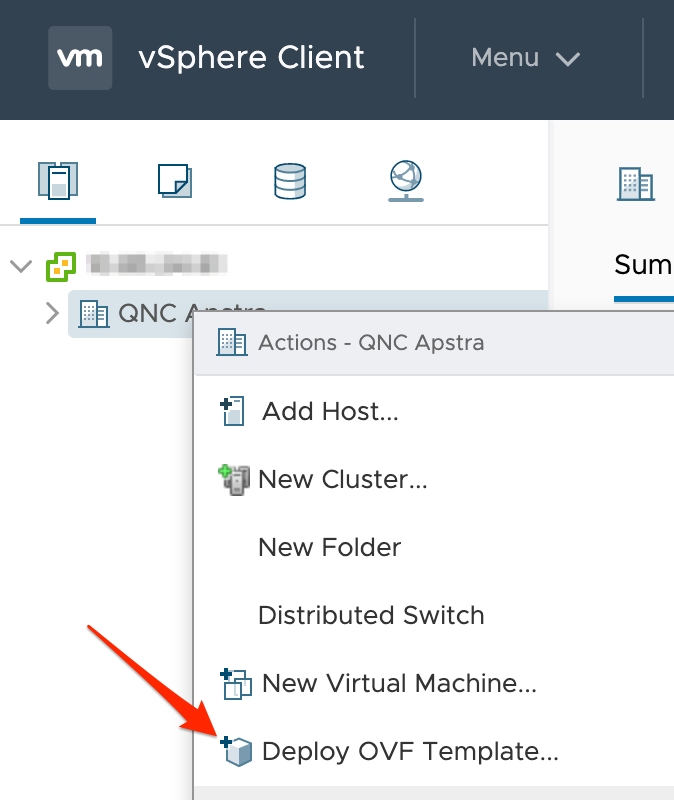
Log in to vCenter, right-click your target deployment environment, then
click Deploy OVF Template.
-
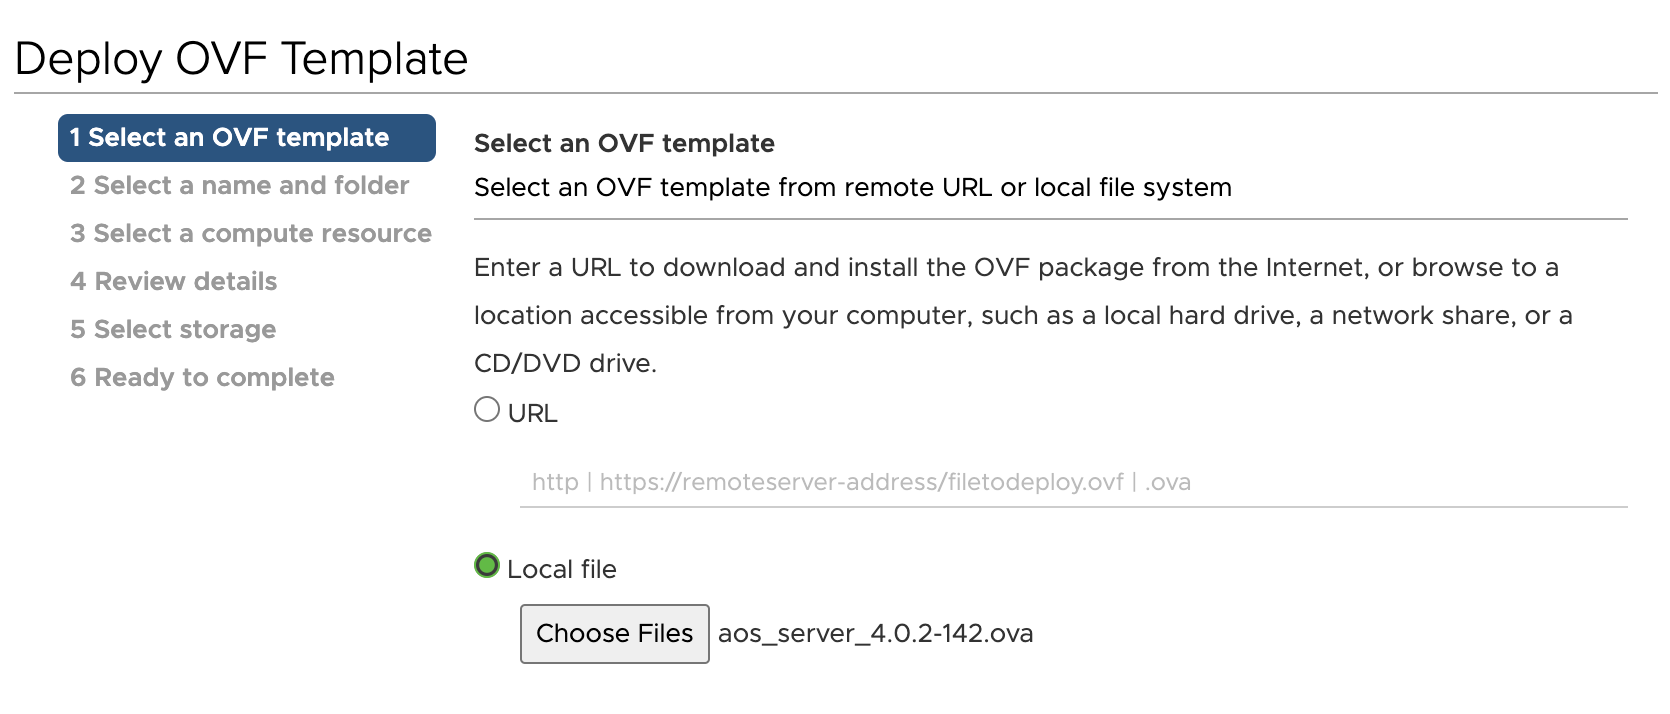
Specify the URL or local file location for the downloaded OVA file, then
click Next.
-
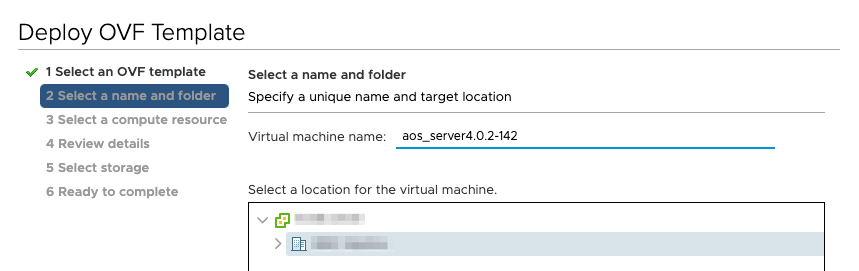
Specify a unique name and target location for the VM, then click
Next.
-
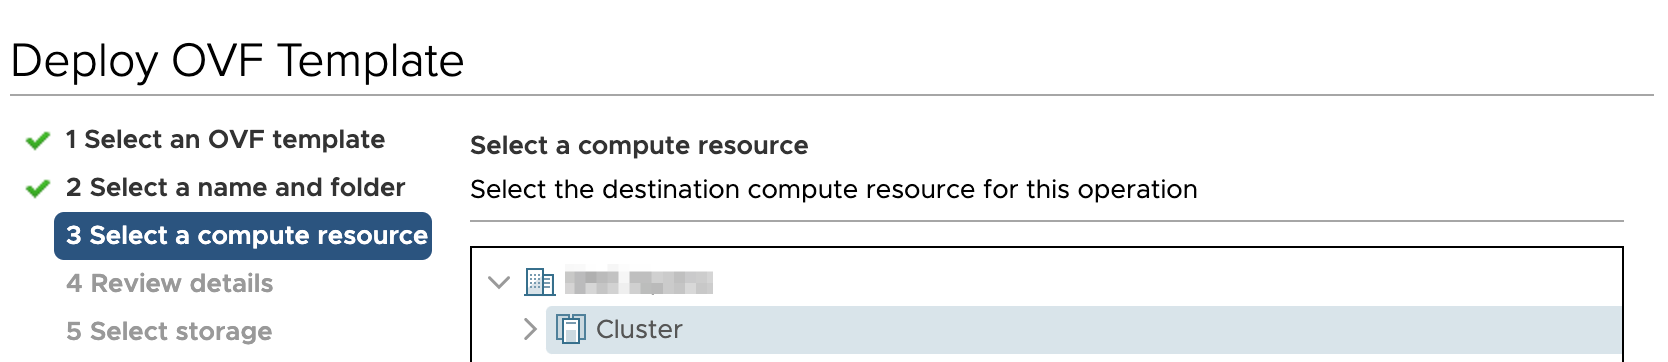
Select your destination compute resource, then click
Next.
-
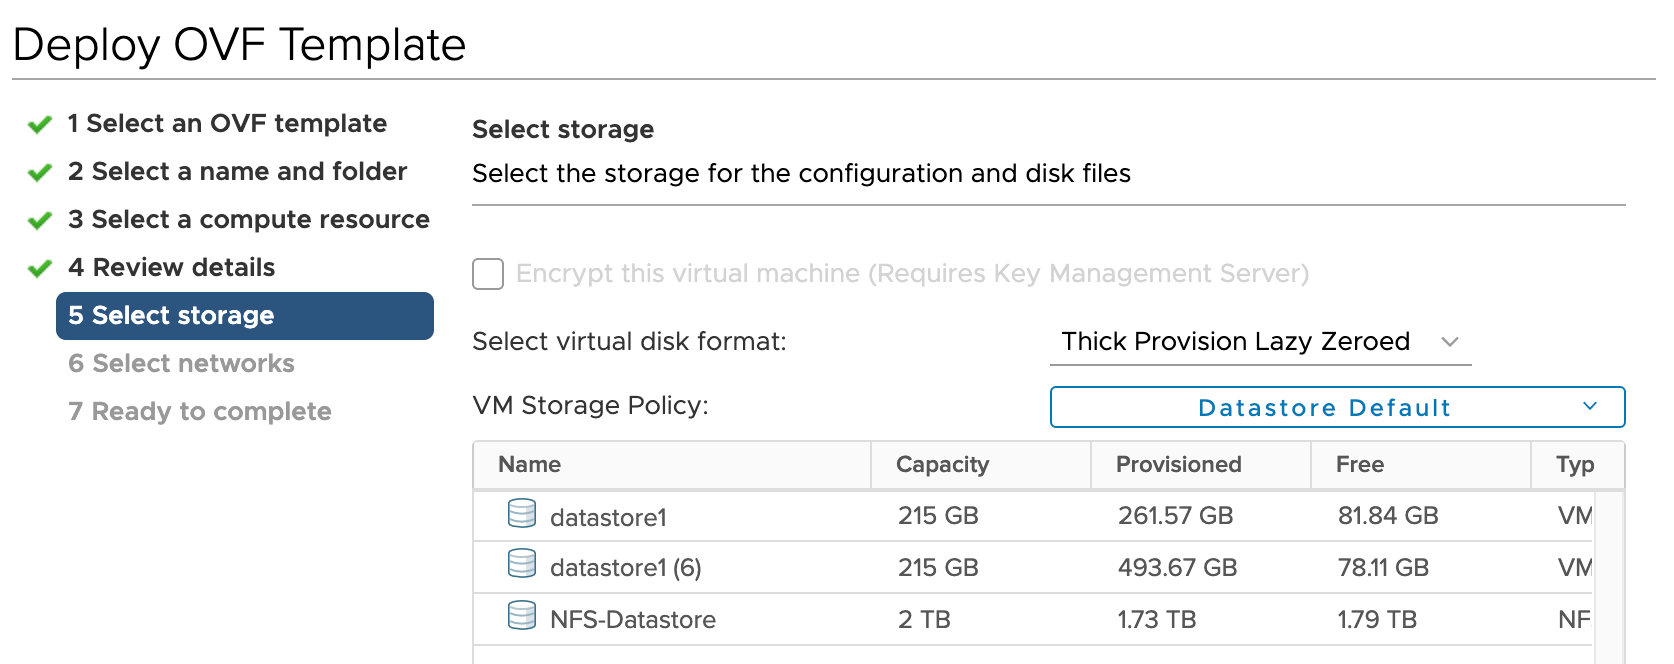
Select storage for the files, then click Next. We
recommend thick provisioning for the Apstra server.
-
Map the Apstra Management network to enable it to reach the virtual
networks that the Apstra server will manage, then click
Next.

Configure Apstra Server
-
Select <OK>. The configuration tool menu
appears.
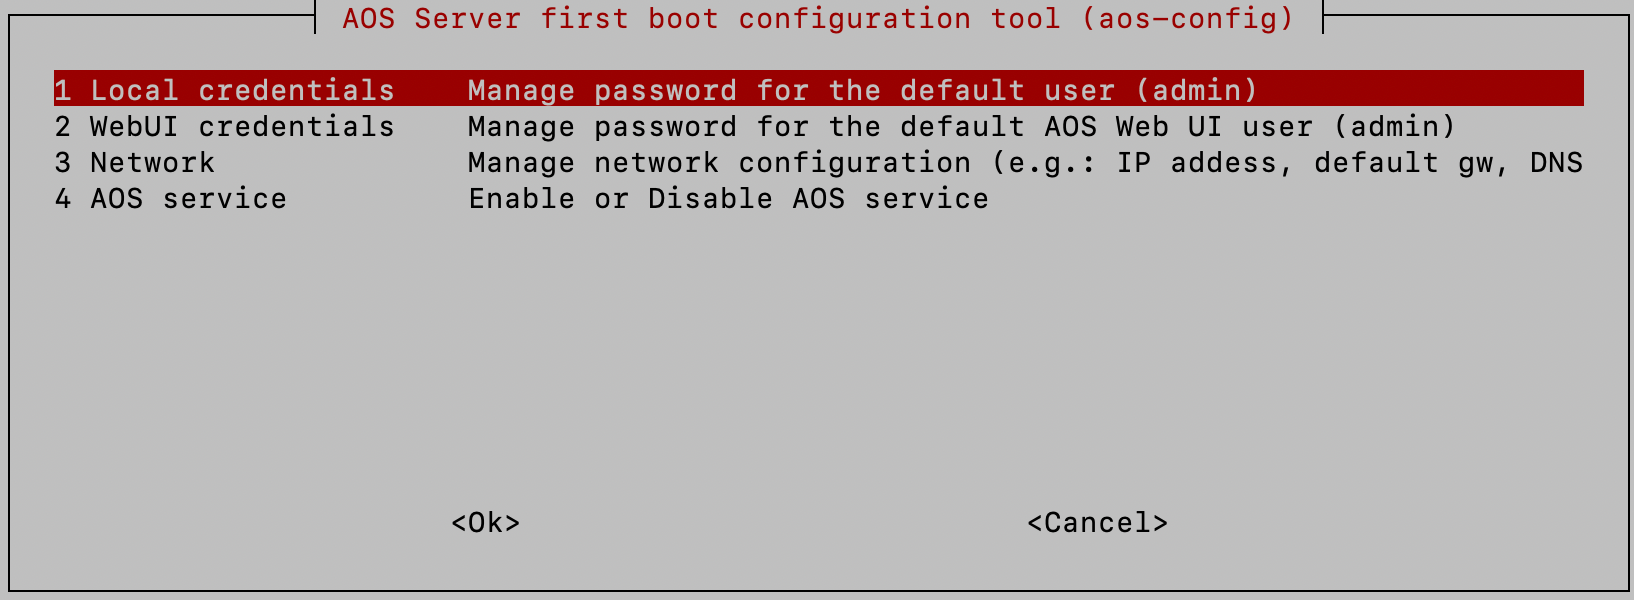 Note:
Note:You updated the default local credentials in the previous steps. To change the password again, select Local Credentials and follow the prompts. You can do this at any time.