SSR1500 Power Supply Maintenance
Maintaining an SSR1500 appliance includes replacing power supplies. Replacing includes removing a failed power supply and installing a functional power supply.
Replacing an AC Power Supply on the SSR1500
The two AC power supplies (part number: SSR1500-AC-PS) are hot-removable and hot-insertable field-replaceable units (FRUs) installed in the rear panel of the SSR1500 appliance. You can remove and replace them without powering off the SSR1500 or disrupting the SSR1500 functions.
Ensure that you have the following parts and tools available:
-
ESD grounding strap
-
Antistatic bag or an antistatic mat
-
Replacement AC power supply
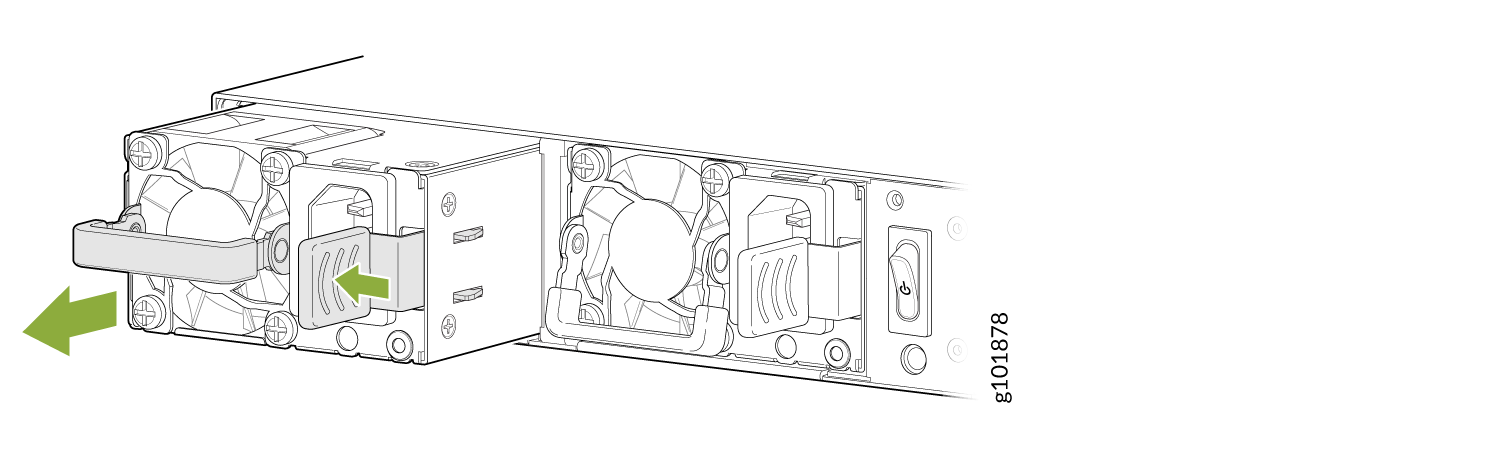
Remove an AC Power Supply from an SSR1500
To remove an AC power supply from the appliance:
-
Place one hand under the power supply to support it and slide it
completely out of the chassis. Take care not to touch power supply
components, pins, leads, or solder connections.
Figure 1: Remove an SSR1500 AC Power Supply
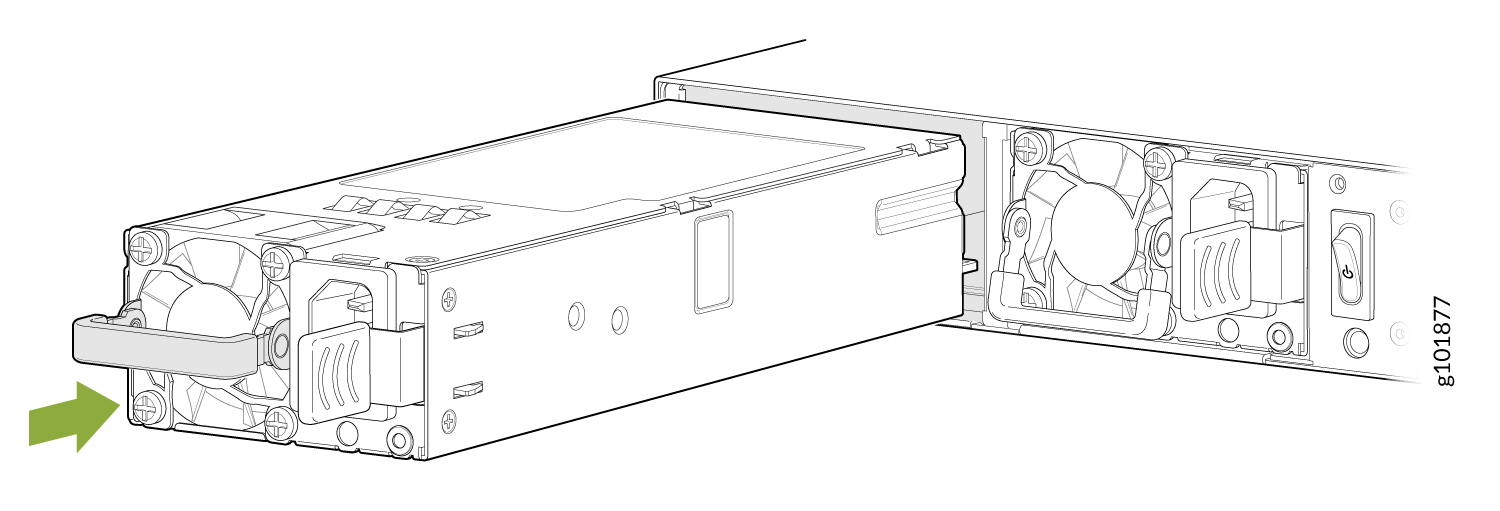
Install an AC Power Supply in an SSR1500
To install an AC power supply:
-
Using both hands, place the power supply in the power supply slot on
the rear panel of SSR1500 and slide it in until it is fully seated and
the ejector lever fits into place. You will hear a distinct click when
the power supply is fully seated in the chassis. See Figure 2.
Figure 2: Install an SSR1500 AC Power Supply